
Last year I painted a small powder room in deep jade, then added a mirrored medicine cabinet with stepped corners. My partner asked if I was “doing a Gatsby thing.” I wasn’t. But that moment made me realize how often we confuse Art Deco revival with full-blown period pastiche. The real challenge isn’t finding Deco elements — it’s using them without making your home feel like a themed hotel lobby from 1928.
Most advice on Deco-inspired design falls into two traps: either it’s all black lacquer and gold giraffe statues (busy, loud, dated within a year) or it’s so watered down that you end up with one sad geometric pillow that clashes with everything. The internet loves to show you rooms that cost $50,000 and photograph perfectly but feel stiff in real life. What gets left out is how materials age, what survives humidity and kids and afternoon sun, and which details actually make a room feel bold without screaming for attention.
These 25 ideas come from living with them — some worked beautifully, some required adjustments, and a couple I pulled out after six months because they just felt off. No plants-as-decor filler, no “just add neutrals” nonsense. Just specific, tested moves that give you that clean, confident, slightly glamorous Neo-Deco feeling without the clutter.
1. Layered Geometric Thresholds That Make Entryways Feel Intentional
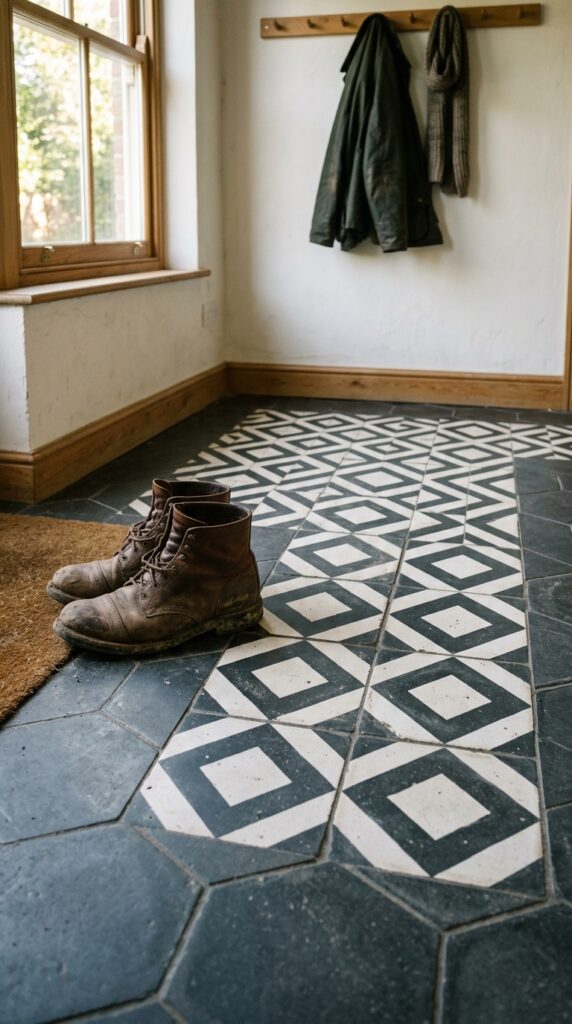
Most people stop at one tile pattern. That’s fine for a bathroom floor. But in an entry, a single geometric can feel like a stamp. The Neo-Deco move is to layer two — a primary field pattern inside a contrasting border or different scale. I laid a small diamond cement tile (black and cream) inside a charcoal hex field, with a 4-inch plain border of matte black. The effect is architectural, not busy, because the border contains it.
Cost runs $8 to $15 per square foot for decent cement tile. The mistake? Using high-gloss tile here. Grout lines collect mud, and gloss shows every scuff. Go with matte or unsealed cement that ages into a softer patina. One trade-off: cement tile needs sealing every couple years in a high-traffic entry. If that sounds like a chore, look at porcelain that mimics cement — half the maintenance, though it lacks the slight chalky texture that feels truly old-school.
Pro tip: Keep the border no wider than 4 to 6 inches. Anything thicker starts to look like a wrestling mat instead of architecture.
2. Unlacquered Brass That Ages On Your Watch (Not Behind Glass)
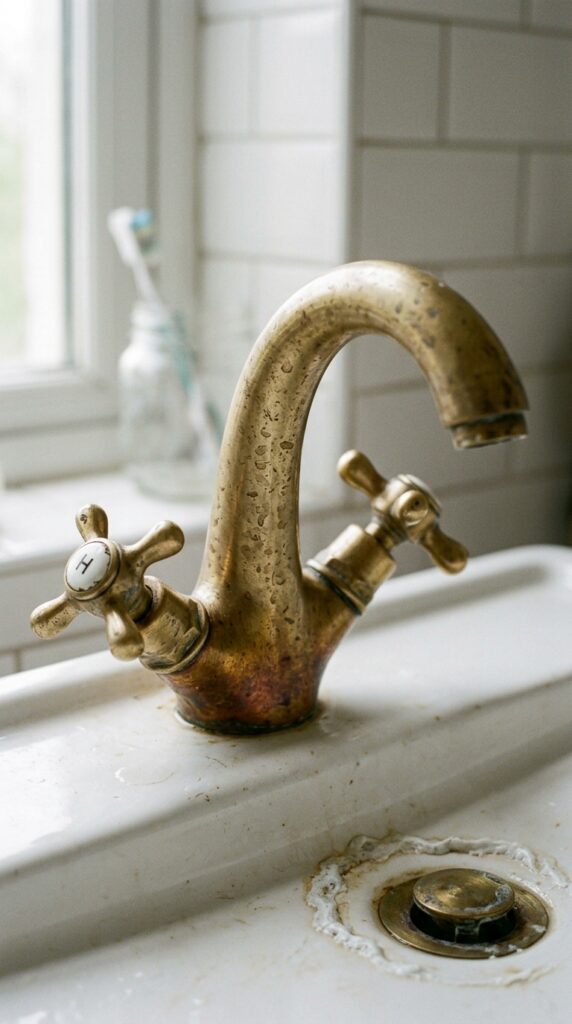
I am tired of fake aged brass that arrives looking like a prop from a period film. The real thing — unlacquered brass — starts bright and slightly brassy, then darkens, warms, and develops character within months. You will see water spots. You will see fingerprints. That is the point. Neo-Deco loves honest materials, not sealed-in-place perfection.
A decent unlacquered brass faucet runs $200 to $500. The cheaper version ($80) is usually brass-plated zinc that wears through to gray plastic. Avoid that entirely. The honest trade-off: if you have hard water, the mineral buildup looks chalky rather than patinated. You’ll need to wipe it down weekly with a damp cloth — no harsh cleaners. Also, don’t put this in a powder room used twice a year. It needs regular touching to develop that lived-in glow. My kitchen faucet (three years in) now has a deep bronze near the handles and a honey tone on the spout. It looks like it belongs to someone who actually cooks.
Never use Brasso or abrasive cleaners on unlacquered brass. You’ll strip the patina you waited years to earn.
3. Fluted Wood Panels Used As Insertions, Not Full Walls
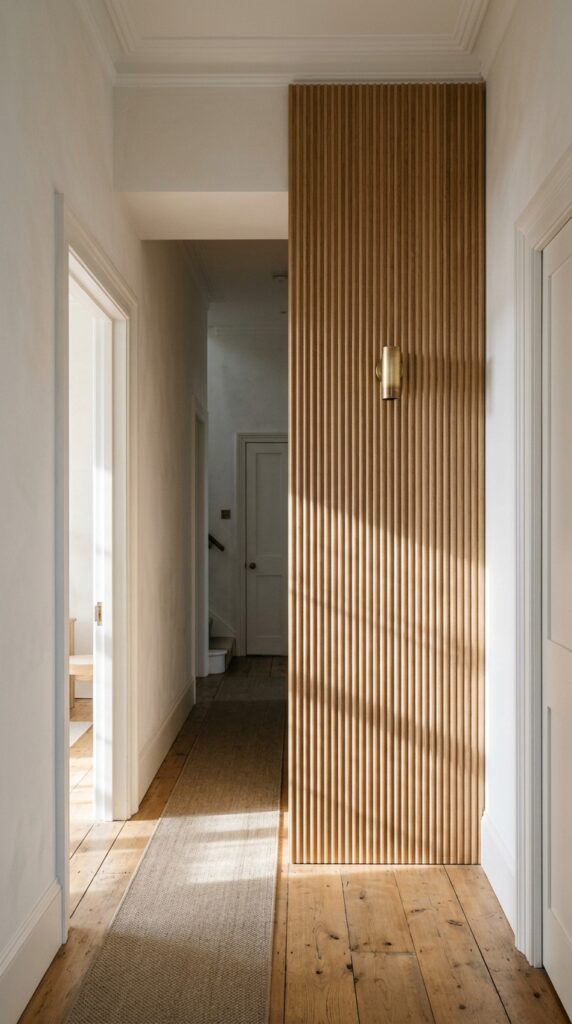
A full wall of fluting feels like a spa reception desk. But a single vertical panel — say, 30 to 40 inches wide, floor to ceiling — creates rhythm without overwhelm. I installed one behind a wall-mounted desk in my home office. The grooves catch side light and add texture that changes hour by hour. It cost about $180 for a 1×4-foot pre-milled fluted MDF panel (primed, then painted) but real oak veneer runs closer to $300.
Here is the honest truth: fluting collects dust. The tight grooves are annoying to wipe. In a hallway next to a laundry room? Fine. In a kitchen near a vent? You’ll see it. Also, avoid this in direct sun if you use real wood veneer — the differential expansion can make the fluting warp slightly over a few years. Paint-grade MDF with a good primer holds up better and costs half as much. The Neo-Deco spirit is about line and shadow, not material snobbery.
Mount fluted panels at least ½ inch off the floor using a hidden spacer. Otherwise, mopping or vacuuming chips the bottom edges within months.
4. One Arched Mirror With A Stepped Frame (Not Six Different Shapes)
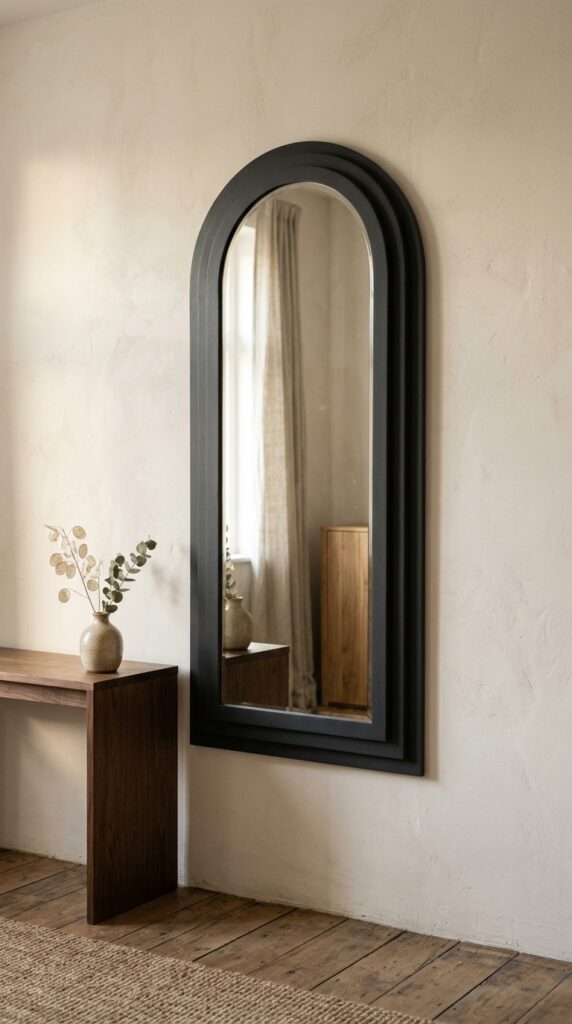
The fastest way to ruin Neo-Deco restraint is to hang a gallery wall. Just don’t. One strong, architectural mirror does more than eight small prints. I found a 24×48-inch arched mirror with a stepped MDF frame (primed and painted in black) for $220. The stepping — three flat bands, each recessed about a quarter inch from the last — gives that Deco geometry without the fuss of actual inlay or metalwork.
What works: placing it opposite a window to bounce light deeper into the room. What fails: hanging it over a cluttered buffet. The mirror needs breathing room. Also, cheap arched mirrors often distort at the curve — look for one with a true bent-glass corner or a seamless joint. Under $100, you’ll get ripples that make your reflection look like a carnival funhouse. I’d budget $150 minimum. And skip the “antique gold” finishes that look like sprayed plastic. Matte black, charcoal, or raw steel read as confident. Fake patina reads as fake.
Hang the mirror so the center is 60 to 65 inches from the floor — higher than typical art, which makes the ceiling feel taller.
5. Terrazzo With Oversized Chips (The 1970s Scale, But Fresh)
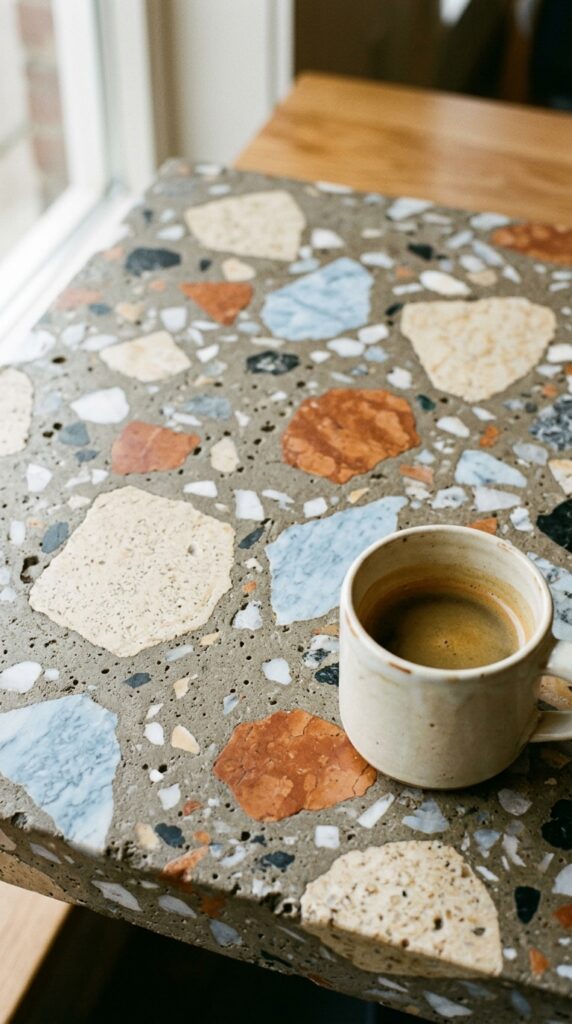
Standard terrazzo has small chips — the size of rice or peas. Neo-Deco scales up. I commissioned a small side table from a maker who uses crushed marble chips up to 1.5 inches. The effect is bold but not chaotic because the cement binder ties everything together. Cost was $450 for a 20-inch round top on hairpin legs. Precast terrazzo tiles with large chips run $20 to $40 per square foot.
The thing nobody tells you: terrazzo is heavy. A 24-inch square tile weighs 35 to 40 pounds. Installation requires a sturdy subfloor and someone who knows how to polish it without burning the resin. Also, terrazzo stains. Red wine leaves a mark if you don’t wipe immediately. The honest trade-off is between durability (it lasts decades) and maintenance (resealing every 2-3 years). In a kitchen, go for epoxy terrazzo — less porous. In a dry living room, cement-based terrazzo ages more beautifully but demands more care.
Test a sample with lemon juice and coffee before buying. Some terrazzo binders react badly to acid and leave dull spots that never buff out.
6. Smoked Glass Shelving On Polished Chrome Brackets
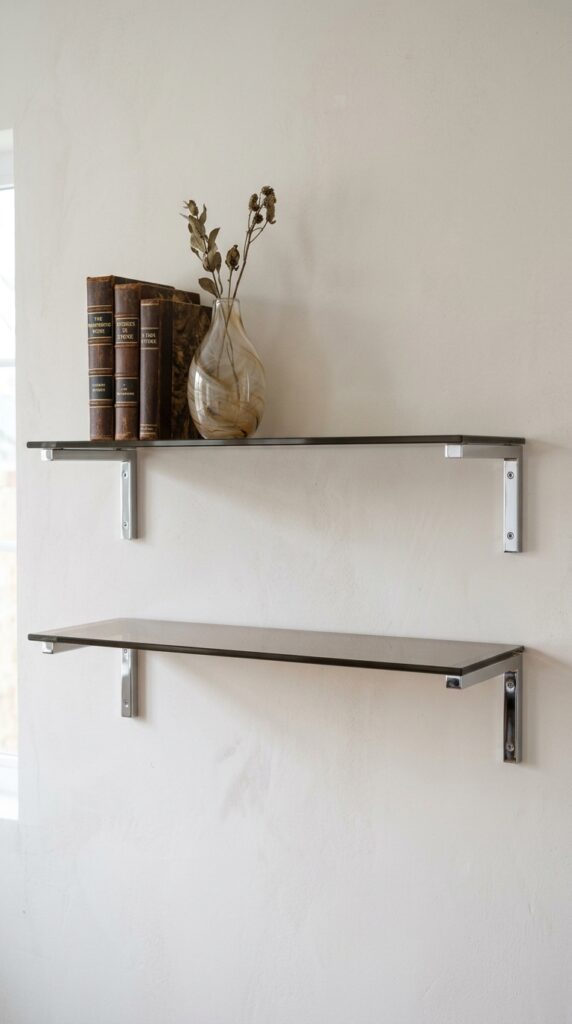
Clear glass shelves disappear — which is fine if you want invisible. But smoked glass has presence. It reads as deliberate, not accidental. I installed three 36-inch smoked shelves in a living room alcove at a cost of about $85 per shelf (including brackets). The bronze tint warms up chrome hardware the way you want — not matching, but harmonizing.
What ages badly: smoked glass that’s too dark. If you can’t see through it, you’ve lost the lightness that makes glass work. Aim for a 30 to 40 percent tint. Also, cheap smoked glass has a greenish cast from iron impurities. Spend $20 more for low-iron glass with a true neutral smoke. The real constraint? Fingerprints show like crazy on smoked glass. In a home with kids, you’ll wipe these shelves weekly. In a formal living room, fine. In a hallway, no.
Use tempered glass for any shelf longer than 24 inches. Annealed glass snaps dangerously if someone leans on it wrong.
7. Black Lacquer Furniture With Softened (Not Sharp) Edges
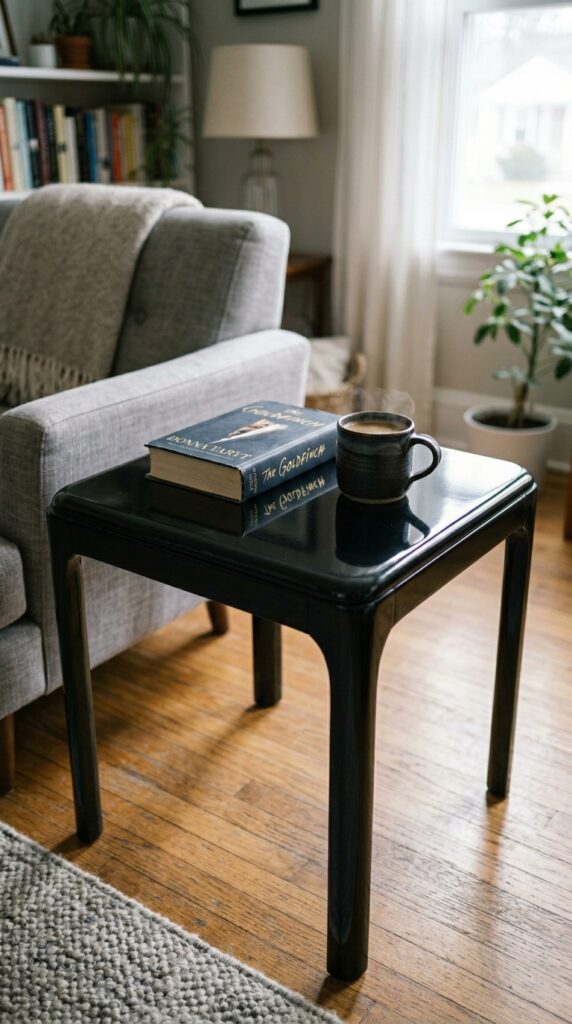
Sharp-angled black lacquer screams “aggressive real estate staging.” Rounded edges — think a 5/8-inch radius on corners and softened leg profiles — feel sophisticated without hostility. I picked up a vintage Lane coffee table from the 1970s (they loved softened Deco) for $200 at an estate sale. The lacquer had crazing, which I left because it looked honest. New black lacquer pieces with softened edges run $300 to $800.
Here is the friction point: high-gloss black shows every dust mote, every cat hair, every micro-scratch. If you have a household where people actually live, consider satin black lacquer instead. It still reflects but forgives fingerprints. Also, direct sunlight on black lacquer creates heat buildup that can cause the finish to bubble. Keep it away south-facing windows. One more thing: never use spray cleaner on lacquer. It leaves a cloudy film. A damp microfiber cloth only.
Test a black lacquer piece by dragging your fingernail lightly across an inconspicuous spot. If it scratches easily, the finish is too soft for daily use.
8. Reeded Glass Cabinet Inserts That Obscure Without Hiding
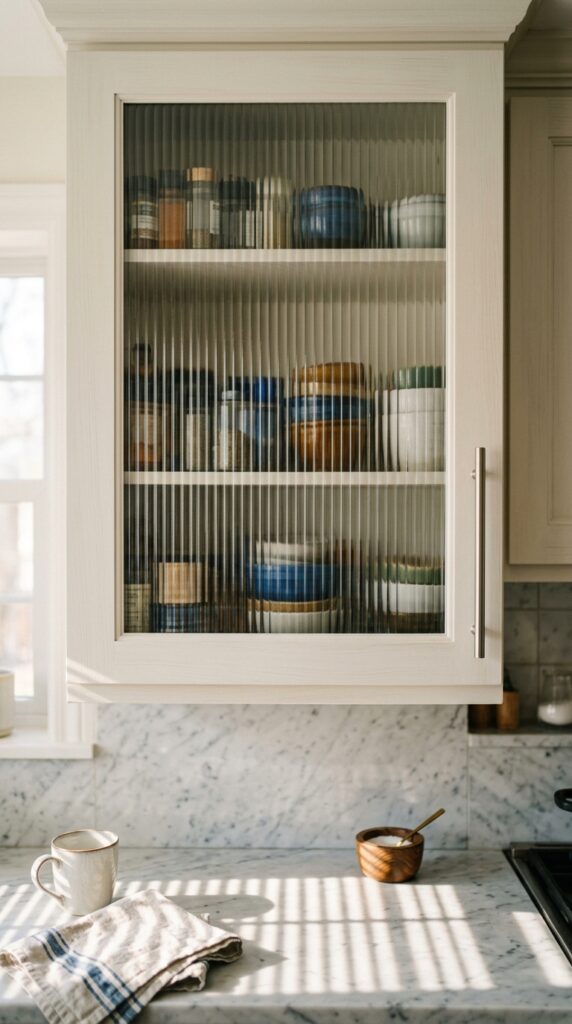
Fluted or reeded glass is the perfect Neo-Deco compromise: you don’t have to keep your cabinets Instagram-organized, but you also don’t want solid wood blocking all visual interest. I replaced four flat-panel cabinet inserts with reeded glass at $45 per panel (custom cut). The vertical lines echo the fluting elsewhere in the room without being identical.
The mistake people make is using reeded glass everywhere. One or two cabinets — especially upper corner cabinets — create rhythm. A whole kitchen of reeded glass looks like a 1980s office partition. Also, cleaning reeded glass is annoying. The grooves trap grease in a kitchen. Use it above the sink or on a buffet, not directly over the stove. Cost-wise, buying pre-made doors with reeded glass runs $120 to $250 each. Cheaper than custom, but you’re locked into sizes.
Order reeded glass with the smooth side facing outward in high-grease areas. The grooves still collect dust, but at least you can wipe the front quickly.
9. Symmetrical Sconces With Linen Shades (Yes, Two Is Correct)
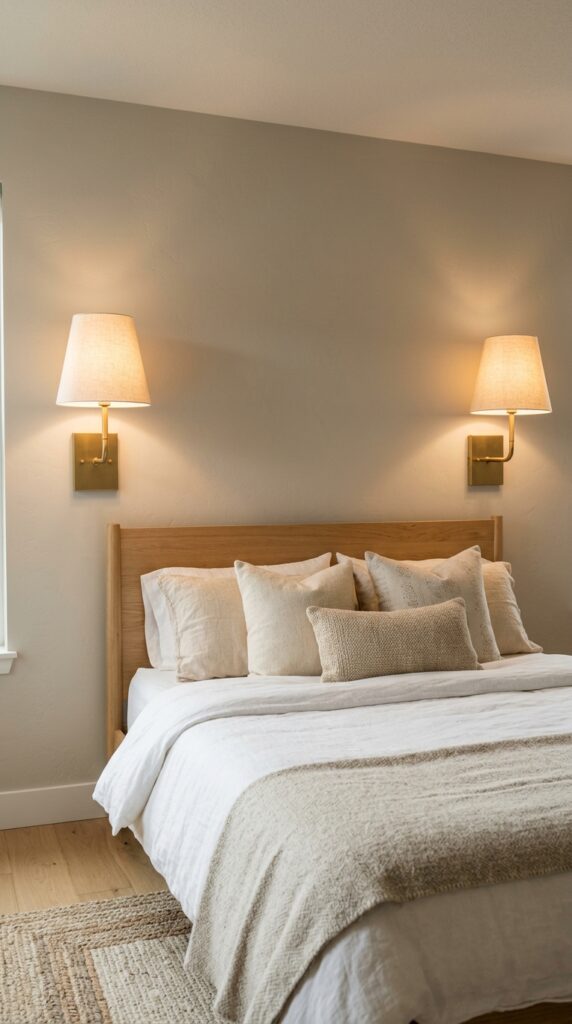
Deco loves symmetry. Modern interiors hate it for being “too formal.” That’s a mistake. Two sconces, perfectly spaced, at the same height, create a calm that no asymmetrical arrangement can match. I installed a pair of backplate sconces with tapered linen shades (about $180 total on sale) in a guest room. The effect is hotel-quality without the sterility.
The trade-off: linen shades yellow over time. Not dramatically, but after three years, they look warmer — almost ivory. Some people hate that. I like it. Also, sconces with exposed bulbs (no shade) are a Neo-Deco no. Too harsh, too industrial. The shade is what softens the geometry. Cost for quality sconces starts at $80 each for decent die-cast metal. Under $50, you’re getting thin brass plating that pits within a year. Buy once, cry once.
Mount sconces so the bottom of the shade is 60 to 66 inches from the floor — high enough to clear bedside tables but low enough to cast useful reading light.
10. A Radiator Cover In Perforated Metal With A Deco Pattern
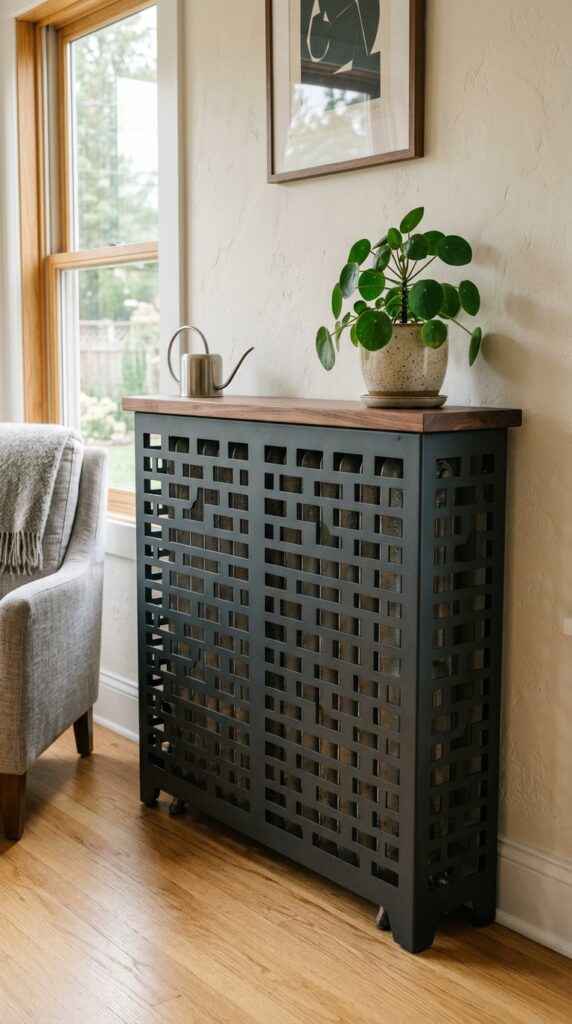
Most radiator covers are ugly MDF boxes that block heat and warp within two winters. A Neo-Deco solution is perforated metal with a pattern cut in — stepped lines, zigzags, or repeating squares. I ordered a custom cover from an Etsy fabricator: 48 inches wide, 28 inches tall, powder-coated matte black, with a geometric perforation pattern I designed in about 15 minutes. Cost was $320 including shipping, plus a walnut top I cut myself ($40).
Here is the constraint: perforated metal still blocks about 20 percent of heat output compared to an uncovered radiator. If you live in a very cold climate and that radiator is your primary heat source, skip the cover. But for supplemental heat or mild winters, the trade-off is worth the visual upgrade. Also, powder coating scratches. Don’t drag vacuum cleaners across the front. One more thing: make sure the pattern is at least 40 percent open area (holes vs. solid metal). Otherwise, you’ve just built a sculpture that doesn’t let heat out.
Order a sample of the perforated pattern first. Some patterns look great on screen but read as “swiss cheese” in real room light.
11. A Curved Velvet Banquette In A Jewel Tone (Not Gray)
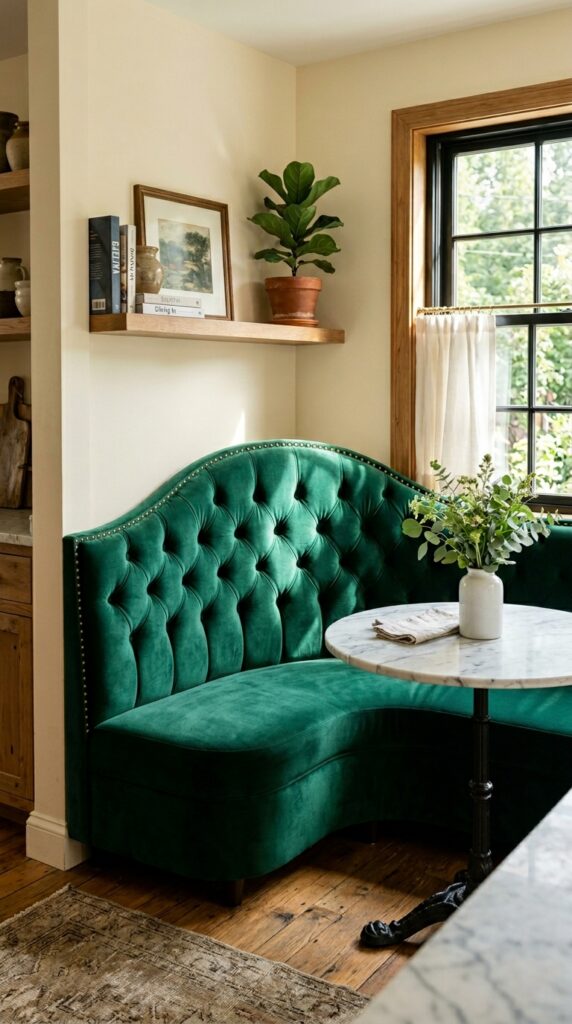
Gray velvet is a coward’s choice. Neo-Deco says pick a jewel tone — emerald, sapphire, amethyst — and commit. I found a 55-inch curved banquette in emerald velvet for $900 (discounted from $1,400 because of a small flaw on the back). The curve softens the geometry everywhere else in the room. It also forces conversation because people sit facing inward instead of along a straight line.
The friction: velvet crushes. After a year of daily sitting, the pile flattens where people actually sit. You can steam it back up, but it never returns to brand-new fluffiness. Also, jewel tones fade in direct sun. Keep the banquette away from south-facing windows or accept that the color will lighten unevenly. Cost-wise, good velvet banquettes start around $700. Under $400, the frame is likely plywood and the foam will disintegrate within two years. I’d rather buy used vintage from the 1990s (when this shape had a moment) and reupholster.
Test the depth before buying. Many curved banquettes are only 18 inches deep — fine for dining, too shallow for lounging. Look for 22 to 24 inches if you want to curl up.
12. Stepped Ceiling Molding That Adds Shadow Without Bulk
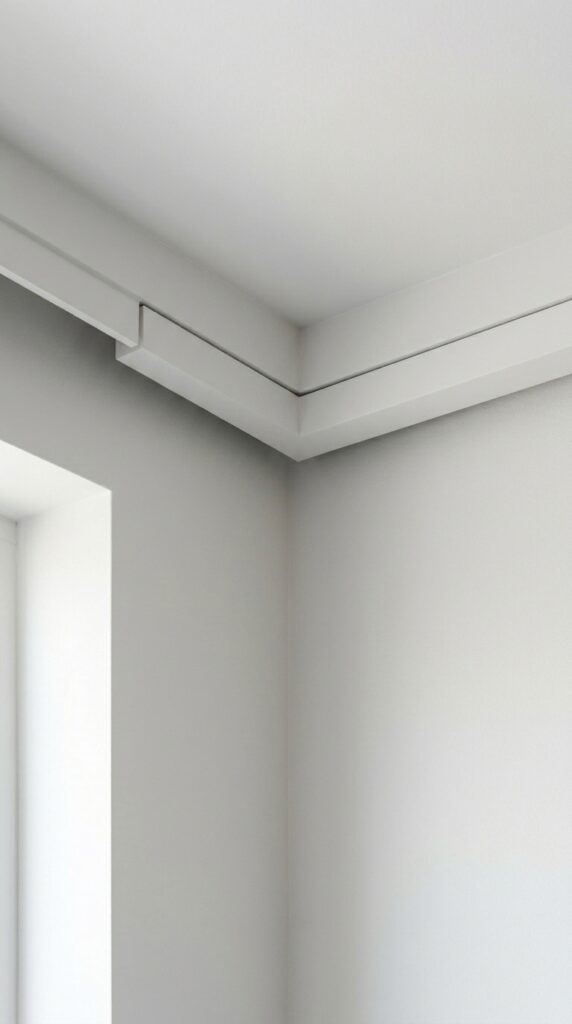
Traditional crown molding in a Neo-Deco house feels wrong — too fussy, too Victorian. But bare corners read as cheap. The solution is stepped molding: two or three flat bands of wood (1×2 and 1×3 stock) installed to create a recessed shadow line. I did this in a living room for about $85 in lumber and a weekend of miter cuts. The effect is subtle — most guests don’t notice it explicitly — but the room feels taller and quieter.
The honest trade-off: this collects dust on the horizontal ledges. In a room you clean weekly, fine. In a bedroom you ignore for two months, the dust becomes obvious. Also, stepped molding works best with 8-foot or higher ceilings. In a 7.5-foot room, it makes the ceiling feel lower. Finally, don’t paint the stepped sections a different color — that turns it into a “feature” rather than architecture. Same white as everything else.
Use a laser level when installing. Even 1/8-inch gaps between sections become glaringly obvious under raking light.
13. Chrome And Leather Pull Handles That Soften The Machine Age
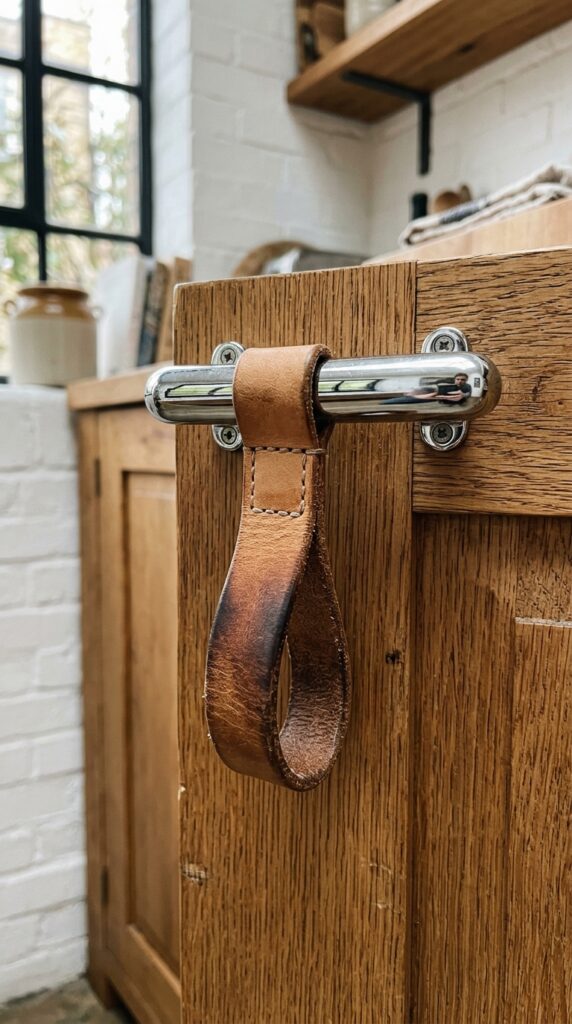
Hardware is where most Neo-Deco attempts fail — too many shiny knobs that look like tassels. Chrome-and-leather pulls combine the machine-age metal with a warm, touchable material. I replaced all the knobs in a media console with these pulls ($12 each, bought six). The leather ages beautifully, darkening where you grip it. After two years, mine have a patina that chrome alone could never achieve.
What doesn’t work: cheap bonded leather that flakes. Look for full-grain vegetable-tanned leather. Also, the chrome should be actual brass with a chrome finish, not plastic. The cost range is $10 to $25 per pull. Under $8, you’re getting a zinc alloy that pits. The constraint: leather stretches over time. After three or four years, you might need to trim a quarter inch and re-punch the hole. Worth it for the feel.
Order one pull first and test it on a drawer you open daily. Some leather finishes feel sticky in humid climates.
14. A Single Marble Slab Coffee Table With Waterfall Edge
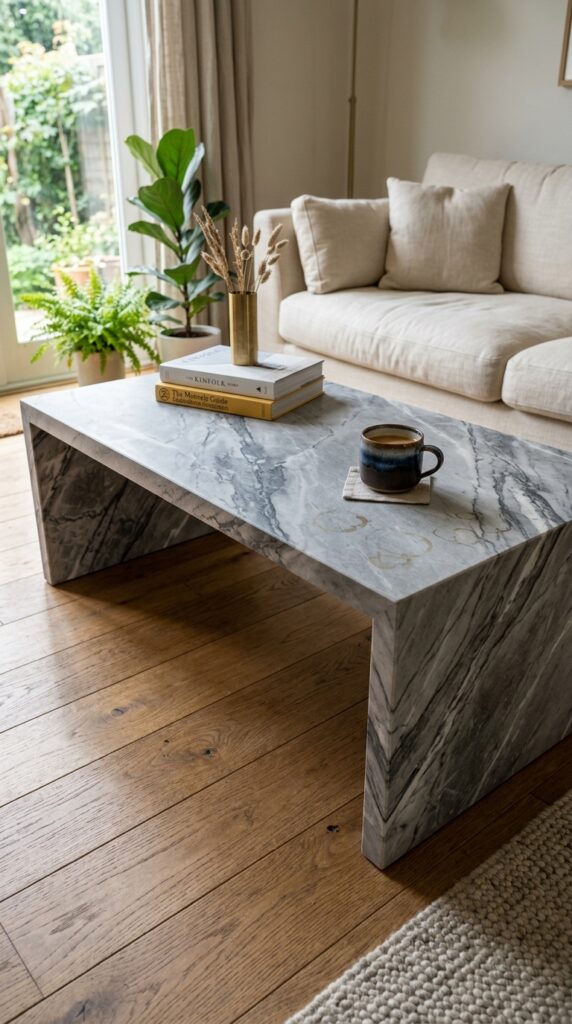
Waterfall edges are everywhere now, but most are veneer over plywood. Real marble in a waterfall edge is a different object. I bought a remnant slab of Carrara (48x24x1.25 inches) for $400 from a stone yard and paid a fabricator $300 to miter the corners and polish the edges. The result is a table that weighs 180 pounds and will outlive me. The continuous vein wrapping the corner is the whole point — it shows someone thought about the material.
Here is the blunt truth: marble stains. Red wine, lemon juice, coffee — all of it leaves marks. The honed finish shows less etching than polished, but it still happens. I’ve accepted the rings as history. If you can’t, get quartzite (harder, more stain-resistant) or a sealed granite that mimics marble. Also, a waterfall table with no legs means you can’t slide your feet under it. For a deep sofa, that’s fine. For a shallow one, your shins will hit the edge constantly. Measure carefully.
Ask the stone yard for a “bookmatched” waterfall if you want the vein to flow continuously. Otherwise, the pattern might jump awkwardly at the corner.
15. Wallpaper With Metallic Sunburst (But Scaled Down To One Wall)
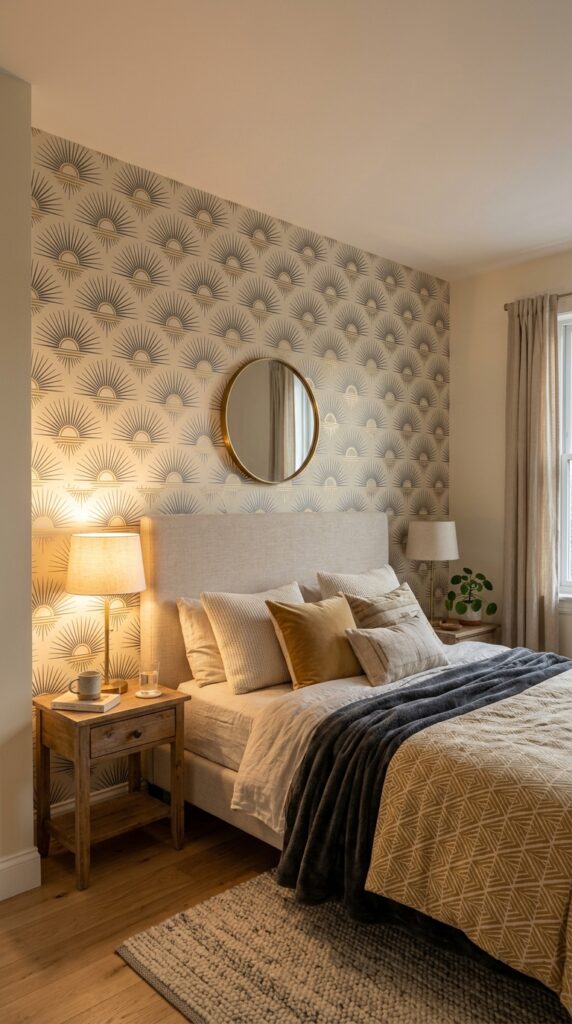
A full room of metallic wallpaper is a panic attack waiting to happen. But one wall — usually behind a bed or a sofa — gives you the Deco glamour without the sensory overload. I used a William Morris-inspired but actually modern metallic geometric (sunburst motif, 75 per roll) on one bedroom wall. The gold is subtle enough that it reads as pale brass in morning light and only glints at sunset.
The mistake is picking a pattern that’s too large or too contrasty. Look for designs where the metallic element is the same value (lightness) as the background but a different finish. That way it shifts as you move rather than screaming. Cost for decent metallic wallpaper: $60 to $150 per roll. Cheap foil wallpaper (under $40) creases during installation and shows every seam. Also, metallic paper is harder to hang — the foil stretches differently than the paper backing. Hire a pro or accept minor wrinkles.
Order an extra roll and save it in a closet. Metallic wallpapers are often discontinued within a year, and patching a damaged section becomes impossible.
16. A Pedestal Sink With Fluted Details (Yes, In A Powder Room)
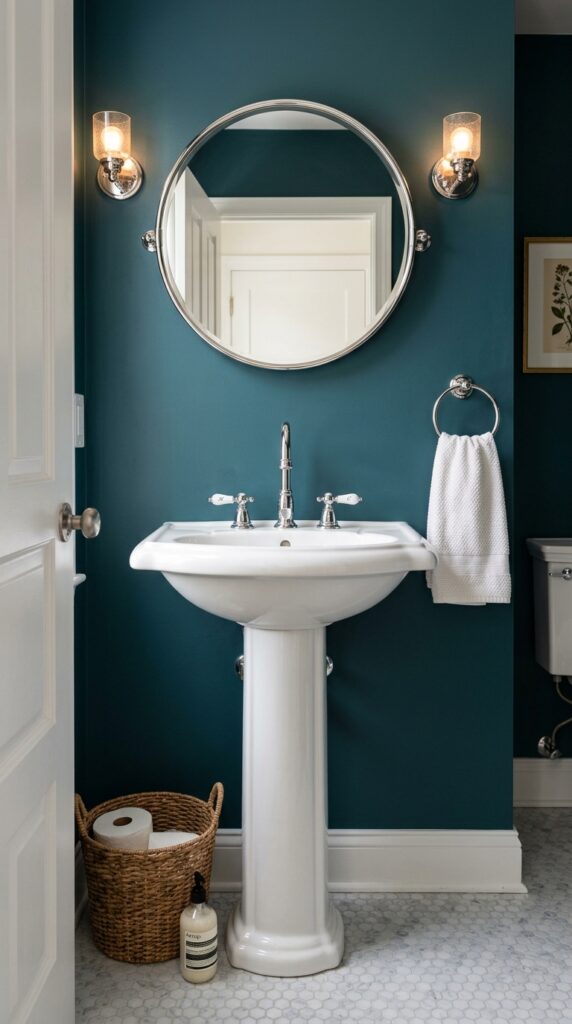
Pedestal sinks went out of fashion because they offer zero storage. That’s exactly why they work in Neo-Deco — they force you to keep the space minimal. I installed a fluted pedestal sink (around $280) in a half-bath that previously had a bulky vanity. The room felt 30 percent larger instantly. The fluting on the pedestal echoes the fluted panels elsewhere in the house, creating a thread without being matchy-matchy.
The constraint: no storage means everything sits on the tiny sink deck or in a wall-mounted cabinet. If you need to hide toiletries, this isn’t for you. Also, the gap between the pedestal and the wall is impossible to clean. You’ll need a thin brush or accept dust bunnies. Cost-wise, decent fluted pedestal sinks start at $200. Under $150, the ceramic is thin and rings when you tap it. Skip those.
Measure the rough-in distance carefully. Pedestal sinks are less forgiving than vanities — the pedestal has to line up exactly with the drain.
17. Layered Rugs: Geometric Over Jute For Texture And Restraint
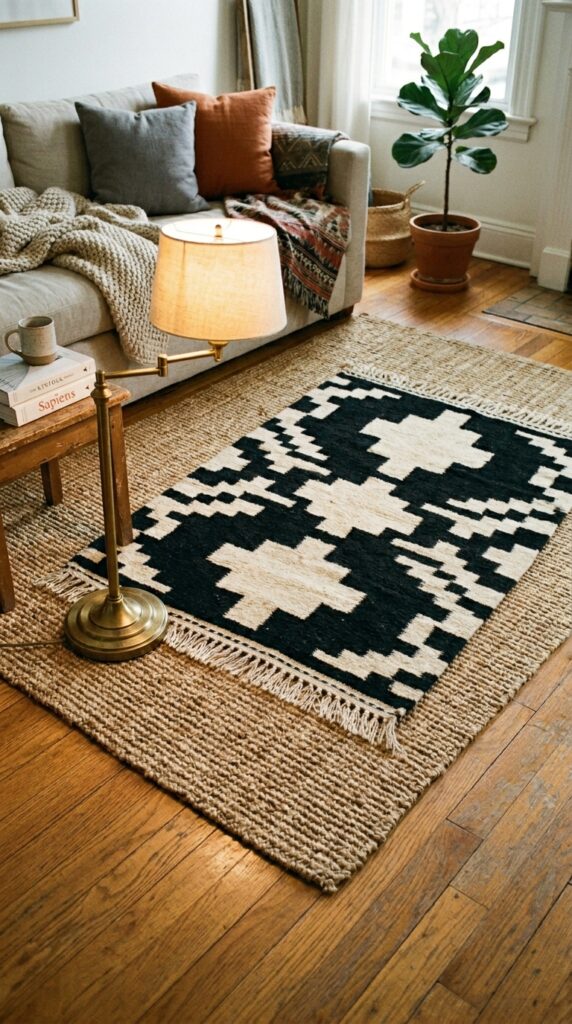
Layering rugs is usually a boho move — Persian over sisal, or a cowhide over something neutral. But for Neo-Deco, put a sharp geometric on top of a plain jute. The jute provides texture and warmth (visual warmth, not thermal — jute is cold underfoot). The geometric adds the pattern. I did this with an 8×10 jute ($180) and a 5×7 wool geometric ($320). The wool sits slightly off-center, which makes the arrangement feel intentional rather than stacked.
The friction: jute sheds. For the first six months, you’ll vacuum up fibers every time. It also stains immediately — a spilled coffee leaves a mark that never fully comes out. And jute feels rough. Not “scratchy” exactly, but not soft. If you have kids who sit on the floor, put a thin felt pad under the top rug or choose a soft wool-blend base instead. Cost-saving tip: buy jute from a big-box store (under $150 for 8×10) and spend your money on the top rug. That’s the piece that needs to last.
Use a non-slip rug pad under the jute and a separate one under the top rug. Layering without pads slides into a tangled mess within a week.
18. Glass Block Accent Wall (But A Small One, Not 1985 Bathroom)
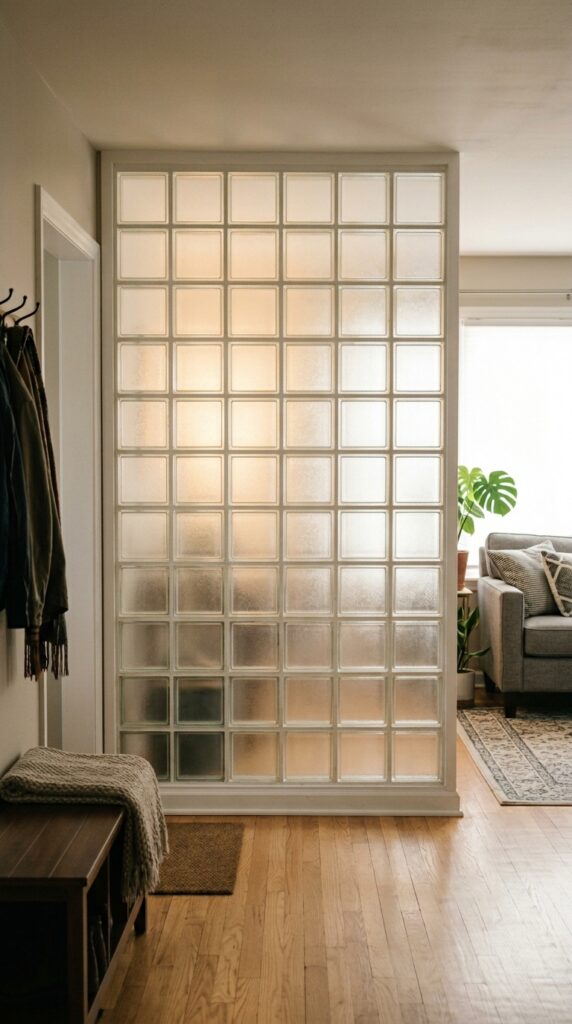
Glass block has a terrible reputation — it peaked in 1980s bathroom remodels with that awful pebbled texture. But modern glass block (clear with a slight fluted or frosted surface) used in a small accent wall is different. I built a 3×4-foot glass block wall between a dark hallway and a sunroom. It brings borrowed light into the hallway without turning the sunroom into a fishbowl. Cost was about $350 for blocks, mortar, and a pro installer (I wouldn’t DIY — getting the mortar joints clean is hell).
The constraint: glass block walls have zero insulation value and terrible soundproofing. Don’t put one between a bedroom and a living room. Also, dust settles in the mortar joints. You’ll need to wipe them with a damp sponge periodically. The version that works: a single column of blocks or a small panel. An entire wall of glass block still looks like a YMCA locker room. Keep it to 3 or 4 feet wide maximum.
Buy one block and hold it up in your space before committing. The light transmission varies wildly between brands — some are almost clear, others milky.
19. A Buffet With Inlaid Pinstripe Lines (Not Full Marquetry)
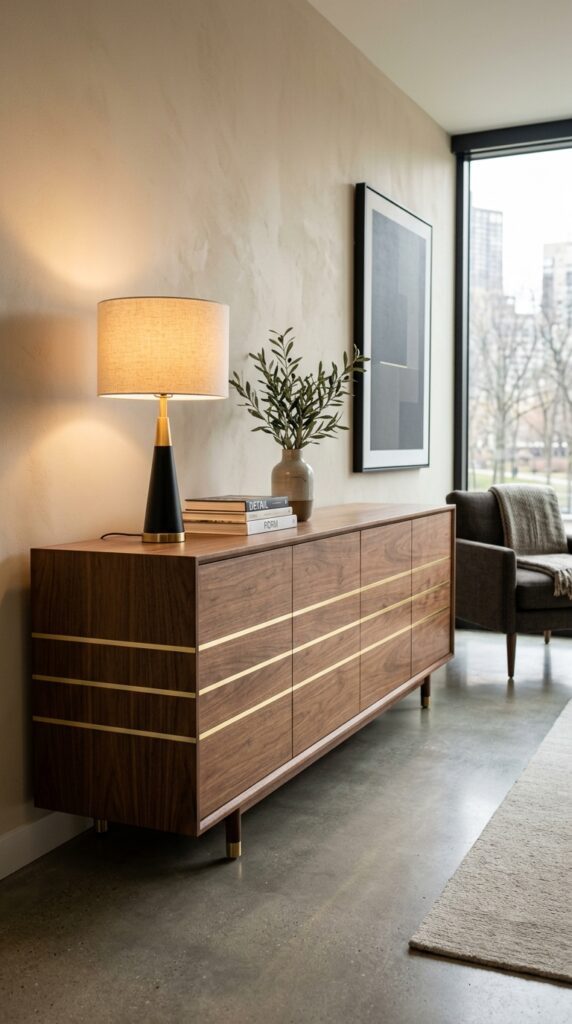
Full marquetry (inlaid scenes or flowers) is fussy. But a few clean pinstripe lines — think a racing stripe for furniture — give a Deco nod without the craft-show vibe. I found a mid-century Danish buffet on Craigslist for $250 and added my own inlay using thin brass strip and a router. Total cost including the buffet was under $400. You can also buy new: several manufacturers make buffets with single or double inlays starting around $800.
Here is the warning: inlaid lines collect dust and wax in the grooves. If you use brass inlay, it tarnishes differently than the wood. Some people love that contrast. Others hate cleaning it. Also, the inlay can pop out in dry climates as the wood shrinks. If you live in a desert, choose maple or holly (wood inlays) instead of metal — they move with the piece. Cost for a professional inlay job runs $200 to $500 depending on complexity. DIY is cheaper but one wobbly router cut ruins the whole front.
Start with a single inlaid line on a small piece of furniture first. Three lines look great on a 60-inch buffet but overwhelm a 30-inch console.
20. A Pivot Mirror With A Thin Brass Frame (That Actually Swivels)
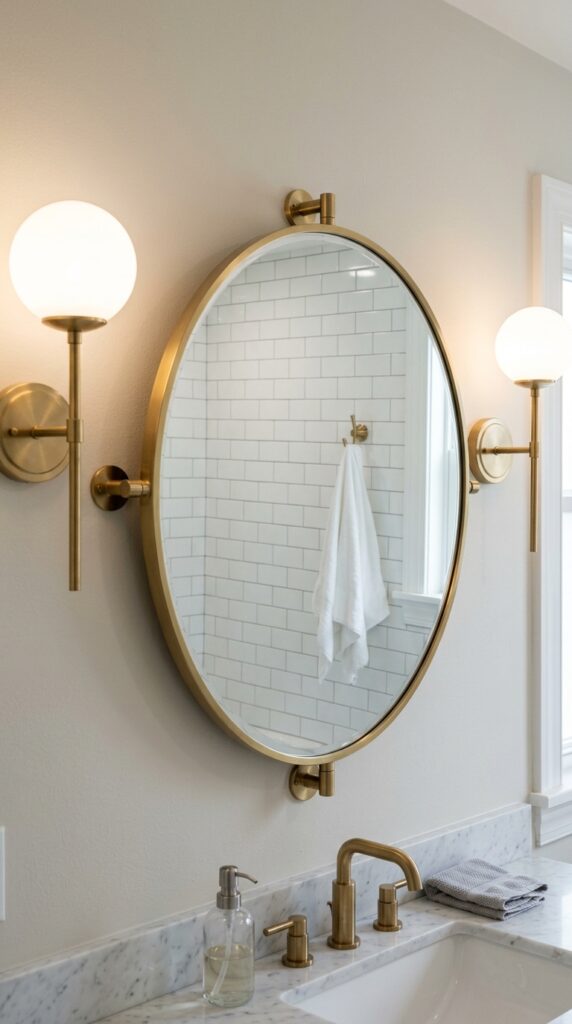
Most pivot mirrors are cheap plastic or warped MDF. A proper one has a solid brass frame and smooth mechanical action. I installed a 24-inch round pivot mirror ($180) in a small bathroom where the vanity is offset from the sink. Being able to tilt the mirror toward me changed how I shave — no more leaning over the counter. The thin brass frame is the Neo-Deco part: it reads as jewelry on the wall, not as a statement piece.
The catch: the pivot mechanism loosens over time. After about 18 months, my mirror started drifting downward. Tightening the allen bolts fixed it, but it’s annoying. Also, round mirrors show every imperfection in the wall behind them because the shape frames empty space. Patch and paint carefully before hanging. Cost range: decent pivot mirrors start at $120. Under $80, the mirror glass is thin and distorts your reflection at the edges.
Buy a mirror with a locking pivot if you need it to stay in one position. The friction-only pivots always sag eventually.
21. Console Table With Lucite And Brass (The 1980s Update)
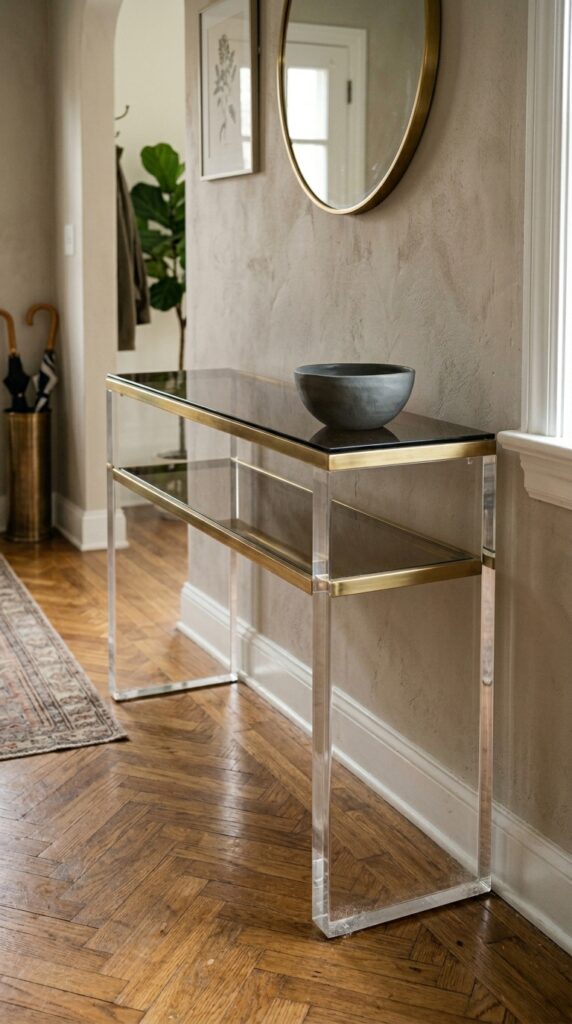
Lucite and brass together could veer into 1980s excess. But kept simple — clear legs, thin brass framing, glass top — it reads as weightless and architectural. I bought a vintage piece from that era for $300 and polished the brass myself. New versions run $500 to $1,200. The trick is using lucite as structure, not decoration. No curlicues, no extra flourishes. Just clean blocks or cylinders holding up a glass plane.
The honest downside: lucite scratches if you breathe on it. Dust acts like sandpaper. You’ll need special plastic polish and a microfiber cloth. Also, lucite yellows with UV exposure. Keep this table away from sunny windows unless you like the color of old piano keys. And the brass will need occasional polishing unless you let it patina (on unlacquered brass) — but most mass-market pieces have lacquered brass that just looks dirty when it wears.
Inspect used lucite furniture for “crazing” — fine cracks inside the material. That’s UV damage, and it can’t be fixed.
22. A Ceiling Medallion Painted High-Gloss (Unexpected Placement)
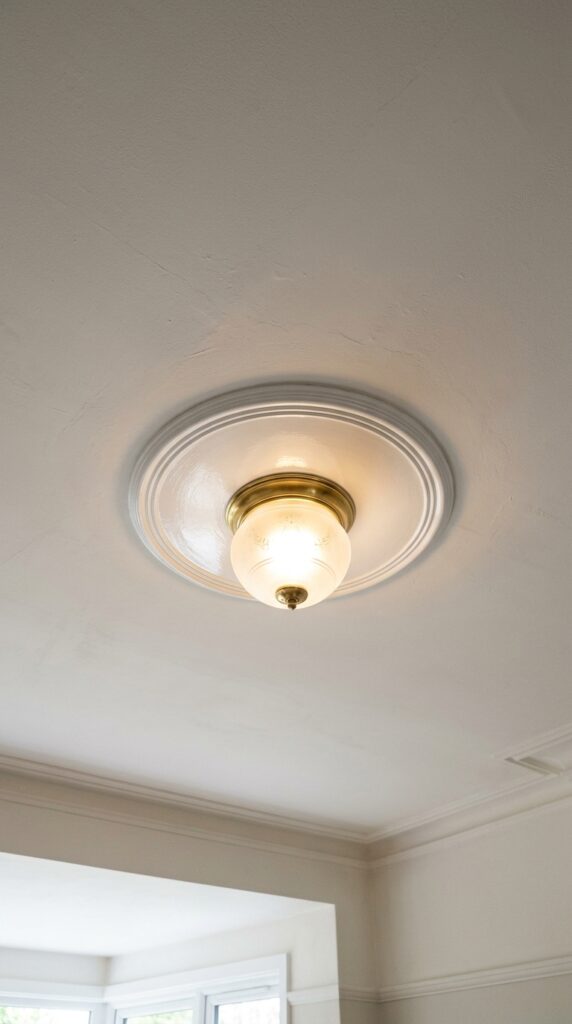
Ceiling medallions are usually ornate plaster donuts that scream “Victorian.” But a simple, flat-profile medallion — think a 16-inch circle with one stepped recess — painted in high-gloss against a matte ceiling is a Neo-Deco trick I stole from a 1930s apartment tour. I did this in a dining room for $45 (medallion from a big-box store, plus a quart of high-gloss white). The effect is almost subliminal. Most guests don’t notice it consciously, but the room feels more finished.
What fails: ornate medallions. Keep the profile flat or with one shallow step. Also, the high-gloss paint shows every imperfection in the drywall joint. You’ll need to skim-coat the ceiling area first. The medallion itself needs to be perfectly centered on the light box — off by an inch and it looks like a mistake. Cost of having a pro install one is $150 to $300. DIY is cheap but requires patience with caulk and touch-up paint.
Use a laser level to mark the center from the walls, not just from the existing electrical box. Those boxes are rarely perfectly centered in the room.
23. One Bold Ceiling Fan In Polished Nickel (Not The Standard Five-Blade)
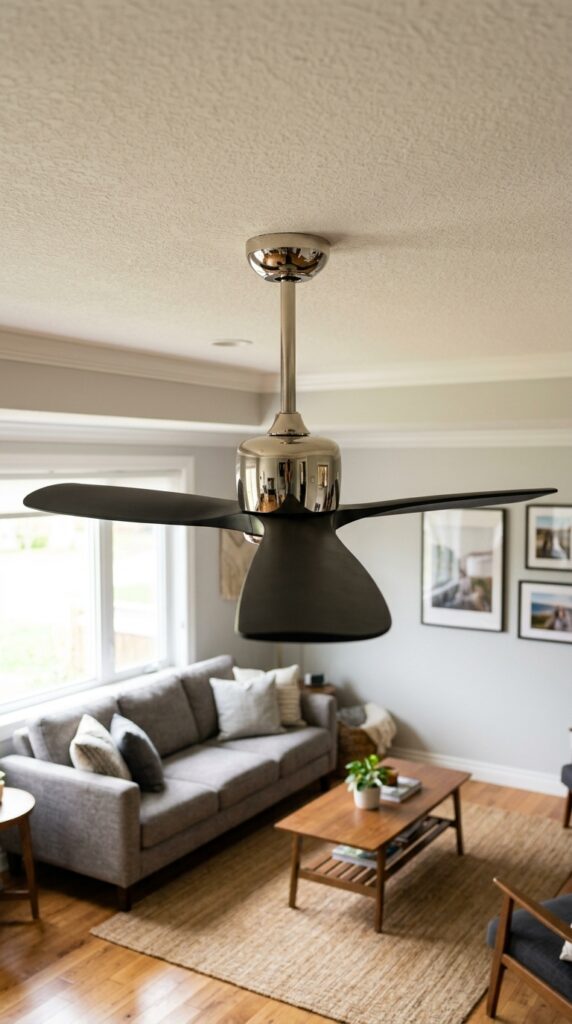
Standard ceiling fans are design kryptonite. But a well-chosen fan — especially one with polished nickel housing and sculptural blades — can be a Neo-Deco feature rather than an eyesore. I replaced a white plastic five-blade fan with a three-blade, low-profile model in polished nickel (about $280). The nickel picks up the chrome hardware elsewhere in the room. The blades are wide and slightly curved, referencing the streamlined Deco aesthetic without being literal.
The friction: polished nickel shows dust immediately. You’ll be up on a ladder every two weeks. Also, many “designer” fans have terrible airflow. Read reviews specifically for CFM (cubic feet per minute). A beautiful fan that doesn’t move air is just a sad sculpture. Cost range for decent aesthetic fans: $250 to $600. Under $150, the nickel is plated plastic and the motor hums. One more thing: skip the integrated light kit. They almost always look cheap. Use separate wall lighting instead.
Buy a fan with a DC motor — they’re quieter, more efficient, and usually have sleeker housings than AC motor fans.
24. A Decorative Radiator Grille That Replaces The Plastic Cover
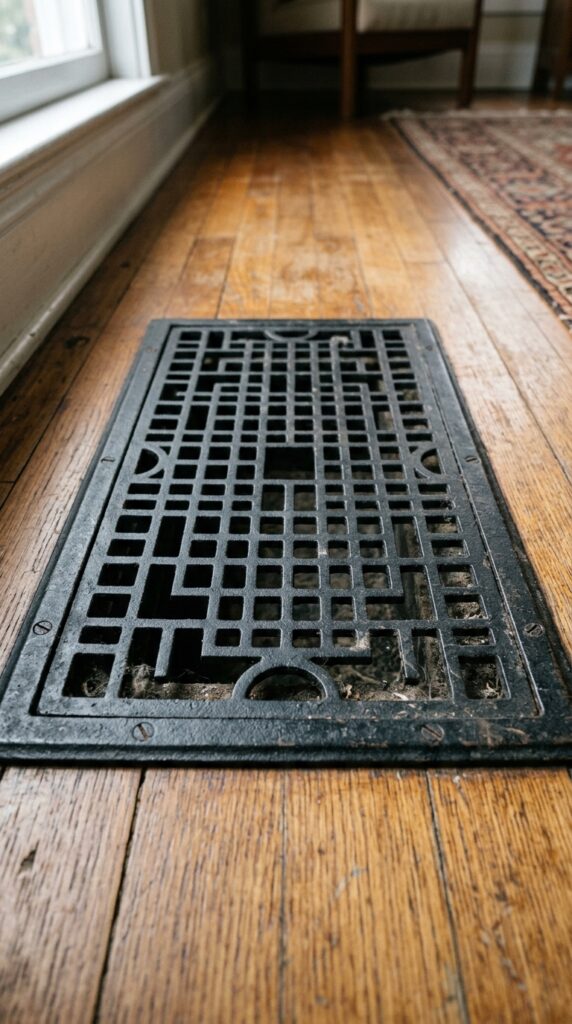
Cheap plastic register covers are an insult to a Neo-Deco room. Swap them for cast iron or steel grilles with Deco-inspired cutouts. I replaced six floor registers (the ugly stamped-metal kind with adjustable louvers) with cast iron grilles featuring a simple stepped square pattern. Each cost $35 to $50. The difference is absurd — suddenly the floor itself looks considered.
The constraint: cast iron grilles are heavy and can dent wood floors if dropped during installation. Also, they conduct heat much better than plastic, which sounds good until you step on one barefoot in winter — it’s startlingly hot. In a bathroom, that’s unpleasant. In a hallway, fine. Most importantly, measure your duct opening exactly. Standard sizes (4×10, 6×12) are easy. Odd sizes require custom fabrication at $100+ per grille.
Order one grille first and test how it sits. Some cast iron grilles have a raised edge that prevents them from sitting flush with the floor.
25. A Cornice Board With Stepped Profile (No Drapery Required)
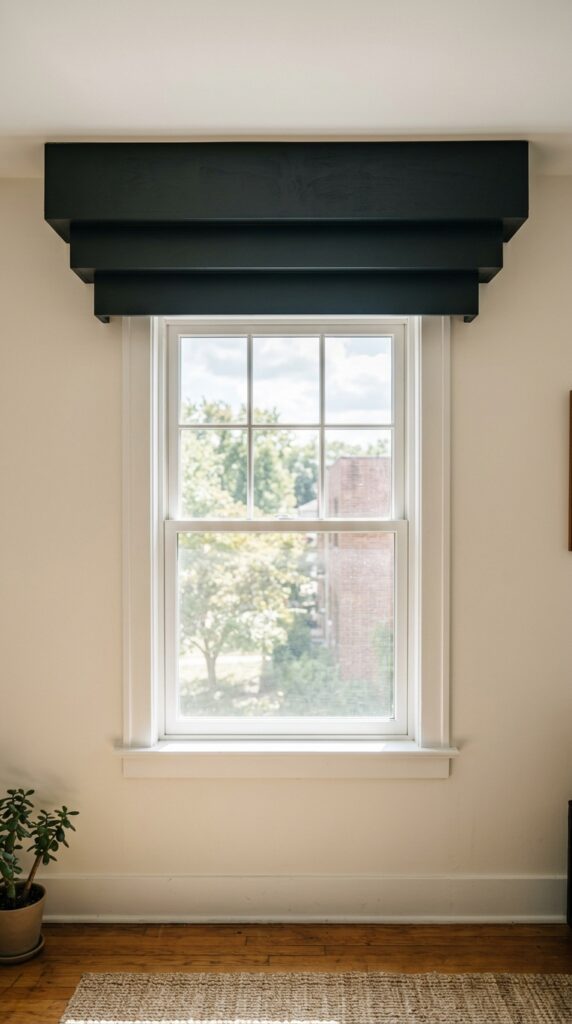
Most cornice boards are upholstered fabric bumps that collect dust. A stepped hard cornice — think of it as a piece of wall sculpture above the window — gives the height and finish of a valance without the fussy fabric. I built one for a living room window using 1/2-inch plywood, a jigsaw, and paint. Total cost under $60. The stepped profile echoes the stepped ceiling molding and the radiator cover. It pulls the room together without a single yard of drapery.
The trade-off: a hard cornice is permanent. You’re screwing it into the wall or window casing. If you change your mind, you’ll have holes to patch. Also, it reduces natural light slightly because the overhang blocks the top few inches of glass — noticeable in a room with low ceilings. Finally, dust settles on the horizontal steps. A quick wipe with a Swiffer once a month solves it, but it’s another surface to clean. For windows that face a busy street or an ugly view, the cornice also visually lowers the ceiling, which can be a good thing (cozier) or bad (cramped). Test with a cardboard mock-up first.
Paint the underside of the cornice a slightly darker color than the face. It absorbs shadow and makes the overhang feel deeper.
Where To Start, What To Skip, And Why This Style Works
Neo-Deco isn’t about collecting objects. It’s about choosing fewer things with sharper lines and letting them breathe. The through-line across these 25 ideas is material honesty — brass that actually ages, marble that stains, lucite that scratches. If you can’t live with imperfection, this style will frustrate you. But if you’re tired of rooms that look like untouched catalogs, the small fractures and wear patterns become the whole point.
If you take one idea from this list today, start with the unlacquered brass faucet or the stepped ceiling molding. Both are relatively low-cost, impossible to mess up, and they change the way a room feels every time you walk past. The faucet forces you to stop babying your finishes. The molding adds shadow and structure without announcing itself. Most people overcomplicate Deco by adding pattern on pattern. The opposite move — subtracting clutter, sharpening edges, committing to a single geometric — is what makes Neo-Deco feel bold without ever feeling busy.
Now go look at one room in your house and ask which surface or edge you’ve been ignoring. That grille. That radiator cover. That dusty window corner. Those are the places where real design lives, not in another throw pillow or a can of “warm neutral” paint. You don’t need permission to make your home look like someone with opinions lives there. You just need to start with one thing and let it be wrong for a while until it becomes right.

