
You don’t need a sprawling cottage garden, a Pinterest-perfect patio, or a single ounce of crafting experience to build a fairy garden that genuinely stops people in their tracks. The DIY versions — the ones made from pasta jars and broken flowerpots and sticks picked up off the lawn — often look better than the ones filled with expensive store-bought miniatures. There’s a looseness to them. A realness that resin garden sets can never quite fake.
What these twelve ideas share is accessibility. Each one can be built in an afternoon with materials you either already have, can find outdoors for free, or can pick up for a few dollars. Some are best for pots and containers, some work directly in the ground, and a couple are genuinely made for complete beginners who’ve never attempted anything like this before.
Expect some opinions along the way. Not every idea works in every yard, and I’ll tell you exactly when to skip something and why.
1. The Broken Pot Cascading Garden
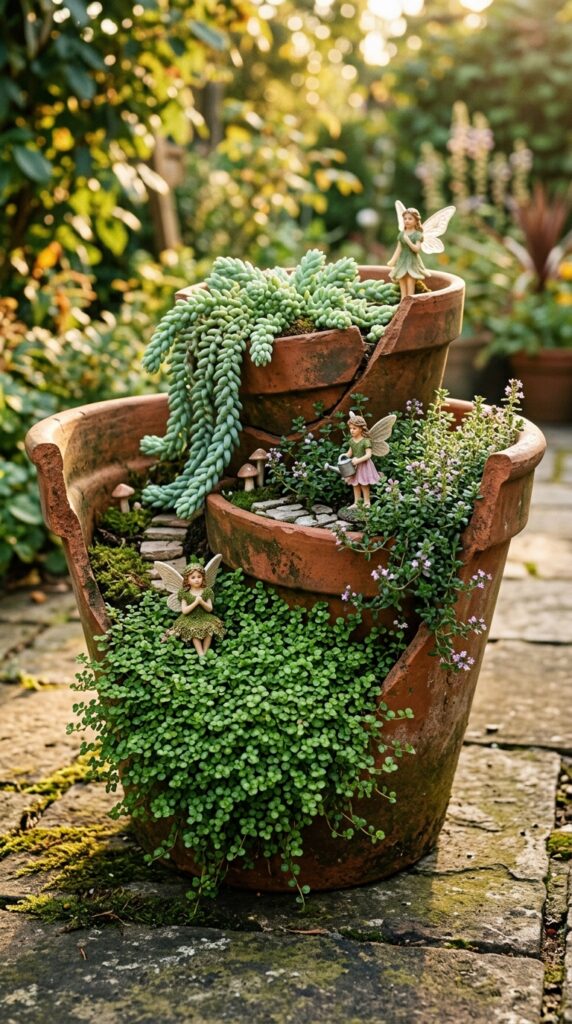
Broken terracotta pots used to mean a trip to the recycling bin. Now they’re some of the most sought-after containers in fairy gardening, and once you understand why, you’ll never throw a cracked pot away again.
The technique is straightforward: take a large terracotta pot and either use one that’s already broken, or carefully crack a section of it using a hammer and chisel. Stack the broken pieces inside the whole base at descending angles, creating a series of exposed ledges, each one slightly lower than the last. Press each shard firmly into a base layer of soil to stabilize it. Then plant each tier independently.
The cascading layout is what makes this work visually. Plant the highest tier with something upright — a small grass or dwarf hebe. The middle tiers suit spreading plants like creeping thyme or mind-your-own-business. Let the lowest level spill over with trailing sedum or baby tears that drape over the broken edge and soften it completely.
Add your fairy figurines on the flat ledges. The broken edges become garden walls, terraced hillsides, natural stone steps. The more deliberately your eye reads each level as a separate space, the more convincingly miniature the whole thing looks.
One constraint: this needs a stable flat surface. A pot garden with multiple stacked layers can topple if nudged on an uneven surface, so choose a flat patio stone, table, or deck as your base. Don’t place it somewhere with heavy foot traffic.
2. Mason Jar Fairy Lantern Garden
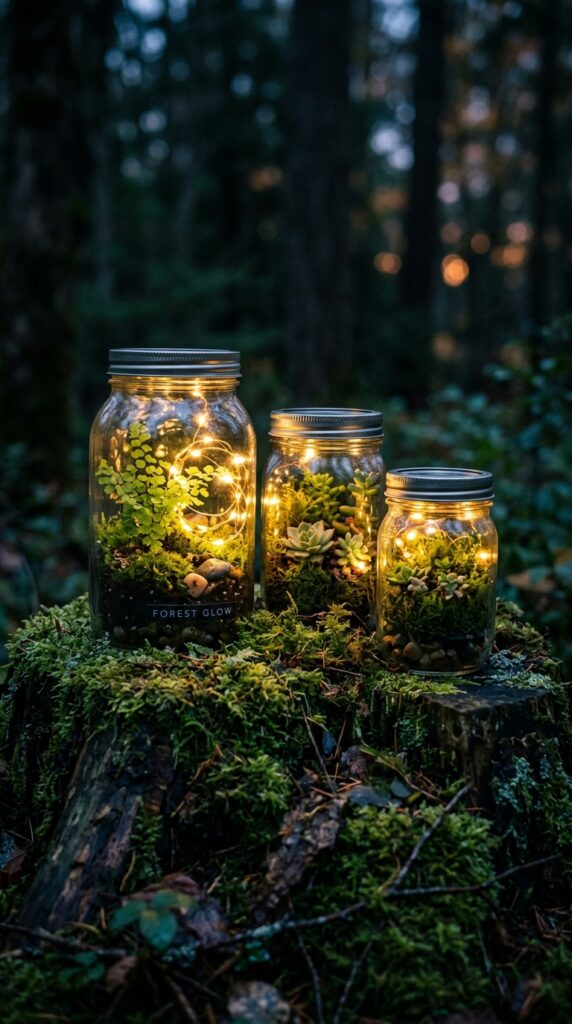
Mason jars are practically made for fairy gardens. The glass walls mean you can see the layering of materials inside — gravel, moss, soil, roots — which adds a whole extra dimension of detail that solid containers can never show. And when you add lighting, the effect after dark is genuinely extraordinary.
Start with clean, dry jars in varying sizes. Layer the base with fine gravel or aquarium stones for drainage, then a thin layer of activated charcoal to keep the soil fresh, then a small amount of potting mix. Keep the soil layer shallow — you’re not trying to grow large plants here.
For planting, miniature ferns, moss plugs, and small air plants all work beautifully in the enclosed environment. Air plants need no soil at all, which makes them especially good for jar gardens where drainage is limited. A tiny pebble, a miniature door cut from craft foam, or a small polished stone can sit on the soil surface as the sole accessory — one well-chosen detail is more powerful than a handful of cluttered ones.
The LED fairy light strand, coiled loosely at the base before planting, charges the whole composition at night. Use warm white rather than cool white — the difference in mood is significant.
That said, skip this if your home is very bright and sunny. Sealed or near-sealed glass jars can overheat in direct sun, damaging plants and fogging the glass with condensation. A bright but indirect spot is ideal.
3. Stacked Slate Stone Fairy Village
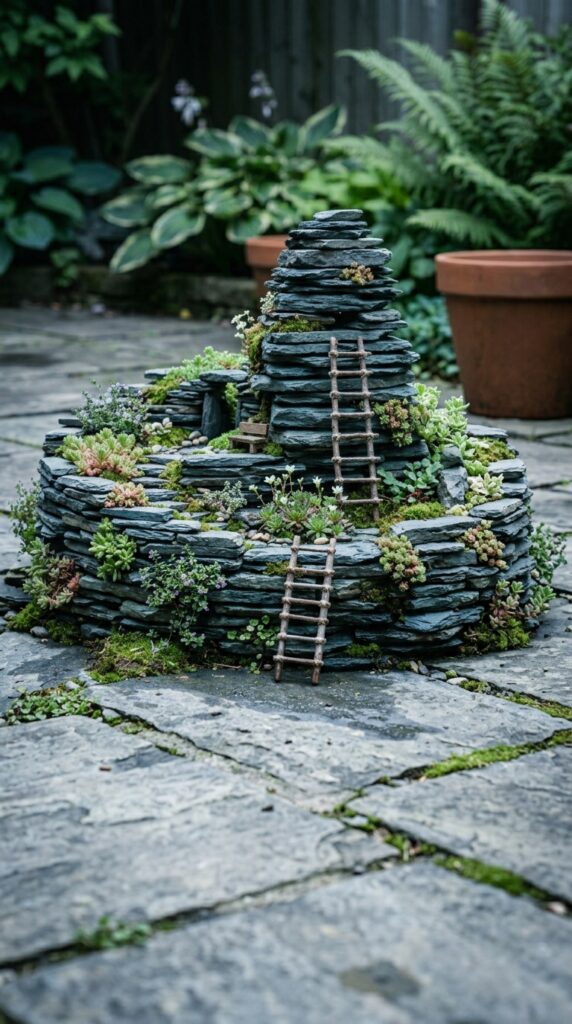
Flat stones from a garden center, a building site offcut pile, or a nearby riverbed are one of the cheapest and most architecturally convincing building materials in fairy gardening. Stacked carefully, they read as walls, towers, bridges, and terraced hillsides. The plants that grow between them — the ones you stuff into the gaps with a fingertip of soil — eventually look like they’ve been there for decades.
Choose slate or sandstone for the best color. Smooth river rocks work too, though they’re harder to stack in a stable way. Avoid shiny polished stones, which look decorative rather than structural and immediately break the naturalistic feeling.
Build in layers, mortaring nothing, relying purely on weight and balance. This is where the real pleasure is — it’s surprisingly meditative, and the wobble-test before you plant anything teaches you quickly which arrangements are stable. Keep the tallest stacks no more than four or five stones high for safety and visual proportion.
Tuck drought-tolerant alpines, saxifrage, and small sedums into the crevices as you build. These plants are specifically adapted to rocky conditions and will anchor themselves naturally over time, eventually binding the whole structure together with roots.
The design principle here is asymmetry. A perfectly symmetrical stone tower looks architectural in the wrong way. Vary the heights, let some sections be taller, leave gaps, tuck a fairy door into a flat-faced section. The slightly random quality is what makes it read as found rather than built.
4. Wheelbarrow Fairy Meadow
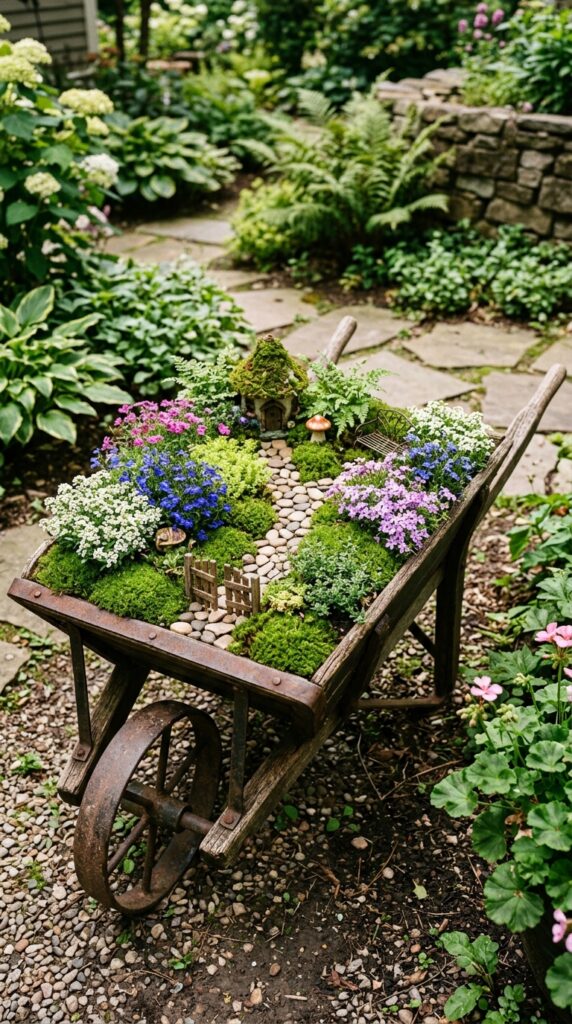
An old wheelbarrow — the kind with peeling paint and a wheel that no longer quite rolls straight — is one of the best large-scale fairy garden containers you can use. The shape alone does narrative work. It implies movement, a journey, something in the middle of being transported from one magical place to another.
Drill drainage holes in the base if there aren’t any already. Line with landscaping fabric before filling with a good-quality potting mix. The larger volume of soil means you can plant more ambitiously here than in a small pot, which is the real advantage of this format.
Go for a wildflower-meadow aesthetic rather than a manicured look. Small flowering plants in purple, white, and pale yellow mixed with ground-hugging moss creates a sense of abundance and accidental beauty. Lobelia, creeping phlox, white alyssum, and sweet alyssum all stay reasonably compact and flower prolifically.
The accessory placement in a wheelbarrow garden needs a light touch. One winding pebble path through the center, two or three miniature elements tucked into the planting, and you’re done. The natural abundance of the planting is the main event here, not the accessories.
Paint the wheelbarrow itself if it’s rusting badly — a coat of matte black or sage green spray paint costs three dollars and extends the life of the container considerably while also making the planting colors pop against it.
5. Log Slice Stepping Stone Path
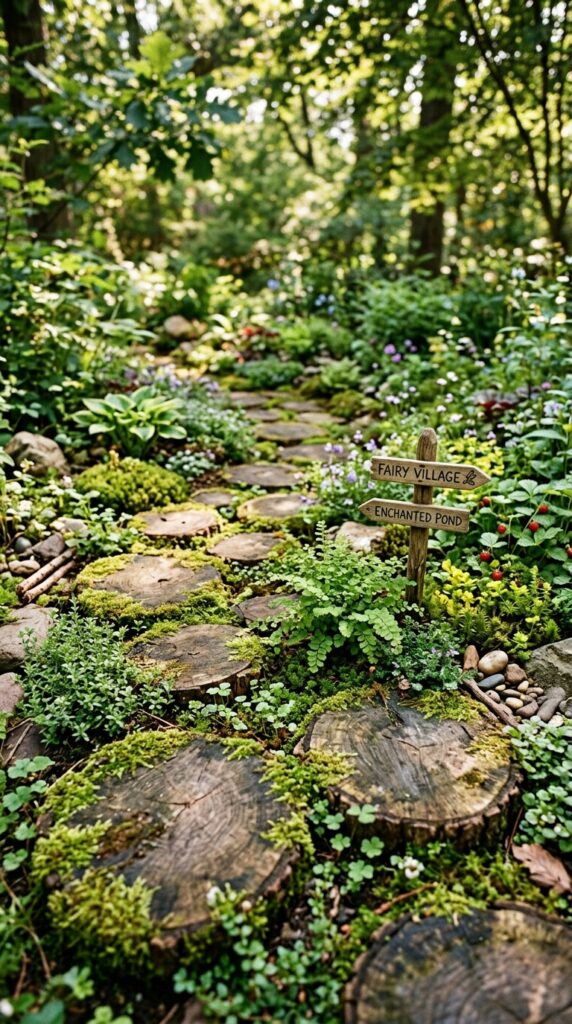
Log slices are one of those materials that look expensive in garden centers but cost nothing if you know someone who’s recently had a tree cut down, or if you check local community boards. A simple handsaw and a branch of any width gives you beautiful, organic stepping stones in twenty minutes.
The slices don’t need to be the same size. In fact, the most natural-looking paths use varied diameters — larger slices where the path is straight, smaller ones on the curves. Press them firmly into the soil so the surface is nearly level with the ground. Slightly sunken slices look embedded rather than placed.
The plant selection around the path matters enormously. Low-growing plants that spread and soften the edges of the wood are what make this look like a real fairy trail rather than a craft project. Creeping thyme between the slices will eventually fill the gaps with fine-textured greenery and tiny flowers. Moss on the log surface itself happens naturally in shaded gardens and can be encouraged by painting the wood surface with natural yogurt.
A single miniature signpost — a lolly stick with a tiny hand-lettered sign reading something like “Enchanted Wood” or simply an arrow — placed at the first curve of the path is enough narrative detail to complete the scene. You don’t need figurines or complex structures. The path tells its own story.
6. Vintage Colander Hanging Garden
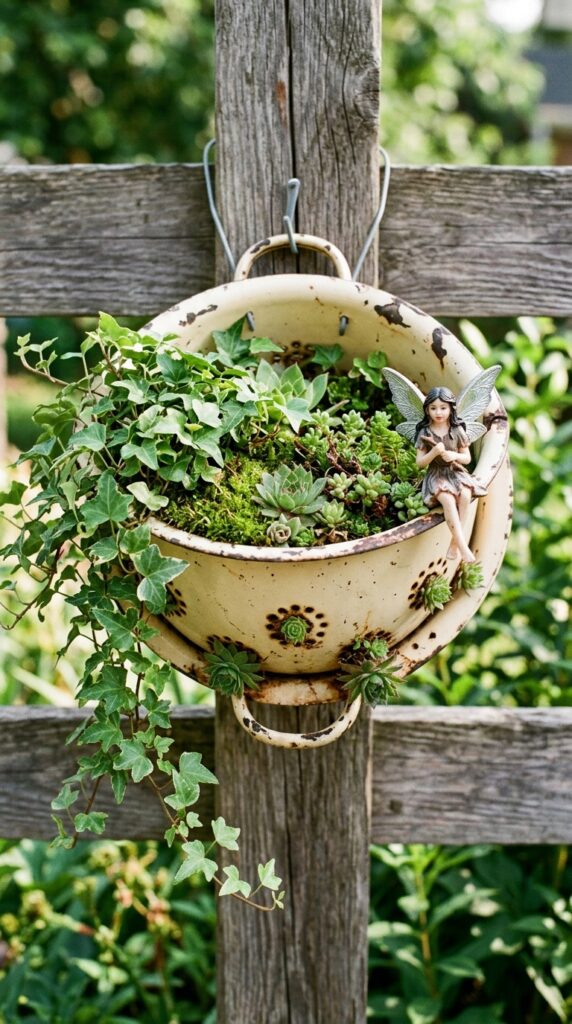
A colander repurposed as a hanging planter is practical, deeply charming, and takes all of eight minutes to set up. The drainage holes that make it useless as a serving bowl are exactly what make it ideal as a planting container — and plants cascading through those holes from the outside look like something you’d see on a professional garden design account.
Source enamel colanders at charity shops for one or two dollars. Cream, pale blue, or sage green enamel all photograph beautifully and age well outdoors. If the colander you find is an unappealing color, a quick spray with matte chalk paint transforms it completely.
Line the interior with sheet moss before filling with potting mix — this holds the soil in while still permitting drainage through the holes. Plant a combination of upright and trailing plants: something low and spreading in the center, with ivy or string of pearls allowed to trail through and out of the lower holes.
Hang it from a fence, pergola beam, or garden hook using the existing handles. At roughly two to three feet from eye level it’s at perfect viewing height — close enough to appreciate the detail, high enough to feel elevated and intentional.
The constraint worth mentioning: hanging containers in this style dry out quickly, especially in summer. Water every one to two days in warm weather and always water thoroughly until it drips freely from the base holes.
7. Fairy Garden in a Wagon Planter
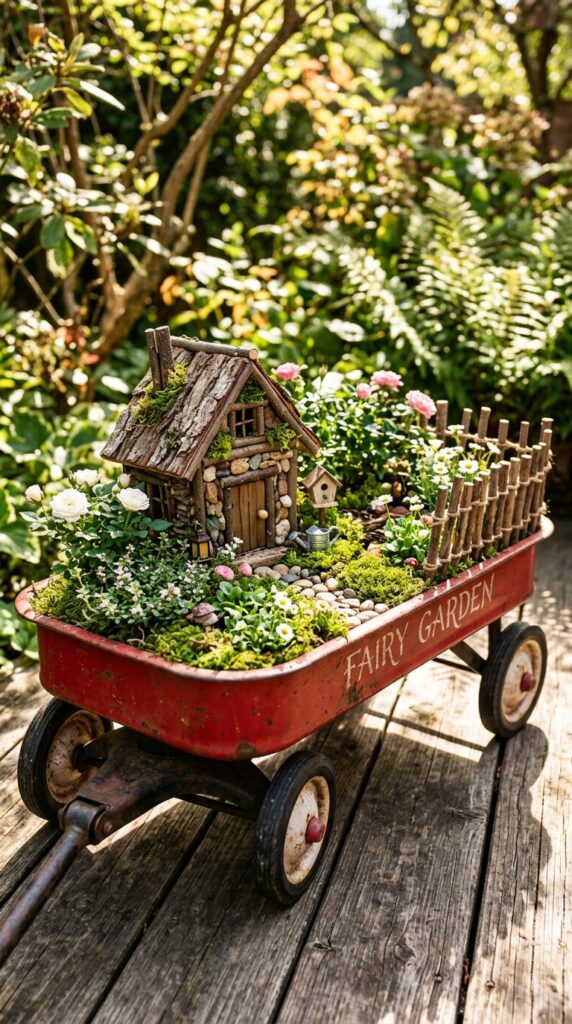
A small metal wagon — the kind that sits in children’s toy stores for twenty dollars or turns up at yard sales for two — is about as close to a purpose-built fairy garden container as you’ll find without actually buying one. The walls are the right height, the shape is charming, and the red paint almost always photographs strikingly against green plant material.
Drill a few holes in the base for drainage, add a layer of gravel, then fill with potting mix. Keep the planting relatively soft and ground-hugging — compact mosses, small flowering ground covers, and one or two dwarf alpines. The wagon itself is doing most of the visual work, so you don’t need elaborate planting to make an impact.
The miniature fence along one interior edge is a detail that works particularly well in wagon gardens. Use craft sticks cut to uniform size and hot-glued to two horizontal pieces as rails. Paint it white or leave it natural. It reads as a garden boundary, which gives the whole scene a sense of organized space within the wagon.
One bonus of the wagon format: it has wheels. You can reposition it seasonally, move it indoors if frost threatens, or wheel it to the most photogenic corner of your garden for whatever occasion calls for it. For a family garden where kids are involved, this mobility is genuinely useful.
8. Pebble Mosaic Fairy Circle Floor
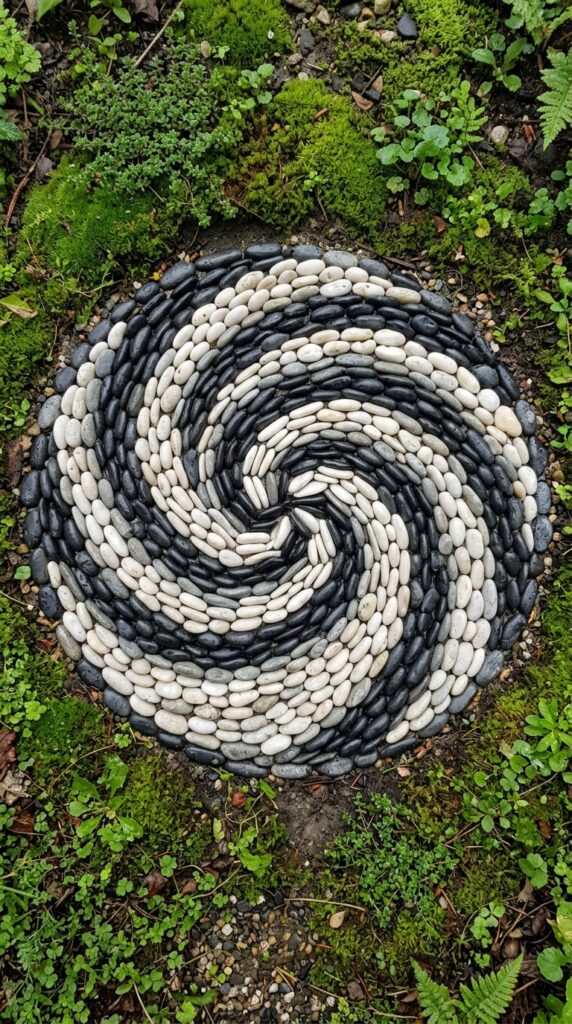
Before you add a single plant or figurine to your fairy garden, the ground treatment is what sets the tone for everything else. A pebble mosaic floor is one of the most underused techniques in DIY fairy gardening, and it’s genuinely easier than it looks.
Clear a circular or organic-shaped patch of garden bed. Firm the soil by tamping it down lightly. Then begin placing pebbles in a pattern, pressing each one into the soil surface so it sits half-buried and stable. Simple spiral or wave patterns read the most naturally — geometric grids look too architectural at miniature scale.
Use pebbles in two or three tones maximum. Black and white with grey, or warm sandy tones with dark brown, both work beautifully. Mixing too many colors makes the mosaic look busy and undoes the fine-detail effect you’re going for.
Surround the finished mosaic with a ring of moss or low ground-cover planting to frame it, and place your main fairy garden accessory — a cottage, a figurine, a miniature well — at the center where the pattern draws the eye naturally.
This is the kind of detail that makes visitors look down and then suddenly look much more closely at everything around them. It signals intention. It says someone cared about the floor of this tiny world, which makes the whole thing feel more real.
9. Driftwood Fairy Shelter
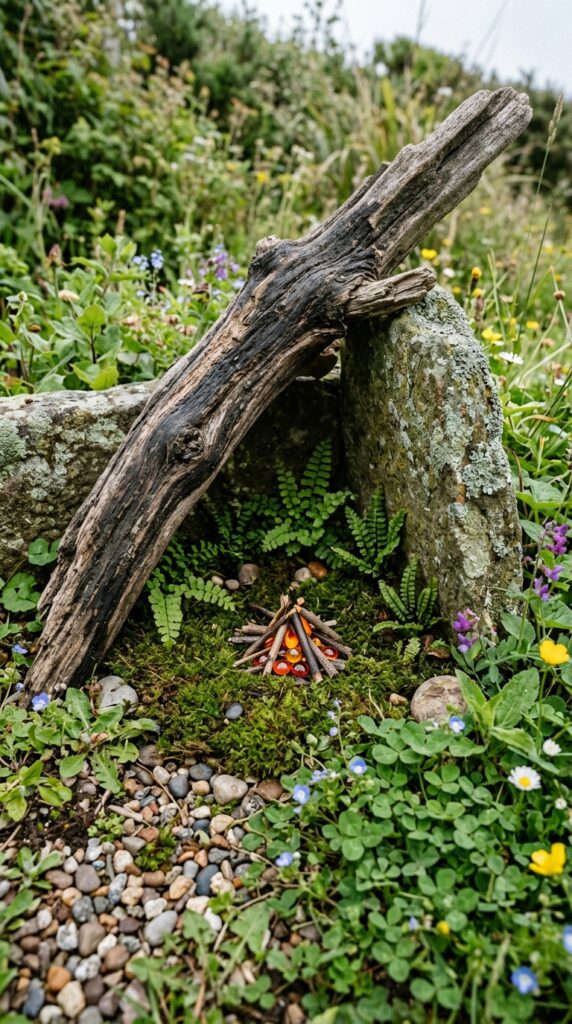
A single dramatic piece of driftwood or a large, characterful branch can anchor an entire fairy garden scene without any other structural elements at all. The wood does the architectural work — creating shelter, shadow, and the impression of ancient natural structures — while the planting and accessories fill in the story around it.
Prop the driftwood at an angle against a larger stone or a garden border edge, creating a natural lean-to or cave-like opening. The space beneath and around it becomes the living area — sweep it clear of debris, press in a firm layer of compost mixed with fine gravel, and lay a sheet of moss as the floor.
A tiny campfire made from a cluster of small sticks (about an inch long) arranged in a cone, with a few orange and red glass beads or polished stones as the “embers,” placed just inside the entrance is the kind of detail that makes adults crouch down for a closer look. It suggests habitation. It implies a story that the viewer gets to finish themselves.
Coastal driftwood weathers beautifully over time, developing a silvery-grey tone that looks both ancient and intentional. Inland you can approximate the look using weathered branches sealed with a thin coat of diluted grey paint rubbed back with a cloth while still wet.
10. Fairy Garden Under a Garden Cloche
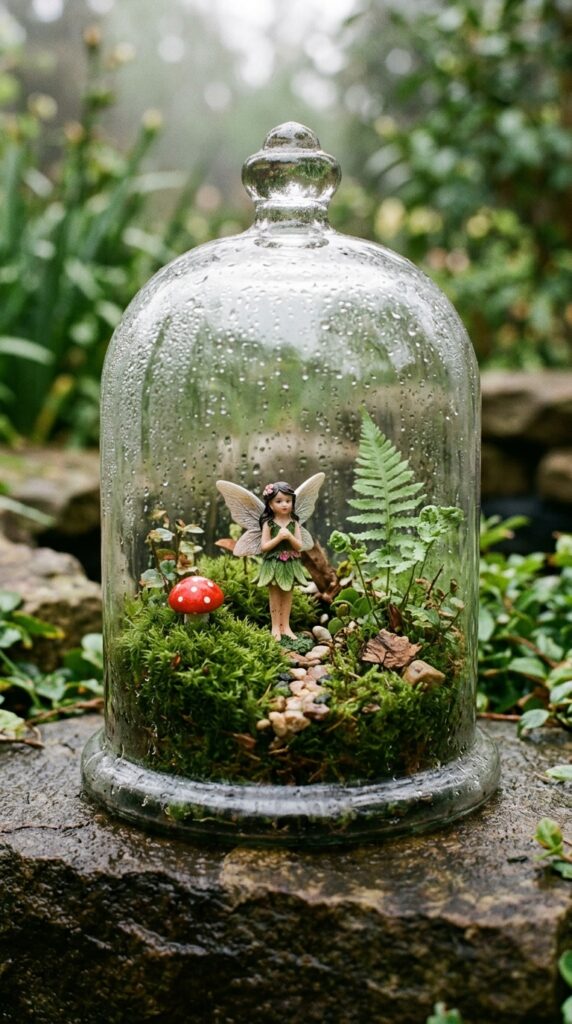
A glass cloche over a fairy garden does something that almost no other technique can: it makes the scene look like it exists in a separate atmosphere. The slight fogging of the glass, the way condensation beads on the inside surface, the distortion of light through curved glass — it transforms even the simplest arrangement into something that feels precious and protected.
Source cloches from antique shops, home goods stores, or online marketplaces. They vary widely in size, from small bell-jar styles that cover a single figurine to large wide-based domes that can shelter an entire small scene. Even a repurposed large glass bowl or a cut-glass vase inverted works perfectly well.
The garden beneath doesn’t need to be complex. In fact, simple is better here because the cloche draws the eye and creates enough visual drama on its own. A square of dense green moss as the base, one or two fern fronds, a single toadstool ornament, and a small figurine partially obscured by the planting is genuinely all you need.
The practical note: most plants don’t thrive under a sealed cloche long-term due to lack of air circulation. Lift the cloche for an hour or two every couple of days, or leave a small gap at the base for airflow. Alternatively, use artificial moss and dried botanical material if you want a permanently sealed arrangement — the visual effect is nearly identical.
11. Butterfly Garden Fairy Habitat
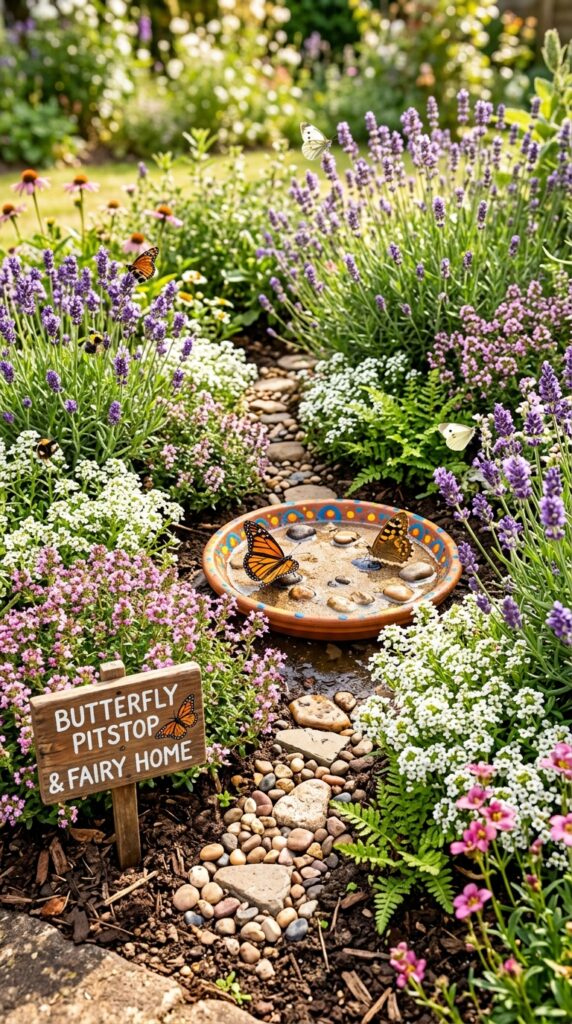
This is the fairy garden that actually benefits your wider garden, which makes it feel less indulgent and more purposeful — useful if you’re justifying the project to a practical-minded partner or neighbor.
Plant a dedicated border section with butterfly-friendly plants that also happen to be perfectly scaled for a fairy garden aesthetic: lavender, thyme, alyssum, creeping phlox, and single-flowered marigolds. All of these stay compact, flower prolifically, attract pollinators, and give the garden a soft, naturalistic feeling quite unlike the manicured look of traditional bedding plant borders.
The central feature is a butterfly puddling dish: a shallow painted stone saucer or plant tray filled with damp sand and a few pebbles for butterflies to land on and drink from. It’s a real functional garden feature, but at fairy garden scale it reads perfectly as a decorative pond or gathering pool.
Edge the border with a simple twig-and-twine fence — just pushed sticks lashed together loosely — to define the boundary between the fairy habitat and the rest of the garden. A small painted signboard at the entrance reading something like “Butterfly Landing” or simply “Garden” in a childlike script completes the scene.
This design works brilliantly in full sun, whereas many other fairy garden styles prefer shelter and partial shade. If your yard is open and sunny, this is your best option.
12. Fairy Garden Window Box
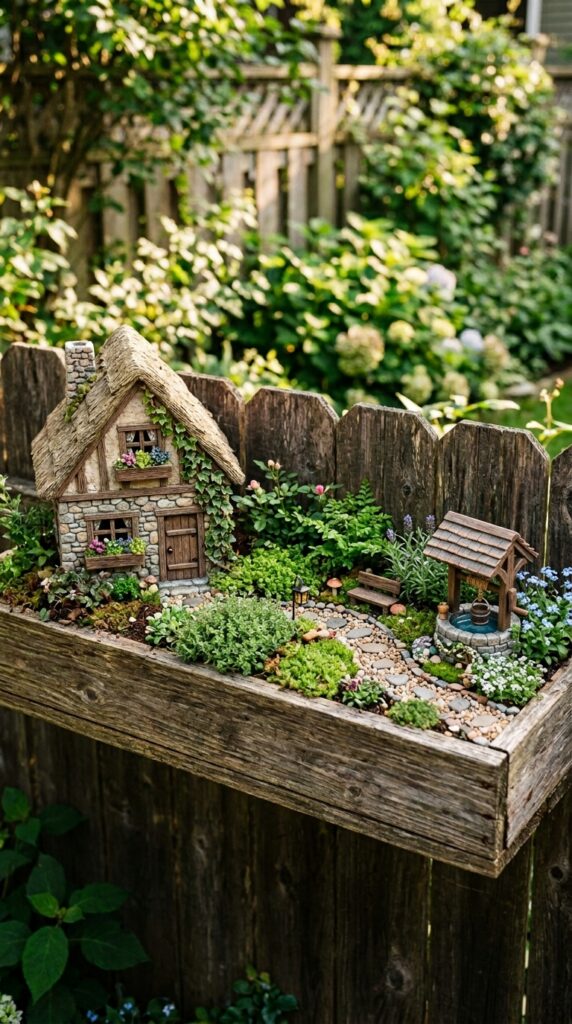
The window box format is one of the most underrated in fairy gardening. The elongated shape naturally lends itself to a narrative layout — a journey from one end to the other, each section telling a different part of the story — and it works equally well on a fence, a balcony railing, or beneath an actual window.
Use a longer box than you think you need. A sixty-centimeter or two-foot box is the minimum for a fairy garden with any real depth to it — shorter and you end up with a crowded, flat-looking scene with nowhere for the eye to travel.
Divide the box into loose thirds in your mind. The first section might be a wild cottage garden — dense, flowery, slightly overgrown. The middle section: a clear path with a well or bench. The final section: a more structured cottage or dwelling with a door and a window box of its own at an even tinier scale. That recursive detail — a miniature window box on the miniature cottage — is the kind of thing that makes people laugh and look closer at the same time.
Trailing plants at each end of the box soften the structure and stop the composition from looking too contained. Let ivy or bacopa drape down the front face. The plants that escape the edges are the ones that make the whole thing look genuinely alive.
For renters and apartment gardeners, a fence-mounted window box fairy garden is the most impactful outdoor feature you can add without affecting the property structure. It’s removable, portable, and unreasonably beautiful for the cost.
Before You Get Started
The most important thing you probably learned from this list isn’t a specific technique or plant combination. It’s that the materials almost never matter as much as the intention behind them. A two-dollar fairy door pressed into a weathered pot that you carried home from a charity shop and a twenty-dollar resin figurine set from a garden center will always look equally magical — or not, depending entirely on how thoughtfully you place them and what you plant around them.
Come back here whenever a new corner of your yard starts looking bare, a pot cracks in winter and needs a new purpose, or you find yourself standing in a thrift store holding something small and oddly charming with no idea what to do with it. Chances are, it belongs in a fairy garden.

