
Small spaces have a way of making people give up before they start. A narrow balcony, a single deep windowsill, a tiny corner of a courtyard patio — these feel like limitations until you realize that fairy gardening is almost the only garden style that actually gets better at a smaller scale. The intimacy is the point. The tightness of the space forces a level of focus and detail that sprawling gardens rarely achieve.
Some of the most beautiful fairy gardens ever photographed were made in a teacup, a single drawer pulled from an old dresser, or a pot no wider than a dinner plate. Scale is a design tool here, not a handicap. When your entire world fits on a shelf or a railing ledge, every single pebble, every tiny leaf, every miniature door hinge becomes something worth noticing.
These twelve ideas are specifically chosen for constrained spaces — apartments, balconies, windowsills, tiny patios, and courtyard corners. No sprawling garden beds required. A few of them need nothing more than a surface wide enough to set a pot on. All of them prove that small is not the same as insignificant.
1. Teacup and Saucer Fairy Garden
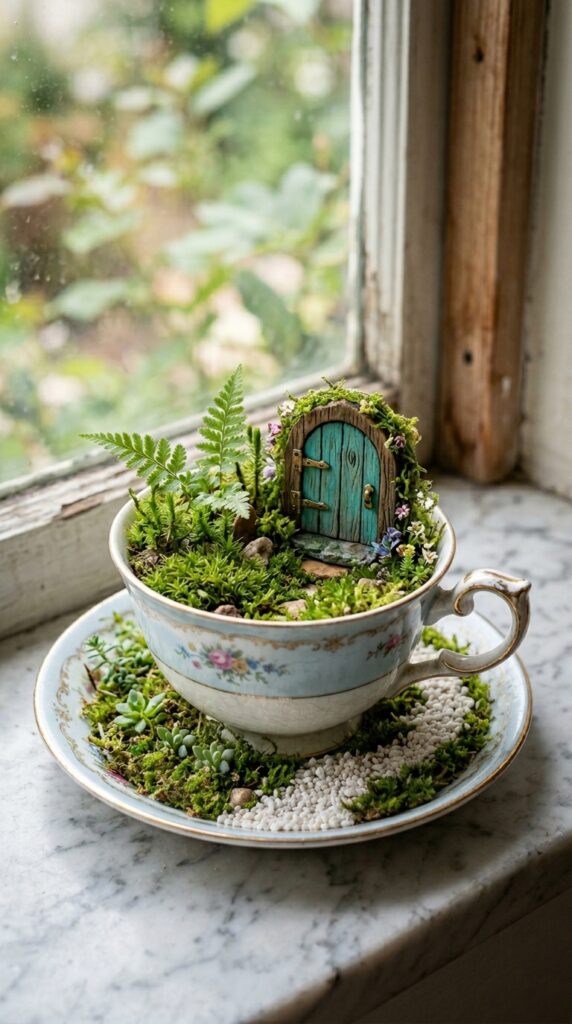
This is the most space-efficient fairy garden format that exists, full stop. A teacup takes up roughly the same surface area as a coaster, yet contains an entire miniature world when done well. The key is restraint — two or three elements maximum, chosen with care, arranged with intention.
Use an oversized vintage teacup if you can find one, the kind sold cheaply at charity shops with slightly mismatched saucers. The larger the cup, the more planting depth you have, and depth matters even at this scale. Drill a tiny drainage hole in the base with a tile drill bit, or accept that you’ll need to water very sparingly and tip out excess after rain.
Plant with the smallest possible plants: a thumbnail-sized piece of cushion moss, a single baby fern, perhaps one diminutive succulent rosette no wider than a fingernail. Add a fairy door — cut from craft foam or thin balsa wood and painted with a fine brush — leaned against the inner cup wall. That’s it. Stop there.
The saucer becomes the garden path. A line of fine white aquarium gravel from the edge of the saucer to the cup handle reads as a pathway leading to the entrance. Total footprint: about six inches square.
One real constraint here: teacup gardens are indoor or covered porch projects. Outdoor rain will waterlog the cup within minutes. A kitchen windowsill with good light or a covered outdoor shelf is ideal.
2. Wall-Mounted Pocket Planter Village
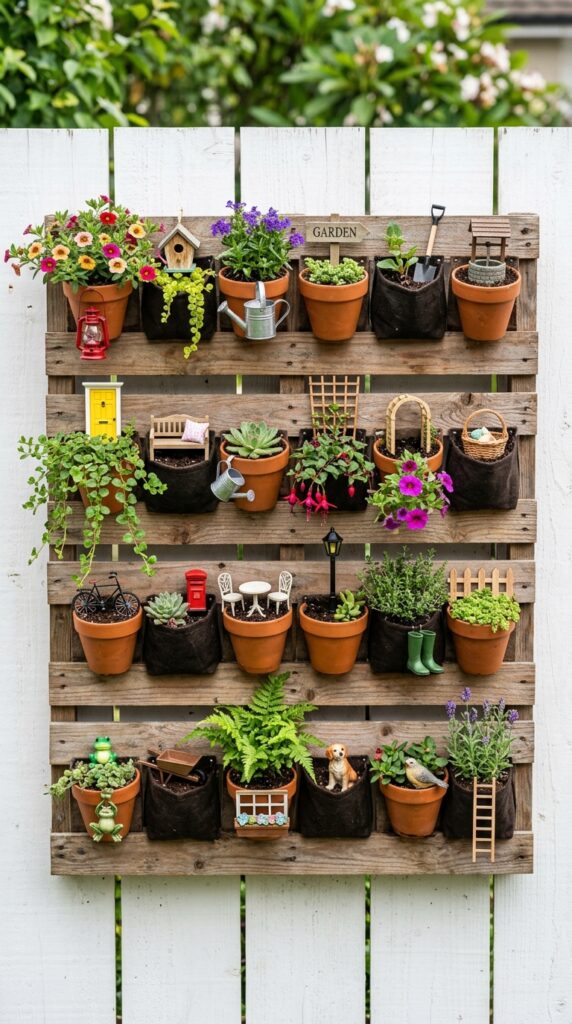
Vertical space is the most underused resource in any small garden, and wall-mounted pocket planters are the most practical way to claim it for a fairy garden without committing to anything permanent. They attach to a fence or wall with two hooks, cost almost nothing, and turn a blank vertical surface into a layered, living installation.
Buy a fabric pocket planter or make your own from a piece of canvas or heavy burlap cut into pockets and sewn or stapled to a backing board. Each pocket becomes its own self-contained fairy world — one might be a moss garden with a tiny door, another a succulent scene with a pebble path, a third a wildflower patch with a miniature bench.
The design principle that makes this work beautifully rather than chaotically is consistency of style across the pockets. Use the same or closely related plant palette throughout — all cool greens, or all warm greens with small white flowers — and keep accessories to one per pocket. That restraint unifies the whole installation even while each individual pocket tells its own story.
Works particularly well for renters. Two small hooks in a fence leave almost no trace, and the entire installation can be taken down and moved in under five minutes. For a shared outdoor space like an apartment building courtyard, a pocket planter fairy wall is a contribution that neighbors genuinely appreciate.
3. Windowsill Terrarium Garden
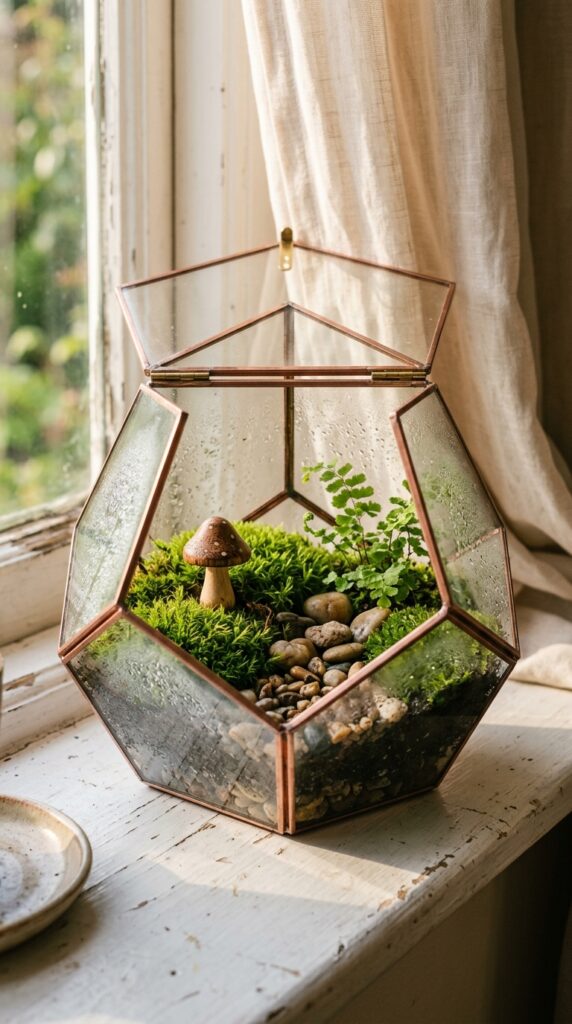
A glass terrarium is the most architecturally elegant container for a small-space fairy garden, and it has a practical advantage that most people overlook: the enclosed environment creates its own humidity, which means tropical-style plants stay moist with very little watering. For anyone who tends to forget plants exist until they look thirsty, this is a significant benefit.
The geometric glass terrariums sold in home goods stores — the angular, faceted ones — are the most striking visually. Even small ones, around twenty centimeters tall, hold enough soil depth to create a proper layered scene. Line the base with horticultural charcoal and fine gravel before adding a shallow layer of peat-free potting mix.
Keep the planting to miniature-scale woodland species: cushion moss, baby fern, creeping fig, and miniature orchids if you want something flowering. These all thrive in the humid environment a closed terrarium creates. Avoid succulents and cacti here — they need the opposite conditions and will rot quickly in enclosed humidity.
The accessories inside a terrarium need to be tiny, simple, and moisture-resistant. A carved wooden mushroom sealed with varnish, a single polished stone, a small piece of driftwood. No painted paper or unsealed craft materials — they’ll deteriorate within weeks in the damp conditions.
On a windowsill facing east or west, the light through the glass panels at certain times of day is genuinely breathtaking.
4. Stacked Pot Tower Fairy Apartment
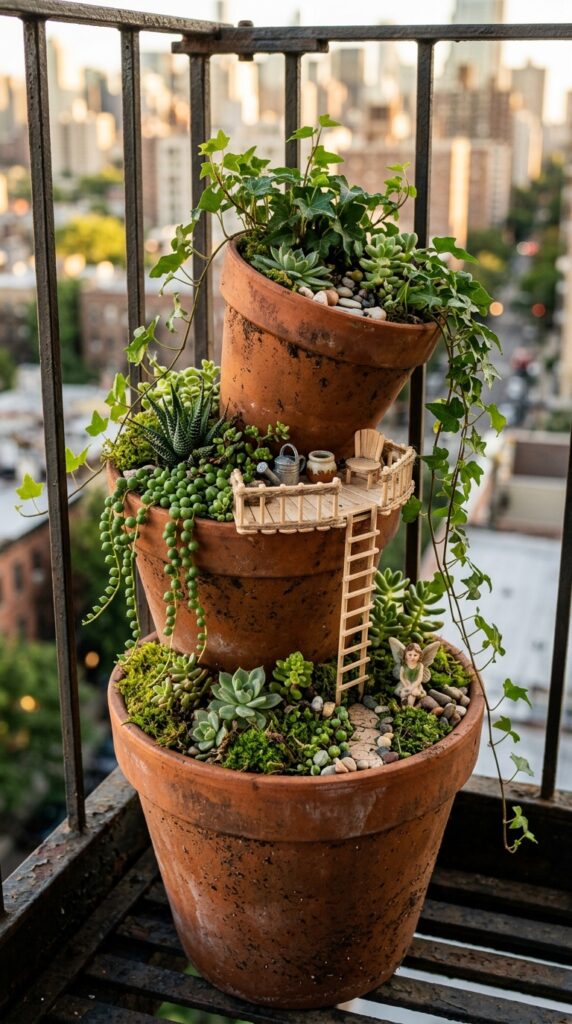
When floor space is measured in inches rather than feet, the only logical solution is to build upward. A stacked terracotta pot tower uses the same footprint as a single large pot but delivers three times the planting surface and creates a vertical visual element that makes a small balcony feel deliberately designed rather than improvised.
Use three pots in descending sizes — a large base, medium middle, and small top. Stack them by filling the largest pot with soil almost to the rim, pressing the medium pot into the soil at a slight angle so one side is lower, then repeating for the small top pot. The angled stacking creates exposed planting ledges on the low side of each pot.
Plant each tier differently for maximum visual layering. The base suits spreading ground covers or trailing plants. The middle tier works well for small flowering annuals or compact herbs. The top tier is perfect for a single dramatic succulent or a tiny structural plant like dwarf grass.
The miniature balcony — a few craft sticks hot-glued together and attached to the middle pot with outdoor adhesive — is the detail that turns a stacked planter into a fairy garden. Add a tiny chair on the balcony ledge. Suddenly a terracotta stack tells a story.
Fair warning: this structure is top-heavy when dry and needs to be in a sheltered spot. Strong wind can topple the upper pots if they haven’t been anchored into the soil beneath them firmly enough.
5. Reclaimed Drawer Fairy Landscape
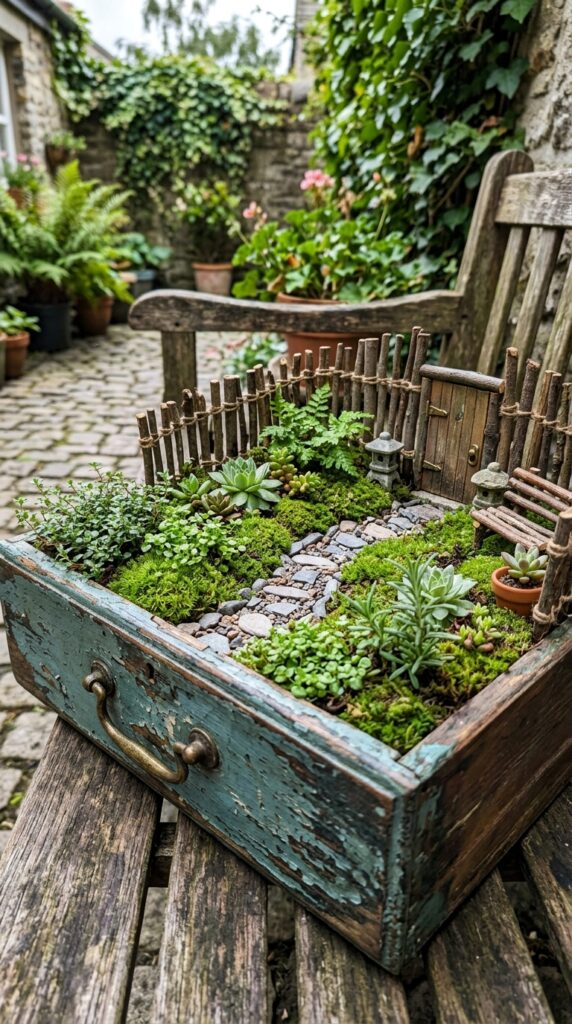
A single dresser drawer is the flat, open canvas that fairy gardening practically invented itself for. The shallow depth forces a landscape approach rather than a container approach, which means the design has to think about ground level, mid-level, and horizon in a way that round pots simply don’t require. The results consistently look more intentional.
Line the base of the drawer with a thick plastic bag or cut-down bin liner, piercing several drainage holes through both the liner and the drawer base. Fill with a shallow layer of compost — no more than three inches deep. The constraint of shallow soil actually helps here, keeping plants small and slow-growing.
Divide the landscape loosely into a foreground, a middle ground, and a background. The foreground gets the pebble path and open ground. The middle ground takes the main planting — low moss, tiny herbs, compact flowering plants. The background gets the tallest element: a stick fence, a small twig structure, or a bark-slab wall that creates a sense of enclosure and depth.
Old drawers with peeling paint and knot holes in the wood need no modification aesthetically — they already look as though they’ve been sitting in a garden for years. If you find one in good condition, rough it up slightly with sandpaper on the exterior for a more weathered look. The contrast between the aged wood and the vivid green planting is much of the visual appeal.
6. Hanging Macramé Planter Fairy Nest
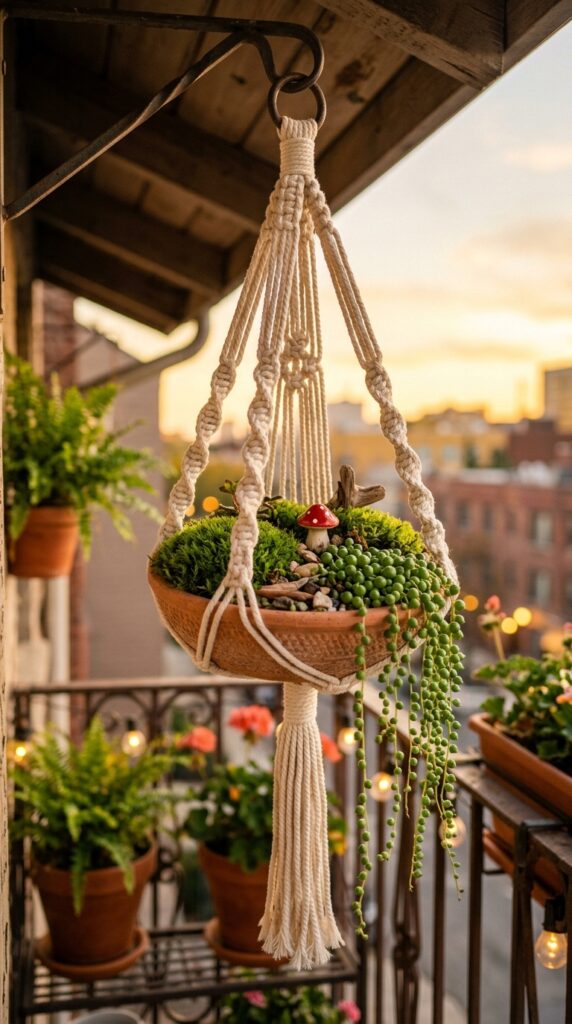
Macramé plant hangers use zero floor space and zero shelf space, which makes them the purest small-space solution on this entire list. Suspended from a single ceiling hook, balcony overhang, or fence beam, they bring the fairy garden to eye level — which turns out to be the single best height for appreciating miniature detail.
Use a wide-mouthed macramé hanger and sit a shallow terracotta dish or wooden salad bowl inside it. The hanger cradles the container without any fastening needed. Line the dish with moss before filling with free-draining compost, and plant with soft trailing and mounding varieties — string-of-pearls cascading over one edge, cushion moss covering the soil surface, one or two tiny ornaments tucked in.
The natural fiber of the macramé hanger integrates beautifully with the organic quality of the planting. Avoid metal or plastic hangers, which create a stylistic mismatch that undercuts the whole effect.
One practical note about weight: a fully planted and watered dish is heavier than it looks. Make sure your ceiling hook, balcony beam, or fence attachment point can take at least five kilograms. Test it with a filled watering can before trusting it with the planted garden.
For an indoor version, this works brilliantly near a bright window, especially in a room where a hanging element adds visual interest at an otherwise empty mid-height.
7. Balcony Railing Planter Fairy Trail
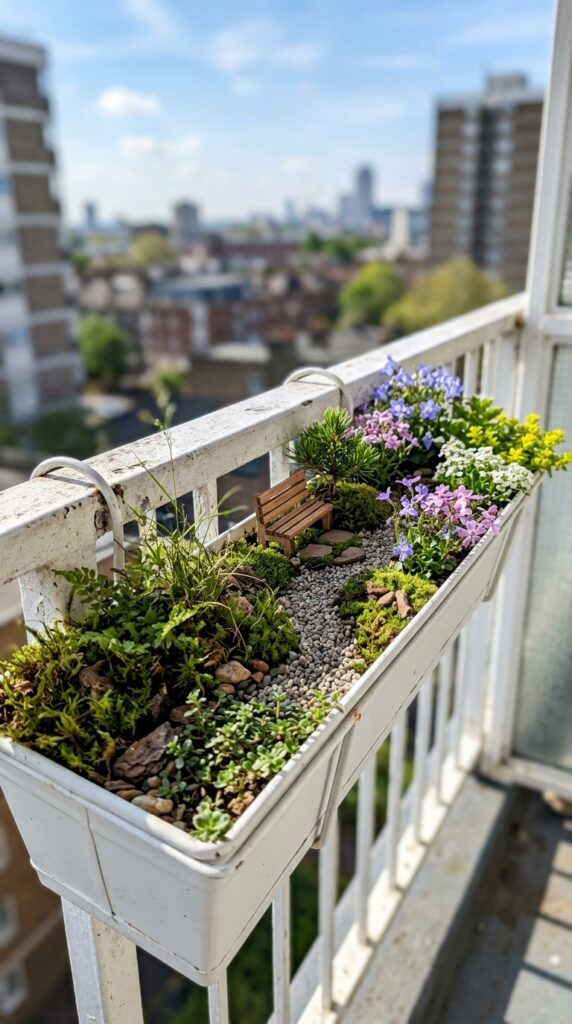
Railing planters are designed for narrow spaces, which also happens to make them ideal for fairy garden narratives that travel from one end to the other. Think of the length of the planter as a journey — a trail through a miniature landscape with a beginning, a middle, and a destination.
Use a railing planter at least forty centimeters long for this approach to work spatially. Shorter and the sections compress to the point where the narrative reading gets lost. Fill with a mix of multipurpose compost and fine gravel for drainage, since railing planters often drain poorly in heavy rain.
Section the trail loosely into three zones. The first end: wild and overgrown, with dense moss and tiny plants spilling over the edge slightly. The middle: an open clearing, a pebble path, a miniature bench made from two flat stones and a twig. The far end: a destination — a tiny cottage or a single large decorative stone surrounded by flowering plants.
The visual trick that makes a railing planter look designed rather than just planted is varying plant heights across the length. Keep the wild end low and spreading, raise the height slightly in the middle with an upright plant or twig structure, and return to low planting at the destination end. This creates a gentle visual rhythm when viewed from the side.
Great for apartment dwellers who want outdoor gardening without floor space. These attach and detach in minutes and leave no permanent marks on the railing.
8. Living Picture Frame Wall Garden
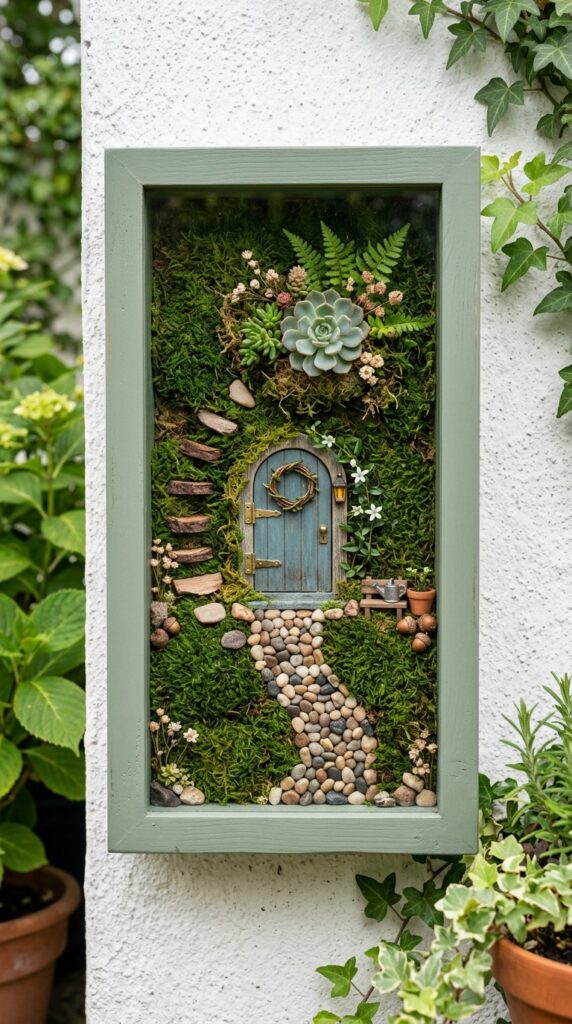
Shadow box frames, the deep-sided picture frames originally made for displaying collectibles, become extraordinary vertical fairy gardens with a sheet of moss, a handful of accessories, and a small amount of outdoor-safe adhesive. They mount on any wall or fence, take up almost no depth, and function beautifully as fairy garden art that’s also genuinely alive.
Use a frame at least five centimeters deep — shallow frames don’t hold enough moss to look substantial. Line the back with a piece of firm coir mat or thick sheet moss, pressed in tightly. Add a very thin layer of compost behind the moss if you want to plant small succulents directly into the frame — echeverias and sedum plugs both establish well in vertical frames with the right mix.
Press a miniature door into the moss surface, secured with a dab of outdoor adhesive. Arrange small pebbles into a path pattern across the moss floor of the frame. Tuck in one or two tiny accessories — a carved wooden mushroom, a small stone — and lean a miniature ladder against the inner frame edge.
Mount the frame horizontally during the first two weeks while the moss and any plants establish, then hang it vertically once everything has rooted. Water by misting rather than pouring, two or three times per week in warm weather.
Paint the frame in a muted exterior color — sage green, dusty blue, or chalky white — that will hold up outdoors and complement the planting without competing with it.
9. Staircase Step Fairy Garden Series
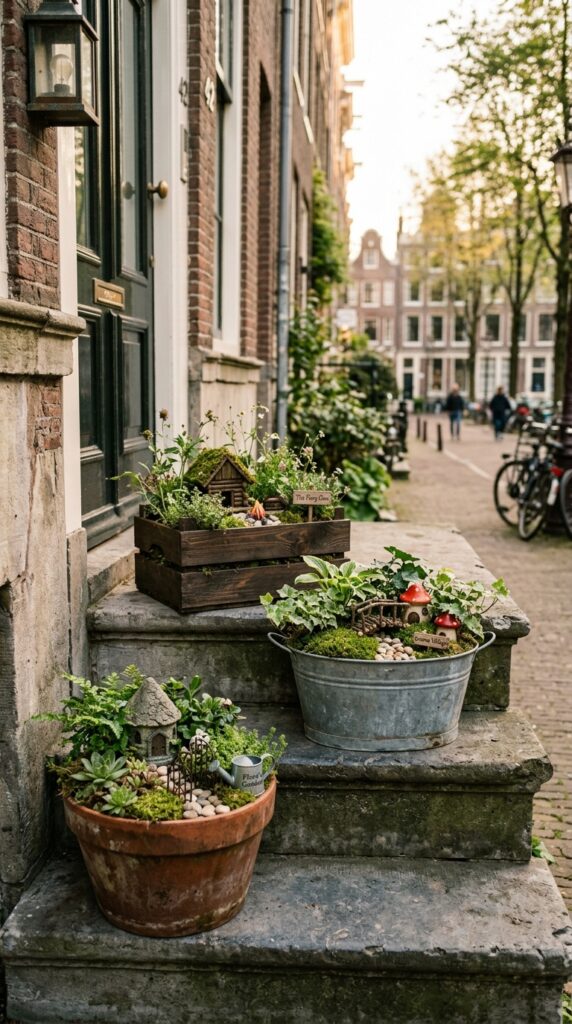
If you have even three outdoor steps leading to a door or garden gate, you have one of the most naturally theatrical small-space fairy garden settings available. Steps create built-in varying heights, which is the hardest thing to achieve in a flat container garden and the most effective at creating depth and visual interest.
The rule here is consistency of style across the containers with variety in the planting and accessories. Use containers that feel visually related — all terracotta, or all weathered metal, or all natural wood — and place one on each step, slightly offset toward the outer edge. Then let each container be its own distinct world.
A mossy woodland scene on the bottom step, a flowering cottage garden in the middle, a structured succulent landscape at the top works beautifully as a progression. The eye travels upward naturally, discovering each new scene in sequence.
Keep containers proportional to the step width. A step that’s thirty centimeters wide shouldn’t hold a pot wider than twenty. The negative space — the visible step surface on either side of the pot — is part of the composition, not wasted space.
For narrow terraced house steps where access matters, use containers no deeper than ten centimeters and secure them with non-slip matting underneath. You don’t want a beautiful fairy garden creating a tripping hazard on your front doorstep, however magical it looks.
10. Tin Can Fairy Garden Cluster
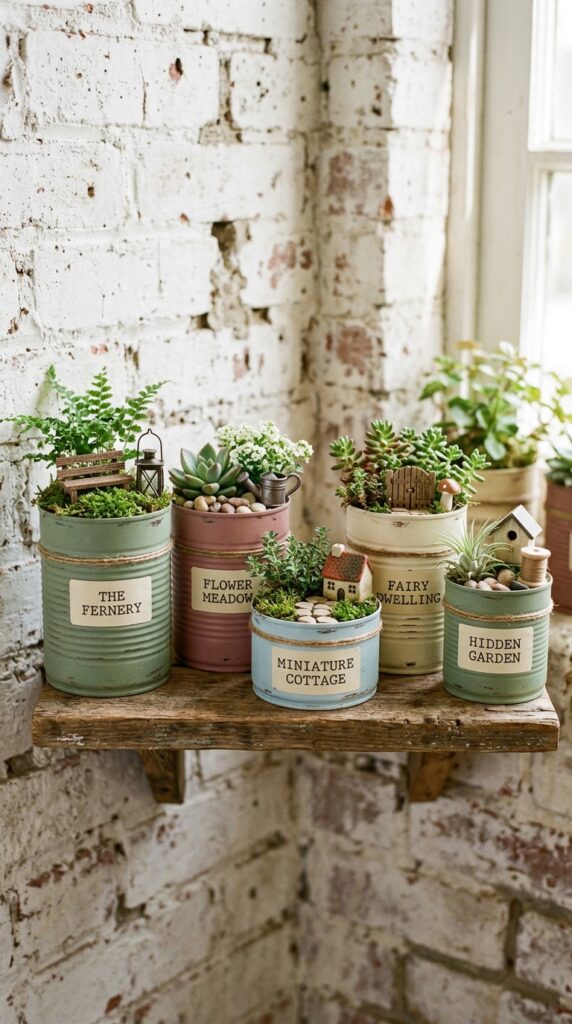
Tin cans might be the most available free planting container on earth. Clean them, drill drainage holes, and they become perfectly proportioned fairy garden vessels that cluster beautifully in groups of odd numbers.
The presentation is everything with tin cans. Left as raw metal they look like refuse. Paint them in matte chalk paint in a cohesive palette — two or three closely related muted tones — and they look like they came from a boutique garden shop. Sage green, dusty rose, and pale blue together is a classic combination that photographs well in almost any light. Apply the paint in thin coats and let it dry incompletely for a slightly distressed, aged appearance that suits the fairy aesthetic perfectly.
Each can holds one plant and one accessory. That’s the constraint that keeps the group looking curated rather than cluttered. A moss-filled can with a single tiny door. A succulent in another can with one polished pebble on the surface. A creeping thyme planted in a third with a stick fence across the front opening.
Group the cans asymmetrically on a shelf, step, or windowsill, varying heights by tucking books or small blocks beneath some of them. A single small can placed slightly apart from the others, as though it wandered off, adds a natural quality that evenly spaced groupings never achieve.
This is an excellent project for beginning fairy gardeners. The individual can scale is forgiving, everything is replaceable cheaply, and the whole cluster can evolve and change as you add new cans over time.
11. Raised Trough Mini Landscape
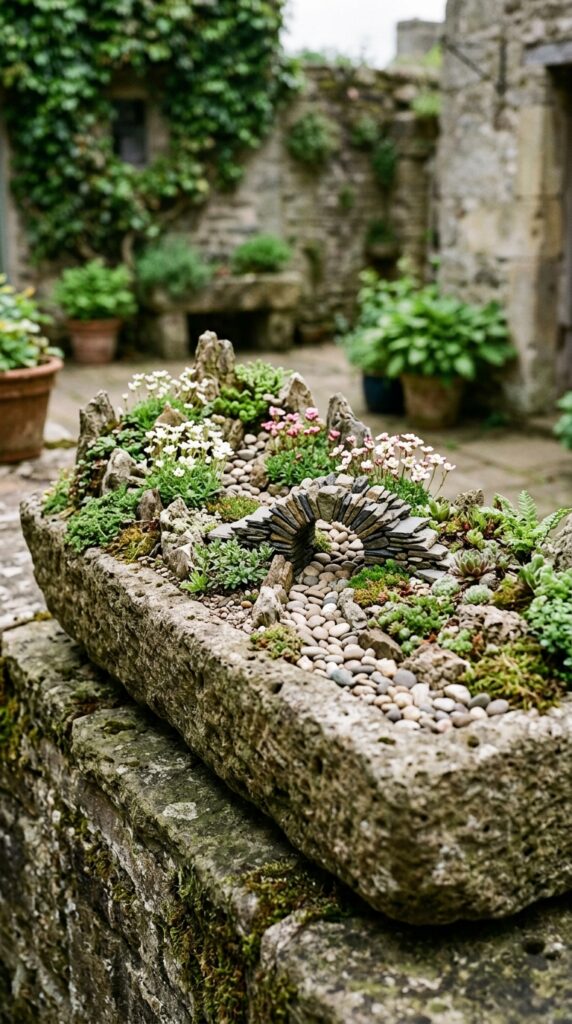
Stone troughs are among the most respected containers in serious garden design, and for fairy gardening in a small courtyard or patio they’re close to perfect. The mass and permanence of the trough — especially a genuine stone or hand-made hypertufa one — gives the fairy garden an authority and gravitas that lighter containers can’t match. It looks like it has been there for years.
Genuine old stone troughs are expensive and heavy, but hypertufa alternatives made from peat, cement, and perlite can be crafted at home for a few dollars in materials and age to look convincingly ancient within a single season outdoors. Instructions for making hypertufa are widely available and require no specialist skills.
Fill the trough with a gritty, free-draining alpine mix — standard potting compost cut with horticultural grit at roughly fifty-fifty. Alpine plants are perfectly scaled for fairy gardens, stay compact for years without any trimming, and are extraordinarily tough. Saxifrage, dianthus, thyme, and sempervivum all thrive in troughs.
The structural landscaping within the trough — small rocks positioned as natural outcrops, a pebble riverbed, a low stone arch made from three flat stones — does as much visual work as the plants. Spend as much time on the hardscaping as the planting. The best trough gardens look like geology first and horticulture second.
Place the trough at waist height if possible. The elevated position makes the miniature landscape fully visible and reduces the crouching that ground-level fairy gardens require for proper appreciation.
12. Bookshelf Outdoor Fairy Garden Shelf
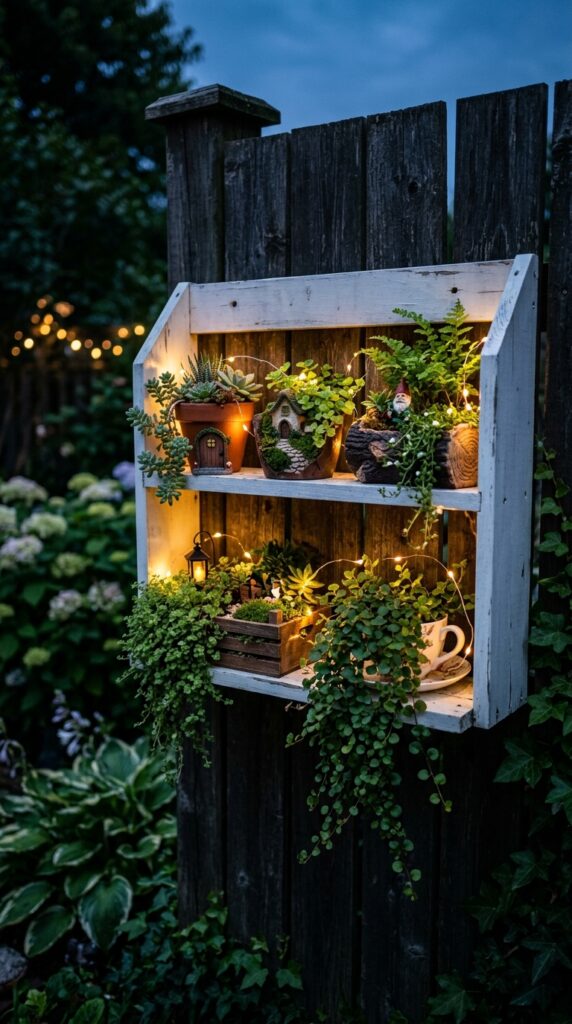
A small shelving unit brought outdoors and dedicated entirely to a fairy garden collection is the small-space idea that scales indefinitely. You’re not limited by a single container’s footprint — you have multiple surfaces at multiple heights, which means the design can grow and evolve over time without ever needing more floor space.
Choose a shelving unit made from solid wood treated with exterior paint or varnish, or a powder-coated metal unit, since untreated indoor furniture will deteriorate quickly outdoors. Two shelves in a unit about sixty centimeters wide give you enough surface area for six to eight individual fairy garden containers — plenty to create a cohesive installation.
Group containers that share a planting palette or visual theme on the same shelf. Mossy, woodland-style gardens on the top shelf; bright flowering, cottage-style gardens below. Or run a single color story through all of them — all cool greens and whites, or all warm terracottas and sage greens.
The string of fairy lights woven through the display, attached loosely to the shelf uprights with small clips, is the evening detail that transforms the whole thing from a plant collection to an installation. Use warm white outdoor-rated LED string lights on a timer — the garden glows from dusk without any effort.
This format works especially well on a rental property because the shelf unit itself is freestanding or easily removable, and the individual containers are entirely portable. You can take your entire fairy garden collection with you when you move, which is a quietly satisfying thing to know.
The Small Space Advantage
Here’s something most gardening advice gets backwards: small spaces don’t limit fairy gardens. They refine them. Every object you add to a twelve-inch container has to earn its place in a way that objects in a large garden bed simply don’t. That editorial pressure — the need to choose carefully, to place deliberately, to stop before you’ve added one thing too many — is what separates the fairy gardens that genuinely look magical from the ones that just look busy.
Whatever corner, shelf, step, or windowsill you’re working with, you now have twelve different ways to approach it. The best one is whichever gets you outdoors this weekend with a small pot of soil and something tiny to press into it. Start there. Everything else follows.

