
There’s something almost embarrassingly delightful about a fairy garden. You set one up expecting to feel a little silly — hot-gluing a miniature door to a flowerpot, pressing tiny pebbles into damp soil with your fingertips — and then you step back and suddenly the whole thing looks like a scene from a storybook. It gets you every time.
The best part? Most of the truly beautiful fairy gardens you’ll see online cost almost nothing to make. They’re built from thrift store finds, dollar store trinkets, backyard moss, and a little bit of patience. The magic isn’t in the price tag. It’s in the layering, the scale, the tiny details that trick the eye into believing something small is something immense.
Whether you’re making one for your balcony, a corner of your garden bed, your porch, or a rainy afternoon with kids, these twelve ideas will give you a solid starting point — with real, practical advice on what actually works and what looks cheap in the bad way.
1. The Mossy Stump Hideaway
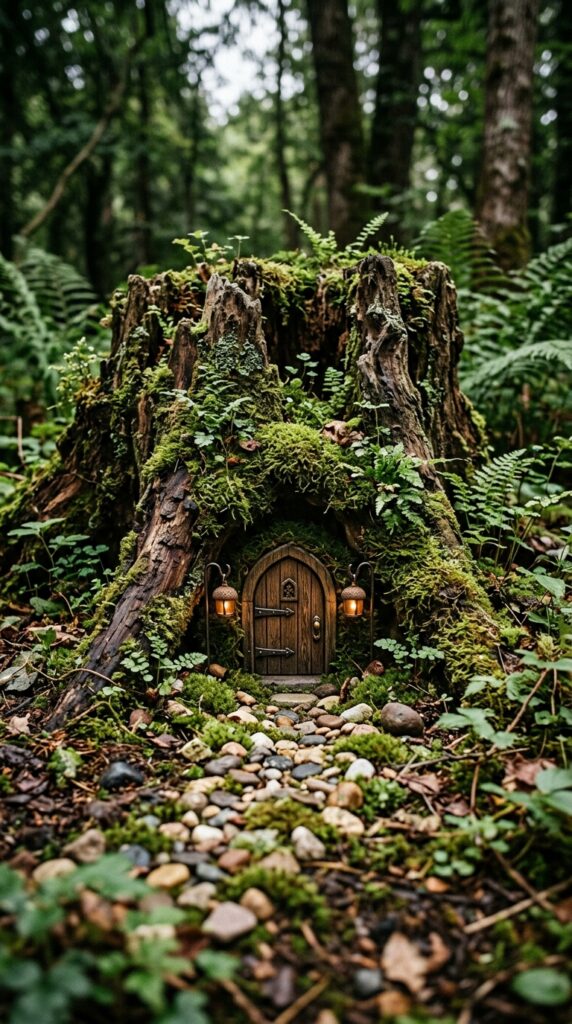
If you have a dead tree stump in your yard, stop treating it like a problem. It’s the single best free base for a fairy garden you’ll ever find. The natural hollows, the rough bark texture, the way moss clings to it without any effort on your part — it already looks like something lived there.
Start by encouraging moss to grow on it naturally, or press sheet moss (available at most craft stores for a few dollars) into the damp wood in patches. Don’t cover it entirely — let the bark breathe. Tuck in miniature ferns or creeping plants around the base. A tiny wooden door pressed into a knot hole or crevice costs less than two dollars at a craft or dollar store and does more visual work than almost anything else you’ll add.
Here’s the trick: keep the planting low and ground-hugging. Tall plants break the miniature illusion fast. Creeping thyme, baby tears, and club moss all stay beautifully small.
One thing to watch — if the stump is actively rotting, it will deteriorate quickly and plants won’t anchor well. A solid, older stump works far better long-term.
2. Terracotta Pot With a Painted Door
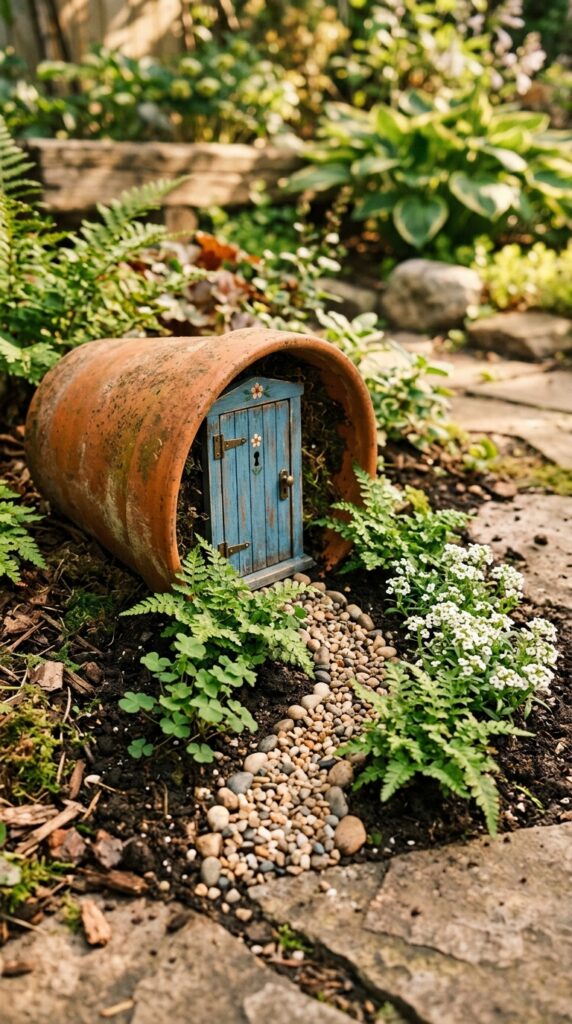
This is the gateway project — the one that got half the internet hooked on fairy gardening in the first place. And it still works beautifully because the concept is so visually clever. A terracotta pot on its side looks instantly architectural. Add a tiny door and suddenly it reads as a home.
Paint the door yourself using leftover craft paint on a small rectangle of craft wood or even thick cardboard sealed with a coat of Mod Podge. Arch the top with scissors or a craft knife. Add a bead for a doorknob. Total cost: under a dollar. The result looks wildly charming.
Plant around the opening with soft, fine-textured plants — mind-your-own-business (Soleirolia soleirolii) is perfect here, forming a dense green carpet that hugs the soil surface. Add a pebble path made from aquarium gravel or small stones collected on a walk.
The constraint here is drainage. A pot on its side doesn’t drain like normal, so keep the soil inside minimal and go heavier on the decorative pebbles than the compost. Skip moisture-hungry plants for this one and lean into drought-tolerant varieties like sedum or thyme.
Cheap, iconic, and genuinely delightful every single time you look at it.
3. Solar Light Lantern Village
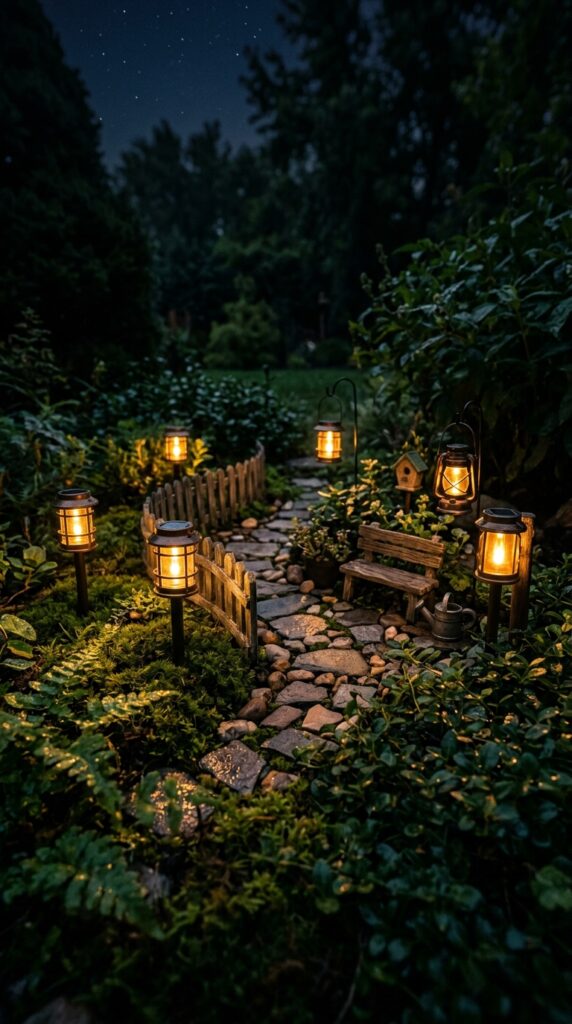
Daylight fairy gardens are lovely. After-dark fairy gardens are genuinely magical. The difference is solar lighting, and the good news is it costs almost nothing.
Dollar stores and discount garden centers sell small solar stake lights for one to three dollars each. They’re not fancy, but nestled between plants and moss, they glow with exactly the warm amber color you want. Buy an odd number — five, seven, nine — and place them at varying heights using small mounds of soil beneath some of them to create levels.
Mix lantern-style tops with simple globe-topped stakes for visual variety. Group them asymmetrically rather than spacing them evenly, which always reads as more natural and less DIY.
One real-world caveat: cheap solar lights often fade after one season. Plan for that. Rather than fighting it, think of them as replaceable seasonal elements. They cost so little that swapping them out annually is no hardship at all.
For a renter-friendly version of this, build the entire scene in a large galvanized tray or wooden crate that you can move freely. The lanterns charge during the day and glow through the evening without any wiring or installation. It’s the single most low-effort way to take your fairy garden from pretty to breathtaking.
4. Succulent Rock Garden With Miniature Pathways
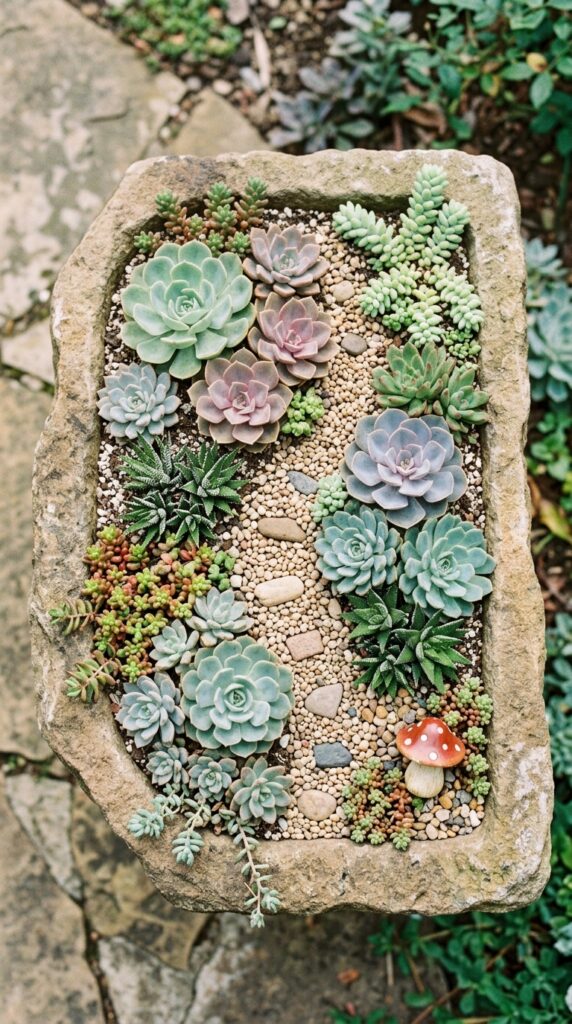
Succulents are the cheat code of fairy gardening. They stay small for a long time, they’re extraordinarily cheap (many garden centers sell tiny 2-inch pots for a dollar), they come in colors that look almost artificial in the best way, and they barely need watering. For anyone who has killed a fairy garden by overwatering or neglect — succulents are your solution.
The trick with a succulent fairy garden is the hardscaping. The plants alone look like a plant collection. Add flat river rocks as stepping stones, fine gravel as a pathway, and one or two miniature accessories, and suddenly it looks designed.
Use a shallow stone trough, a terracotta dish, or even a wooden crate lined with landscape fabric as your container. Fill with a gritty cactus and succulent mix — not regular potting compost, which holds too much moisture for these plants.
Color-coordinate your succulents loosely. Three rosette echeverias in dusty pink and blue-green alongside a trailing sedum and one spiky haworthia gives you texture, height variation, and color without chaos.
Skip this one if you live in a very shaded spot. Succulents need good light to hold their compact shape and colors — without it, they etiolate and stretch, which breaks the miniature illusion completely.
5. Fairy Door Tree Base Installation
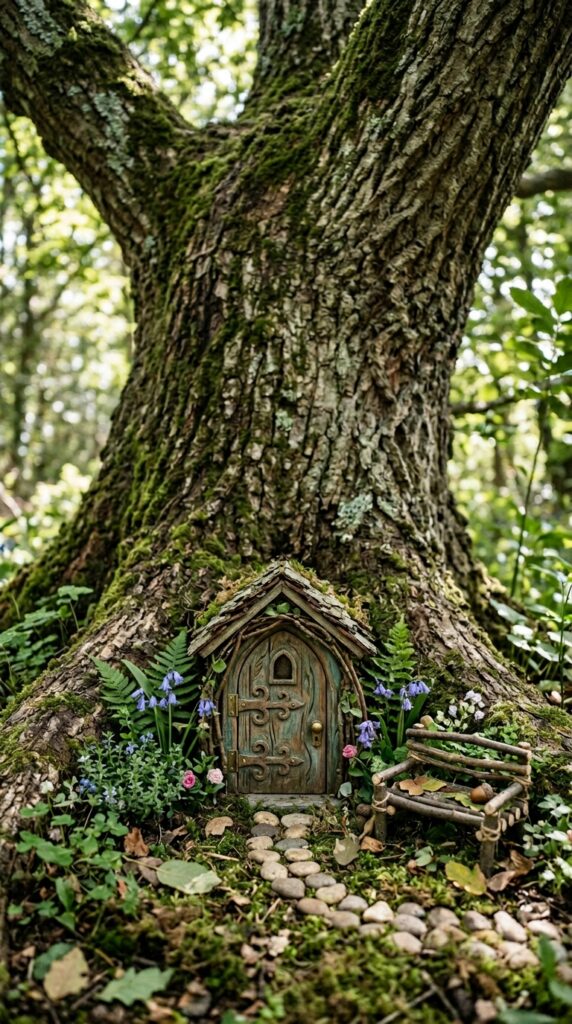
There’s a reason the fairy-door-on-a-tree-base look never gets old. It uses the tree’s own scale and age to sell the fantasy completely. The older and more textured the bark, the better it works.
You can buy a ready-made resin fairy door for two to five dollars online or at craft stores, or make one from craft sticks and wood glue in about twenty minutes. Paint it in muted tones — deep green, aged wood brown, or dusty terracotta — rather than bright colors, which look plasticky against real bark.
The installation itself just needs a dab of outdoor-safe adhesive or a small screw if you own the tree and don’t mind that. Around the base, build a tiny garden using whatever grows naturally nearby. Moss is your best friend here. Supplement with a few pressed pebbles, a miniature gate made from twigs lashed together with twine, and perhaps a tiny handmade sign.
One design rule worth following: keep everything within a roughly twelve-inch radius of the door. Spreading the garden elements too far dilutes the focused, intimate feeling that makes this style work. You want the eye to land on the door and feel like it stumbled onto something secret.
6. Enchanted Birdbath Fairy Pool
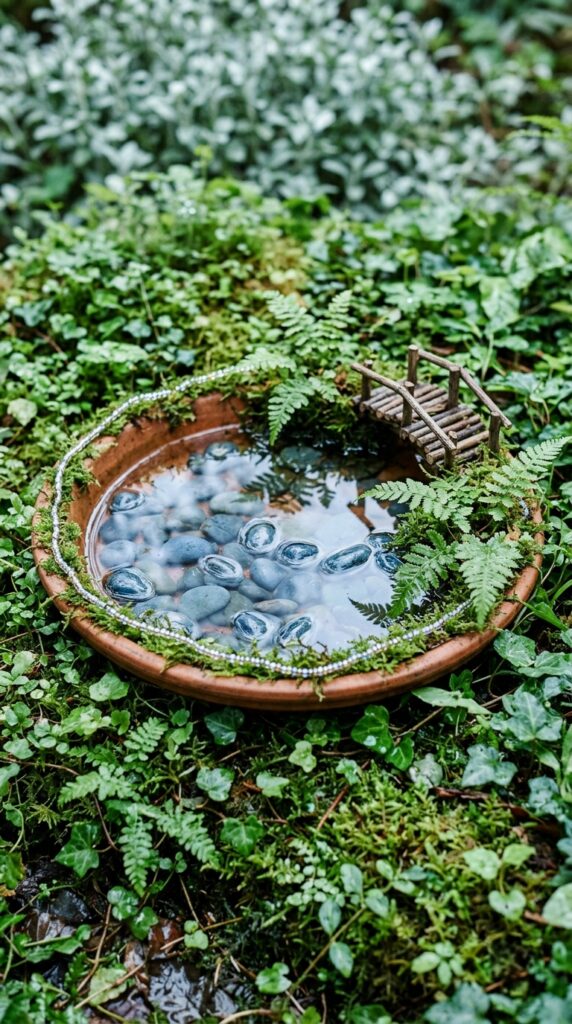
A shallow saucer or birdbath becomes a fairy pond with almost no effort, and the visual payoff is enormous. Something about the reflective surface — sky in miniature, plants doubled in the water — makes the whole garden feel alive.
Use the widest, shallowest terracotta saucer you can find. Fill the base with a single layer of smooth river pebbles or aquarium stones in grey and blue tones. Fill with just enough water to cover the stones by half an inch. The pebbles visible beneath the water surface are what sell the illusion of depth.
A tiny bridge crossing one edge of the pond is the detail that makes people stop and look twice. Build one from flat craft sticks glued together with wood glue. It takes ten minutes and costs almost nothing.
Plant the surrounding area with moisture-loving ground covers. Mind-your-own-business, baby tears, or even small pieces of sedum will soften the edge of the saucer and make it look embedded rather than placed.
Fair warning: the water will need topping up in hot weather and the pebbles will develop algae over time. A quick rinse every few weeks keeps it looking fresh. It’s a high-impact feature that requires minimal ongoing investment if you stay on top of the cleaning.
7. Twig and Bark Furniture Scene
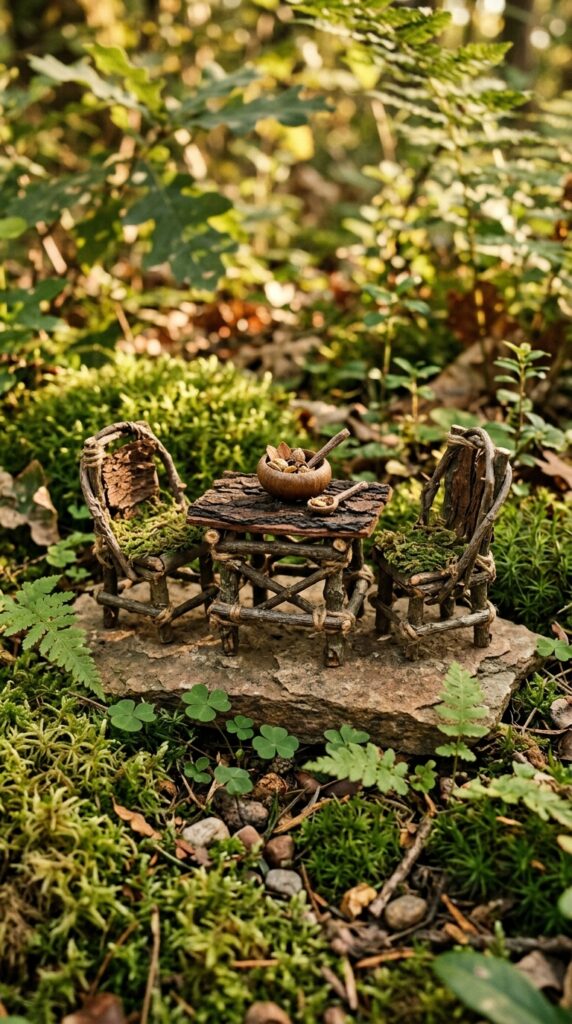
Fairy furniture from craft stores tends to look shiny and plasticky up close. The handmade twig alternative looks dramatically better and costs literally nothing if you have any trees nearby.
Collect straight, similar-diameter twigs and dry them for a day or two. Cut them to size with garden snips. For a basic chair, you’ll need four legs, two armrests, a seat base, and a back — all held together with hot glue. It sounds fiddly, but honestly takes fifteen minutes once you’ve done it once. The irregular, organic quality of natural twigs is what makes the result look artisan rather than amateur.
A small flat stone serves as the perfect table surface — far more convincing than anything you could buy. Press it slightly into the soil so it looks settled, not placed.
The key material tip: use twigs of similar bark color and texture within each piece of furniture for visual cohesion. Mixing very light birch twigs with very dark oak twigs in one chair looks accidental rather than rustic.
This is a great project for kids. The skill level is genuinely low, the result is impressive, and using found natural materials makes the whole thing feel more connected to the garden itself.
8. Miniature Herb Garden With Fairy Signage
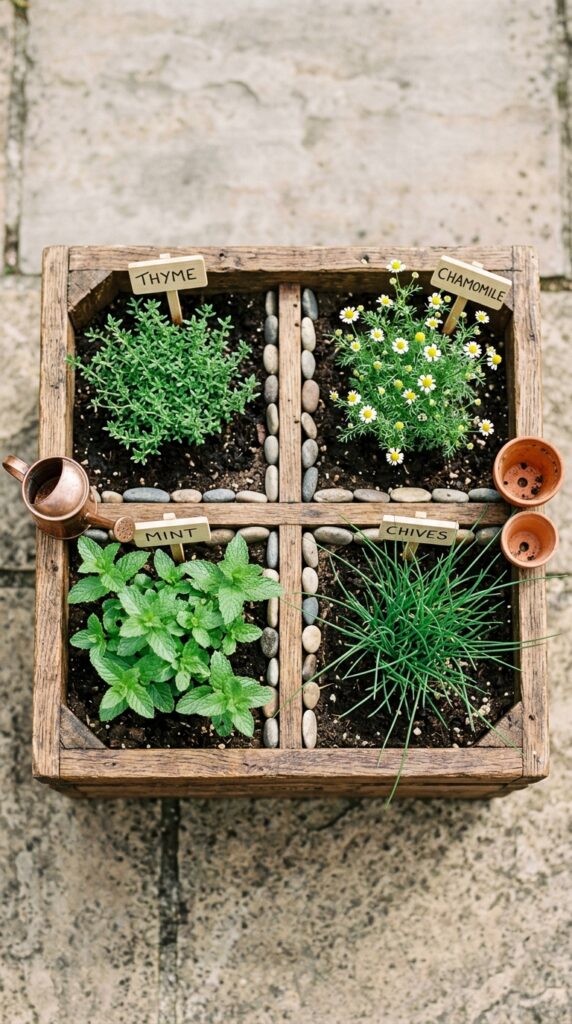
Here’s a version that’s actually functional, which makes it feel even more magical somehow. A miniature herb fairy garden gives you something genuinely useful — tiny harvests of thyme for cooking, chamomile for tea — alongside all the visual charm.
Use a wooden crate or shallow trough. Divide the planting into sections using flat stones or short craft-stick fences. Plant herbs that stay compact: thyme is ideal, as is chamomile, chives, and low-growing mint (though mint needs containment — plant it in a separate small pot sunk into the soil or it will take over).
The signage is what elevates this from a herb tray to a fairy garden. Cut small rectangles of craft wood, paint them white, write herb names in tiny script with a fine black marker, and press them onto toothpick stakes. Seal with Mod Podge. It costs pennies and adds enormous charm.
One trade-off: if you actually harvest these herbs regularly, the garden will look sparser over time. Either treat the herbs as purely decorative — letting them grow freely — or replant small plugs each season as you harvest. Both approaches work fine, depending on how precious you want to keep the garden looking.
9. Fairy Garden in a Vintage Colander
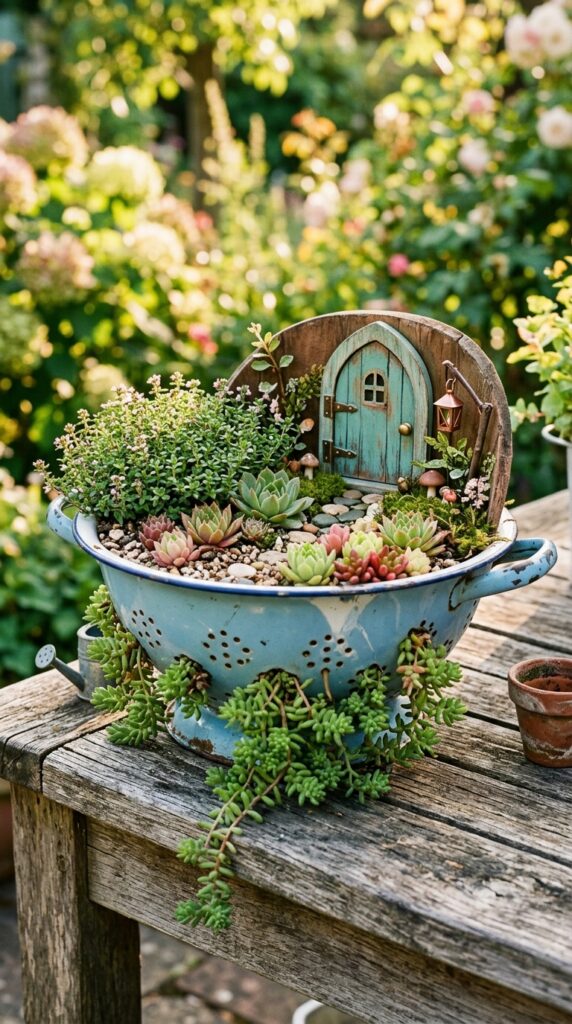
Thrift stores are full of old colanders, and they make spectacular fairy garden containers. The holes provide natural drainage — genuinely better than most purpose-made planters — and the shape is charming without needing any modification whatsoever.
Enamel colanders in vintage blues, greens, and creamy whites are the most coveted. But an old stainless colander can be spray-painted in ten minutes with matte chalk spray paint in any color you fancy. Sage green, dusty rose, and chalky terracotta all look beautiful.
Plant with a mixture of upright and trailing varieties. One or two small echeverias or a patch of thyme in the center, with trailing sedum or ivy cascading through the lower holes, looks professionally styled. The plants growing through the holes is the detail that everyone comments on.
Line the colander with coconut coir liner before filling with compost — this stops the soil from falling through while still allowing drainage. One sheet of coconut liner from a garden center covers several colanders and costs almost nothing.
Works beautifully on a tabletop, a windowsill, or a garden bench. This is probably the best renter-friendly fairy garden option on this entire list — portable, lightweight, and genuinely beautiful.
10. Woodland Floor Fairy Circle
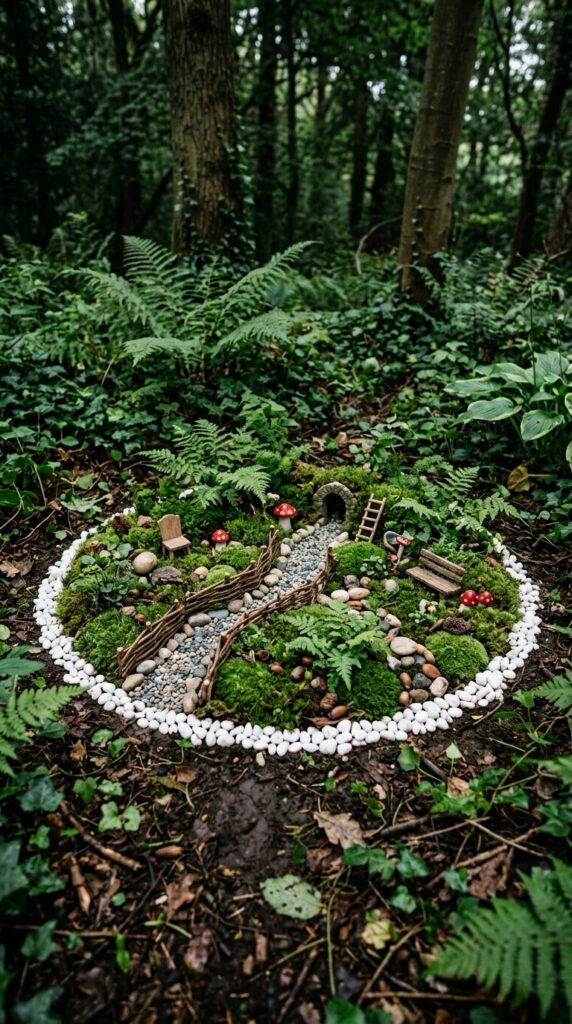
Some of the best fairy gardens don’t need a container at all. Carving out a dedicated circular patch directly in your garden bed — even a small one — gives you scale that no pot can match and a level of naturalism that looks genuinely wild.
Mark your circle with a ring of white or cream pebbles, which subtly references the folklore of fairy rings without being obvious about it. Inside, build your landscape in layers: a base of dense ground cover (moss, baby tears, or creeping mint), then mid-level plants like miniature ferns or small hostas, then vertical elements — twigs, miniature structures, carefully placed stones.
Shaded garden corners are ideal for this. Moss establishes faster in shade, ferns thrive there, and the lower light levels give the whole scene a more atmospheric, enchanted quality than a sunny spot would.
The main challenge is maintenance. A woodland floor design looks lush when tended and neglected when not. Weeding between the small plants takes patience — a small pair of tweezers or a narrow weeding tool keeps it manageable. Commit to fifteen minutes every week or two and it will reward you enormously.
11. Hanging Lantern Fairy Garden
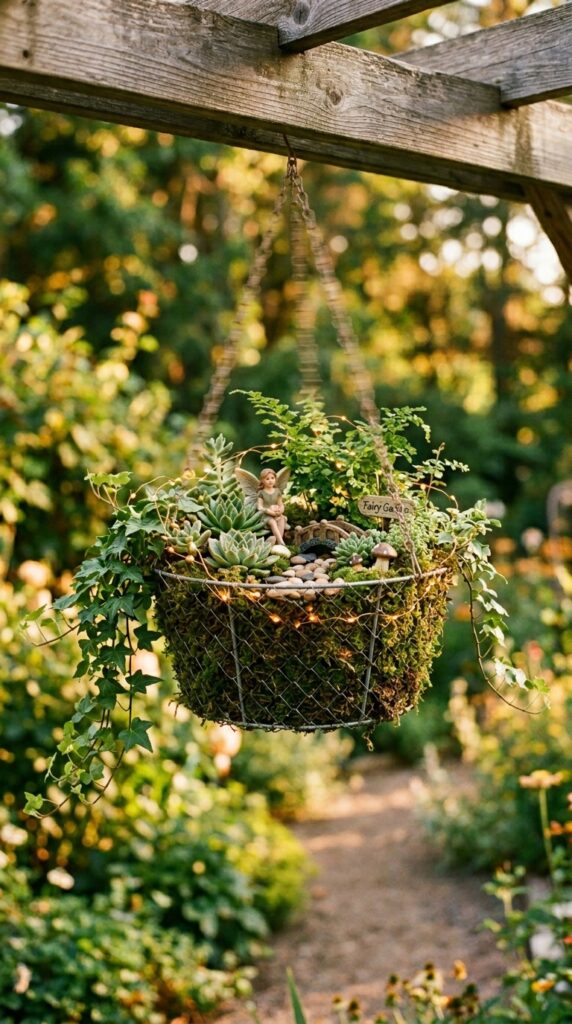
Vertical fairy gardens are underused, and that’s a shame because they work brilliantly in small spaces. A wire hanging basket — the kind sold for growing petunias — takes five minutes to repurpose into a suspended miniature world.
Line the basket with sheet moss rather than the usual coconut liner. Press it firmly against the wire frame, then fill the center with compost. The moss-lined exterior is what does the visual work here — it looks like a floating piece of the forest floor.
Plant the top with a combination of trailing and mounding plants. Trailing ivy or string-of-pearls will cascade over the edges beautifully. Tuck in a few accessories — a tiny door pressed into the moss side, a couple of miniature toadstools, a fairy figurine partially hidden by the foliage.
For a truly dramatic evening effect, weave a short battery-powered LED fairy light strand through the planting. The warm white lights visible through the moss and trailing plants at dusk look extraordinary. A single set of lights costs two or three dollars and lasts a full season on one battery set.
The practical note: hanging baskets dry out faster than ground-level containers. Check moisture every second day in warm weather and water thoroughly rather than just wetting the surface.
12. Recycled Book Fairy Garden
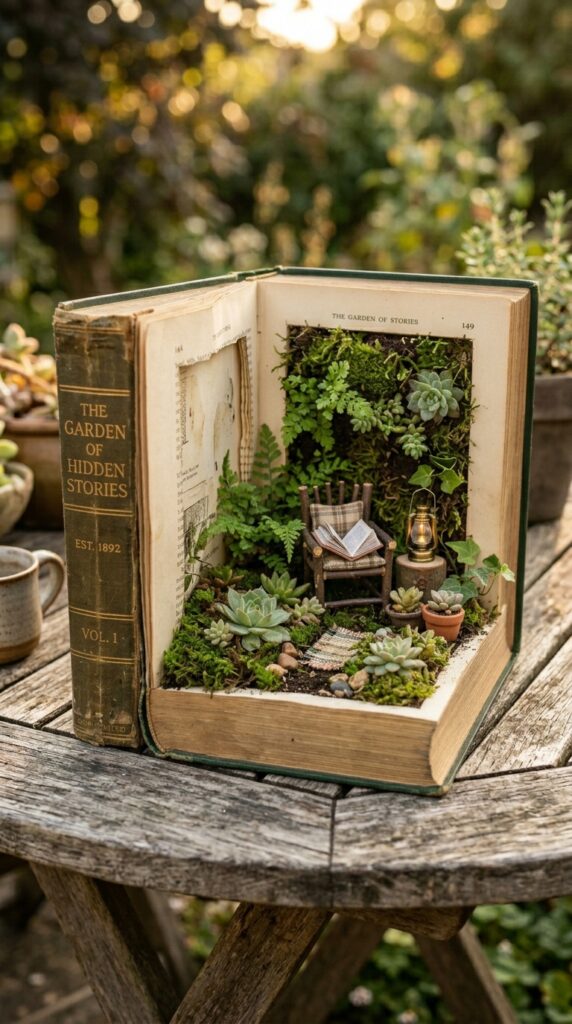
This last one is a little more involved, but it’s the most original and conversation-starting fairy garden on the list by a significant margin. A hollowed hardcover book becomes a planting vessel and narrative prop simultaneously — a fairy’s garden library, a storybook come to life.
Source a thick, large hardcover from a charity shop for fifty pence or a dollar. Remove the pages carefully, or glue them together in sections and hollow out the center using a craft knife. Line the interior with plastic sheeting or a cut-up freezer bag, sealed with waterproof glue, to protect the covers from moisture. Fill with a gritty, free-draining compost mix.
Plant with compact, slow-growing plants. Moss and small succulents are ideal — they won’t outgrow the space for a long time and won’t need heavy watering that would damage the book over time.
The styling detail that makes this extraordinary: create a tiny reading nook inside the planting. A twig chair, a miniature lantern, a tiny folded paper “book” the size of a thumbnail. Set it in a slightly sheltered outdoor spot rather than in full rain exposure to extend its lifespan, or treat it as an indoor or covered porch feature entirely.
This is the fairy garden you photograph and share. It’s the one guests ask about first. And it costs under three dollars to make.
A Final Word
Building a fairy garden is one of those rare creative projects where your budget has almost no relationship to the quality of the result. The most magical ones you’ll ever see were made from things found in the back of a drawer, collected on a walk, or bought for change at a charity shop. What makes them work is attention — small choices made with intention, details that reward a close look, and a willingness to let the garden be a little bit silly and a little bit wonderful at the same time.
Come back to this list when you need a fresh idea for a new season or a new corner of your outdoor space. There’s always room for one more tiny world.

