
The first time I watched someone pile wet boots on a brand-new white bench, I knew the mudroom laundry combo dream had a problem. It looks pristine in the catalog — a row of wicker baskets, a sleek folding counter, a stackable washer and dryer tucked behind cabinet doors. Then real life arrives: muddy cleats, a dog that ran through a swamp, three loads of towels that didn’t get folded, and the faint smell of dampness that never quite leaves. That bench gets scratched. The baskets collect dust. And the cabinet fronts show every water spot. The dream doesn’t fail because the idea is bad. It fails because most advice skips the part about how things actually age in a room that does double duty — one side grubby, one side damp.
Conventional mudroom laundry combination advice tends to fall into two camps. Either it’s aspirational photography with no mention of what happens when the dryer vent gets clogged or the dog shakes mud onto the folded laundry. Or it’s pure utility — industrial shelving, a concrete floor, and a utility sink that looks like it belongs in a mechanic’s garage. Neither serves the person who wants this room to feel like part of the house, not a holding cell for mess. I’ve lived through three iterations of mudroom laundry combos in two different houses, and I’ve made almost every mistake you can make. I installed open shelving that looked great until I saw how much lint settled on the baskets. I bought a rug that could not survive the combination of wet boots and a spin cycle. I learned the hard way that not all paint stands up to steam and mud.
This article is not a roundup of Pinterest pins. It is seventeen specific, lived-in ideas that I have either built, tested, or watched degrade in a friend’s house. Every one includes a real trade-off — something this idea does not suit, something that annoys me about it, or something you should avoid. You’ll get cost ranges that reflect real prices, not “affordable upgrades” that ignore lumber costs. You’ll get material honesty: what turns gray, what rusts, what traps odors, what actually survives a wet dog. If you’re remodeling or just rethinking a tight space, start here. I’ll tell you what works, what ages badly, and what I’d do differently — and I’ll do it without pretending my life is a catalog shoot.
1. The Drying Zone That Doesn’t Scream Laundry
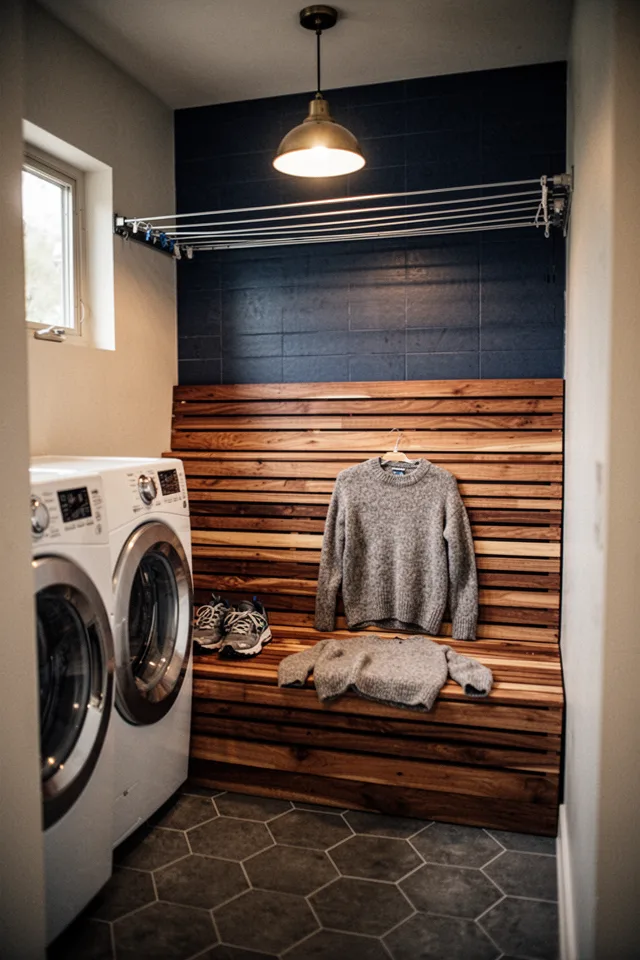
The mistake most people make is treating the drying area as an afterthought — a cheap metal rack shoved between the machines and the door. That rack becomes a visual clutter magnet within three days. Instead, I built a shallow niche, about 18 inches deep, into the wall next to the washer-dryer stack. Cedar slats, spaced half an inch apart, allow air to circulate from behind. A slim retractable clothesline overhead handles delicates and hand-wash items. The whole thing is framed by a dark navy tile backsplash that hides water spots and lint dust. The visual result: it reads as a built-in feature, not a temporary setup.
The trade-off: you lose cabinet depth. That niche is 18 inches that could have held brooms or supplies. But if you have a separate broom closet or a vertical storage wall (more on that later), this niche earns its keep. Cost: roughly $200 to $400 for the slatted wood and tile if you DIY; closer to $800 if you hire out for the niche framing and tiling. The retractable clothesline is under $30. What ages well: cedar turns silver over time, which actually looks quieter and more settled in a mudroom. What does not: the retractable line’s plastic housing. Spend a little extra on a stainless steel model.
A dedicated drying niche is the one thing that keeps wet laundry from migrating to the dining room chairs.
2. The Bench That Doubles as a Hamper
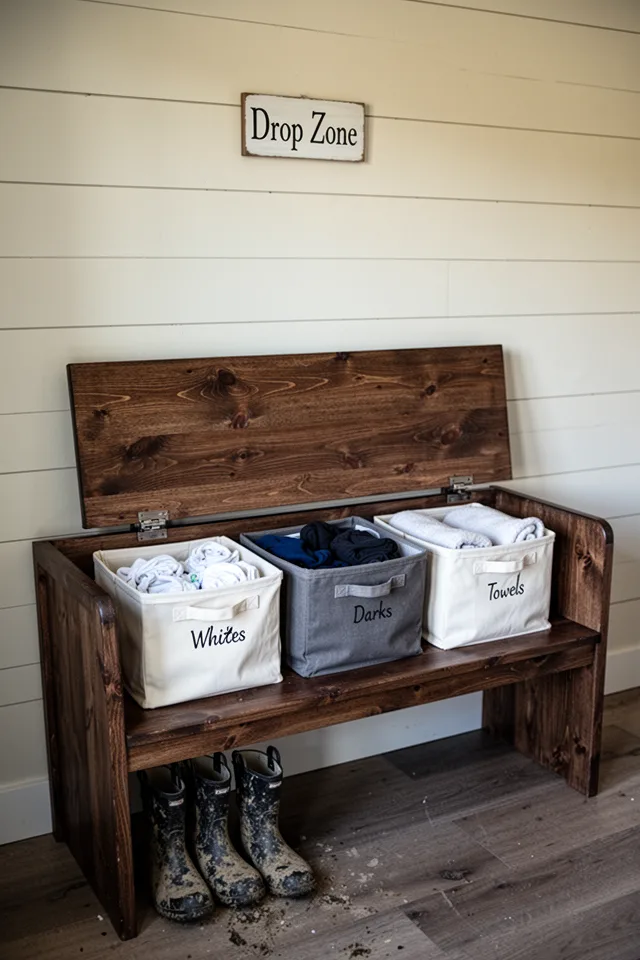
Every mudroom bench claims to double as storage, but most just become a flat surface for junk. The version that actually works has a hinged seat with three removable canvas hampers underneath. I built mine from solid pine — not plywood — because pine takes a beating without splintering. The seat lifts on gas struts (cheap ones, but they hold). The bins slide out from the front so you don’t have to lift the seat every time. Why three bins? Because the one-bin system means you sort later, and nobody sorts later. Three bins lets you separate as you drop.
The trade-off: the bench depth needs to be at least 18 inches to fit the bins comfortably. That eats into floor space. If your mudroom is narrower than 4 feet, this feels cramped. Cost: pine lumber about $100, gas struts $30, three canvas bins $45 total. If you hire a carpenter, add $300. What ages poorly: the hinges if you buy cheap. Paint the seat with a semi-gloss enamel so it wipes clean; matte paint absorbs dirt and looks grimy within a year. Also, don’t install it directly against an exterior wall without insulation behind the shiplap; the cold transfers to the seat and makes it unpleasant to sit on.
A bench hamper is only as good as its gas struts. Buy the kind that lift slowly and don’t slam.
3. The Pet Wash Station That Actually Drains
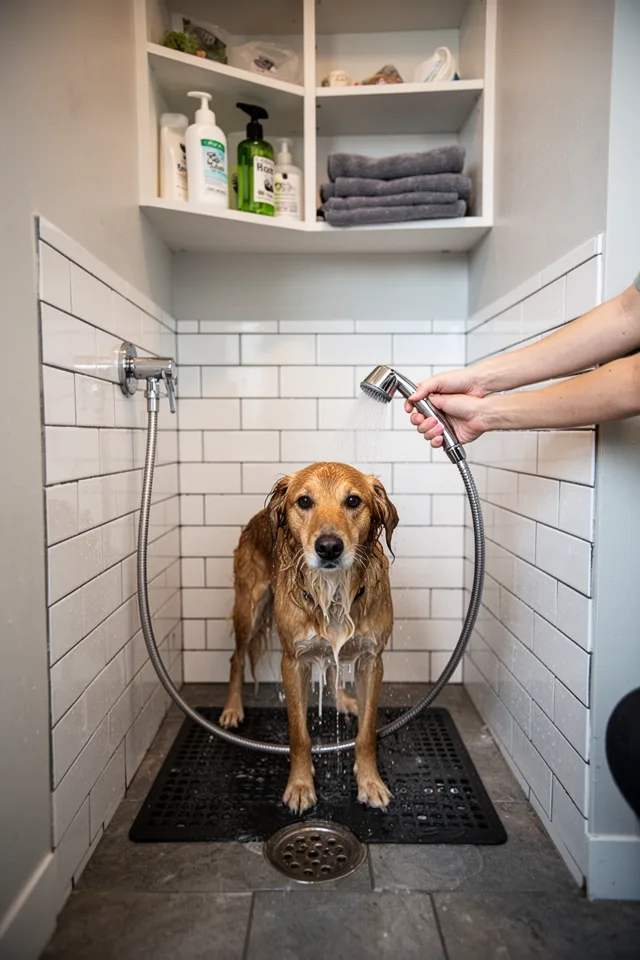
Most pet wash stations are designed by people who have never washed a muddy golden retriever in a space smaller than a garage. They place the wash basin at waist height, which is fine for small dogs, but for large dogs you end up wrestling them onto a platform. I prefer a floor-level alcove with a drain — basically a walk-in shower that is also a dog bath. The drain is key. Without one, you will be squeegeeing water into a utility sink for the rest of your life. The tile goes up three feet, then transitions to a wall that can be painted with washable eggshell. Dark grout hides hair and soap scum.
The trade-off: this takes up about 3 feet by 3 feet of floor space, plus a dedicated drain line that requires a plumber. If your mudroom is tight, this is not the priority. Cost: $600 to $1,500 depending on plumbing and tile. The handheld sprayer is another $80. What fails: the rubber mat on the floor — buy one with holes so water drains through, not a solid mat that sits in a puddle. Also, the sprayer hose will kink if you cheap out. Spend $50 on a metal-braided hose.
If your dog is over 50 pounds, skip the elevated basin. A floor drain and a hand sprayer are the only way.
4. The Drop Zone with a Hidden Ironing Board
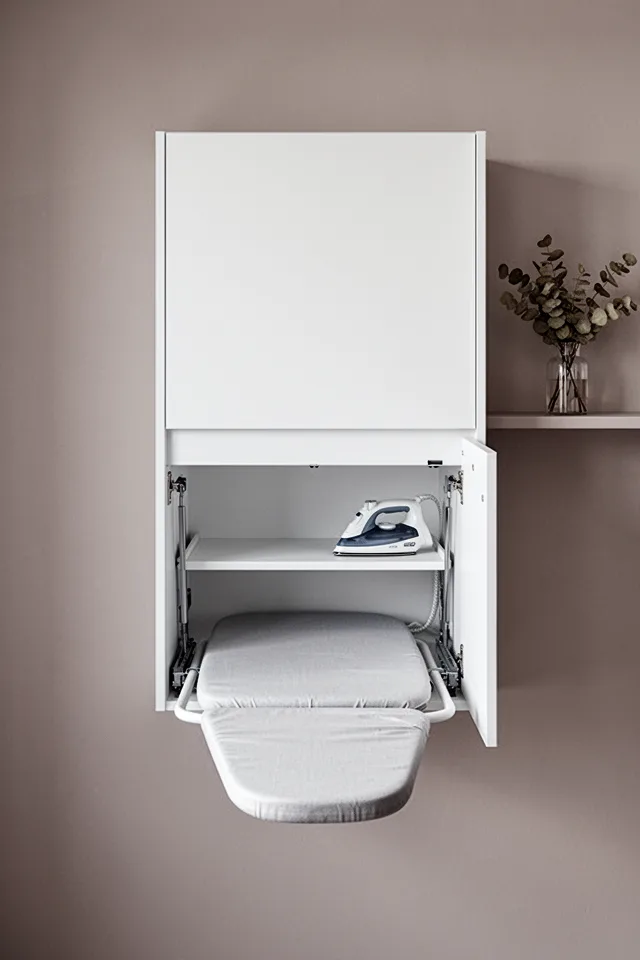
I don’t know a single person who actually enjoys getting out the ironing board, setting it up, and then putting it away. The solution is a wall-mounted cabinet with a fold-down ironing board that stays inside. I installed one in my laundry side of the room — tucked between the washer and the broom closet. The cabinet is shallow, about 6 inches deep when closed, so it doesn’t protrude into the walkway. When open, the board slides out and locks into place. The iron sits on a small shelf inside the cabinet, plugged into a retractable cord reel. It takes exactly 8 seconds to access.
The trade-off: the board surface is not as large as a full-size freestanding board. You won’t iron a king-sized sheet on this. But for shirts, pants, and napkins, it works fine. Cost: $150 to $300 for a decent cabinet unit. Installation is easy if you have a stud finder and a level. What ages: the hinges get loose after about five years of daily use. Lubricate the pivot points annually with a silicone spray. Also, the iron shelf inside can get hot — use a heat-resistant pad underneath the iron.
Hidden ironing boards are not a gimmick. They are the single best cure for “I’ll just leave this shirt in the dryer.”
5. Lockers for Adults (Not Just Kids)
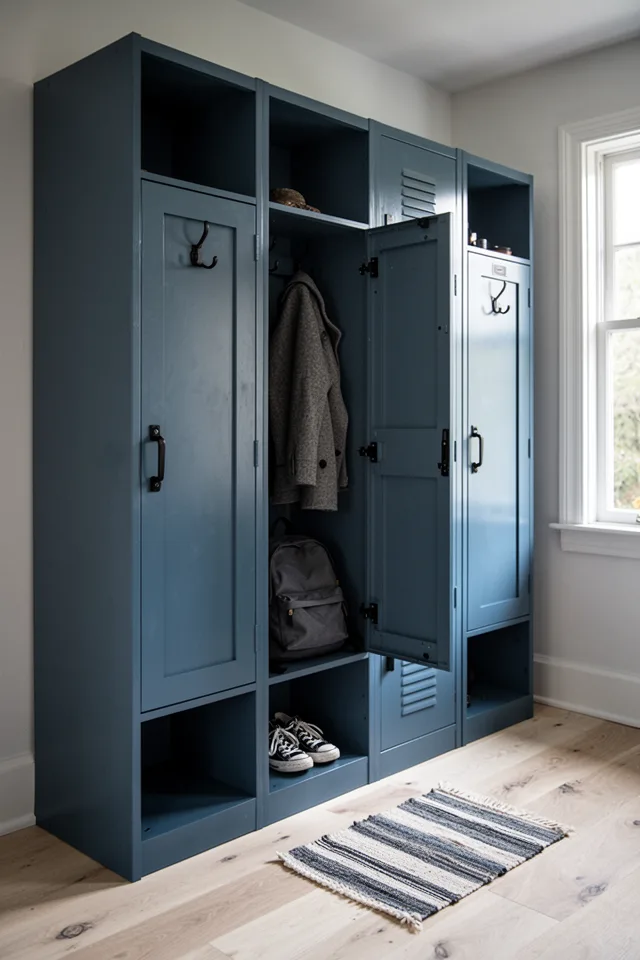
Kids’ lockers in mudrooms are everywhere. Adult lockers — tall, full-height cabinets with a hanging rod, a shelf, and a shoe cubby — are underrated. I built three of them in my current house: one for me, one for my partner, one for guests. Each is 18 inches wide and 80 inches tall. The top shelf holds hats and gloves. The lower cubby holds bags. The hook rail holds coats. The floor inside has a shallow drip tray for wet shoes. It’s like a personal closet for your outside gear, and it keeps the rest of the room clear.
The trade-off: these lockers eat up wall space. If your mudroom is also the hallway to the garage, you might only have room for two. Cost: custom-built from birch plywood, painted, with hardware: about $400 per locker if you DIY. Prefab metal lockers are cheaper ($150 each) but look institutional and clang when you close them. What does not work: open cubbies without doors — they become catch-alls for random mail and keys. Doors give you the win of closing the mess away.
Full-height lockers with doors are the adult version of the drop zone. They hide the chaos and make you feel like a functional person.
6. The Boot Dryer Nook
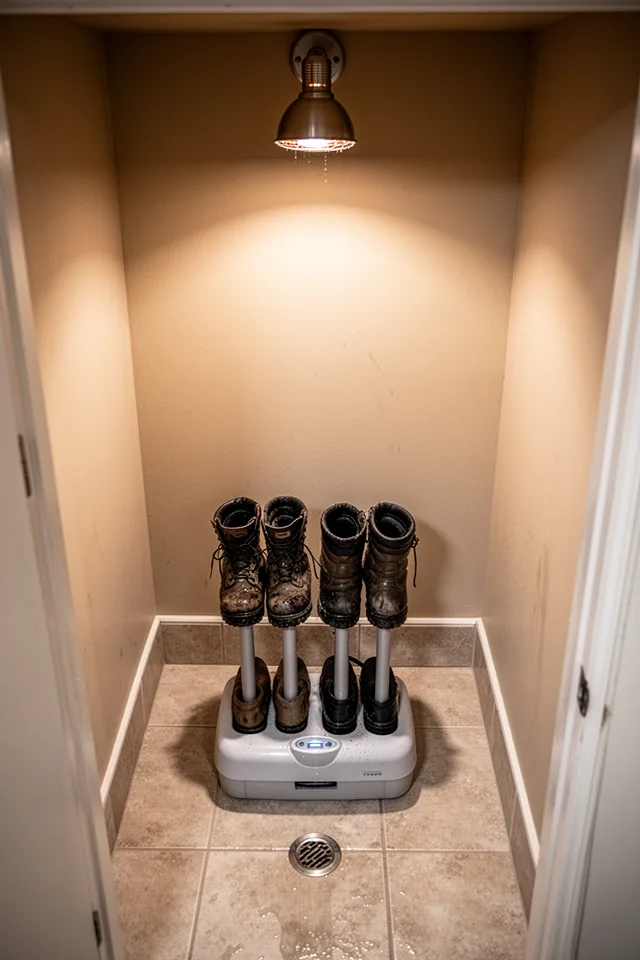
If you live anywhere with snow, rain, or kids who play in mud, a boot dryer is not a luxury — it is a sanity preserver. The problem is where to put it. I carved out a 20-inch-wide nook in the mudroom, lined the floor with the same tile used in the dog wash station, and added a small drain. The boot dryer sits on the floor. Above it, a low-wattage heat lamp keeps the air moving and prevents that musty boot smell from settling into the nook. The whole thing is open to the room, not hidden, because if it’s hidden, you won’t use it.
The trade-off: the nook takes up 20 inches of width that could have been a cabinet or shelves. Also, the boot dryer itself is not silent — it has a fan that hums. I find it comforting, but some people hate the noise. Cost: boot dryer unit $40 to $120. Heat lamp $20. Tiling and niche framing $200 to $500 if you DIY. What fails: the boot dryer’s plastic casing can crack if you drop a heavy boot on it. Buy one with a metal grate if possible. Also, don’t put the heat lamp too low; it can melt synthetic boots.
Wet boots left in a closet grow mold. Wet boots on a dryer in a ventilated nook go from soaked to wearable in 90 minutes.
7. The Soaking Sink That Doesn’t Splash
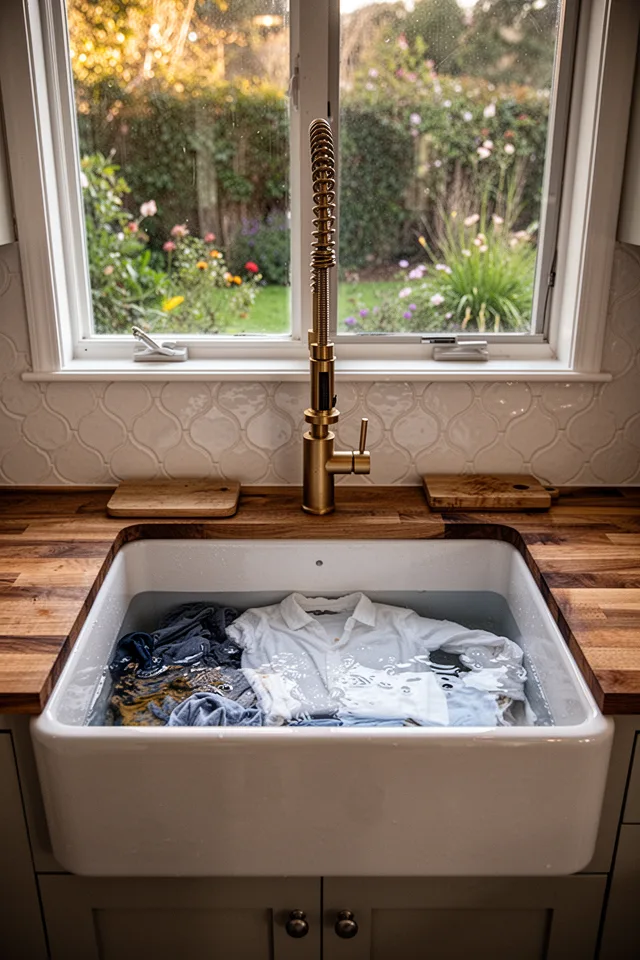
Most utility sinks in mudroom-laundry combos are shallow, plastic, and designed for hand washing paintbrushes — not for soaking a heavily soiled shirt or a pair of stained jeans. I installed a deep fireclay apron-front sink, the kind usually reserved for kitchens. It’s 12 inches deep, with a curved interior that doesn’t trap grime. The faucet is a tall gooseneck with a pull-down sprayer that reaches every corner. The butcher-block counter around it is sealed with a marine-grade varnish that can handle moisture. I’ve soaked everything from mud-crusted jeans to a wool sweater in that sink.
The trade-off: fireclay is heavy — you need a cabinet with serious support underneath. And butcher block requires maintenance: re-oil or re-seal every six months or it will warp. Cost: sink $250 to $500, faucet $150 to $300, butcher block $100 to $200, sealing supplies $40. What does not hold up: the sprayer’s plastic parts inside the faucet head. Replace them after two years or the spray pattern degrades. Also, the fireclay will chip if you drop a cast iron skillet into it — and people do. Use a rubber mat at the bottom.
A deep soaking sink changes the way you handle stains. You actually treat them immediately instead of throwing the item in a basket and forgetting.
8. The Folding Counter That Doubles as a Desk
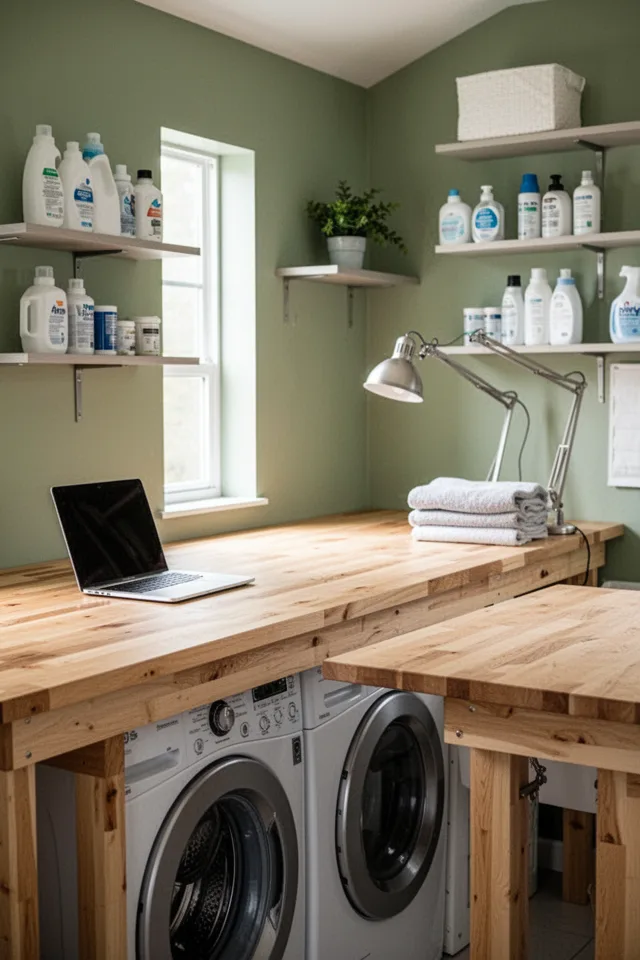
I needed a folding surface in the laundry area, but I also needed a place to pay bills, answer emails, and sometimes eat lunch standing up (don’t judge). So I made the folding counter 36 inches high — standard standing desk height — and ran it the full length of the washer-dryer wall. The counter is butcher block, sealed with the same marine varnish as the sink counter. The left side is for folding laundry. The right side holds a laptop and a task lamp. In practice, I use it more as a desk than a folding surface, but when laundry piles up, the desk clears fast because there’s no permanent clutter on it.
The trade-off: this only works if the washer and dryer are front-loading and placed under the counter. If you have top-loaders, the counter can’t extend over them. Also, the standing height is not comfortable for everyone — if you’re under 5’2″, you might need a small step stool. Cost: butcher block countertop $150 to $300, floating shelves $40 each, task lamp $50. What does not work: leaving a laptop on the counter while the dryer is running — the vibration can slowly damage the hard drive. Either use a solid-state laptop or put a mouse pad under it.
The folding counter that also functions as a desk is the smartest use of vertical space in a combo room. Just don’t expect to do both at the same time.
9. The Vertical Storage Wall for Brooms and Mops
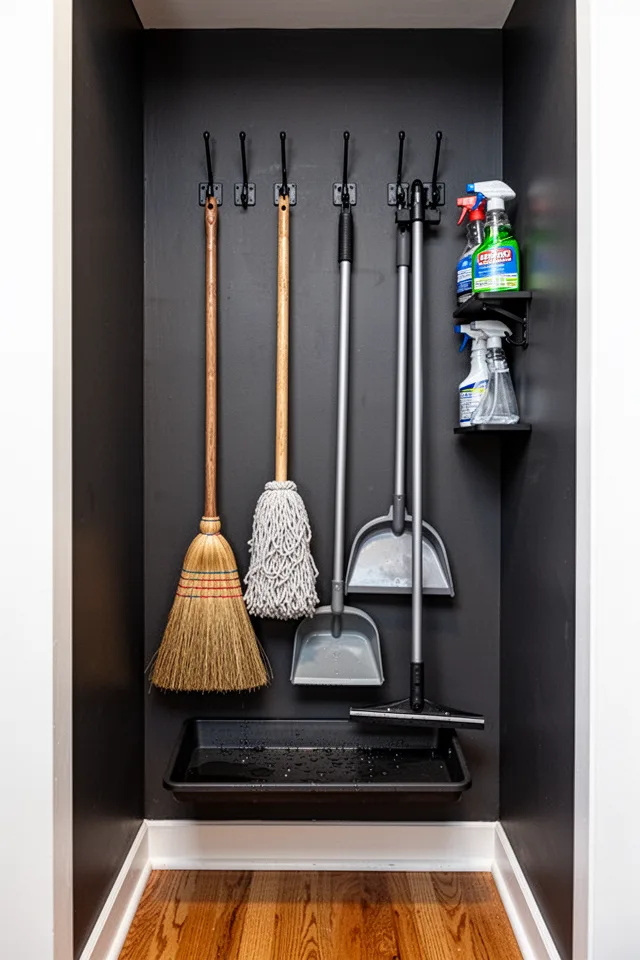
The mudroom typically becomes the staging ground for all cleaning tools, and most people shove them in a corner where they fall over. The alternative is a dedicated vertical storage wall. I used a 2-foot-wide section of wall near the door — too narrow for cabinets, just wide enough for a row of clips. I installed a sturdy rail system with interchangeable hooks and clips. The broom, mop, and squeegee hang head-down, so the handles don’t hit the ceiling. A shallow drip tray at the base catches water from the mop head. The wall behind is painted dark charcoal, which hides grime and makes the tools look curated.
The trade-off: this wall is now off-limits for any other use. No art, no hook for coats. You have to commit to the storage function. Cost: rail and hooks $30 to $70, drip tray $15. What fails: the clips that hold the broom handle — they loosen over time. Replace them every couple of years, or use magnetic ones if you have metal handles. Also, don’t put the mop too close to the laundry; the dampness from the dryer can make the mop head smell mildewy. Keep a 6-inch gap.
Every mudroom needs a place for cleaning tools that is not “behind the door.” Give it its own wall and stop tripping.
10. The Ceiling-Mounted Drying Rack That Doesn’t Hit Your Head
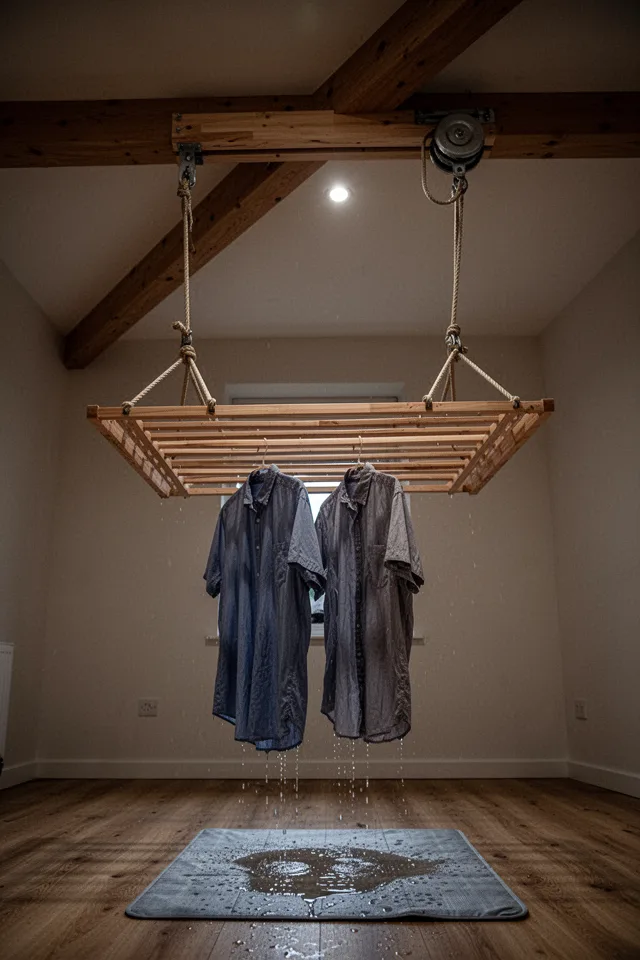
Ceiling-mounted drying racks are great in theory, but in practice they often hang too low and become a forehead hazard. I installed one in a mudroom with a 9-foot ceiling, and I made sure the raised position is high enough that even my 6’3″ brother-in-law doesn’t brush it. The rack is a simple beechwood model from a Scandinavian brand — no plastic parts. It lowers on two ropes with pulleys, and a cleat on the wall holds the rope taut. The key is the placement: I hung it over the dry area, not over the washer or the entry path. That way, even when it’s down, it doesn’t block traffic.
The trade-off: you need a ceiling joist to anchor the pulleys, and you need a clear floor area of about 3×3 feet below it. If your mudroom is small, this rack might not fit. Cost: rack $50 to $100, pulley system $20, installation free if you have a drill. What does not hold up: the ropes — cotton ropes fray after a year. Replace with nylon or a thin wire cable for durability. Also, the rack slats can warp if you constantly hang wet heavy items. Let the items drip for five minutes in the sink before transferring.
Ceiling racks are the ultimate space saver, but only if you have the height. Don’t install one in an 8-foot ceiling unless you want a permanent head dent.
11. The Mudroom Tile That Hides Everything
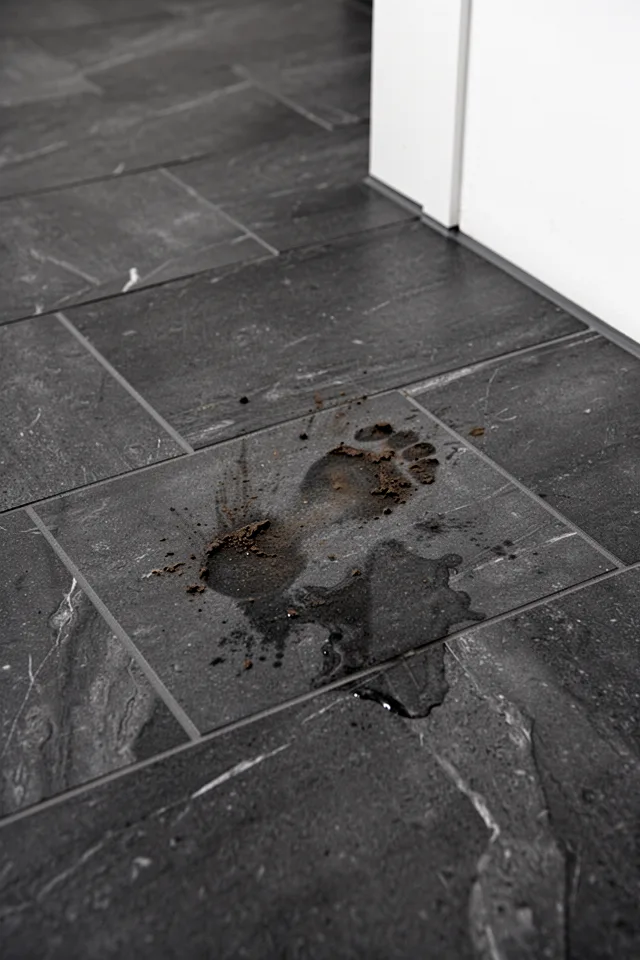
Tile is inevitable in a mudroom, but the wrong tile makes every speck of dirt visible. I learned this the hard way after installing light gray rectified porcelain that showed every crumb, every hair, every drop of water. The right tile is dark — think charcoal, dark slate, or even a deep navy — with a matte finish and a slight visual texture. I used large-format porcelain (24×24 inches) in dark charcoal. The grout is the same color as the tile, so the grid disappears. Muddy footprints still happen, but you only see them if you look closely. A quick swish with a damp mop and it’s gone.
The trade-off: dark tile can make a small mudroom feel cave-like if the walls are also dark. Keep walls light (off-white, pale gray, soft beige) to balance. Cost: tile $4 to $8 per square foot for porcelain. Installation $8 to $15 per square foot if hired. What does not age well: glossy or high-sheen tile — the water spots show immediately and the glaze wears in high-traffic areas. Stick to matte. Also, avoid very small hexagon mosaics; they look cute but have too many grout lines that trap dirt.
Dark matte tile is not a design compromise. It is a maintenance strategy. Your floor will look clean even when it isn’t.
12. The Utility Sink with a Countertop Made for Soaking
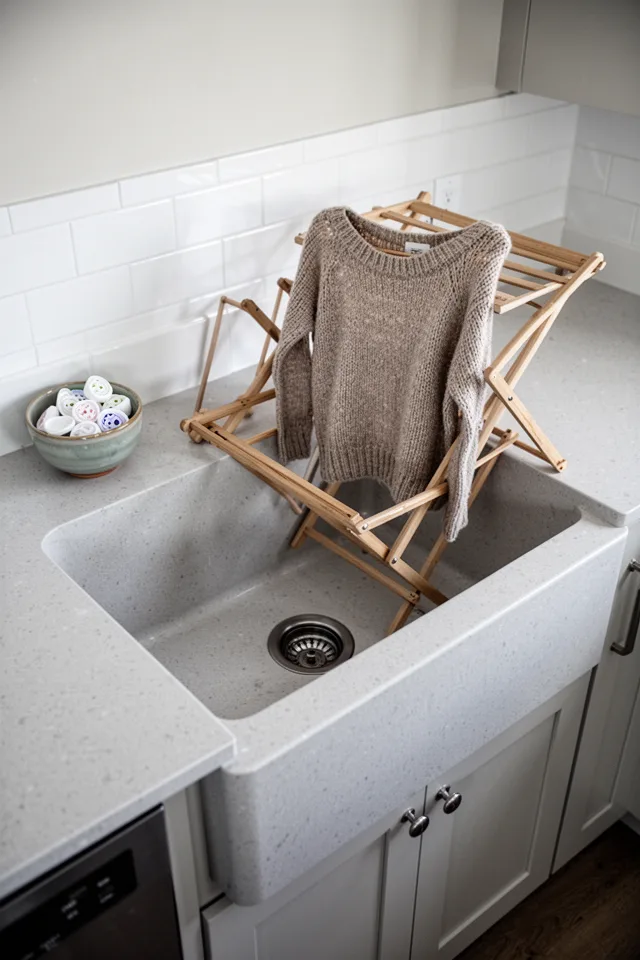
A regular utility sink with a separate counter is fine, but I’ve found that an integrated basin — where the counter and sink are one piece of quartz — is more practical for soaking. No seam means no trapped moisture or grime. I chose a light gray quartz with subtle flecks. The sink basin is 14 inches deep, with a gentle slope that still holds enough water to submerge a shirt or a pair of jeans. The counter extends 12 inches on either side, giving me space to lay out wet items or a drying rack directly over the sink. The integrated design also means no caulk line to fail.
The trade-off: quartz is heavy and expensive. A custom-sized integrated sink-counter combo is easily $800 to $1,500. It’s also not as heat-resistant as fireclay — don’t put a hot iron on it. Cost: $800 to $1,500 for the quartz piece and installation. What fails: the seam if you add a separate backsplash — make sure it’s a continuous slab or use a seamless silicone bead. Also, quartz can stain if you leave bleach or dye on it for hours. Rinse immediately.
Integrated quartz sink-counter combos eliminate the biggest source of mold in a laundry room: the crevice between the sink rim and the countertop.
13. The Cubbies That Actually Fit Your Bags
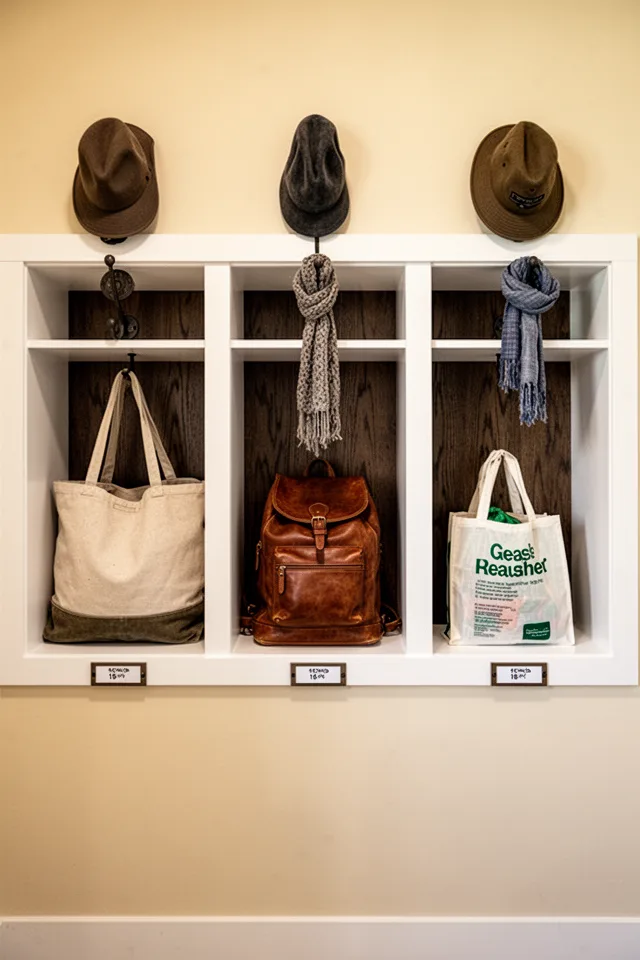
Standard mudroom cubbies are sized for kids: small, shallow, made for lunchboxes. Adult bags — gym bags, leather totes, backpacks — need depth. I designed my cubbies to be 18 inches deep and 18 inches tall. That accommodates even a bulging duffel bag. Each cubby has a hook above for hanging a bag handle or a hat. The interior back is painted a dark wood tone, which adds depth and hides scuffs. The cubbies are open front, but I added a small lip on the bottom to prevent bags from sliding out when you grab something fast.
The trade-off: deep cubbies take up more floor space. If your mudroom is narrow, you might only fit two cubbies instead of three. Cost: DIY using plywood boxes: $100 to $200 for three cubbies. Prefab mudroom cabinets start at $300. What ages badly: the hooks inside the cubbies — they loosen with heavy bags. Use metal hooks with a wide base and screw into studs. Also, the lip on the bottom can collect dust; vacuum it monthly.
Most mudroom cubbies are designed by people who only carry a wallet. Deep cubbies are for the rest of us.
14. The Hooks That Don’t Tangle Scarves
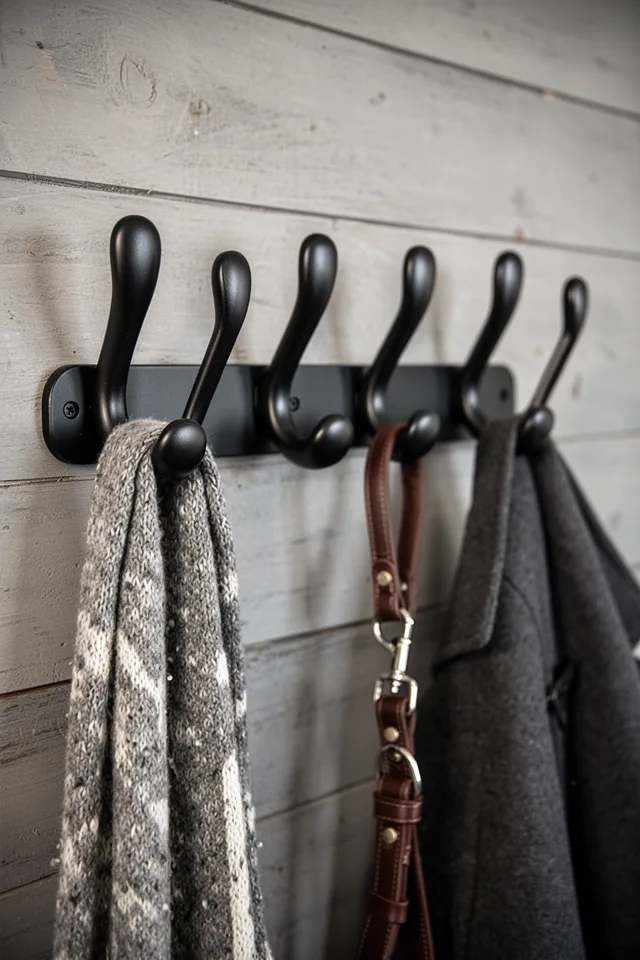
Standard J-hooks are terrible for scarves and hats — they tangle, they slip off, they bend under heavy coats. The solution is a hook with a rounded, upward-angled knob that holds items without pinching them. I swapped out all my mudroom hooks for these. They look like small door knobs mounted on a rail. Scarves hang without folding, coats stay secure, and dog leashes don’t slip down to the floor. The spacing between hooks is important: 8 inches minimum. Closer and coats overlap, farther and you waste wall.
The trade-off: these hooks are not good for heavy bags with thin straps — the strap can slide off the slanted top. Use a different hook for bags. Cost: $3 to $8 per hook, $30 to $50 for a rail. What fails: cheap painted hooks chip within a year. Buy solid brass or stainless steel in a matte finish. Also, if the hooks are installed too low (below shoulder height), scarves drag on the floor.
Hooks are not all the same. The right shape eliminates the daily frustration of unraveling scarves from a metal J.
15. The Laundry Sorter That Slides Under the Bench
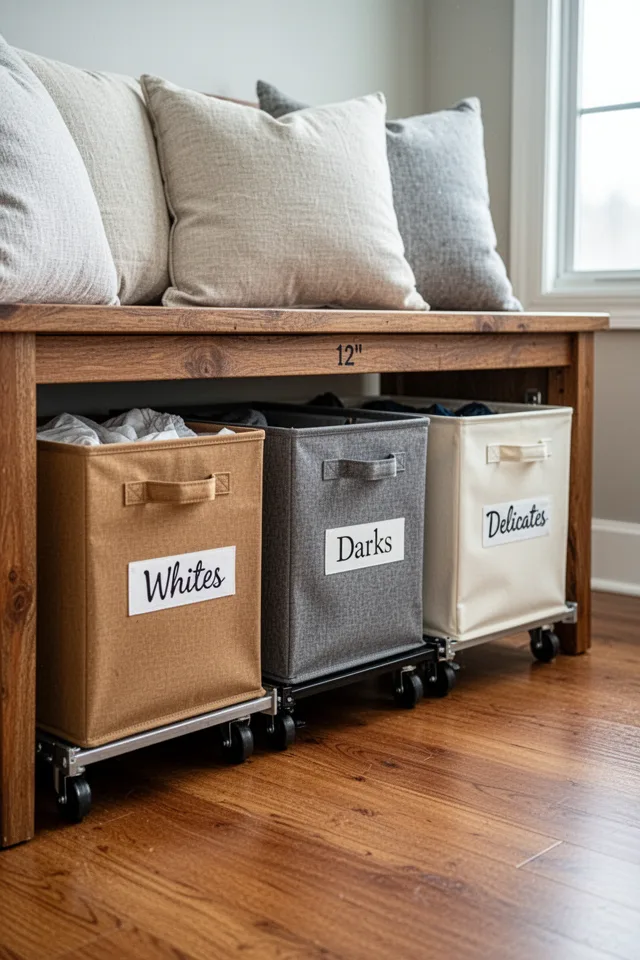
Instead of a bulky stand-alone laundry sorter that takes up floor space, build a bench with clearance underneath, then use rolling fabric bins that slide in and out. I built my bench 18 inches off the floor — tall enough for standard bins with casters. The bins are canvas with a wire frame, so they hold shape but collapse if needed. The casters are silent (rubber, not plastic). When laundry piles up, you just pull out the bin and carry the whole thing to the washer. No transferring, no sorting on the floor.
The trade-off: the bench height might be too tall for children to sit on comfortably. Also, the bins can collect dust under the bench between cleanings. Cost: bench lumber $100, bins $25 each, casters $15 per set. What does not work: bins without a rigid frame — they sag and get stuck under the bench. Buy ones with a metal or wood frame. Also, labels on the bins that are printed on paper — they fade. Use engraved wooden tags instead.
Rolling bins under a bench is the only laundry sorting system I’ve never abandoned. It uses wasted space and keeps the floor clear.
16. The Light Switch You’ll Never Forget to Turn Off
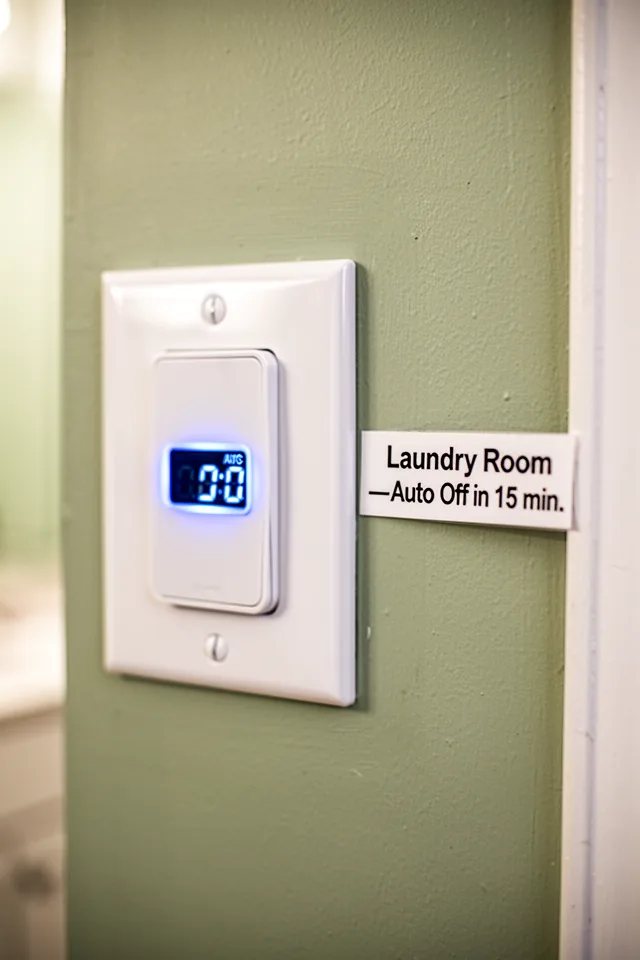
This is not a design element in the usual sense, but it’s the most practical thing I’ve done in my mudroom. I installed a smart light switch with a timer function. When I start a load of laundry, I flip the switch on, and the light stays on for 30 minutes (or however long I set it). After that, it turns off automatically. No more walking into the mudroom the next morning and seeing the light burning from a forgotten load. The switch also connects to a motion sensor near the door, so if someone walks in, the light turns on automatically for five minutes.
The trade-off: you need a neutral wire in your switch box. Some older homes don’t have one. Also, the timer setting confused my partner at first — she kept thinking the light was broken. Cost: smart timer switch $20 to $40. Installation free if you’re handy, or $50 for an electrician. What ages: the battery in some switches dies after a few years. Buy one that uses the house wiring for power, not a battery backup. Also, label the switch clearly so guests don’t get confused.
An auto-off light switch is not a fancy upgrade. It’s a permanent cure for your partner’s habit of leaving the mudroom light on all night.
17. The Window That Lets You Watch Kids Play While Folding
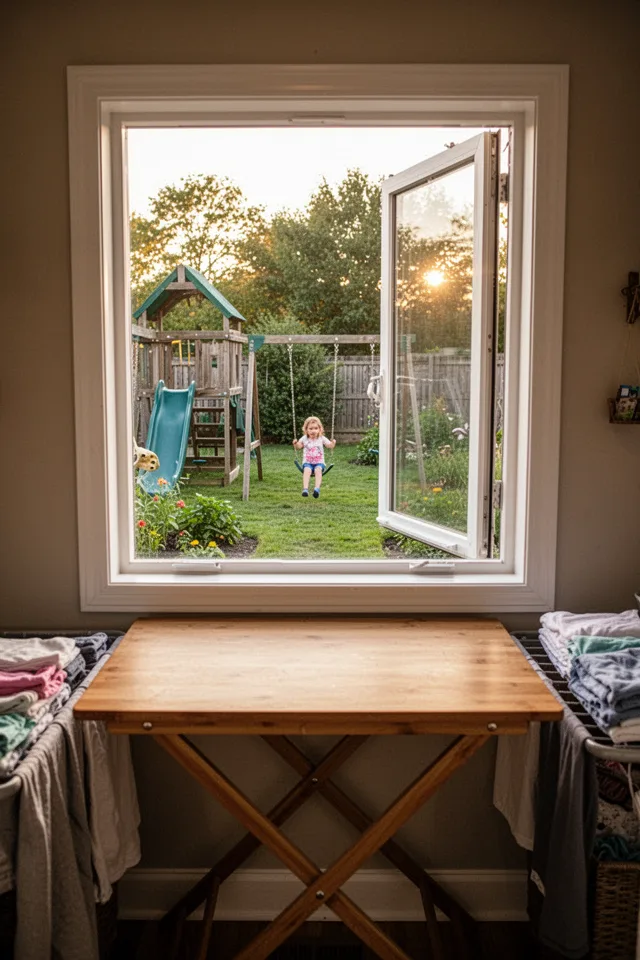
Every mudroom laundry combo I’ve designed has one element that makes the chore tolerable. For me, it’s a window placed low enough that you can see the yard while you’re folding. I installed a replacement window at the height of my folding counter — the sill is exactly at counter level. I can stand at the folding counter, look over a small vase of dried flowers, and watch my kid play on the swing set or the dog chase a squirrel. That simple visual connection turns a mundane task into a moment of presence.
The trade-off: windows in a mudroom are vulnerable to moisture and temperature swings. Condensation can form on the glass in cold weather, which then drips onto the counter. Cost: window replacement $300 to $800 depending on size. Folding counter $200. What does not hold up: standard builder-grade windows with aluminum frames that sweat. Get a double-glazed, low-E glass window with a thermally broken frame. Also, don’t put the window directly above a washing machine — the vibration can rattle the glass over time.
The best mudroom laundry combos have one window that makes you forget you’re folding underwear. It sounds silly. It’s not.
So there you have it — seventeen ideas that have survived my real life, my family’s mud, and my own perfectionism that eventually had to let go. The core decision you need to make is simple: what do you actually do in this room? Do you wash dogs, fold sheets, store boots, or all three? Pick the top three functions and build around them. Do not design for the mudroom you wish you had. Design for the one you’ll walk into at 7 PM after a rainstorm with a dog and a pile of grocery bags.
If I had to pick one place for most people to start, it would be the bench that doubles as a hamper. It is the most direct way to contain the mess before it spreads. Get that right — solid pine, gas struts, three bins — and you’ve already cut daily clutter in half. Then add one more idea from this list that addresses your biggest pain point. For me, it was the boot dryer nook. For you, maybe it will be the soaking sink or the wall of lockers.
Remember: the best mudroom laundry combos are not the ones that look perfect in a photograph. They are the ones where the ceiling drying rack is in use, the dog’s paws are on the dark tile, and a half-folded towel sits on the counter while you watch the sunset through that low window. That is the room worth building.

