
There’s a particular kind of magic that happens when a child discovers mud. Not the kind that sends parents running for the hose — well, not only that — but the deep, focused, genuinely imaginative kind of play that a mud kitchen unlocks. It’s messy by design, and that’s entirely the point.
A mud kitchen doesn’t have to be elaborate or expensive. It doesn’t need to match your deck furniture or coordinate with your raised garden beds. What it does need is a little thoughtfulness: the right height, somewhere to “store” things, a surface that can take a beating, and enough personality that kids actually want to play there. Whether you’ve got a sprawling lawn, a narrow patio, or even a compact corner by the back fence, there’s a mud kitchen configuration that works for your space.
These twelve ideas span everything from reclaimed wood builds to repurposed furniture finds, so you can pick the approach that fits your budget, your garden aesthetic, and your kid’s particular brand of creative chaos.
1. The Reclaimed Pallet Classic
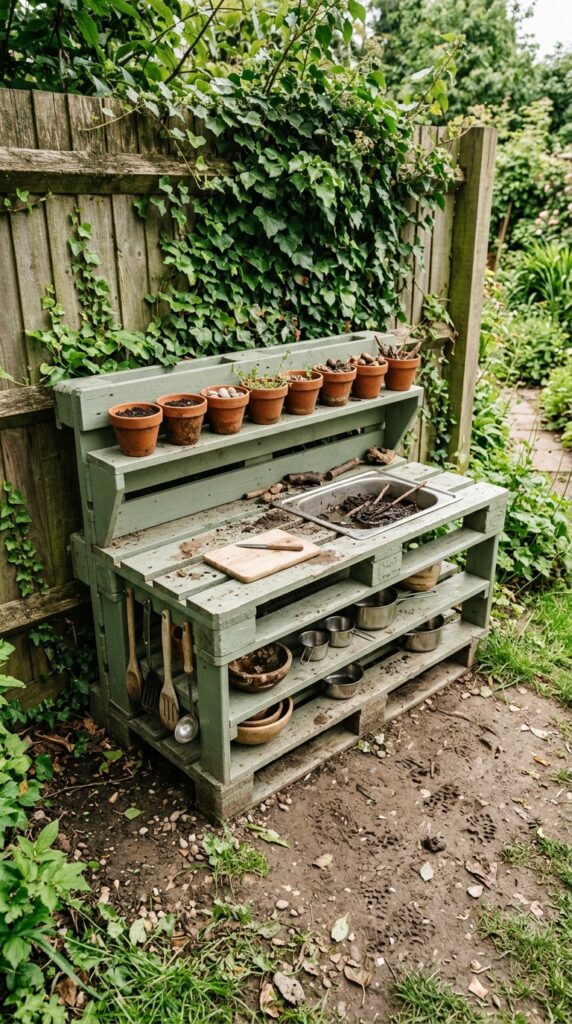
Pallets are the MVP of the mud kitchen world, and honestly, it’s not even close. They’re free or nearly free, structurally solid enough for years of play, and they already arrive with built-in shelving when you stack them creatively. Two pallets — one upright as the main structure, one horizontal as a prep surface — give you an instant kitchen setup for almost nothing.
Sand down any rough edges thoroughly before assembly. Children will run their hands over every surface. Use exterior wood stain in earthy tones rather than bright paint if you want something that ages beautifully instead of chipping after one rainy season. Sage green, charcoal grey, and warm terracotta all hold up well outdoors.
Here’s the trick: screw a short length of wooden dowel across the top of the upright pallet to hang small tools and cups. It looks intentional and gives kids a place to “put things away,” which, miraculously, some of them will actually do.
One thing to watch — pallets sourced from shipping yards may have been treated with chemicals. Always confirm they’re heat-treated (marked HT), not methyl bromide treated (MB). Non-negotiable for a children’s play space.
2. The Repurposed Dresser Kitchen
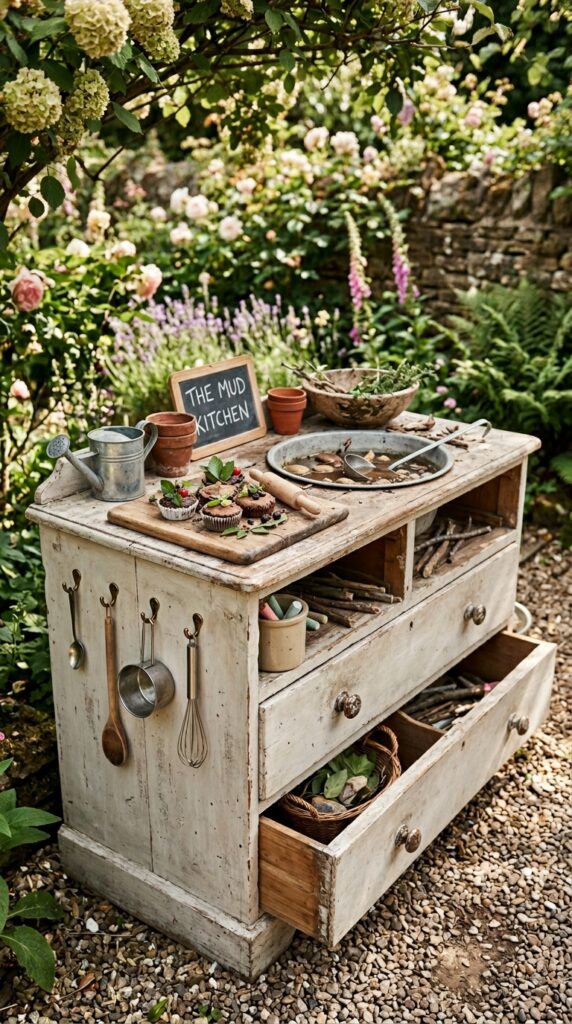
Old dressers are criminally underused in the outdoor play space world. Charity shops and online marketplaces are constantly cycling them out — and for mud kitchen purposes, a beat-up dresser is actually more valuable than a pristine one, because you don’t have to feel precious about it.
Remove the top drawer entirely and drop in a basic metal basin — the kind sold for livestock watering works brilliantly and costs almost nothing. That becomes your “sink.” Leave the lower drawers functional so kids can store their mud kitchen props, dried herbs from the garden, and whatever treasures they’ve collected.
Use chalk paint for the exterior — it adheres without primer, it’s easy to touch up, and the matte finish photographs beautifully. Seal it with outdoor furniture wax to protect against moisture. A couple of small cup hooks screwed into the side panel for hanging tools completes the look.
This works best when positioned under a roof overhang or pergola. A dresser sitting in direct rain will eventually warp at the joints, no matter how well you’ve sealed it. Give it a little shelter and it’ll last several years easily.
3. The Timber Frame Build with Sink Basin
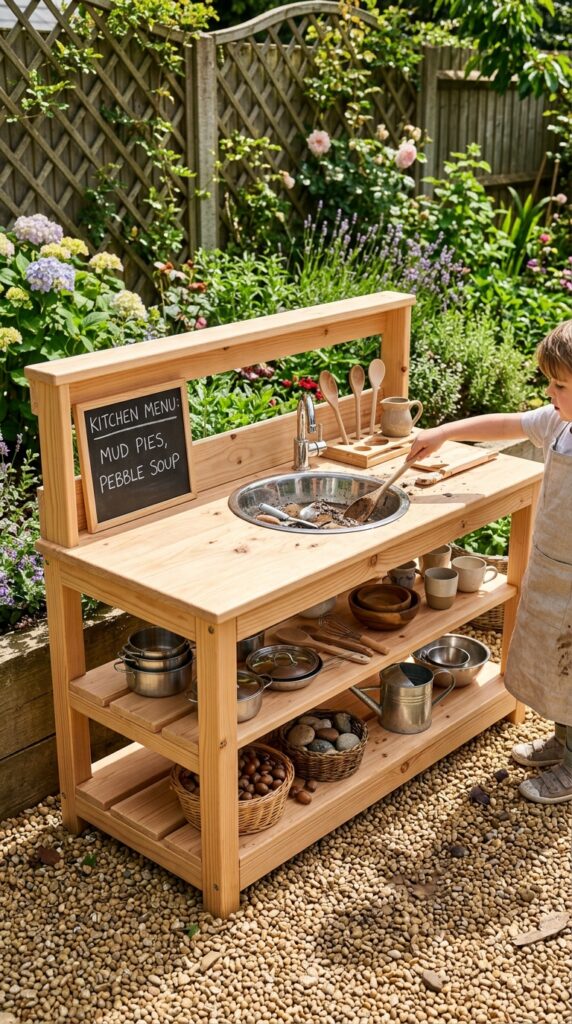
If you’re even slightly comfortable with basic carpentry, building a timber-framed mud kitchen from scratch gives you total control over height, depth, and layout. This matters more than people realize. A kitchen that’s too low gets abandoned by age five. Build it at elbow height for your child now, but make the legs adjustable or plan to rebuild the base as they grow.
A stainless steel drop-in basin is the single best upgrade you can make to any mud kitchen. They’re cheap, they’re easy to clean, and children take the kitchen dramatically more seriously when there’s a real “sink” involved. You don’t need to plumb it — just let it drain naturally through a hole in the base into a gravel pit below.
Frame the structure with pressure-treated pine, use exterior-grade plywood for the shelving surfaces, and leave the interior open below the counter for storage. Add a simple back panel from pegboard — the kind with pre-drilled holes — so you can hang tools, fake herbs, and small containers without any additional drilling.
Keep the proportions generous. Children need elbow room to really commit to a full mud feast.
4. The Painted Brick Wall Backdrop Kitchen
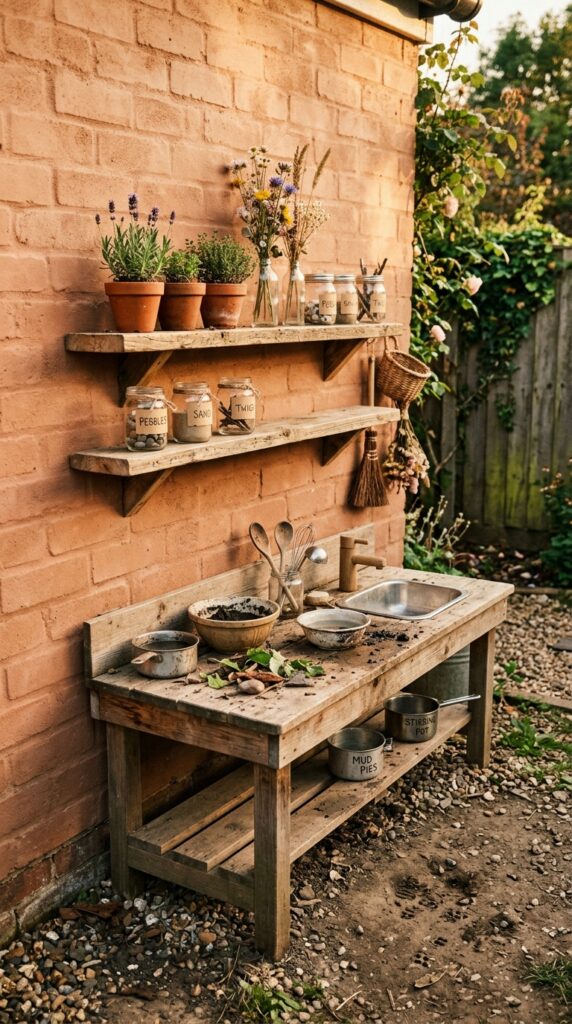
Not every mud kitchen needs to be a freestanding unit. If you have a garden wall — brick, rendered, or timber fence — use it. Mount a simple wooden countertop on wall-fixed brackets at the right height and let the wall itself become the backdrop and vertical storage surface.
Limewash paint on brick costs less than you’d expect and transforms a dull garden wall into something that looks genuinely considered. Terracotta and warm ochre tones age beautifully outdoors. Add two or three wooden shelves above the counter using standard shelf brackets, and you’ve got display space for the mud kitchen’s collection of pots, “ingredients,” and tools.
The constraint here is obvious — you’re working with a fixed location. Make sure the wall gets decent natural light and isn’t in a perpetually shaded spot, because children gravitate toward warmth when they play. A north-facing wall in a cold climate will mean the kitchen sits unused half the year.
Label small jars with chalkboard paint and a paint pen: “Pebbles,” “Sand,” “Petals.” It makes the kitchen feel like a real pantry and encourages sorted, imaginative play.
5. The Under-Pergola Kitchen Nook
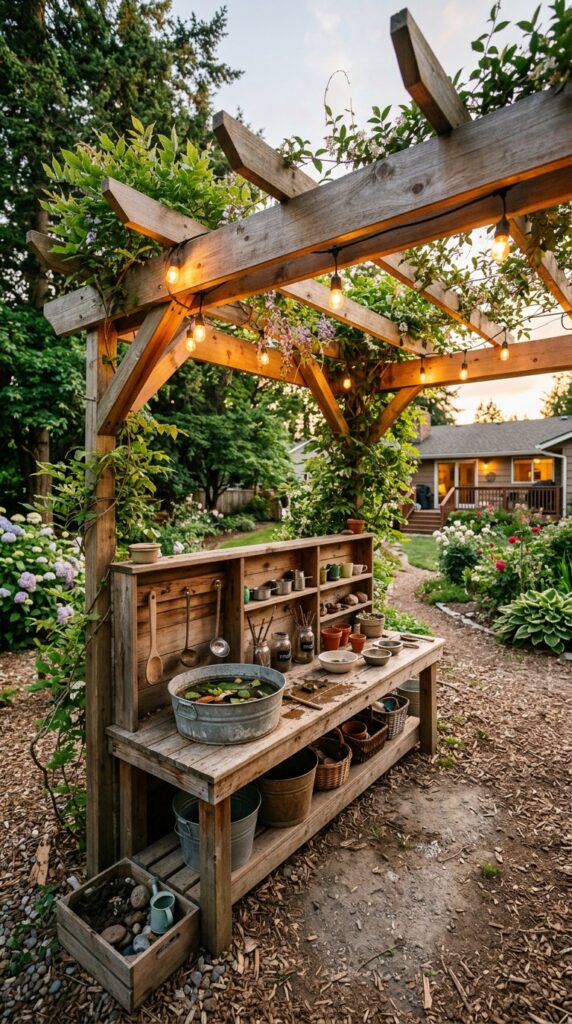
Giving the mud kitchen its own overhead structure changes everything about how children use it. A pergola or simple overhead frame signals that this is a dedicated space — a room of sorts — and kids respond to that sense of enclosure by staying longer and playing more deeply.
You don’t need to build a full pergola from scratch. A four-post structure with a simple cross-beam roof, made from cedar or pressure-treated pine, takes a weekend and minimal tools. Keep the footprint modest — roughly two meters by one and a half is plenty — and leave the roof open or add a single polycarbonate sheet for light rain protection.
String lights looped across the overhead beams turn the space magical at dusk. Solar-powered ones mean no wiring, no electrician, no issues. Add a climbing plant like nasturtium or a fast-growing annual vine along one post and within a single season you’ll have a genuinely enchanting little corner.
The only real cost here is time. But the payoff — a child who actually plays outside independently for hours — is substantial.
6. The Minimalist Scandinavian-Style Setup
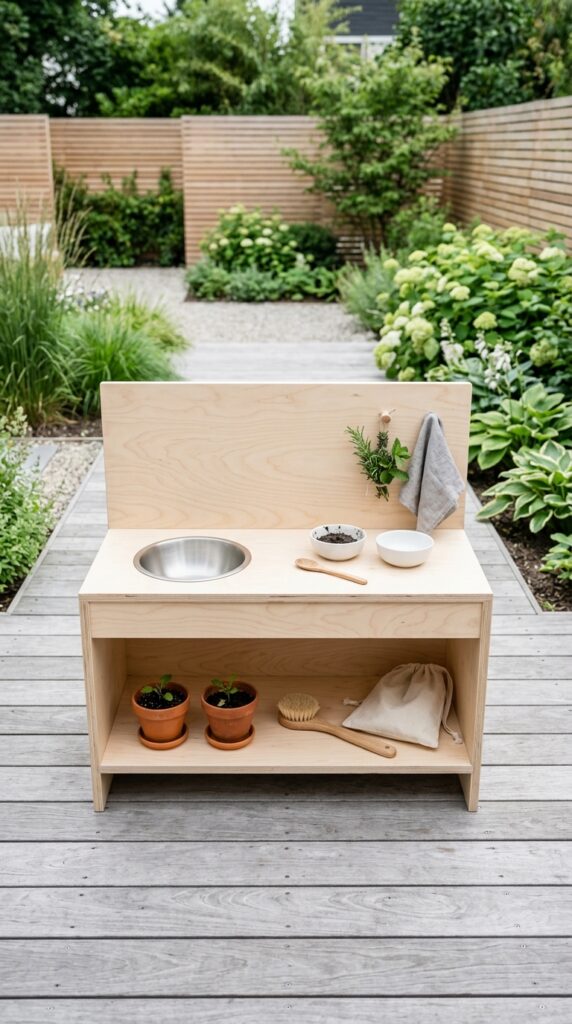
Sometimes the most used play kitchen is the one that doesn’t try too hard. A simple birch plywood construction — straight lines, no decorative cuts, no painted characters — lets the child’s imagination do the work rather than the furniture doing it for them.
This approach works especially well in modern or design-conscious gardens where you want the play area to feel like it belongs rather than interrupting the aesthetic. Pale birch or light ash stained with a clear exterior oil keeps the natural grain visible and blends with contemporary outdoor furniture.
Keep the silhouette low and horizontal — think Scandinavian design sensibilities, where function and proportion matter more than ornamentation. Two square storage cubbies below the counter, a single shelf above, and a round basin set in. That’s genuinely all you need.
The only watch-out: unfinished or lightly oiled plywood will grey off naturally over time outdoors. Some people love this. Others don’t. If you want to maintain the pale tone, plan to reapply exterior oil once a year, which takes about fifteen minutes and a cloth.
7. The Full Corner Kitchen with Storage
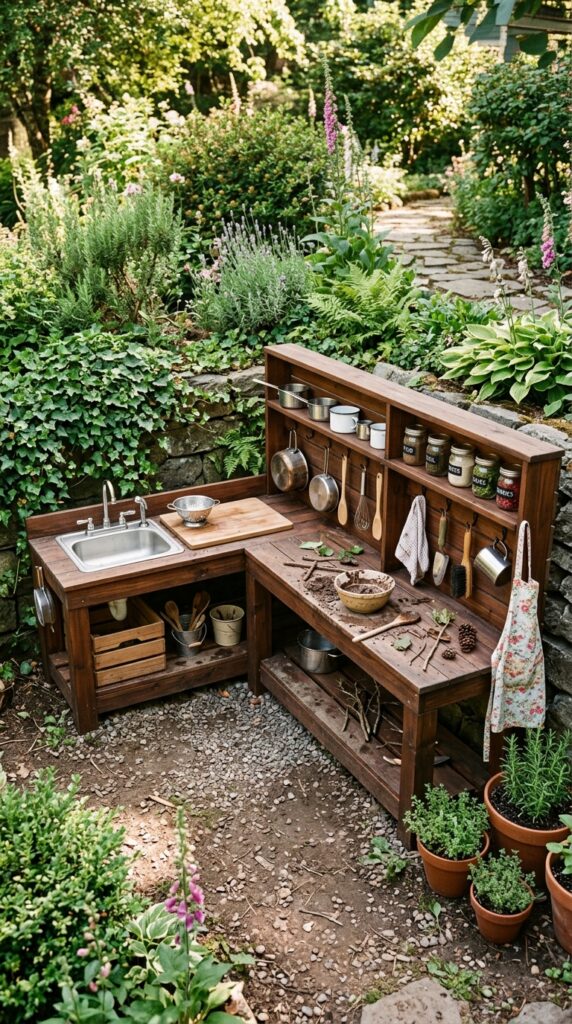
An L-shaped layout is the upgrade that mud kitchens rarely get but almost always deserve. It creates a proper corner workspace, gives children the ability to move along a surface the way a real cook does, and provides significantly more storage without taking up dramatically more footprint.
Build one side as the “cooking” station with the basin and a burner circle painted in dark grey or black. The return side becomes prep space — a flat, clean surface at the same height with a shelf running above it. This second shelf is where the “pantry” lives: jars of pebbles, dried seed pods, acorn caps, anything the kids have foraged and decided is an ingredient.
Dark-stained cedar or reclaimed hardwood looks exceptional in this format because the colour reads as premium even in a children’s context. It photographs beautifully, too, which may or may not matter to you but definitely matters if you ever post a garden photo online.
This is the one configuration that genuinely rewards more space. Don’t attempt it in a narrow side passage or you’ll feel the squeeze immediately.
8. The Wheelbarrow Station Kitchen
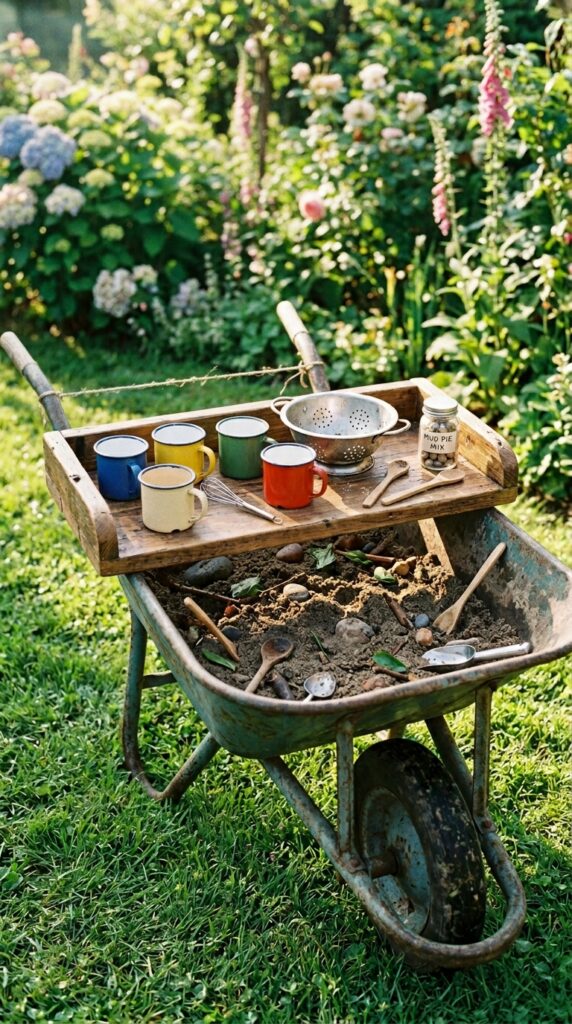
This one is for small gardens, renters, or anyone who simply refuses to commit to a fixed structure. An old metal wheelbarrow becomes a genuinely charming mud kitchen that can be wheeled into shade on hot days, tucked away in the shed over winter, and repositioned whenever the mood strikes.
Fill the barrow basin with a layer of gravel at the base for drainage, then top with play sand or soil mix. Balance a small wooden tray or chopping board across the handles to create an impromptu prep surface. Hang a couple of small hooks on the wooden handles for tools.
It won’t have the same depth of play as a full kitchen build, but for the youngest children — toddlers and early preschool — it’s honestly more than enough. They don’t need the full layout to get absorbed. They need something at the right height with interesting texture and a few props.
The constraint is obvious: limited surface area. If your child is the kind who needs to have fifteen things going simultaneously, the wheelbarrow will feel cramped by age four. Scale up when the time comes.
9. The Herb-Integrated Garden Kitchen
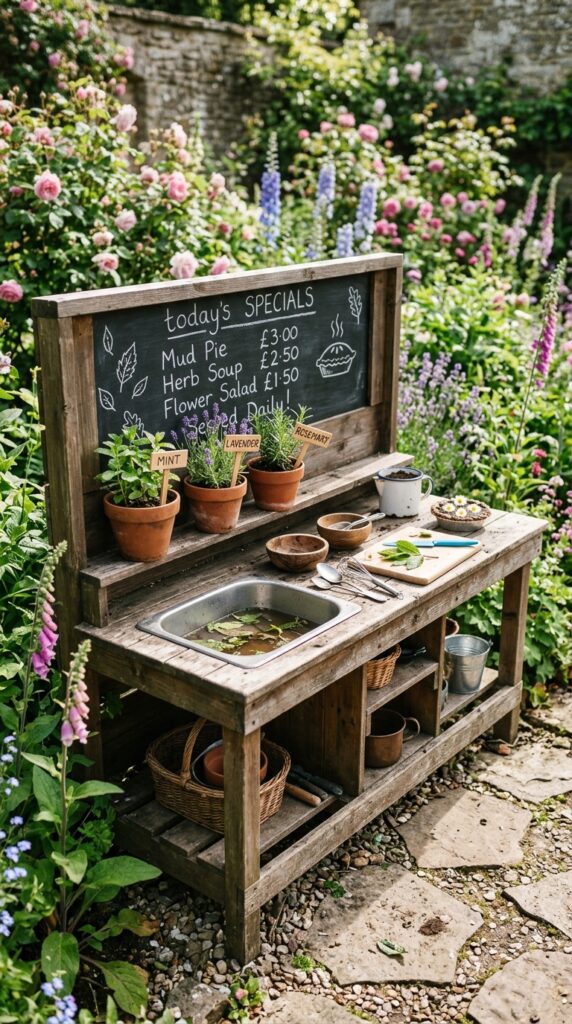
Here’s an idea most mud kitchen guides skip entirely: grow things into the kitchen itself. Line the back of the counter with small terracotta pots of culinary herbs — mint, chives, lavender, lemon balm — and suddenly the kitchen has real ingredients that smell extraordinary and teach children something real about where flavour comes from.
Mint and lemon balm are essentially unkillable. They’ll survive being picked to pieces daily, which is precisely what will happen. Lavender adds colour and scent and holds up well in most climates. Keep them in pots rather than planting them out, so you can bring them indoors over winter and replace any casualties without disturbing the kitchen setup.
Add a small chalkboard panel above the counter — painted directly onto a strip of wood with chalkboard paint — for “today’s specials” or recipe notes. Hand it to a child with chalk and watch what happens.
One thing to watch: avoid anything edible that might cause confusion, like strawberries or cherry tomatoes. In a mud kitchen context, you want clear messaging about what’s for playing and what’s for eating.
10. The Fairy-Tale Storybook Kitchen
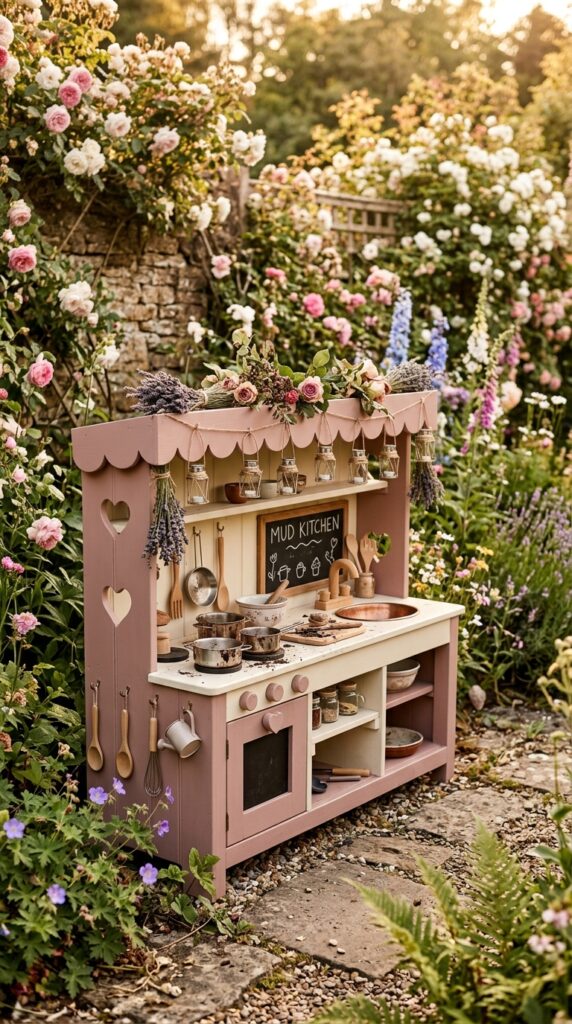
Not everyone wants their mud kitchen to look like a workshop build. For the child who’s drawn toward storybook aesthetics — who already talks about fairies and bakes imaginary cakes for imaginary guests — lean into the whimsy fully and without apology.
A scalloped roofline cut from exterior plywood with a jigsaw takes twenty minutes and transforms a plain structure into something genuinely enchanting. Heart or star cutouts in the side panels add to the storybook quality. Paint in soft, chalky tones — dusty rose, sage, warm cream — rather than saturated candy colours, which tend to look cheaper and fade faster.
Hang dried flower bundles from the overhang using garden twine. Bunches of dried lavender, strawflower, or seed heads from the garden all work beautifully and can be replaced seasonally. Small solar lanterns hung from hooks complete the atmosphere as daylight fades.
This aesthetic can feel too precious if you try to keep it pristine. Let it get muddy. Let the paint chip a little. A fairy-tale kitchen with genuine wear looks romantic rather than neglected.
11. The Nature Table Kitchen Combo
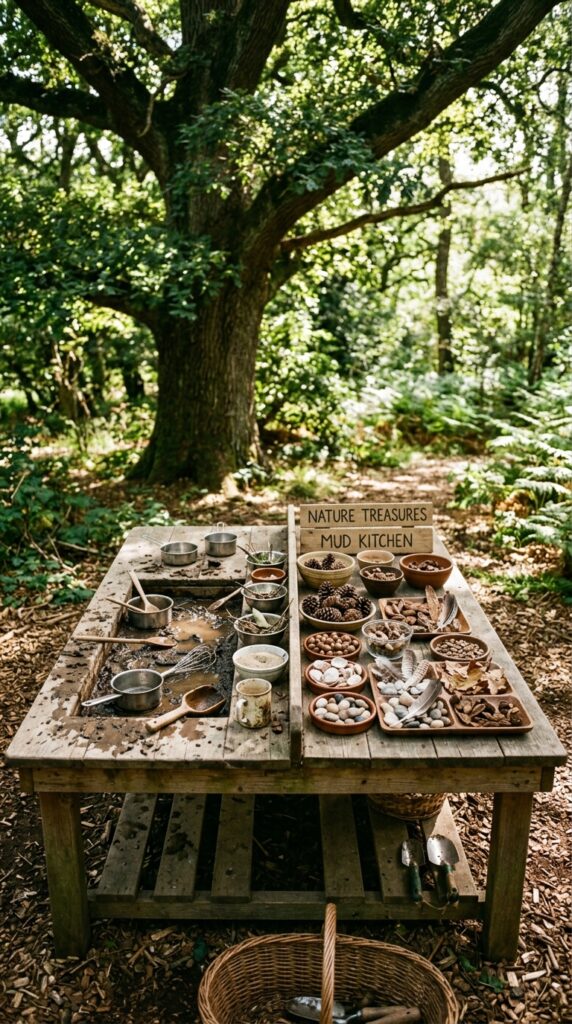
Some children are less interested in the cooking metaphor and more interested in collecting, sorting, and examining. For those kids — and there are many — a nature table hybrid approach works better than a standard kitchen layout. Half the surface becomes a mud mixing station; the other half is a display and investigation area for whatever they’ve gathered from the garden.
Use a wide, low table at child height and divide the surface visually with a strip of wood or simply by the way you arrange things. Keep one basin for mixing and one shallow tray for displaying finds. Add a magnifying glass on a lanyard hung from the structure and a small wooden caddy with tweezers, brushes, and small containers.
This setup rewards the curious, methodical child who wants to understand rather than just play. It also evolves well — what starts as a mud kitchen gradually becomes a garden science station, then a proper nature journal-adjacent space as the child grows.
The constraint here is surface area — a wider table is essential. A narrow structure won’t comfortably accommodate both functions without feeling cluttered.
12. The Upcycled Kitchen Cabinet Kitchen
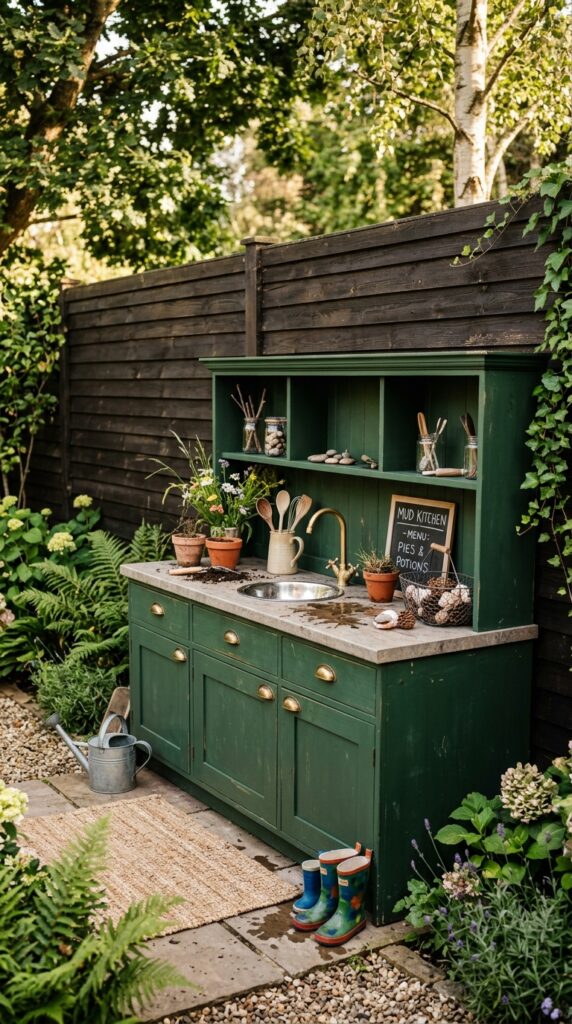
The most spectacular mud kitchens tend to come from the most unexpected sources. A genuine salvaged kitchen cabinet unit — the kind you can find for almost nothing when someone is renovating — turns a mud kitchen into something that stops visitors in their tracks. Real doors, real drawers, real countertop surface: children take this kitchen extraordinarily seriously.
Source units from online renovation disposal listings or salvage yards. You want units that are all-wood construction rather than MDF, which won’t survive outdoor moisture long-term. Once you find the right piece, clean it thoroughly, treat with an exterior wood sealant on all cut edges, and paint with exterior-grade paint in a dramatic, considered colour: deep forest green, navy, charcoal, or a rich terracotta.
Keep the original door handles — especially if they’re brass-toned. They look genuinely wonderful against a dark painted cabinet and give children the satisfying experience of opening and closing real cabinet doors.
If the original countertop is stone or solid surface, it can stay. If it’s laminate, replace it with a marine-grade plywood top sealed with exterior varnish. A little work up front buys years of beautifully functional play.
Building Something Worth Playing In
What you’ll notice, after spending any time with these ideas, is that the best mud kitchens share a handful of qualities regardless of style: they’re built at the right height, they offer genuine storage, they have some kind of vertical element for hanging or displaying things, and they look like someone put thought into them rather than just dragged something outside.
Children respond to intention. A mud kitchen that’s been designed — even simply — gets used more deeply and for longer than a random collection of old pots on a low bench. That doesn’t mean spending money. It means making a choice about what you want the space to feel like and following through.
The mess, to be clear, remains non-negotiable. But if you’ve built something with real character, you’ll find yourself looking out the kitchen window at a muddy child in an apron, stirring something with tremendous concentration, and feeling genuinely pleased with how you spent that weekend. That’s a worthwhile trade.

