
I have a corner in my living room that spent three years holding a sad rubber plant and a stack of unread New Yorkers. You know the spot—the one where the wall angles in and every piece of furniture looks either too big or apologetically small. That corner was a confession of defeat until I started thinking about corners not as leftover space but as the best opportunity for something with presence. The problem with most corner bookshelf advice? It’s either all floating shelves that look like a Pinterest fever dream or bulky corner units that swallow a room.
The conventional wisdom says fill the corner with a standard bookshelf and call it done. That fails because corners demand a different logic—they need a shape that works with the angle, not against it, and they need to feel intentional, not like you just shoved a bookshelf where nothing else fit. Over the years I have lived with six different corner setups in three apartments, and I have strong opinions about what actually works. This list skips the obvious and goes straight to the ideas that turn dead corners into the most interesting part of a room.
1. The Ladder That Refuses to Be Precious
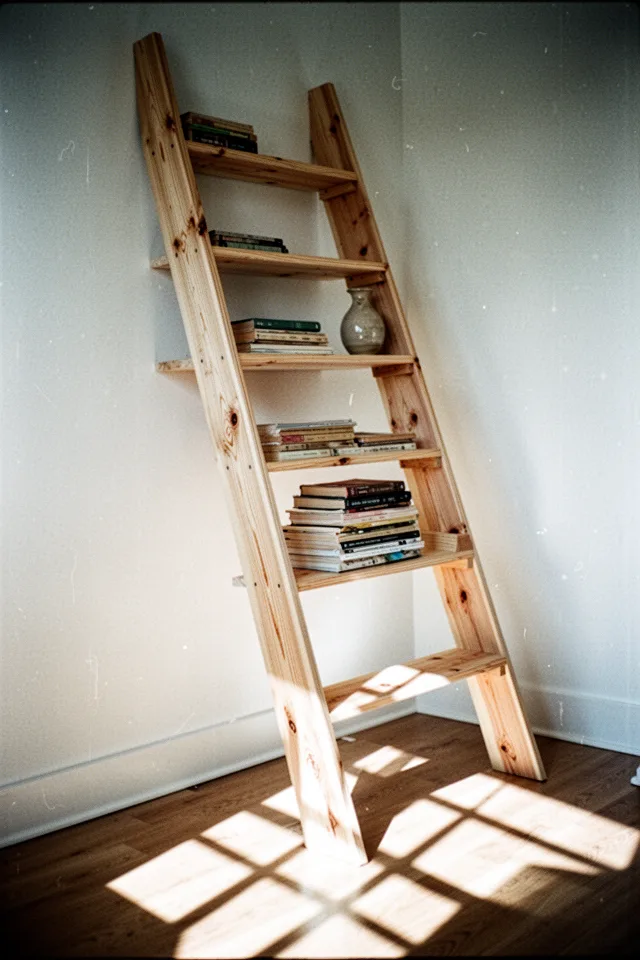
I bought a leaning ladder shelf from a flea market for forty dollars, stripped the varnish, and never sealed it. That was five years ago. The pine has silvered into a quiet grey that looks older than the house. These ladder shelves work because they don’t pretend to be symmetrical—they lean, they breathe, and they make a corner feel like a reading nook without trying too hard. Most ladder shelves you see online are too precious, with perfectly spaced rungs and a finish that screams “I bought this at a boutique.” The real version is simpler: find one with uneven spacing, let the wood age, and stack books horizontally so the weight looks natural.
The trade-off is stability. A ladder shelf needs to be anchored if you have kids or clumsy pets. The top rung becomes a dust magnet because it’s at eye level but out of arm’s reach. I keep a small duster on the bottom shelf just for that. Cost is under $80 if you hunt secondhand, or around $120 for something decent new. Skip the ones with chrome or glass; wood that ages well is worth the patience.
Let the wood go grey. A ladder shelf that looks too new will always feel like a prop, not furniture.
2. The Chunky Boxy Stone That Outlasts Trends
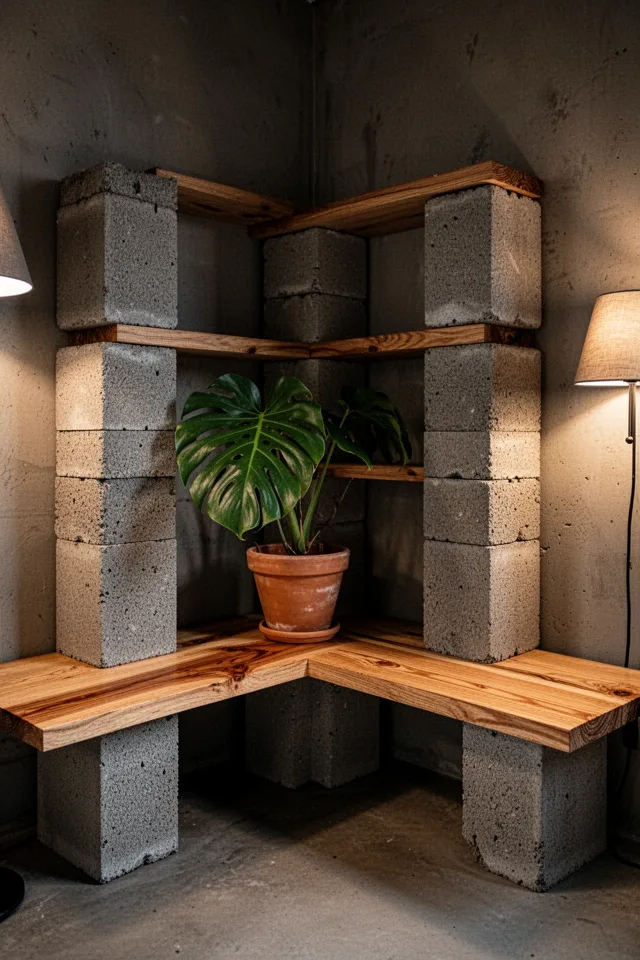
This is the corner shelf that does not care about trends because it is made of materials that have been around for centuries. I built one for my sunroom using twelve cinder blocks and three two-by-twelves. Total cost was under $60. The blocks are ugly in a beautiful way—they have chips and imperfections that you cannot fake. The shelf sits low, about thirty inches tall, which means it works as a plant stand, a book stacker, and a place to put down a coffee mug. The height is the trick: most corner shelves go too high and make the space feel cramped. A low, chunking boxy shape opens the corner up instead of closing it in.
The thing nobody tells you: concrete blocks will shed dust for the first few months. Wipe them down with a damp cloth and accept that your hands will be a little dirty when you rearrange books. Also, this is heavy. You need a solid floor—no, that corner in a carpeted bedroom will make the blocks sink into the pile over time. Put plywood underneath or choose a tile or hardwood floor. This is not a rental-friendly option unless you want to carry concrete up three flights of stairs. But once it’s in place, you will never want to move it.
Don’t paint the blocks. The raw concrete grey will balance out any color in the room and make your plants look greener by contrast.
3. The Window Corner That Hitches a Ride on the Sill
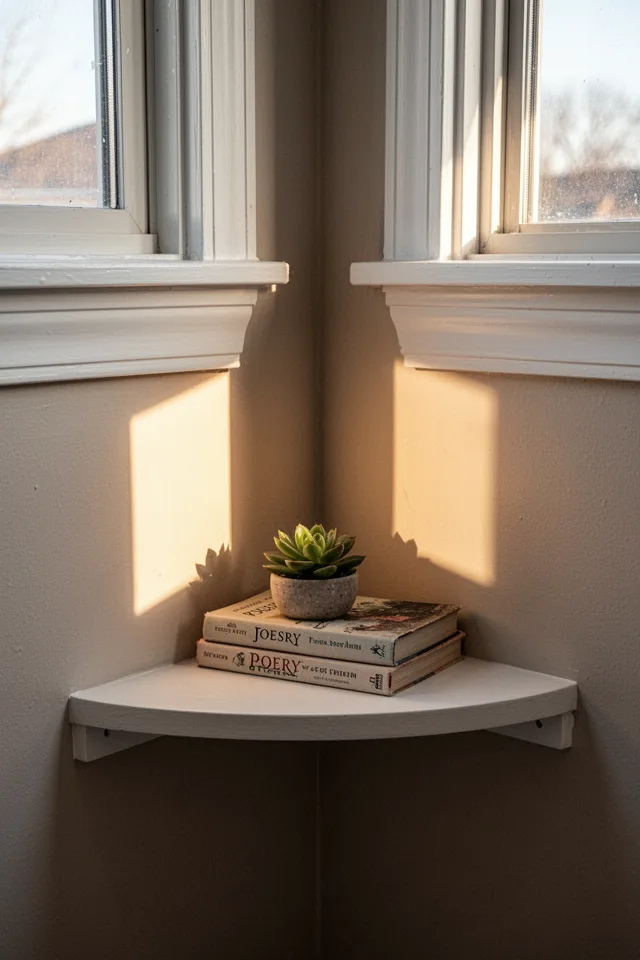
Corners with windows used to drive me crazy—you cannot put a tall bookshelf there without blocking light, and a chair feels like a waste. The answer is a shelf that runs just below the window sill and wraps the corner. I cut a single piece of pine to span the window wall, then mitered a second piece to run into the adjacent wall. Total materials: one board, two L-brackets, and an afternoon. The shelf becomes an extension of the window trim, so it looks like the house came with it. The height is crucial: set it exactly level with the sill so the eye flows straight across.
The drawback: this shelf will get direct sun for part of the day. Paperbacks will fade. Dust will settle fast because the sill traps air. I keep only hardbacks and ceramic objects there, and I wipe it down every week. Cost is under $20 if you have basic tools. Skip any fancy finish—just paint it the same color as the trim. The invisibility is the point.
Match the paint exactly. A white that is even half a shade off will make the shelf look like a mistake instead of architectural detail.
4. The Triangle Fill That Mocks Empty Corners
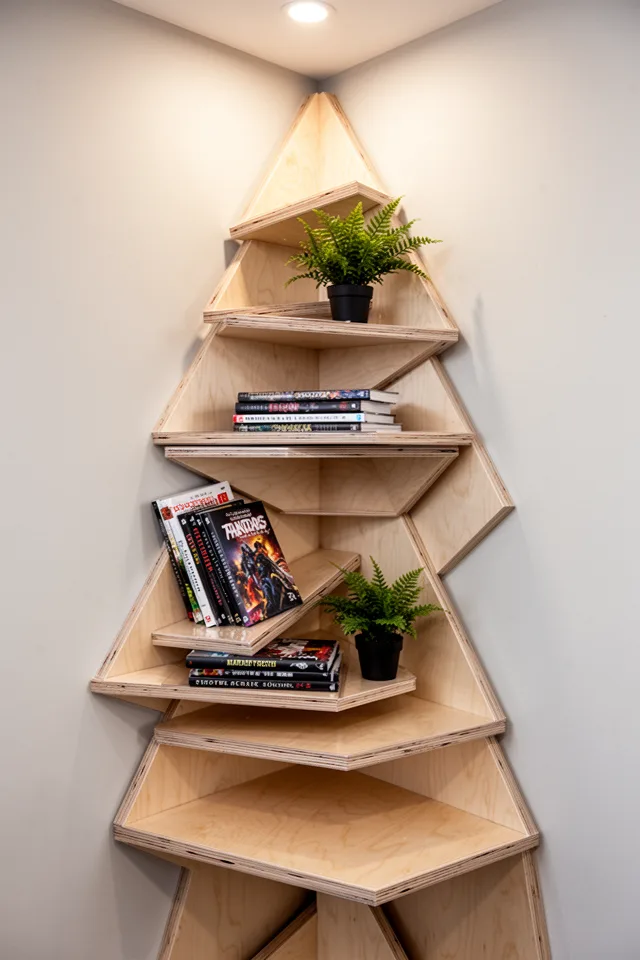
I saw a version of this in a Copenhagen apartment and spent a year trying to replicate it. The idea is simple: cut triangles of plywood at the exact angle of your corner (usually 90 degrees), then mount them on a central pole or bracket system so they rotate slightly as they go up. The result is a bookshelf that is also a sculpture. Each shelf holds only a few books because the triangles are narrow at the tip, but that is the point—it forces curation. You cannot cram this shelf full. It is for display, not storage.
The honesty: this is not a beginner project unless you have a table saw and patience. The first time I tried, my angles were off by three degrees and the whole thing wobbled. I ended up buying a kit from an Etsy woodworker for $150. It took two hours to assemble. The spiral shape collects dust in ways that are tedious—each triangle has a top surface and a bottom edge. If you live with a lot of dry air or open windows, this shelf will need regular dusting. But the payoff is a corner that becomes a conversation piece without being loud.
Use plywood with a nice edge—birch or maple. Paint hides the layers, and the layers are what make the spiral interesting.
5. The Wide, Low Platform That Reframes a Room
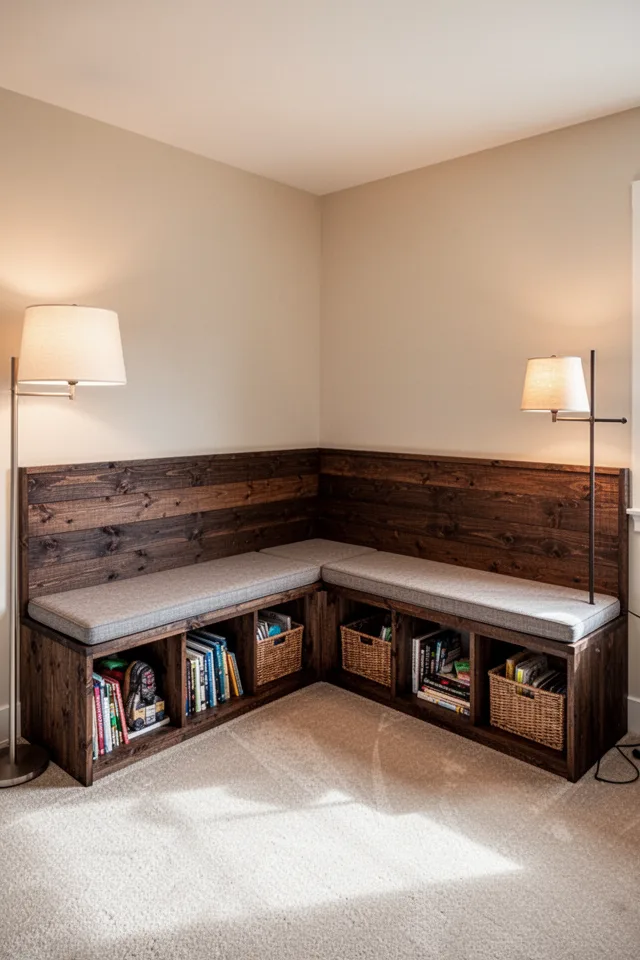
Most corner bookshelves go up. This one goes sideways. I built a platform that runs along both walls of my dining room corner—three feet high, eighteen inches deep, with open cubbies underneath for books and records. On top, I put a dense foam cushion and a pile of throw pillows. It became the place where guests sit during dinner parties, where my kid reads, where I take naps that I pretend are meditation. The shelf space underneath is generous: each cubby holds about twenty books. The total storage equals a tall bookshelf, but the visual weight is low, so the room feels taller.
The downside is floor space. This platform takes up a chunk—you need a corner that is at least four feet in each direction. In a small room it can feel overwhelming. Also, cushions gather crumbs and pet hair, and if you use a light fabric, it will stain. I went with a dark grey outdoor-grade fabric that is machine-washable. Cost for lumber and cushion was around $200. If you hire a carpenter, double that. But for the price of a cheap sofa, you get a bench and a bookshelf and a statement.
Build the cubbies with a clearance of at least twelve inches deep and ten inches tall. Anything smaller and you will spend your life jamming books in at awkward angles.
6. The Rotating Corner Carousel That Saves Reach
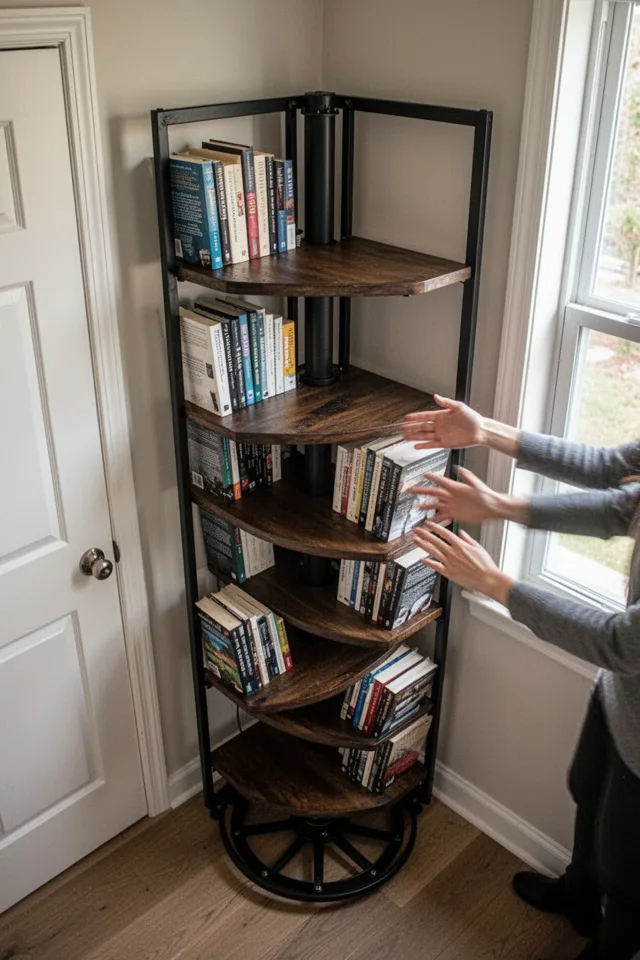
I found a vintage rotating corner shelf at an estate sale. It was ugly—laminate and brass—but the mechanism was perfect. I stripped it and rebuilt it with plywood shelves and a metal pole. The principle is brilliant: instead of having to reach into the corner, you just spin the shelf. Both sides are accessible. This is a game-changer for a narrow corner between a door and a wall, where you cannot fit a standard shelf because the door swing would hit it. The rotating unit stands about five feet tall, takes up only the corner footprint, and gives you three full shelves.
The trick is the bearing. A cheap lazy Susan from a hardware store will fail under the weight of books. You need a heavy-duty bearing rated for at least fifty pounds. I used a turntable bearing from a woodworking supplier—$25. The unit itself is not cheap to build if you want it to spin smoothly. Expect to spend $100–150 total, more if you buy a pre-made one. The other catch: it will wobble slightly if you load it unevenly. Put heavy books on the bottom shelf. And keep the base clear—carpet can catch and stop the rotation. This is a shelf for people who love mechanical solutions to spatial problems.
Test the spin before you load it. A shelf that catches halfway around will annoy you every single time you use it.
7. The Painted Mural Shelf That Keeps Books Company
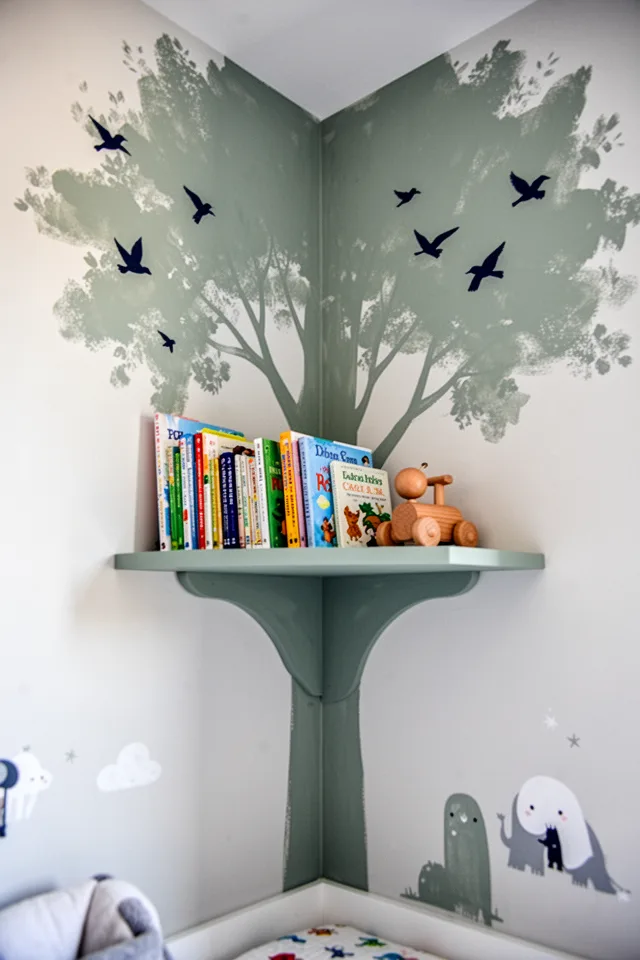
I tried this in my daughter’s room after realising a full bookshelf would block the only window. One floating shelf, a can of paint, and a stencil later, the corner became a destination. The shelf is just a simple pine plank mounted with invisible brackets. The mural is a tree that grows up the wall and branches out over the shelf. The books sit among the branches. It turned a dead corner into the most-visited spot in the room. The key is that the shelf does not compete with the mural—it becomes part of it.
This is a rental-unfriendly idea if you cannot paint the wall. But if you own your place or have a lenient landlord, it is cheap—maybe $30 for paint and a shelf. The trade-off is that the mural locks you into a theme. If you get tired of the tree, repainting the whole corner is a hassle. Also, the shelf will cast a shadow on part of the mural depending on the lighting. I solved this by using a small LED strip under the shelf to light the books and the tree. The effect is magical at night. But don’t use this in a living room unless you love commitment.
Keep the mural on just one wall of the corner, not both. Painting both walls turns the corner into a cave.
8. The Bay Window Arc That Hugs the Curve
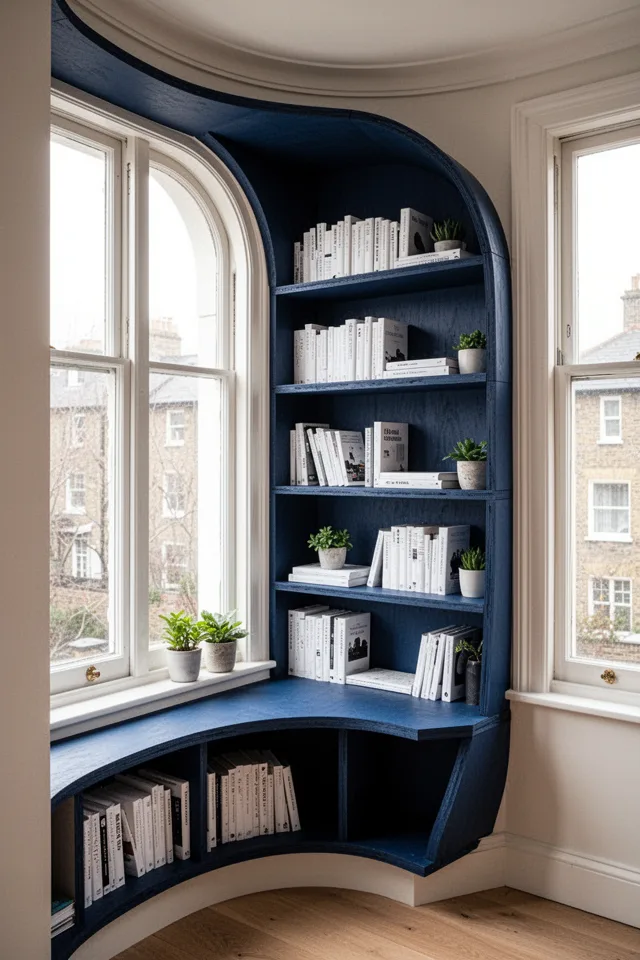
Bay windows are the worst offenders for dead corners because the diagonal walls create a weird triangle that standard shelves cannot fill. I spent weeks staring at my bay window corner before I tried a curved shelf. I used a sheet of flexible plywood, cut it to a sweeping arc, and fixed it to the wall with brackets. The shelf follows the curve of the window and creates a continuous line that feels architectural. It holds about a dozen books—enough for a curated collection. The curve makes the corner feel intentional, not awkward.
This is not a beginner DIY unless you have experience with flexible plywood and a jigsaw. The material is finicky—it can crack if you bend it too sharply. I had to soak mine in water for an hour to make it pliable. Total cost was around $50 for the plywood and brackets. The result is unique, but it also means you cannot use standard shelf decorations—anything with a square base will stick out past the curve. Stick to rounded vases and books laid flat. And dusting the curve is a pain because no cloth fits perfectly. A microfiber duster with a bendable head helped.
Test the bend with a thin strip of scrap first. Nothing worse than cracking your main piece halfway through.
9. The Height-Scaling Stack That Mocks Gravity
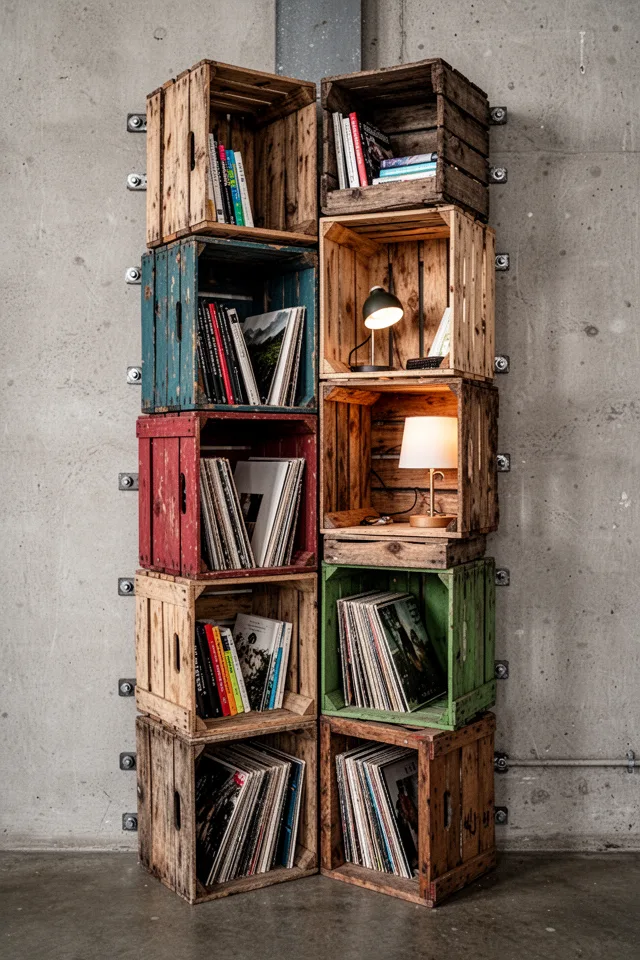
I started collecting wooden crates from flea markets and grocery stores years ago. They stacked unsteadily until I screwed them together and to the wall in a corner. The result is a floor-to-ceiling bookshelf that costs almost nothing if you have patience. Each crate is a separate compartment, so the visual rhythm is unpredictable—some deep, some shallow, some narrow. The corner becomes a vertical collage of storage. I have about forty crates spanning three sides of a corner in my studio, and they hold everything from art books to vinyl to a collection of seashells.
The hard part is structural. You cannot just stack crates; they will tip. Every crate must be screwed to the one below it and to the wall at every point of contact. That is a lot of screws and a lot of drilling. Also, crates vary in depth, so the front edges do not align. That’s fine for an eclectic look, but if you are a symmetry person, this will drive you crazy. Cost: near zero if you scavenge, about $50 if you buy a bundle of new ones online. The biggest risk is dust. Each crate has interior corners that trap matter like a lint trap. Vacuum with a brush attachment monthly.
Use only crates with solid bottoms and sides—wood that’s too thin will sag under the weight of hardcovers.
10. The Hanging Rope Shelf That Floats
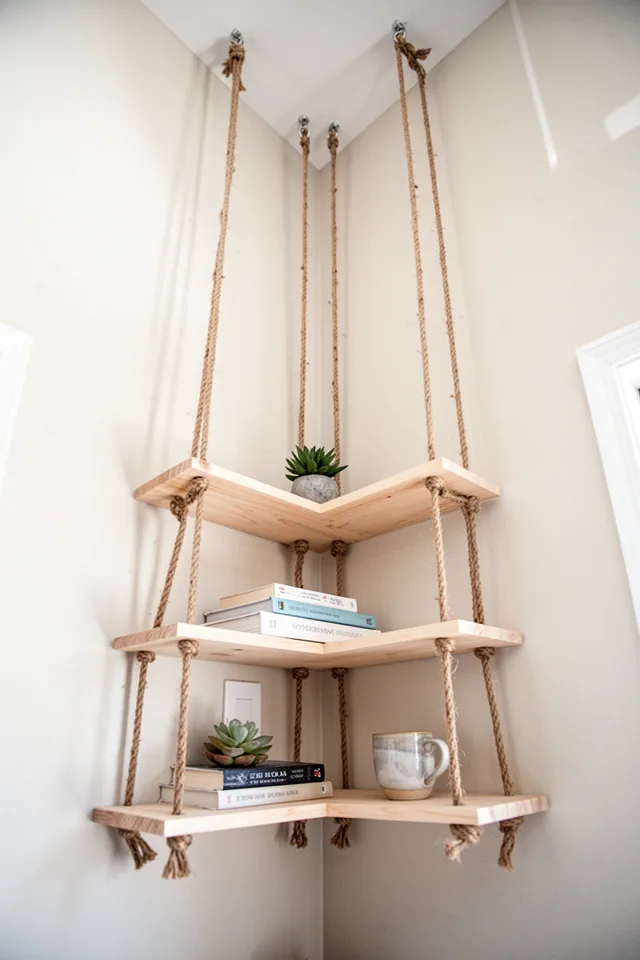
Hanging shelves in a corner exploit the empty air above the furniture. If your corner has tall ceilings, a standard shelf stops too soon. A rope-suspended shelf system draws the eye up and makes the room feel larger. I installed three shelves in a corner of my kitchen—above a prep table—and hung them at different heights. The shelves hold cookbooks, a plant, and a bottle of olive oil. The jute rope adds texture and a slight sensorial roughness that contrasts with the white walls.
The catch: these shelves swing. If you have a cat or a child who bumps into the corner, the shelves will sway. Books can slide off. I solved this by using small clear silicone bumpers on the wall side to keep the shelves stable, but they still have a gentle movement. Also, jute rope stretches and will need retightening after a few months. Cost is around $30 for materials if you DIY—drill a hook into the ceiling, cut rope, drill holes in shelves. The look is deliberately imperfect, so don’t obsess over level. Slight tilt adds character. But if you need perfectly horizontal, this is not for you.
Use a taut-line hitch or similar adjustable knot so you can retighten without cutting the rope.
11. The Doorway Corner Tuck That Works Like a Bookcase
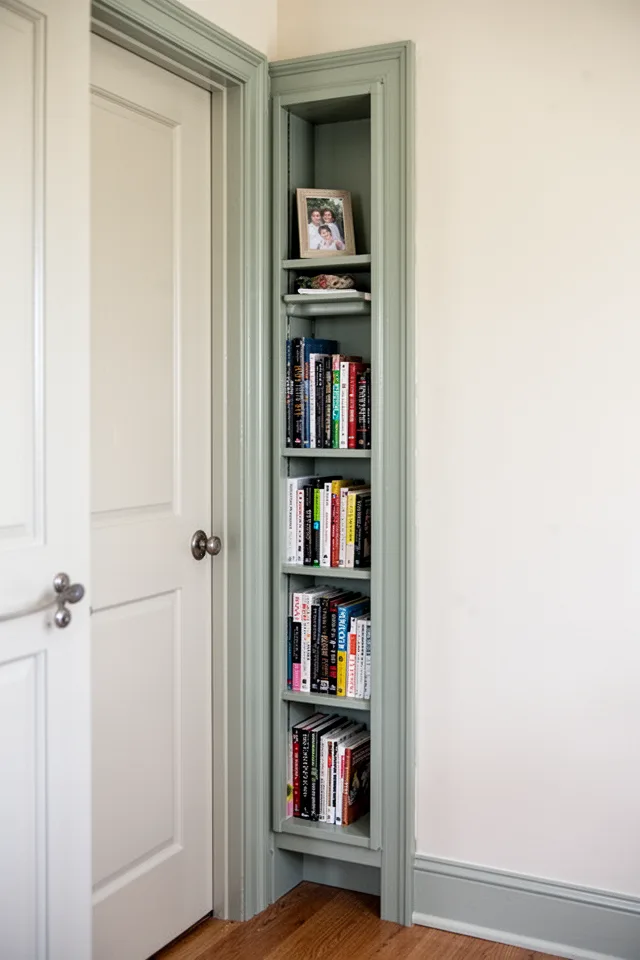
The worst corner is the one right next to a door—too narrow for any furniture, but too wide to ignore. I have one between my kitchen door and the pantry. Standard advice says leave it empty or hang a tiny picture. I built a shallow bookshelf just six inches deep, floor to ceiling, fitted perfectly into the eighteen-inch width. It holds forty paperbacks each row. The trick is to use only half-height shelves so you can stack two rows per level. The depth forces you to keep only your favorite books—no space for junk.
The construction requires precise measurement because any mistake will block the door swing or look crooked. I used an electric saw and a lot of patience. Cost was around $40 for MDF and paint. The restriction: you can only fit small paperbacks or thin hardcovers. Oversized art books will stick out and get hit by the door. Also, because it’s shallow, the shelf tends to lean forward if overloaded—anchoring to the wall is essential. This is a niche solution, but for a tight corner next to a door, it is the only one that makes sense.
Install a small lip on each shelf to keep books from sliding forward when the door slams.
12. The Medicine Cabinet Switch That Stores Vertically
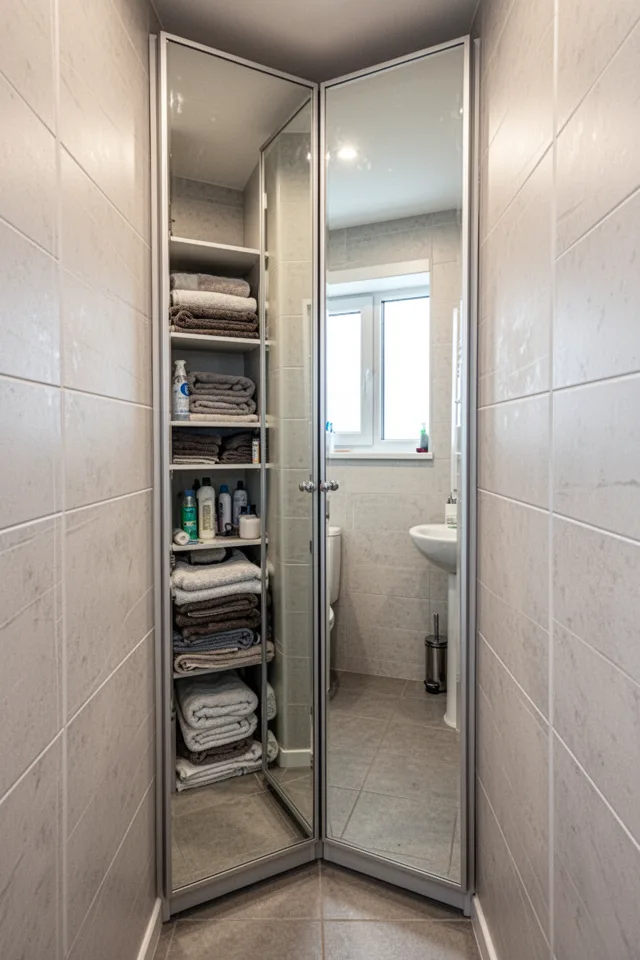
Bathroom corners are almost always empty because they are too narrow for standard storage. I turned one into a floor-to-ceiling mirrored cabinet. The design is like a tall, skinny medicine cabinet built into the corner, with two mirrored doors that swing open. Inside, I have adjustable shelves for toilet paper, extra bottles, and a stash of towels. The mirror reflects the bathroom and visually doubles the space. It cost about $200 to have a local cabinet maker build it from MDF with mirror panels.
The downsides are real. Mirrored doors show every fingerprint and water spot. In a bathroom with steam, you will be wiping the glass weekly. The cabinet is also difficult to install because the corner walls are rarely exactly 90 degrees; any gap looks obvious. I had to use shims and caulk to hide the imperfections. Also, the depth is shallow—only about five inches—so you cannot store large bottles. But for a small bathroom desperate for storage, this is the most effective corner use I have found.
Use anti-fog mirror film or treat the glass with a rain repellent—otherwise every shower leaves the cabinet doors opaque for an hour.
13. The Corner Gallery Wall That Integrates Shelves
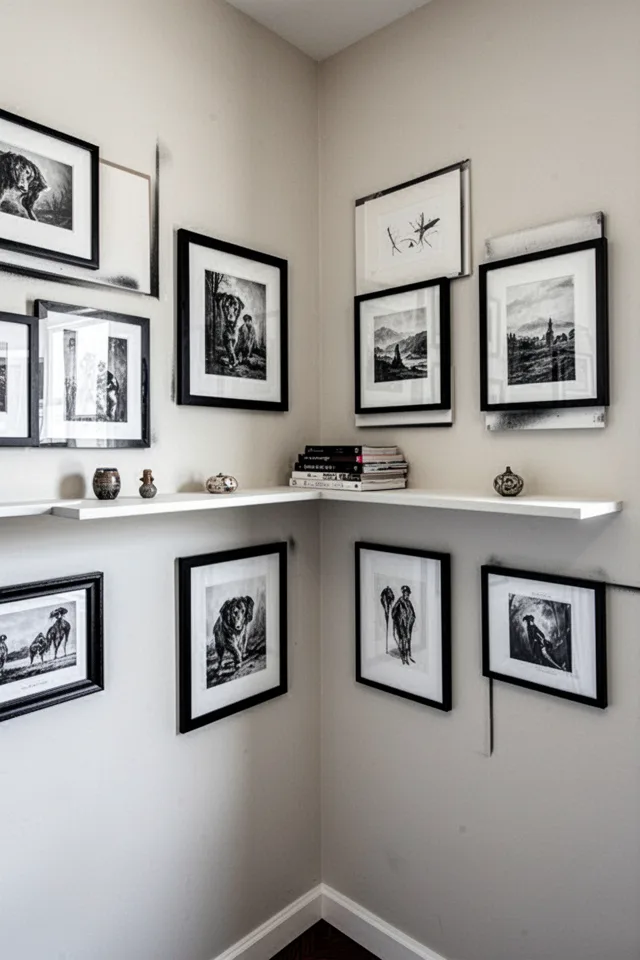
Gallery walls usually stop at the corner because nobody knows how to wrap art around the angle. I solved this by installing a single corner shelf at eye level—about 58 inches from the floor—and then hanging art above and below it on both walls. The shelf acts as a visual anchor that ties the two walls together. I used small frames to prevent the corner from feeling heavy. The shelf holds a few small objects: a ceramic hand, a matcha bowl, a stack of postcards. It turns the corner into an exhibition space.
The practical price: this is not for messy people. The shelf will collect dust, and the art needs to be rearranged if you change your mind. I have re-hung mine three times. Cost is around $40 for a shelf and brackets, plus frames you likely already own. The limitation is that the shelf must be perfectly level, because the eye will notice if it is off when the art aligns around it. Also, don’t overload the shelf—visual clutter will cancel out the gallery effect. Keep it to three or four objects max.
Hang the shelf first, then arrange the art around it. Trying to add the shelf after the art is a recipe for extra nail holes.
14. The Outdoor Corner Bookshelf That Weathers
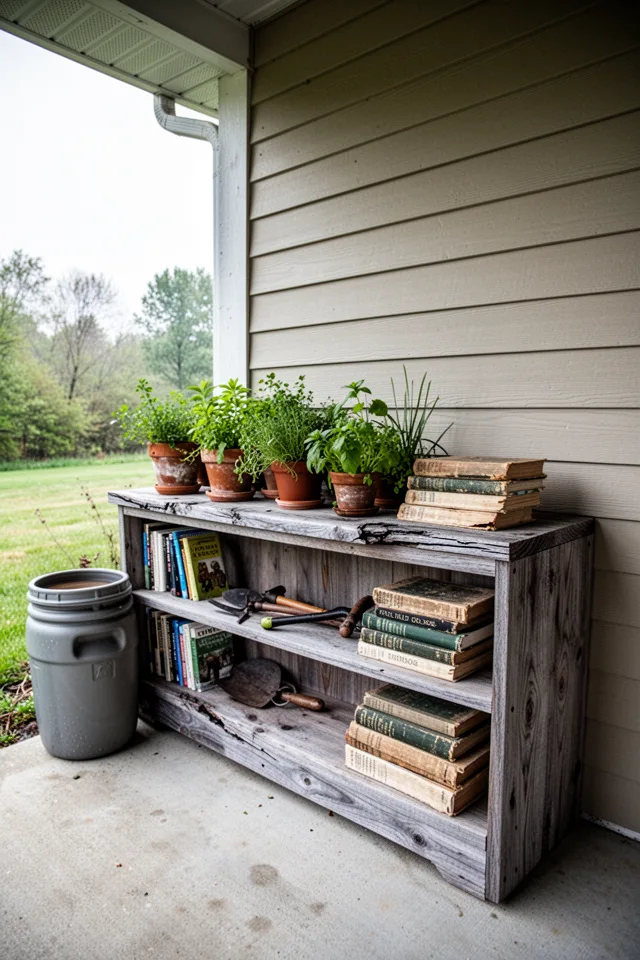
Outdoor corners are even more neglected than indoor ones. I built a low cedar shelf for the covered corner of my patio. Cedar resists rot naturally, but I left it unsealed. After two rainy seasons, it turned a beautiful silver-grey that matches the deck. The shelf is only twenty inches tall, so it functions as a plant stand and a place to stack gardening books. It cost about $60 for cedar planks and screws. The design is simple: a rectangular box with one open side, anchored to the wall.
The reality: outdoor bookshelves are not for fine books. Moisture will warp paper even under a covered porch. I keep water-resistant field guides and magazines I do not mind losing. The wood will check and split—that is part of the look. If you want it to stay pristine, you must seal it annually, and even then, the sun will change the colour. Also, bugs. Spiders love the crevices. I check monthly for webs. But if you accept that outdoor shelves are a little ragged, they add a lived-in charm that no indoor shelf can replicate.
Use stainless steel screws. Galvanized will rust and stain the wood within a year.
15. The Double-Duty Desk Corner That Hides Cables
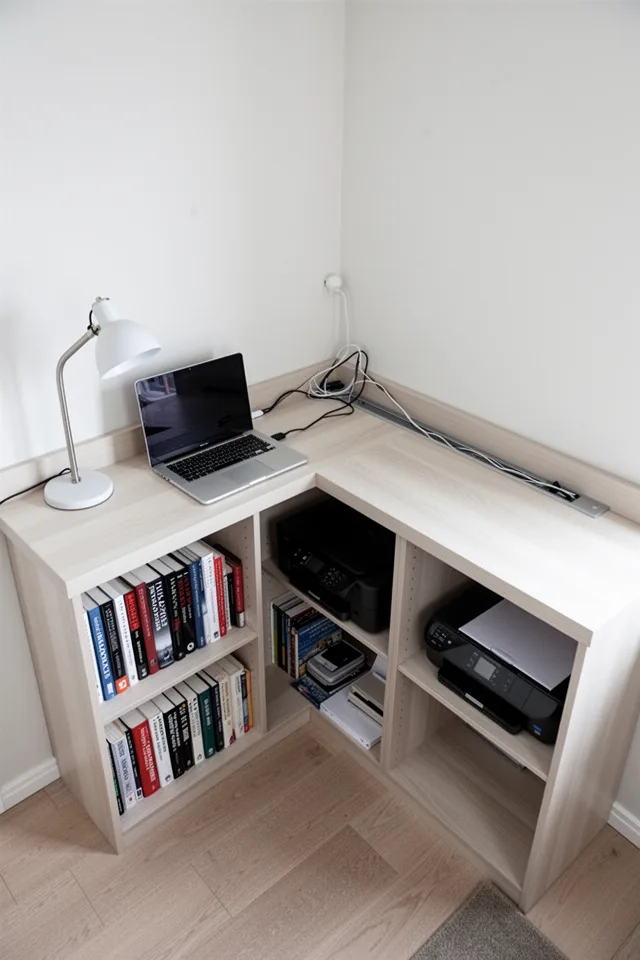
I needed a home office in a corner of my bedroom, but standard corner desks are either huge or flimsy. I built a desk surface that is essentially a wide shelf spanning both walls—about 30 inches deep and 48 inches on each side. Underneath, I built a set of shallow shelves that hold books and a printer. The trick is that the shelves are open, but I used canvas bins for clutter. The entire unit is anchored to the wall. Total cost: $150 for lumber and a desktop IKEA countertop cut to size.
The issue is cable management—because the desk is in a corner, cables from both walls converge. Without a channel, they become a trip hazard. I used a plastic cable raceway along the back edge, painted the same as the wall. Also, the corner itself is a dead zone for reach—you have to stretch to plug something into the outlet behind the desk. I installed a power strip on the surface. This is a good solution only if you are comfortable with some DIY and have the space. It transforms a wasted corner into a functional workstation without a bulky desk.
Measure your monitor height carefully. A shelf that is too low will make you slouch; a shelf that is too high will block the view of the room.
16. The Freestanding Arch That Says “I Meant To”
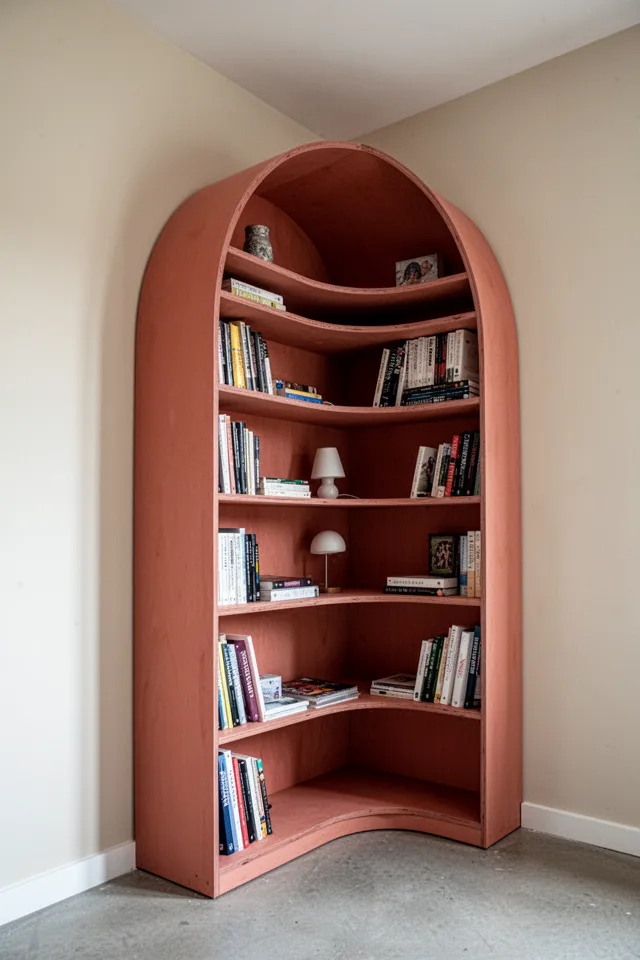
I saw a photo of an arched bookshelf in a magazine and spent a winter building one from plywood. It is not attached to any wall—it stands on its own, like a piece of furniture that happens to be in a corner. The arch creates a frame within the room, and the shelves follow the curve. It holds about sixty books. Because it is freestanding, you can move it to another spot if you rearrange the room. The shape is so strong that even if the shelf is empty, it still looks like a deliberate architectural move.
This is the most expensive item on this list. Building one costs about $200 in plywood and glue, plus hours of cutting curves. A pre-made version can run $400–800. The arch takes up a lot of floor space—you need a corner with at least 36 inches of clearance on each side. Also, it is heavy and awkward to move. I had to disassemble mine to get it through a doorway. But if you want a corner bookshelf that feels like a statement, not a afterthought, this is it. The arch softens the sharp corner and makes the room feel more circular.
Build the arch in two halves that bolt together. You will thank yourself the first time you need to move it.
After living with all these corner bookshelves, here is the decision you need to make: do you want the corner to disappear or become the focal point? If you want it to vanish, go with the window-shelf extension or the doorway tuck. If you want it to hold attention, invest in the arch or the spiral. Most people should start with the ladder shelf—it costs little, requires minimal skill, and gives you room to experiment. Corners are the neglected children of room design, but once you treat them with a little intention, they become the places you naturally drift toward. That sad rubber plant corner eventually became my favorite seat in the house. Yours can too.

