
The first time I stood in my empty basement after the drywall went up, I realized every rec room I had ever seen in a magazine was a lie. They showed pool tables under perfect can lights and sofas that had never held a spilled soda. My space smelled like concrete dust and looked like a beige box. I spent the next three years slowly filling it with things that actually survived real life, and I learned that most advice on this subject was written by people who have never had to clean nacho cheese out of a sofa cushion at midnight.
The conventional wisdom—buy a sectional, put up a TV, add a minifridge—is so bland it should come with a warning label. What nobody tells you is that the wrong choices will make you hate the room in six months. The right ones will have you canceling plans to stay home. This list is not a collection of Pinterest board filler. Every idea here has been lived with, argued about, and in a few cases, rebuilt after the first version failed. I have real opinions about felt thickness, glue smells, and why your basement will never look like a catalog.
1. The Acoustic Wall That Actually Looks Good
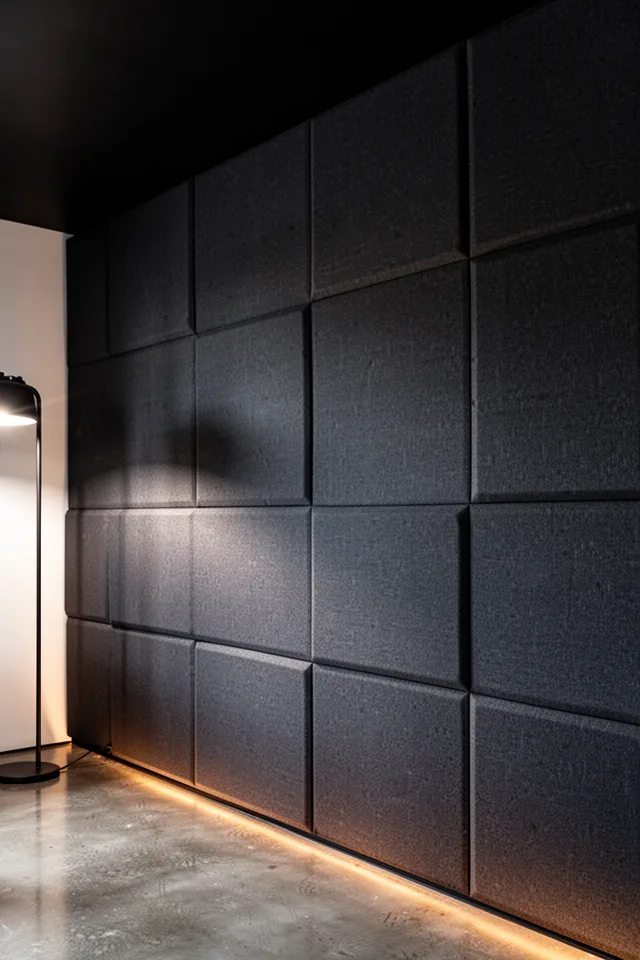
Foam pyramid tiles are a mistake. They crumble, they yellow, and they look like a 2012 gaming den. The version that actually works is fabric-wrapped fiberglass or mineral wool panels, usually two inches thick. You can buy them pre-made from companies like ATS Acoustics or build them yourself with rigid fiberglass, burlap, and a staple gun. I built my own for about $80 per panel, which is half the cost of premade and lets you match the fabric to your room.
Here is the real trade-off: acoustic panels soak up high-frequency reflections beautifully, but they do almost nothing for low bass boom. If your rec room has a concrete slab and drywall, you will still get a muddy low end. The solution is to pair panels with a thick area rug and a heavy curtain over any bare wall. Also, do not mount panels directly against the wall. Leave a two-inch air gap for better absorption. I used simple cleats and a French cleat system—cost me about $15 in lumber.
One thing most guides skip: fabric choice matters. I used Guilford of Maine FR701, which is flame-rated, feels like a nice upholstery, and does not attract dust like cheap felt. It comes in about 50 colors. The room went from echoey to velvety in under an afternoon.
If you can hear the person in the next seat while a movie is playing, you wasted your money on a TV.
2. The “Third Place” Lighting System
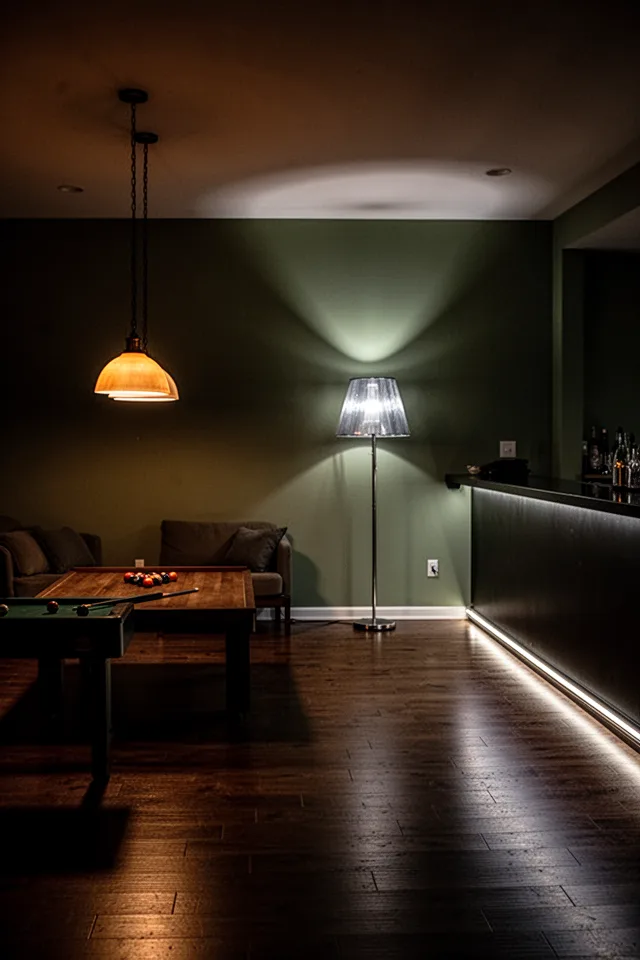
Overhead lights ruin everything. The standard can-light grid turns a room into a doctor’s office. What you want is layered lighting: one ambient source (a big pendant or flush-mount with a dimmer), one task source (a floor lamp for reading or board games), and one accent source (a strip light behind a shelf or under a console). I run my rec room off three dimmer switches mounted at the door. It cost about $90 for the dimmers and another $150 for the fixtures, but the difference is psychological. The room feels smaller and safer, which is exactly what a rec room should feel like.
The trick is color temperature. Do not mix warm and cool bulbs. Pick 2700K for everything. Anything higher will make the room feel like a hospital waiting room, especially if you have a TV. I tried 3000K once and my face looked green on Zoom calls. Also, use lamp shades with a translucent inner lining. Direct glare from an exposed bulb makes everyone look tired. Spend the extra $10 on a shade with a diffuser.
Budget warning: good dimmers are around $20 each, but the cheap ones buzz. I use Lutron Diva dimmers. They are silent. Do not buy the off-brand slider dimmers from the hardware store—they hum and flicker with LEDs.
Three light sources, one dimmer per source. That is the entire secret. Nothing else matters.
3. The Modular Sofa That Breaks Apart
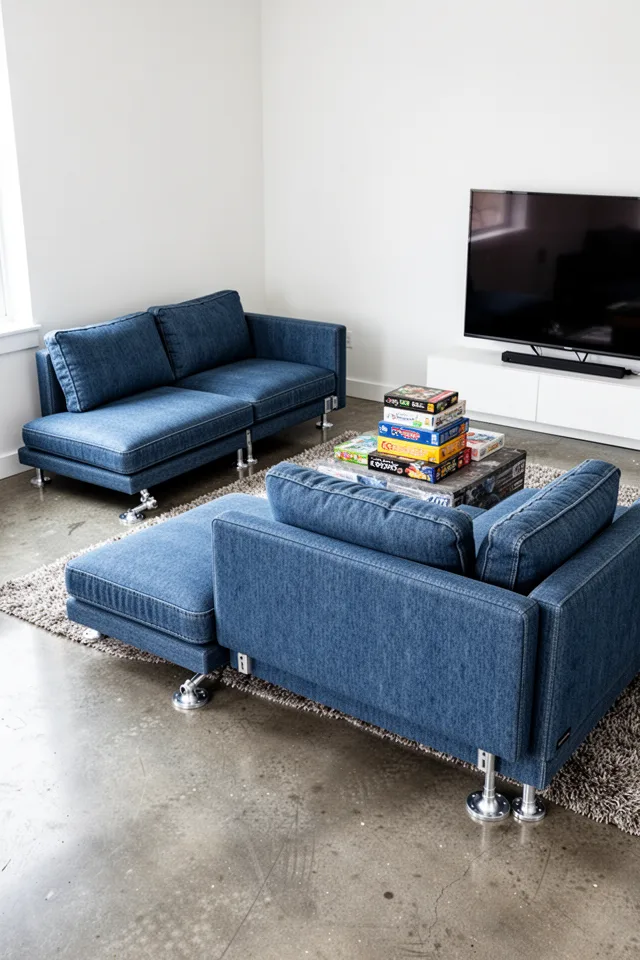
Do not buy a sectional. A sectional is a commitment. It dictates the room layout forever. Buy a modular sofa system where each seat is a separate unit that can be moved, rotated, or removed. I use a system from a brand called The Bright Angle (not cheap, but worth it), but you can find similar from Rove Concepts or even Room & Board. The point is that when your board game night needs a U-shaped conversation pit, or you want to push everything against the wall for a dance party, you can do that in ten minutes.
The cushions matter. Look for high-resilience foam wrapped in down or a down-alternative. Cheap foam will sag after one winter. I learned this the hard way. A modular sofa that costs under $1,500 usually has furniture-grade foam, which lasts about three years before it starts looking lumpy. The trade-off is that modular sofas are heavy. Moving a single seat across the room is manageable, but doing it every week gets old. I keep a set of furniture sliders under the sofa for this reason.
Fabric choice: performance polyester is the only option for rec rooms. It spills coffee like a hydrophobic shield. I spilled a full glass of red wine and wiped it up with a paper towel. Zero stain. Do not use velvet or linen, no matter how pretty.
Your sofa should not dictate your party. Your party should dictate your sofa.
4. The Vintage CRT Gaming Setup
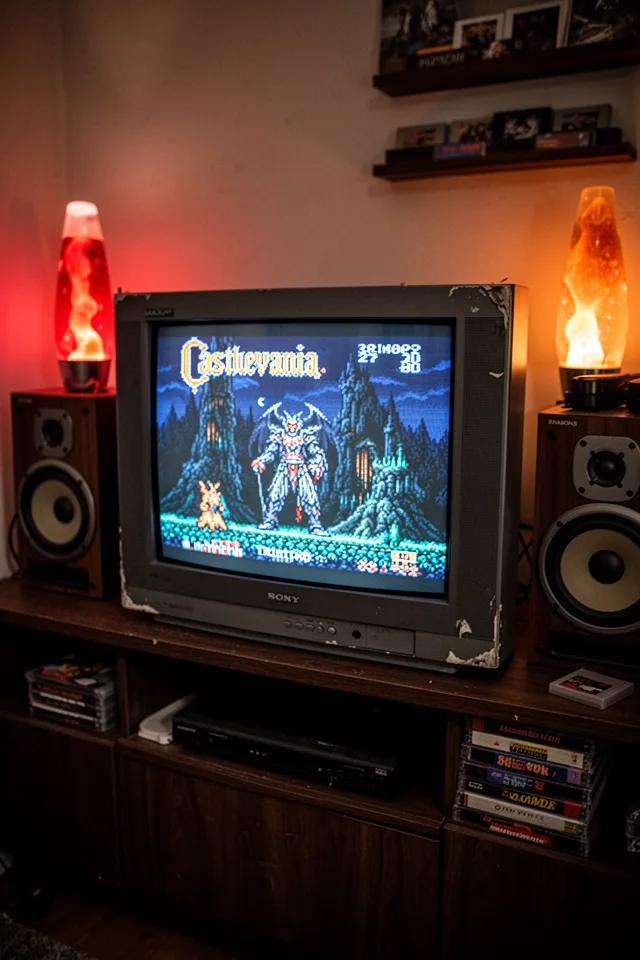
If you play any retro games—Nintendo, Sega, PlayStation 1—you need a CRT. Modern TVs turn pixel art into a blurry mess and add lag that makes platformers feel like wading through syrup. A good CRT, like a Sony Trinitron or a JVC D-Series, gives you zero lag and perfect scan lines. But here is the reality check: these things weigh about 100 pounds. A 27-inch Trinitron is a hernia risk. I moved mine with a hand truck and still tweaked my back. You need a solid, low console that can hold that weight without bowing.
Finding a CRT is the hard part. Check Facebook Marketplace, estate sales, or thrift stores. Expect to pay $20 to $50 if you find one. The trade-off is that you are buying a 20-year-old electronic that may fail. Capacitors dry out. If you are not comfortable with basic soldering, factor in $100 for a repair. Also, CRTs emit a faint high-pitched whine that some people find annoying. I do not notice it, but my wife does. We solved it by putting the CRT in a room with a door. Sound familiar?
Get a component cable adapter if you are playing PlayStation 2 or Dreamcast. It makes a massive difference. I use a RetroTINK for upscaling to modern monitors, but for true authenticity, nothing beats raw composite into a CRT.
If you have never felt the weight of a CRT while trying to get it down a flight of stairs, you are not ready for retro gaming.
5. The Board Game Table That Hides
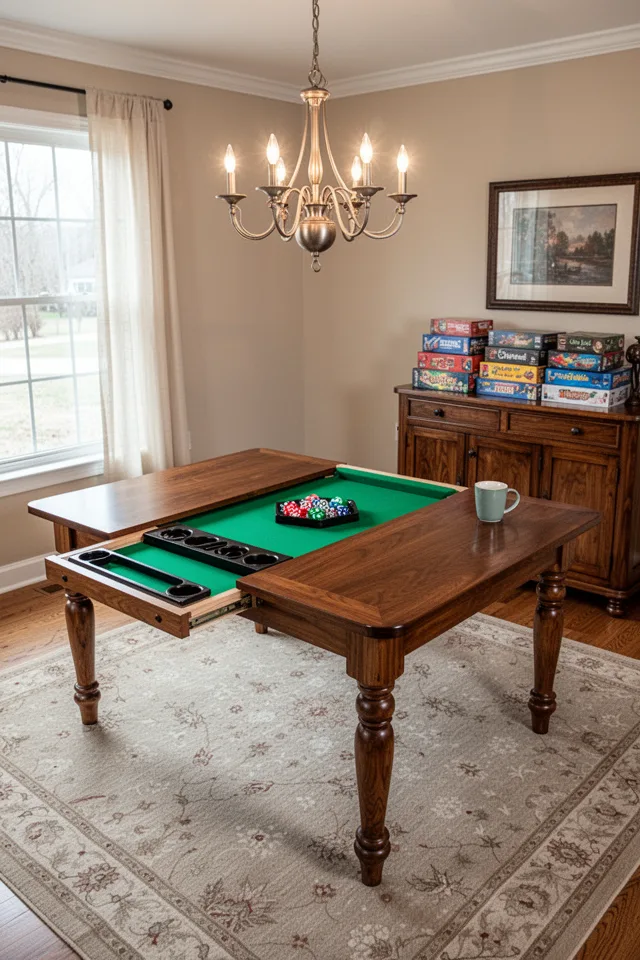
Most board game tables are ugly and expensive. They look like conference room furniture and cost $3,000. The better version is a convertible dining table with a reversible top. One side is standard wood for eating, the other is felt for games. I built mine using plans from a company called Game Theory Tables, but you can also buy ready-made from Legacy Game Tables. The key is the recessed playing surface. It should be about half an inch deep so dice do not roll off, with built-in cup holders that do not wobble.
The trade-off is real. The felt surface gets dirty fast—snack crumbs, spilled drinks, greasy fingerprints. I vacuum mine after every session and spot-clean with a lint roller. Also, the recessed area traps small pieces. If you play games with hundreds of tokens, plan on crawling under the table to find them. A good rule: use a tablecloth when eating, and flip the top only for game nights. The mechanism is typically a spring-loaded hinge that costs around $200. Make sure it is soft-close, or you will slam your fingers.
I paid about $1,200 for the materials and completed the build in a weekend. A pre-made version of similar quality runs $2,500. If you are handy, the DIY route saves a chunk of money and lets you customize the wood stain. I used walnut with a matte polyurethane finish. It scratches over time, but that just makes it look older. I like that.
You will eat dinner on it five nights a week and play games on it one night. Design for the five nights, not the one.
6. The Podcast / Streaming Desk
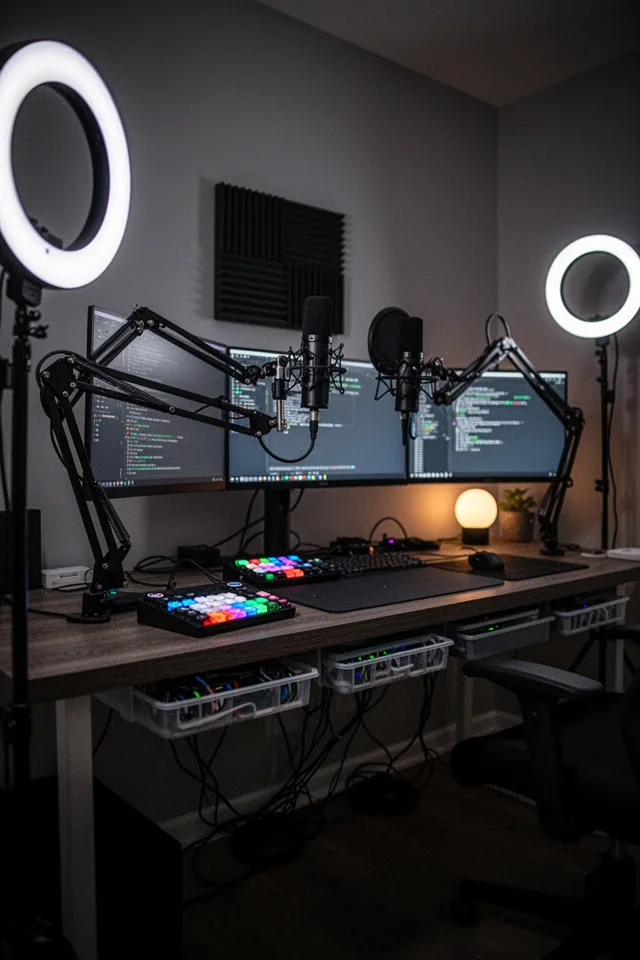
If you start a podcast or streaming setup, you will quickly realize that a regular desk is terrible for audio. The mic picks up desk vibrations, keyboard clicks, and the hum of the PC. The fix is a floating desk mounted to the wall, or at least a rubber isolation pad under the microphone stand. I use a standing desk from Flexispot with a rubber mat underneath. It cost about $350 and is shockingly stable. The real investment is in acoustic treatment behind the mic. A single 2×4 foot acoustic panel hung vertically behind your head will kill most room echo.
The trade-off is that a streaming desk eats space. The wide monitor arms, the boom arm, the audio interface, the cable mess—it all spreads out. I learned to keep cables bundled with Velcro ties and route them through a under-desk tray. For about $40, you can make it look clean. Also, microphone choice matters: a dynamic mic like the Shure SM7B rejects background noise much better than a condenser. I switched from a condenser and my audio quality jumped dramatically.
One mistake I see constantly: people put the mic directly in front of the monitor. That picks up fan noise. Place it to the side at a 45-degree angle. And set your gain low. You can always turn up the volume in post, but you cannot remove fan hum.
Your audience will forgive a mediocre video. They will not forgive a tinny, echoey voice.
7. The Indoor Putting Green That Looks Like Grass
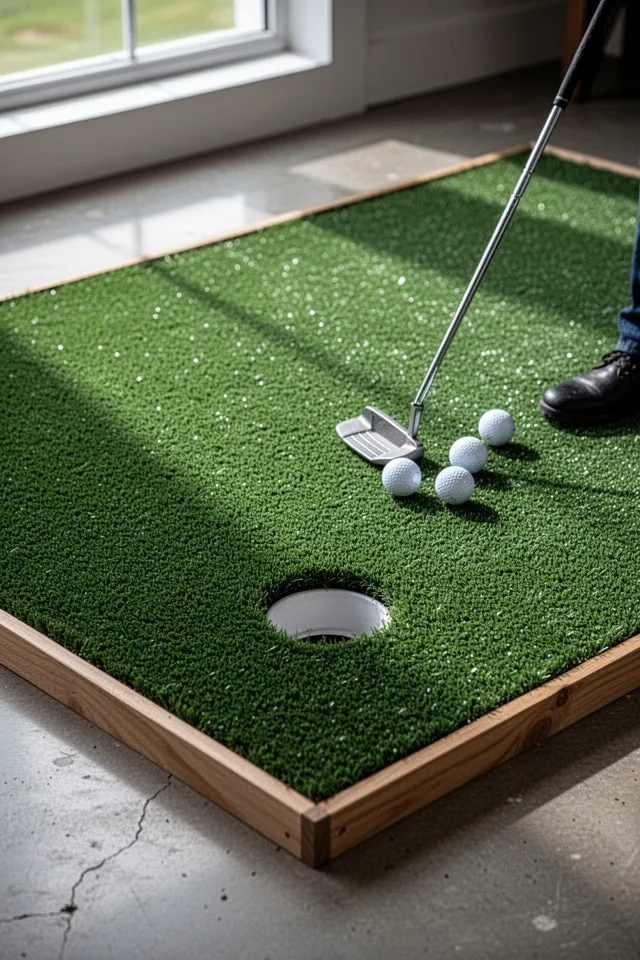
Indoor putting greens are either cheap felt that rolls ridiculously fast, or expensive turf that feels like outdoor carpet. The sweet spot is a nylon-blend turf with a sand infill. The sand weighs down the turf and gives it a realistic roll speed. I built a 4×10 foot green in my basement for about $300 using turf from a company called SynLawn (Sienna series) and a sheet of 1/2-inch plywood as the base. The process: cut the plywood, lay a 1/4-inch foam underlayment, stretch the turf, staple it, and cut the hole. Add sand infill with a drop spreader.
Trade-off: sand infill is messy. It migrates out of the turf and onto the floor. I vacuum it up weekly. Also, the turf will absorb spills if you put it near a bar. I learned to seal the edges with a bead of silicone, but even then, a spilled drink will leave a shadow. The other issue is that the turf gets hot in direct sunlight. My green is in a basement, so not a problem, but if yours is near a window, consider UV-resistant turf.
For under $30, you can buy a putting cup with a flag. Do not skip this. The hole needs to be cut cleanly with a utility knife, and the cup should be set flush with the turf. I used a standard cup from a hardware store and set it in a small concrete anchor.
Nothing will improve your short game faster than a putting green you can walk to barefoot in your pajamas.
8. The Home Bar With Ice Maker That Doesn’t Hum
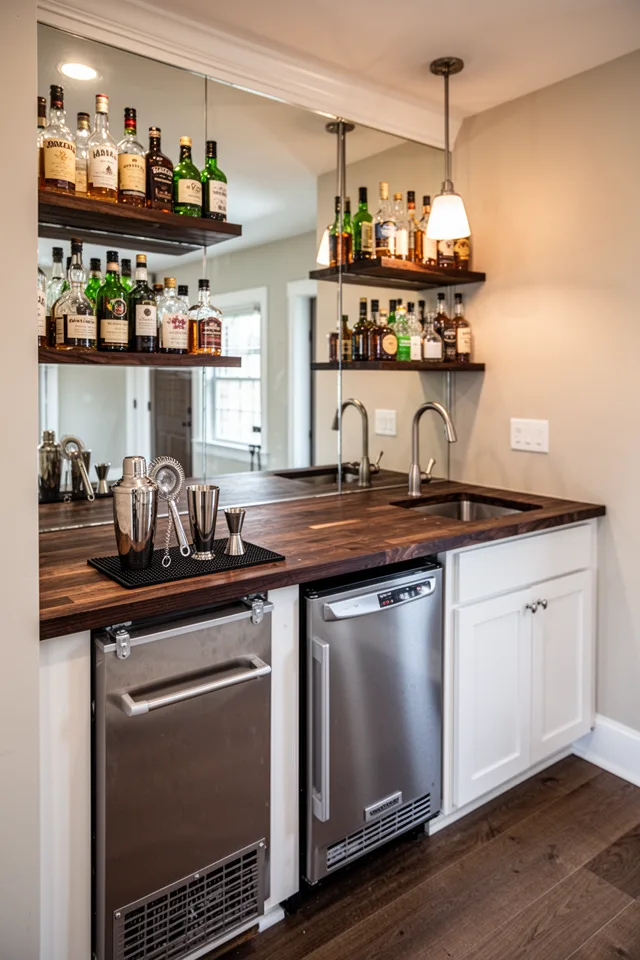
A home bar without ice is a sad desk. But a countertop ice maker is a noisy, condensation-producing disaster. The better option is an undercounter ice maker from a company like NewAir or EdgeStar, which produces bullet ice or even clear cube ice. They cost around $400 to $800, drain into a bucket, and are much quieter than the cheap countertop models. I installed mine under a built-in bar counter in a weekend. It requires a dedicated electrical outlet and a drain line. I plumbed it into a sink drain for about $60 in PVC parts.
The trade-off: these units produce a specific shape of ice. Bullet ice melts fast but is easy to chew. Clear cube ice is better for cocktails but takes longer. Also, the compressor makes a low hum that you notice when the room is quiet. I built a small sound-dampening box around mine using foam board and mass-loaded vinyl. It cut the noise by half. Another issue: they need regular cleaning to prevent mold. Every three months, I run a vinegar solution through the water line.
If you cannot plumb, get a portable ice maker that has a two-gallon reservoir and a pour-out feature. Cost about $200. It will not drain, so you have to empty the bucket manually, but it is easier than making trays.
Ice is the difference between a cocktail and a juice shot. Do not skimp on the machine.
9. The Climbing Wall That Does Not Ruin Your Floor
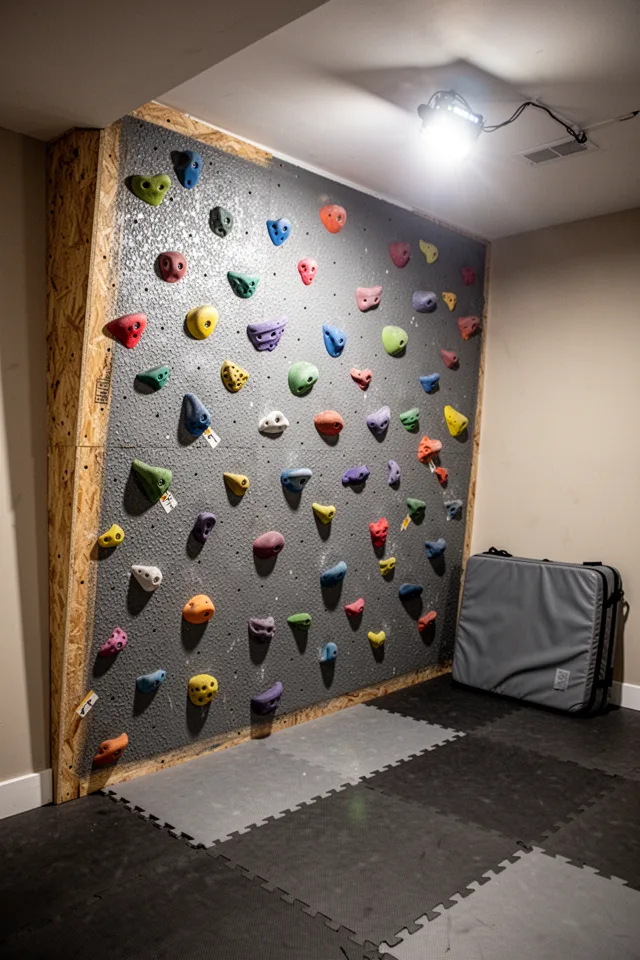
A climbing wall in your rec room is a statement. It says “I have no fear of drywall repair.” I built a 8×12 foot overhanging section (leaning about 10 degrees) in my basement. It cost about $400 for 3/4-inch plywood, 2x4s for framing, climbing holds from Atomik, and a textured paint called Rock Climbing Wall Texture. The total build took two weekends. The key is a strong frame because the wall will flex without it. I used 2x4s every 16 inches and cross-braced at the corners.
The trade-off: climbing holds wear out. The rubber coating on screw-on holds lasts about a year of regular use before they get slick. You can buy replacements for about $2 each. Also, the textured paint sheds tiny particles for months. I vacuum the floor every week. The biggest danger is hitting the floor. Even with interlocking foam mats, a fall from the top could injure an ankle. I added a 4-inch thick crash pad from Metolius for about $150. It takes up space but is non-negotiable.
If you have low ceilings, forget a vertical wall. Build a horizontal bouldering traverse along one wall. It is safer and uses the whole length.
You will not use it every day. But when you do, you will never want to go to a gym again.
10. The Record Listening Station (Not Just a Shelf)
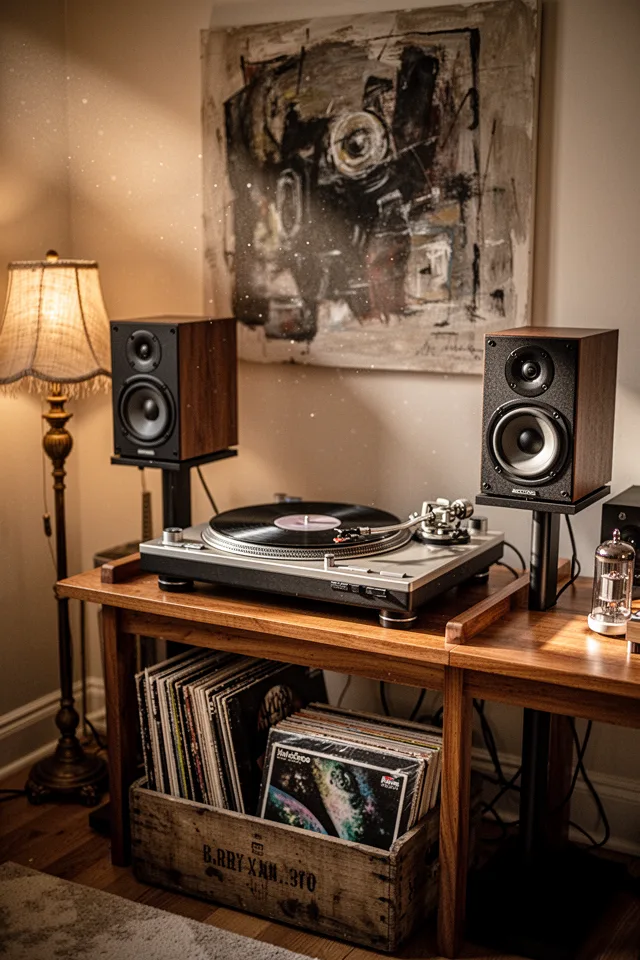
A turntable sitting on a bookcase with speakers on the same shelf is not a listening station. It is a vibration machine. The stylus picks up the speaker vibrations and you get distortion. You need isolation. The turntable should be on a separate, heavy surface. I use a solid block of butcher block countertop on a steel frame. Cost about $200. Speakers must be on stands or on a different piece of furniture. I use monolith stands from Sanus, about $60 per pair. Fill them with sand for stability.
The trade-off: vinyl is a warm hobby, but it is also expensive. Records are $20 to $40 each now. Storage is a problem. A single crate holds about 50 records, and you will fill it faster than you think. I built a custom shelf using 1×10 pine boards for about $30. Also, you need to clean records. A carbon fiber brush costs $15 and helps reduce static. If you skip cleaning, the pops and clicks become a distraction.
Speaker placement matters. I used the triangle rule: speakers two feet from the wall, four feet apart, aimed at your listening chair. Getting the toe-in right took an afternoon. Do not rush it.
If you are still using a Crosley suitcase, you have not heard your records yet.
11. The Workshop Corner That Earns Its Keep
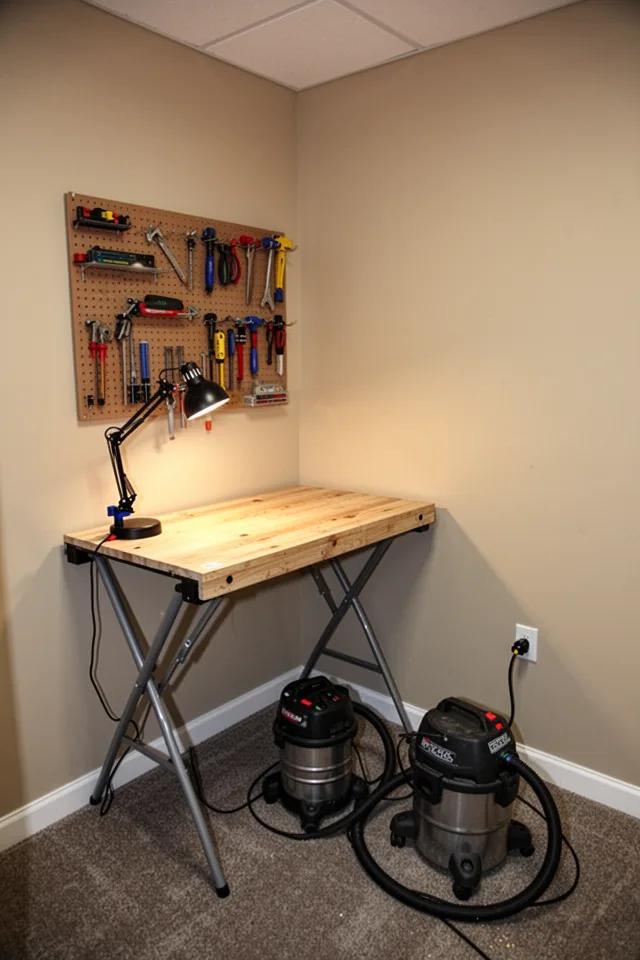
Every rec room needs a place to fix things. Not a whole woodshop—just a corner where you can glue a leg back on, replace a controller battery, or build a small shelf. I use a folding workbench from Costway ($80) that folds flat against the wall when not in use. Above it, a 4×4 foot pegboard with hooks holds the tools I use most: hammer, screwdrivers, pliers, a level. The whole setup is about $150 total, including the pegboard and a basic tool set.
Trade-off: dust. Any sanding or cutting will send particles into your rec room. I keep a cheap shop vac plugged in and run the hose under the bench. I also put a roll-up mat on the floor for easier cleanup. The other issue is lighting. A single overhead light casts shadows. I use a clamp-on task lamp with a daylight bulb, cost about $20. That fixed the shadow problem completely.
One thing I learned: anchor the pegboard to studs. Hanging tools is heavy. I used two toggle bolts per stud. The first attempt failed after a month.
A rec room without a toolbox is a rec room that requires constant trips to the basement.
12. The Mini Home Gym With Rubber Flooring That Does Not Stink
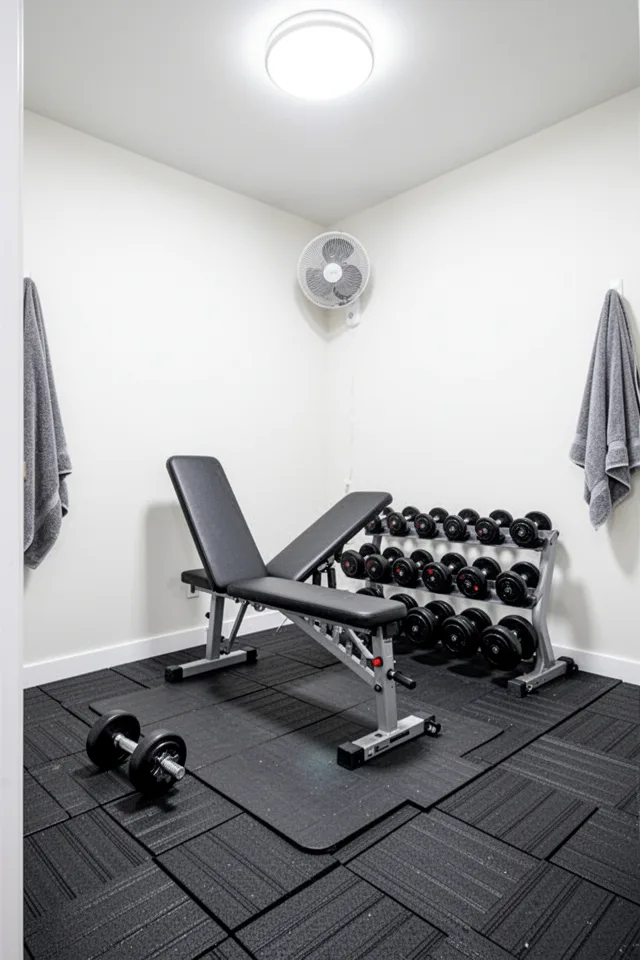
Rubber flooring is the backbone of any home gym. But the cheap interlocking mats from the hardware store reek of tire rubber and off-gas for weeks. The better option is recycled rubber rolled flooring or high-density rubber tiles from brands like HorseMats or RubberForm. I used 4×6 foot horse stall mats from Tractor Supply, about $50 each. They are 3/4-inch thick, weigh 100 pounds each, and smell like a barn for about a week. After that, the smell fades completely. They absorb drops well and do not dent.
The trade-off is installation. These mats are heavy and stiff. You need a utility knife with a fresh blade, and you will still struggle to cut straight lines. I measured twice and cut once, and still got wavy edges. Also, the mats have a texture that catches dust. I vacuum them with a shop vac every few days. Sweeping does not work—the texture traps dirt.
Do not buy the thin foam puzzle mats from Amazon. They compress under weight and tear. Your deadlift will turn them into puzzle pieces.
If your gym floor smells like a tire factory a month after installation, you bought the wrong stuff.
13. The Library Wall With Rolling Ladder (Without Breaking Your Budget)
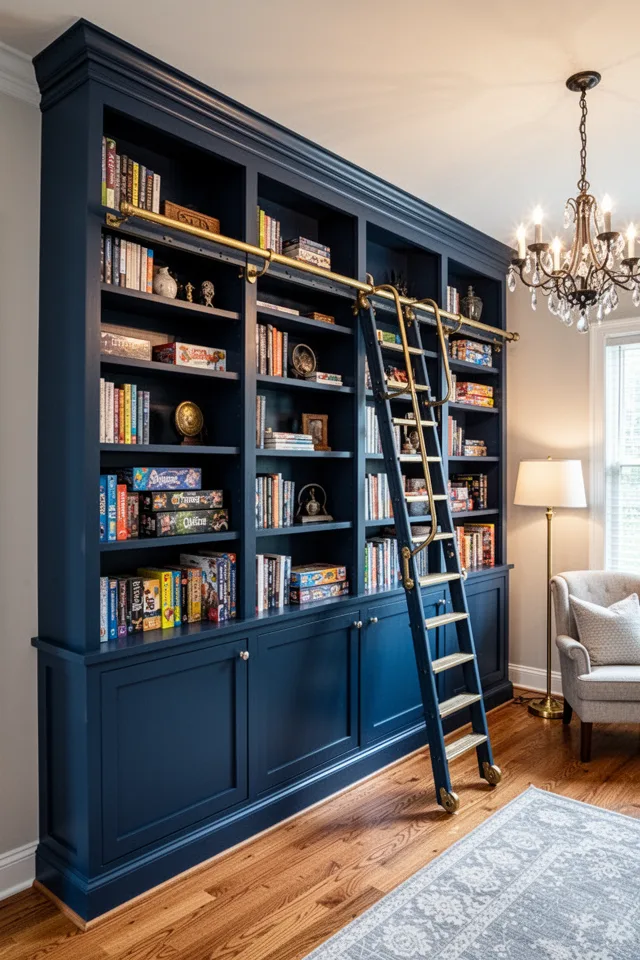
A library wall with a rolling ladder is the kind of detail that makes a rec room feel like a room you pay rent for. But a custom built-in with a ladder track can easily hit $3,000. The hack: buy a standard IKEA Billy bookcase setup (the tall ones), bolt them together, and add a custom rolling ladder from a company like Ladder Rack or Create a Library. The ladder track attaches to the front face of the bookshelves. I did this for about $600 total—$400 for the Billy shelves, $200 for the ladder and track.
The trade-off is that the Billy shelves are not deep enough for large art books or board game boxes. The standard depth is 11 inches. Most rec room items are bigger. I solved this by using the deeper Billy shelf units (the ones designed for CDs, which are about 8 inches deep) on the bottom row, and standard on top. Or you can build your own shelves from plywood for around $100 in materials, but that takes a weekend and a table saw.
Also, the rolling ladder is not great on carpet. The wheels need a smooth surface. I have hardwood, so it glides fine. If you have carpet, consider a rail system that mounts to the wall instead of the floor.
You do not need a library to have a library wall. You just need enough books to fool the eye at first glance.
14. The Meditation / Yoga Nook That Does Not Scream “Woo-Woo”
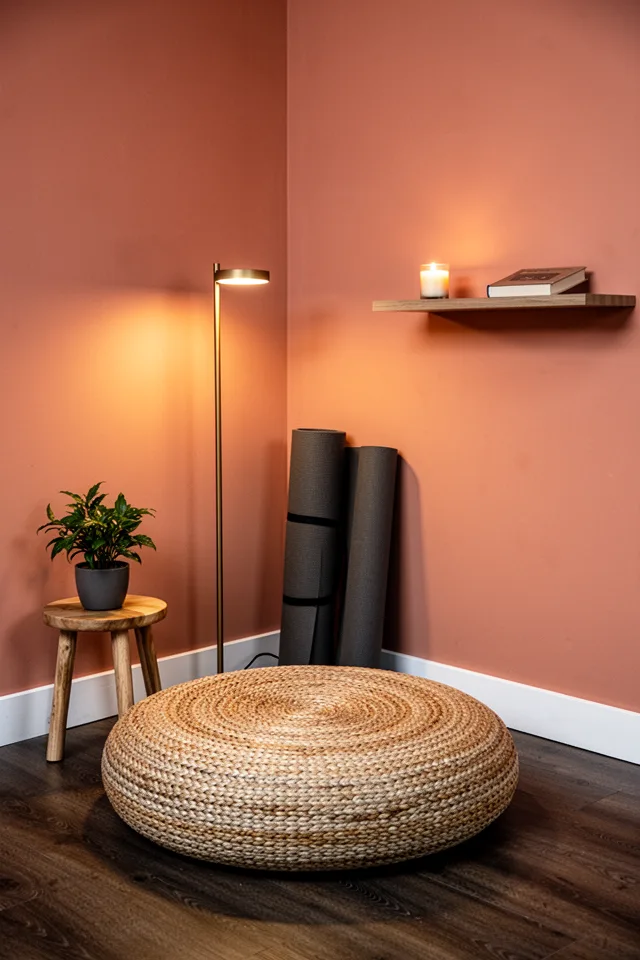
Most rec rooms are designed for high energy: pool, games, movies. But if you live there, you also need a place to sit still. A meditation nook does not have to be a whole room. It can be a corner with a floor cushion and a lamp. The trick is to keep it minimal—no clutter, no inspirational quotes on the wall, no crystals. I have a large round cushion from MoonLoom (about $80), a small side table, and a floor lamp with a dimmer bulb set to 2700K at 20% brightness. That is it.
The trade-off is that the corner will collect dust and loose items if you do not maintain it. I keep a small basket for the yoga mat and a hook for the cushion when not in use. Also, the cushion fills with cat hair. I bought a removable cover that is machine washable. That solved the grooming issue.
This idea is the cheapest on the list: under $150 total, including the cushion and lamp. But it might be the one you use most, because sometimes you just need to sit on the floor and stare at a candle for ten minutes.
You do not need a Himalayan salt lamp to own a corner. You need a floor, a cushion, and permission to stop.
15. The DIY DJ Booth That Does Not Fall Apart
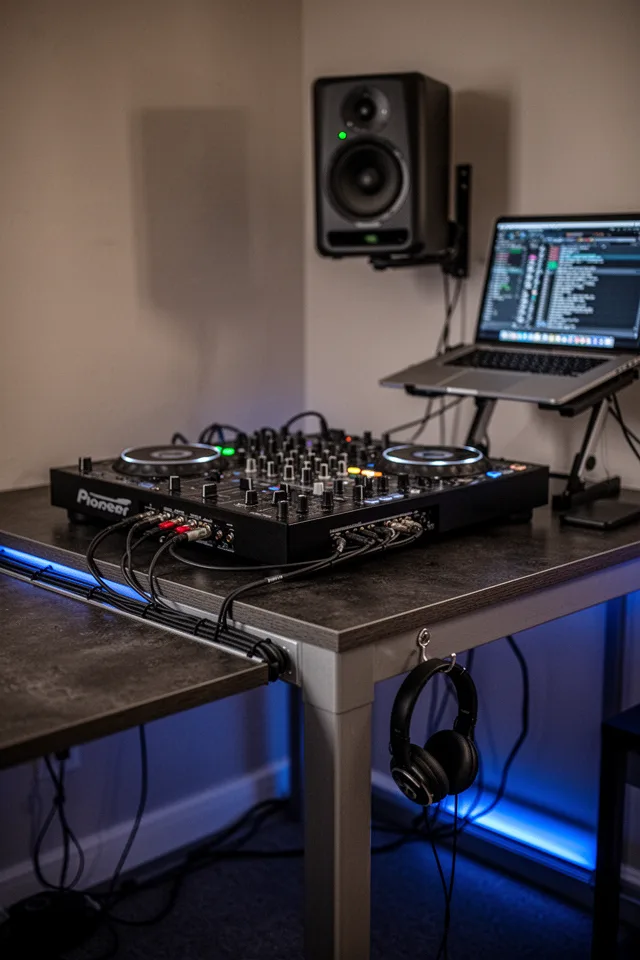
DJ gear is heavy, and most folding tables cannot handle the weight of a controller, a laptop, and the torque of scratching. I built my DJ booth using a 4×2-foot butcher block countertop from IKEA (the KARLBY, about $180) mounted on two heavy-duty sawhorses from Crew (about $40 each). The result is rock solid. The top is 1.5 inches thick, so no flex. I added a cable management tray underneath for about $15. The whole thing cost under $250.
The trade-off is that a butcher block is heavy—about 60 pounds. Moving it requires two people. Also, the sawhorses are adjustable, but they can wobble if the floor is uneven. I added small rubber shims under the feet. The other issue is monitor placement. Studio monitors should be at ear level and equidistant from your head. I wall-mounted mine using foam isolation pads to prevent vibration.
If you are not DJing, this setup works as a general purpose standing desk. I use it for video calls during the week. Multipurpose is the soul of a rec room.
A wobbly table will make every mix sound like a mistake. Build for the drop, not for the setup.
Conclusion
If you are standing in an empty rec room right now, you have a choice. You can fill it with the same beige sectional and can lights that everyone else has, or you can build a room that actually matches how you live. The best rec rooms are not the ones that look finished on the first day. They are the ones that get changed three times, where the acoustic panel falls off and you screw it back, where the felt on the game table develops a wine stain that becomes a story.
Where should you start? If you only take one idea from this list, make it the lighting system. That dimmer switch and three light sources will change the feel of any room, no matter what else you put in it. Everything else is negotiable. But start with light. The room will tell you what comes next.
I built my rec room slowly. Some parts took a weekend, some took a year. The only rule I kept was this: if I did not want to be in it at 11 PM on a Thursday, I had failed. My room passes that test now. I hope yours will too.

