
Last Saturday, I spent three hours trying to pick a paint color for my hallway. Not painting—just picking. Six swatches taped to the wall, each one looking wrong in the afternoon light. The problem wasn’t the colors. It was the gap between what the internet told me would look effortless and what actually happens in a real house with real light, real dust, and real life. That gap is where most weekend projects die.
The standard listicle advice—“add plants,” “use neutrals,” “declutter”—isn’t wrong, it’s just useless. It tells you the destination without showing you the path. It doesn’t account for the way gravel shifts under a gate, how cheap hardware tarnishes in six months, or why that clever Etsy organizer will sag under the weight of your keys. I’ve tried the obvious stuff and the not-so-obvious stuff. I’ve painted things I shouldn’t have, installed things that fell off, and learned which projects actually hold up over time.
This list isn’t a roundup of what’s trending. It’s 19 projects I’ve lived with, ruined, fixed, and kept. Each one comes with a real constraint, a real cost estimate, and a honest answer to the question: will this still look good next year?
1. Replace Switch Plates With Wood
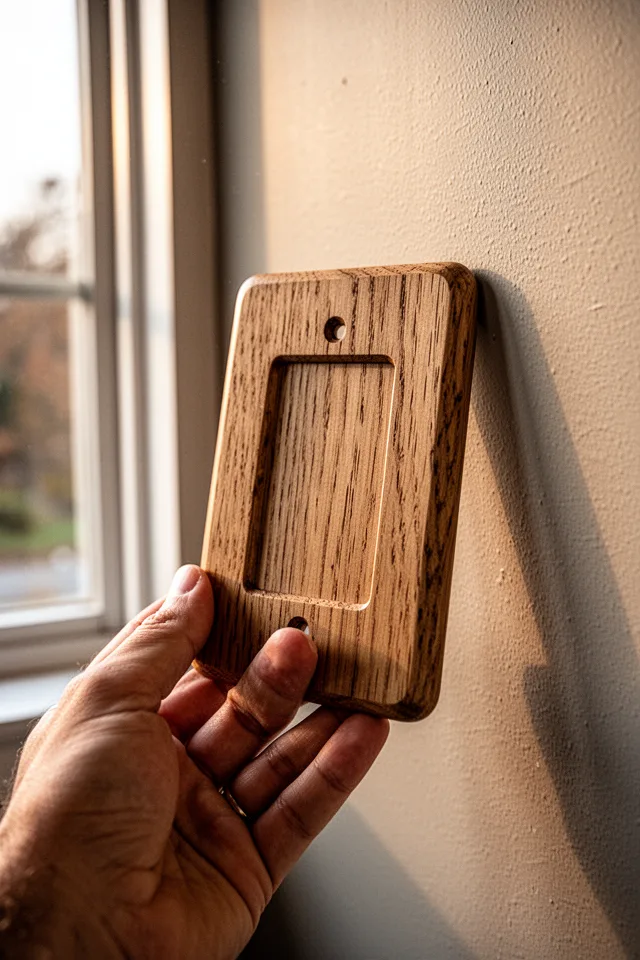
The cheapest way to make a room feel intentional is swapping out those beige plastic switch plates for pieces of wood. I’m not talking about the overpriced designer ones. I’m talking about a pack of unfinished oak or walnut blanks from a craft store—under $2 each. Sand them lightly, apply a coat of Danish oil, and screw them in. The difference is immediate. Light bounces off the grain instead of getting swallowed by cheap plastic. Touching them feels better too, which sounds ridiculous until you do it.
Trade-off: Wood moves. In humid climates, those plates can warp slightly over a year. I live in a dry climate and haven’t had issues, but if you’re coastal, seal them with polyurethane. Also, you’ll need a small countersink bit so the screw heads sit flush. Skip that and you’ll feel the screw every time your hand passes over it.
The cost is under $15 for a whole room, and the result makes guests ask, “Did you do that yourself?”
2. Install a Magnetic Knife Strip—Out of Sight
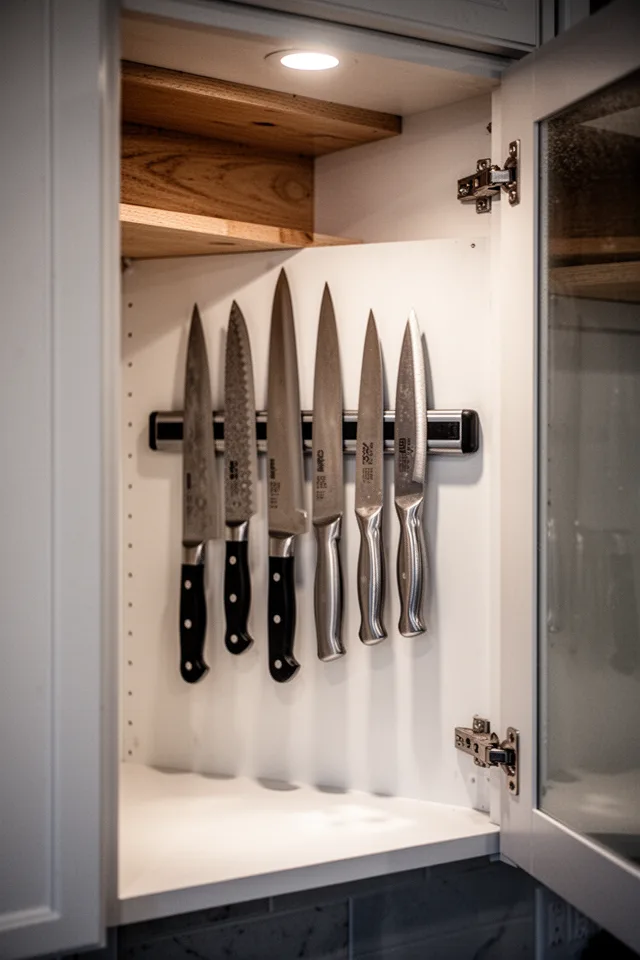
Every kitchen has one wall where you want to hang knives but can’t because the backsplash is wrong, or the wall studs are in the way, or you just don’t want your cooking space to look like a surgical theater. The solution is mounting a magnetic strip to the inside of a cabinet door. I did this three years ago and it’s still one of my favorite decisions. The knives are accessible, hidden, and never cluttering the counter. You just need a strip that’s strong enough—cheap ones lose magnetism fast—and a cabinet door that clears the contents when opened.
The trade-off is cabinet clearance. I’ve seen people damage knives by closing the door into a stack of plates. Measure twice. Also, if your cabinet door is warped or doesn’t close flush, the vibration will slowly loosen the screws. I used a thin rubber gasket between the strip and the door—solved it.
The upgrade costs around $25 and frees up an entire drawer.
3. Paint an Interior Door Black
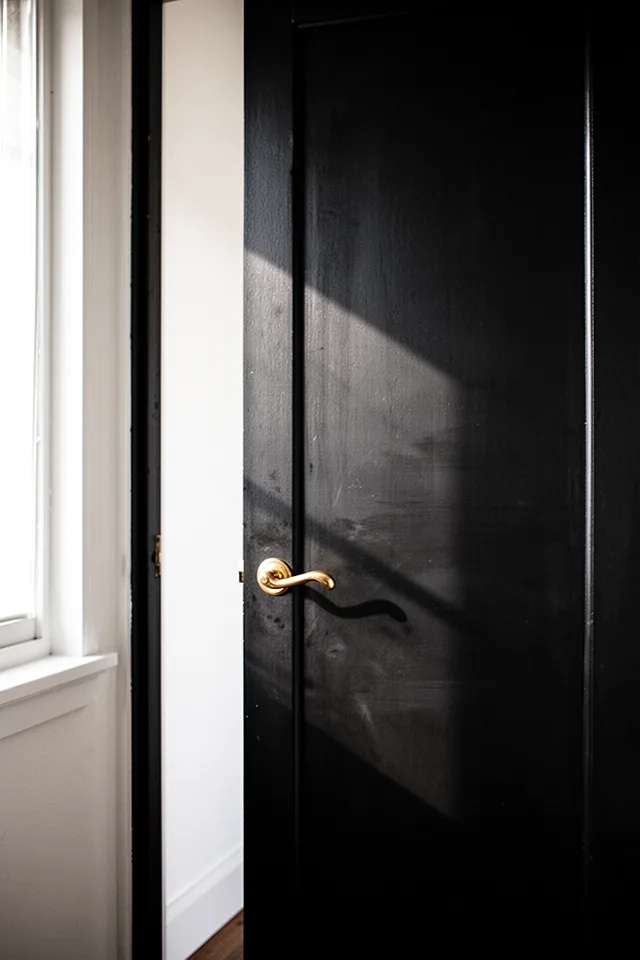
I’m not a “paint everything black” person—I’ve hated more dark rooms than I’ve liked. But painting a single interior door in a high-traffic room? That works. The door becomes a frame for the space, grounding the wall color and giving the eye a place to rest. I used Benjamin Moore’s Black Satin in an eggshell finish on a hollow-core door and it completely changed the feel of my hallway. Suddenly the white walls felt crisp, not sterile.
Real talk: hollow-core doors are cheap and don’t always take paint well. You need a quality primer or the grain will telegraph through. Also, black shows every fingerprint. I learned that the hard way a week after painting. I now use a semi-gloss finish for the top and bottom panels but keep the flat on the center—reduces fingerprint visibility. About $30 for a quart of good paint, plus a small foam roller.
One door costs under $40 and gives an entire room a focal point without any renovation.
4. Build a Simple Cinder Block Bench
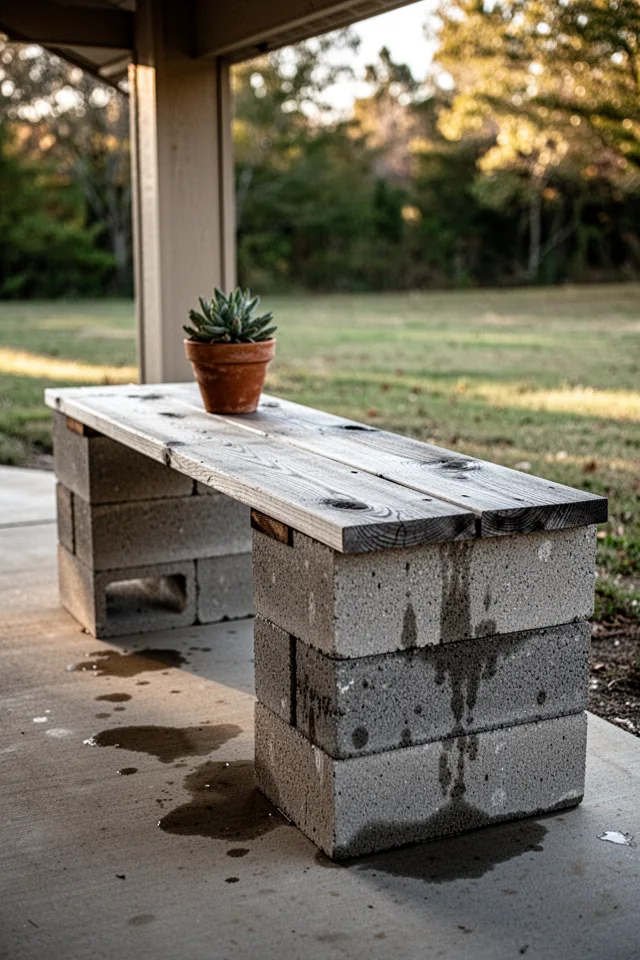
I built this bench six years ago after seeing one in a magazine that cost $800. I built mine for $45. Two 2×10 pine boards, eight cinder blocks, and a bottle of linseed oil. The trick is stacking the blocks in pairs with the open side facing down, then laying the boards on top. No fasteners. No tools. It’s a temporary solution that somehow becomes permanent because it works perfectly.
Over time, the wood will check and crack if left untreated. I used linseed oil for the first two years, then stopped. Now the boards are silvered and split in a way I actually prefer. The blocks shift if someone sits heavily on one corner, so I set them on a gravel base to prevent sinking. Total cost under $60, but you’ll need a few inches of gravel underneath for stability. Not ideal for formal gardens, but perfect for a side yard or fire pit area.
After six years, this is still the most-used seat in my yard.
5. Hang a Peel-and-Stick Backsplash That Doesn’t Peel
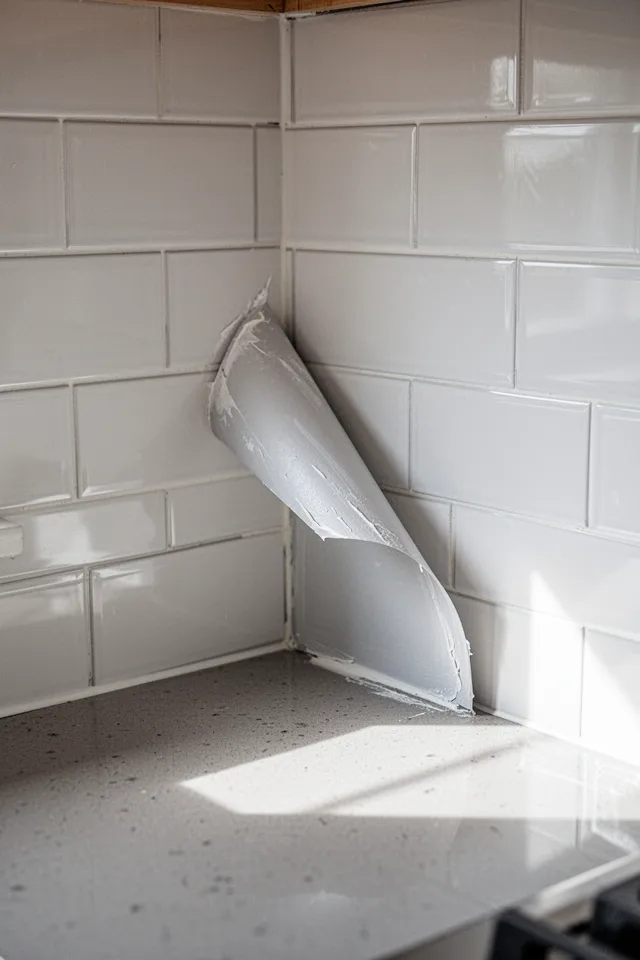
I was skeptical of peel-and-stick backsplashes because every review mentions peeling. But I found a brand that uses a 3M-style adhesive rather than cheap double-sided tape. Applied correctly—which means cleaning the wall with TSP, letting it dry 24 hours, and pressing each panel with a rolling pin—it’s held for two years through steam, grease, and my toddler throwing applesauce. The trick is buying the kind that comes in large sheets, not individual tiles. Those little squares peel up at the corners within months.
The real trade-off: you cannot paint over it later. If you ever want to change it, you’ll have to scrape off adhesive and likely re-drywall. So this is a five-year solution at best. Also, it reflects light differently than real tile—there’s a slight plastic sheen up close. But for $80 to $120 for a standard kitchen backsplash, it’s a weekend fix that actually looks decent if you’re renting or waiting for a renovation.
Buy the large sheets, not the tiles, and use a rolling pin to bond the edges—that’s the difference between peeling and staying.
6. Install a Hose Bib Timer (Outdoor Faucet)

This is one of those boring upgrades that changes your relationship with your garden forever. A simple battery-operated timer that screws onto your outdoor faucet. You set it to water for 30 minutes at 6 AM, and you never think about it again. I installed mine three summers ago, and I have not killed a single plant from under-watering since. The cheap plastic ones from big box stores break after one season. Spend $35 to $60 on a brass or solid metal one.
The trade-off: batteries die. Mine runs two seasons on a set of AAs, but the warning beep is not loud enough to hear indoors. I check it every few weeks. Also, if you live in freezing climates, you need to remove it before winter or the metal will crack. That’s one extra minute in November. Small inconvenience for months of automated watering.
A $50 timer saves more plants than any $200 self-watering planter ever will.
7. Add a Mudroom Hook Rail With a Shelf
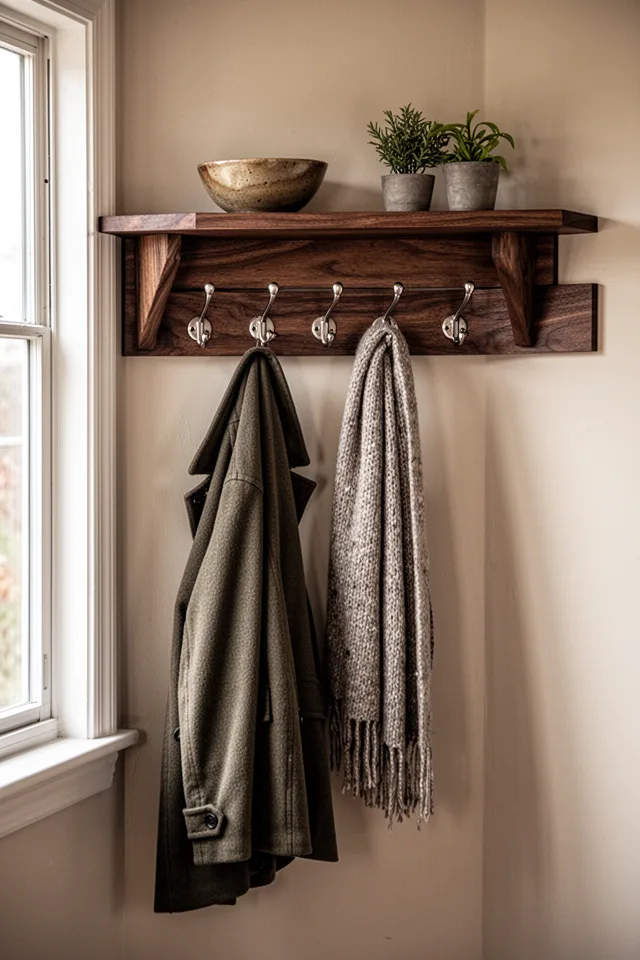
Every entry needs a drop zone, but the store-bought units are either too big or too ugly. I built this from a 1×6 pine board and a set of wrought iron hooks. The shelf is just a piece of 1×8 cut to the same length, attached with L-brackets. Two hours, one drill, and about $30. The shelf keeps keys, mail, and a small plant out of the way, while the hooks handle the daily coats.
The problem with many hook rails: they sag. If you use drywall anchors, the weight of wet coats will pull them out over a season. I stud-mounted mine into two studs. That’s the only way. If your entry doesn’t have studs in the right place, use toggle bolts—those hold better than any plastic anchor. Also, space the hooks at least 8 inches apart or coats will overlap and push each other off. That’s a real thing.
Stud-mount the rail, space hooks 8 inches apart, and you’ll never pick a damp coat off the floor again.
8. Paint Your Bathroom Vanity a Dark Color
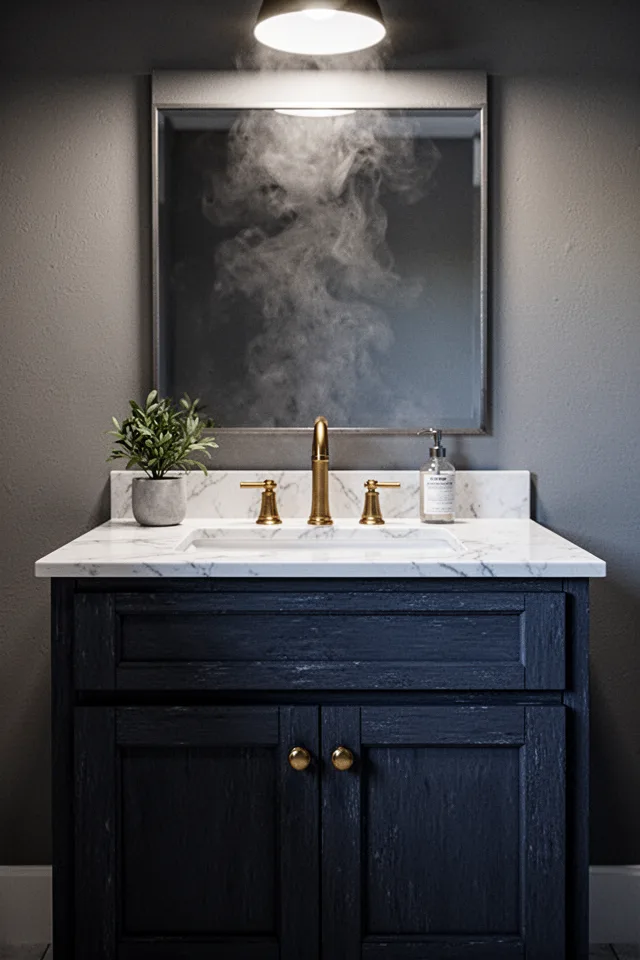
Bathroom vanities are usually the ugliest thing in the room—generic oak or white laminate that dates the space. I painted my builder-grade maple vanity a deep charcoal using a cabinet paint that cures hard. It transforms the room instantly, making the mirror and fixtures feel intentional. Cost is about $50 for a quart of cabinet paint and a small foam roller.
The catch: bathroom humidity tests paint adhesion hard. You need to sand the surface, apply a bonding primer, and let each coat cure for at least 48 hours. I did this in a guest bathroom that gets less steam, and it held perfectly. In a primary bath with daily showers, I’d recommend a high-gloss enamel paint for easier wiping. Also, dark colors show water spots. You’ll need to wipe the sink area after each use. Small price for a vanity that looks like it cost $2,000 instead of $200.
Proper sanding and bonding primer are non-negotiable—skip either and you’ll be repainting in six months.
9. Build a Gravel Patio (No Concrete)
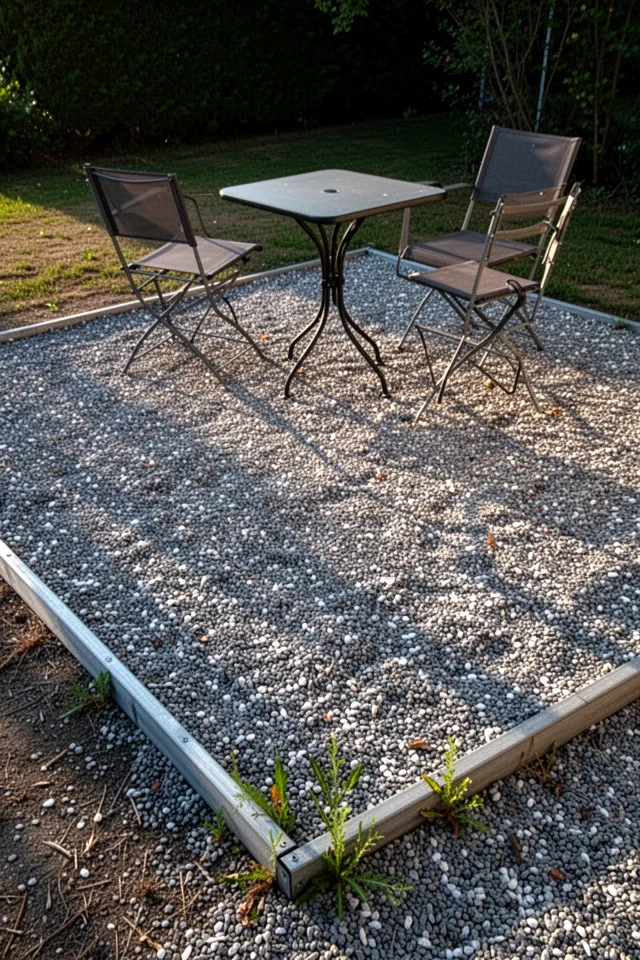
Concrete costs a fortune and requires permits. Gravel costs $50 per cubic yard and can be done in a weekend. I built a 10×12 foot gravel patio behind my house by excavating four inches of soil, laying landscape fabric, and hauling in pea gravel. It’s not a permanent solution—weeds will come through the fabric after two years, and gravel shifts underfoot. But for $200 total, I had a usable outdoor space for three summers running.
The honest reality: gravel gets everywhere. Dogs track it inside, it sinks into the grass edges, and you’ll need to top it up yearly. But it drains perfectly and never cracks. I used a metal border to keep it contained, which helped a lot. If you want something more stable, use decomposed granite and rent a tamper—it packs down hard and almost feels like concrete.
Gravel patios are cheap but not carefree—budget 30 minutes every spring to spread a fresh bag.
10. Install Under-Cabinet Lighting (Wireless)
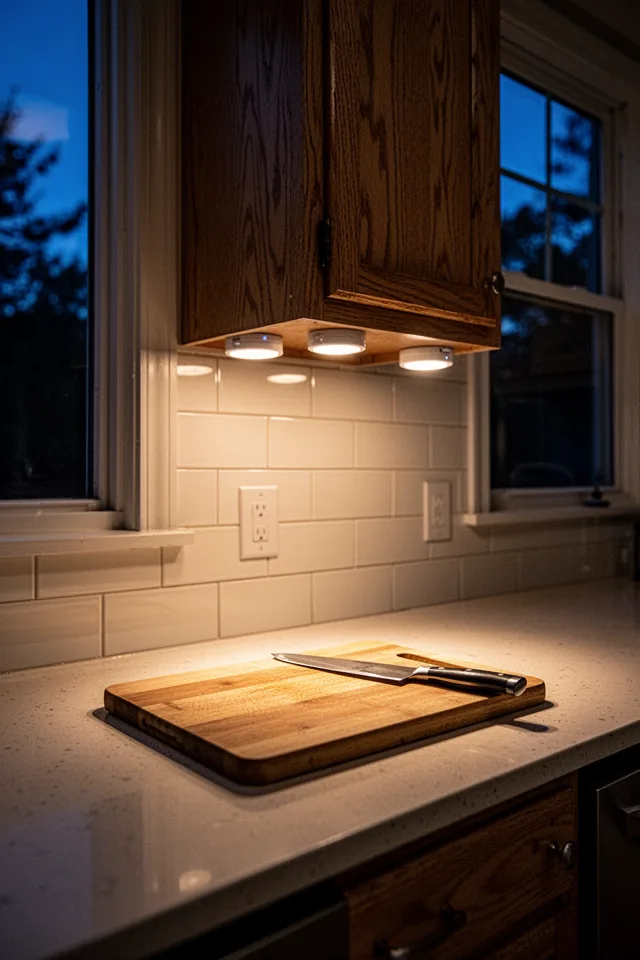
Under-cabinet lighting is one of those things you don’t realize you need until you have it. Then you can’t cook without it. The wireless puck lights that stick on with adhesive are hit or miss—I’ve tried three brands. The good ones have a remote control and last six months on three AAAs. The bad ones flicker after a month. I eventually spent $60 on a set with a rechargeable battery pack and magnetic mounts. They’ve lasted two years.
The catch: brightness. Budget wireless pucks put out about 100 lumens, which is enough for ambiance but not for chopping onions. If you want task-level light, you need hardwired fixtures or a plug-in strip with a dimmer. That’s a bigger project. But for a quick weekend fix that makes your kitchen look 10x better, the magnetic rechargeable pucks are worth it. Just buy ones with warm light (2700K) or your counters will look like a laboratory.
Warm light pucks (2700K) make the space feel soft—cool white ones belong in a garage.
11. Make Your Own Concrete Planter
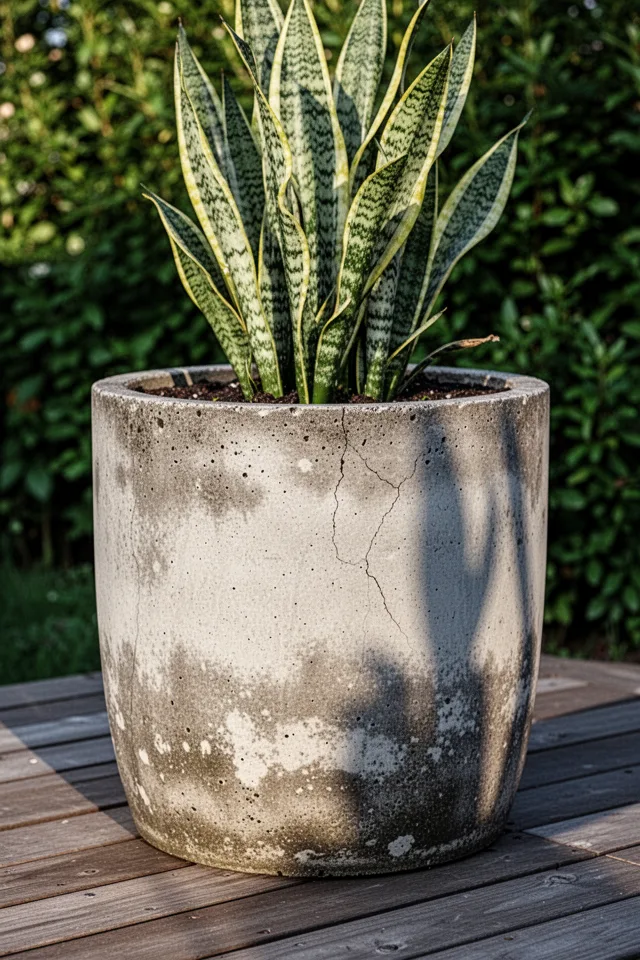
Store-bought concrete planters are wildly overpriced. A 12-inch diameter one can cost $80. I made mine for $12 using a plastic bucket as the outer mold and a smaller bucket as the inner mold. The concrete mix came from a bag I used for the gravel patio project. It took two days to cure, and the result has subtle imperfections—a few air bubbles, a slight tilt on the rim—that make it look better than anything polished at West Elm.
The process is messy and you need a level surface to cure on, or the planter will wobble forever. Also, concrete is alkaline and can burn plant roots if you don’t seal the inside or use a plastic liner. I line mine with a cheap nursery pot inside. That way the concrete stays dry and the plants stay happy. Cost: $10 to $15 plus whatever you pay for the bag of concrete mix.
Imperfect concrete looks intentional—but always line the inside with a plastic pot to protect roots.
12. Replace Bi-Fold Doors With Curtains
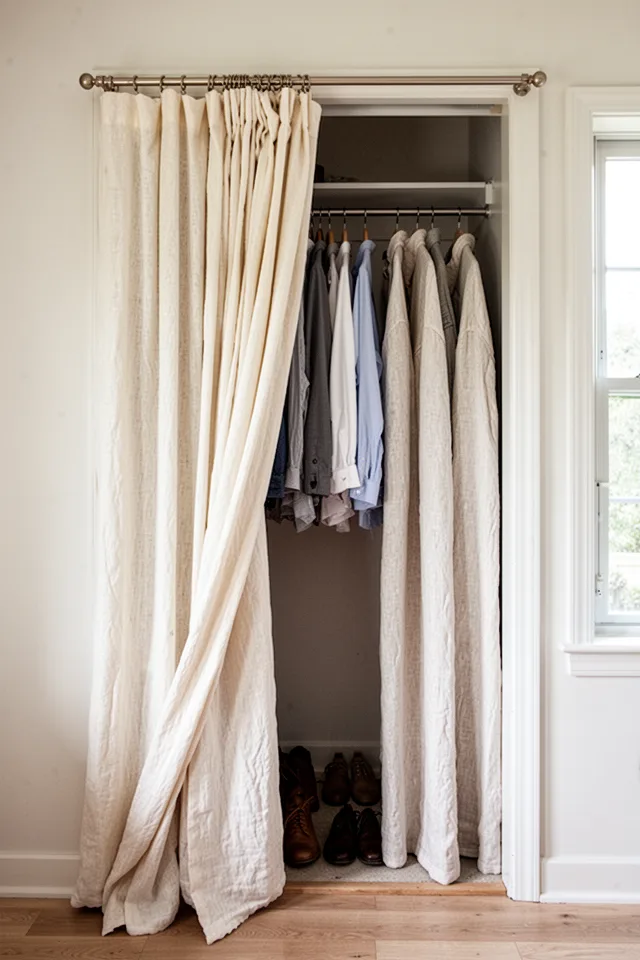
Bi-fold doors are the cheapest, most frustrating invention in home design. They pop off their tracks, never close evenly, and rattle when you walk past. I removed mine from my bedroom closet in under an hour, patched the screw holes, and hung a tension rod with a pair of linen curtains. The whole thing cost $40 and took one morning.
The trade-off is dust. Curtains don’t seal like doors, so your clothes will collect more dust. If you own a lot of dark wool, this may not be ideal. But for everyday cotton and synthetics, it’s fine. Also, if the curtains are too long, they’ll pool on the floor and get stepped on. Hem them so they hover an inch above the carpet. I used iron-on hem tape instead of sewing—held for a year before I re-did it.
Bi-fold doors are the enemy of peace—curtains cost less and make less noise.
13. Hang a Pegboard in the Garage
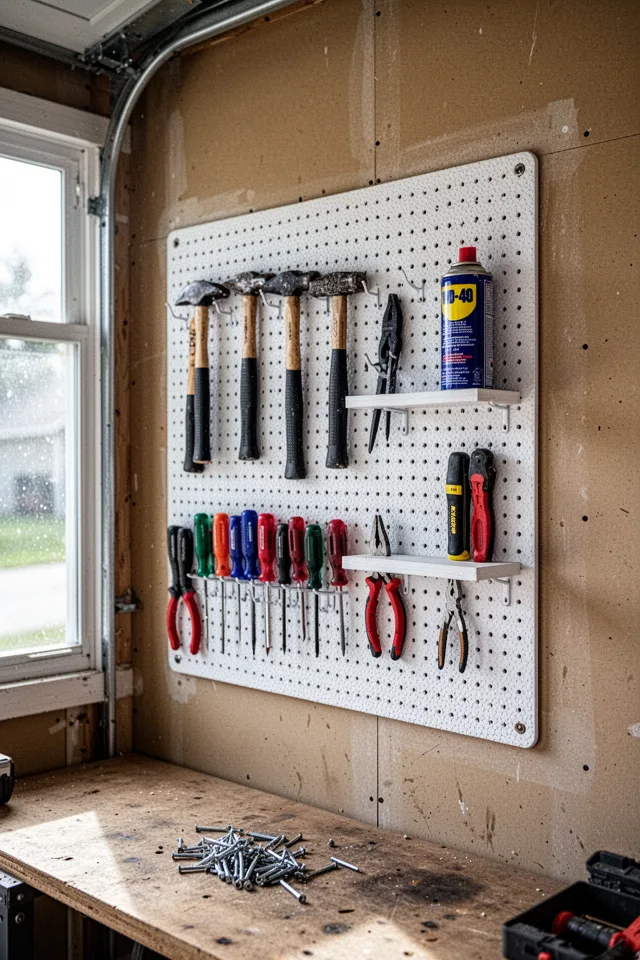
I resisted pegboards for years because they looked like a dad hack from the 1970s. But when I finally mounted one in my garage to stop losing tape measures, I realized the shame was misplaced. A 4×4 foot panel costs about $25, a set of hooks is another $15, and mounting it with furring strips behind it provides airflow so the board doesn’t warp. I can now find my tools. It’s a miracle.
What nobody tells you: the hooks fall off easily if you pull a tool sideways. You need the locking-style hooks or add a small zip tie around each hook. Also, don’t bother with colored pegboard panels—they fade within a year in a garage with windows. White stays white. Total investment: around $50, but you’ll spend more if you buy the branded systems with fancy bins. Just get the basic panel and hooks.
Locking hooks cost a dollar more and save you from picking screwdrivers off the floor.
14. Refinish a Thrift Store Dresser
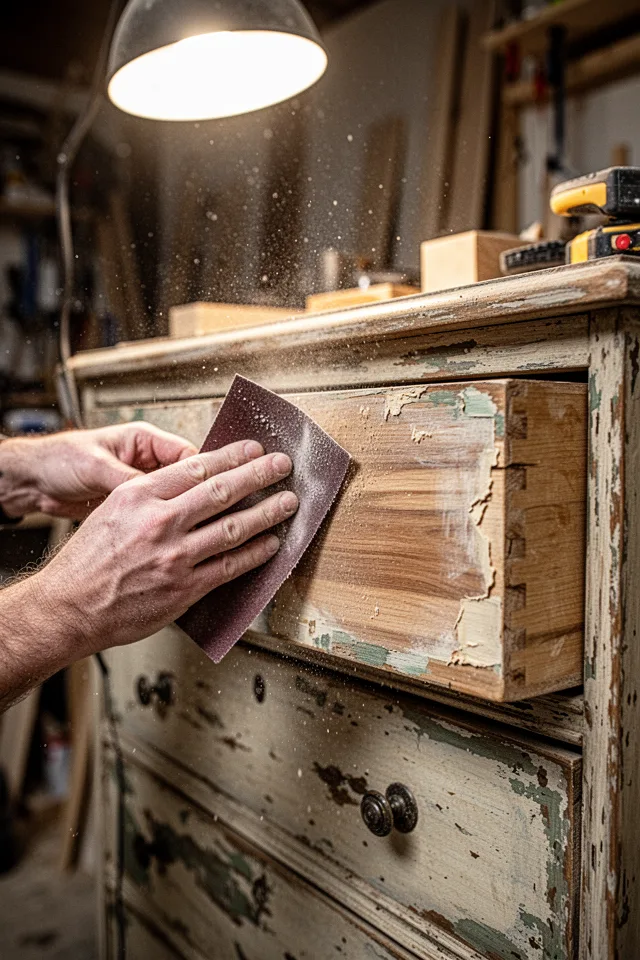
I’m not going to pretend refinishing furniture is quick—it’s not. But doing it over two weekends turns a $30 thrift store find into a piece that costs $500 new. I bought a solid wood dresser from the 1960s for $25 at a Habitat ReStore. Stripped the yellowed varnish, sanded it down, and applied a tung oil finish. The grain came up like honey. That was four years ago, and it’s still the best piece of furniture in my house.
The honest part: sanding takes hours. You need an orbital sander or you’ll hate your life. Also, many thrift dressers are engineered wood with a veneer, so if you sand too deep, you hit the particleboard. Test an inconspicuous area first. And don’t skip the stripping stage—paint stripper is messy and stinky, but sanding through eight layers of paint is worse. Cost: $25 dresser + $30 for sandpaper and stripper + $15 for oil. A $70 weekend with a three-year payoff.
A solid wood dresser from a thrift store is cheaper than anything from IKEA—and way better built.
15. Install a Rain Chain
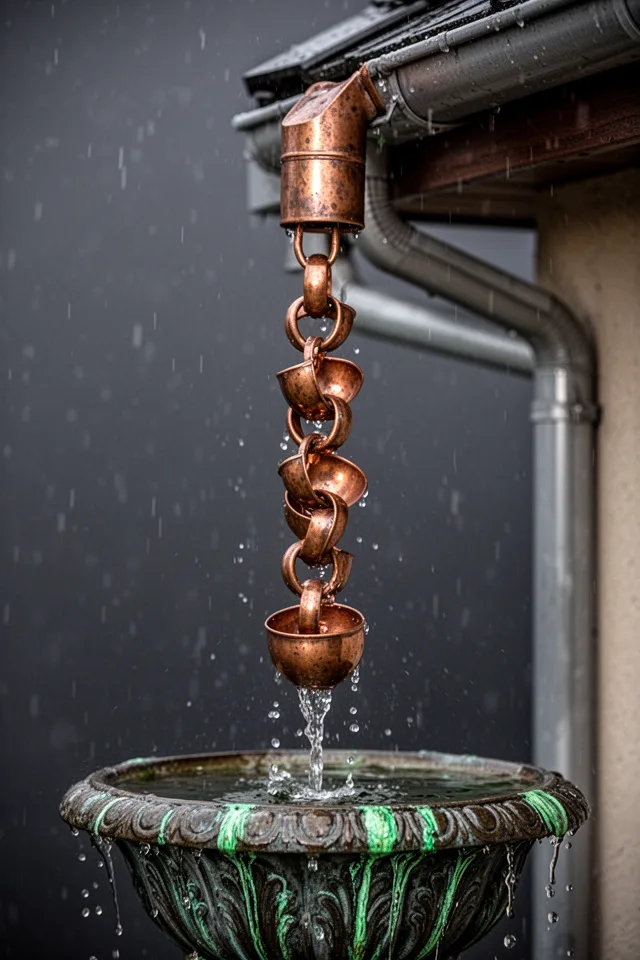
Rain chains replace the ugly plastic downspout extension with something that turns rainwater into a sound feature. I installed one on my porch gutter four years ago. It took ten minutes—screw the hangar bracket into the gutter, attach the chain, and redirect the water into a potted basin. The sound during a light rain is a gentle trickle. In a heavy downpour, it’s a loud gush. Both are more pleasant than the usual gutter rumble.
But rain chains are not functional like downspouts. They will splash water outside the basin if the wind blows. And if you have a foundation or basement, you need to ensure the water drains away from the house. I use a large ceramic dish filled with pebbles to absorb the splash, and the overflow runs into a french drain. Also, copper chains cost $40 to $80, but they last forever. Cheap aluminum ones will corrode within two years.
Copper rain chains patina beautifully and never rust—aluminum ones lose their charm fast.
16. Add a Wooden Headboard From a Fence Picket
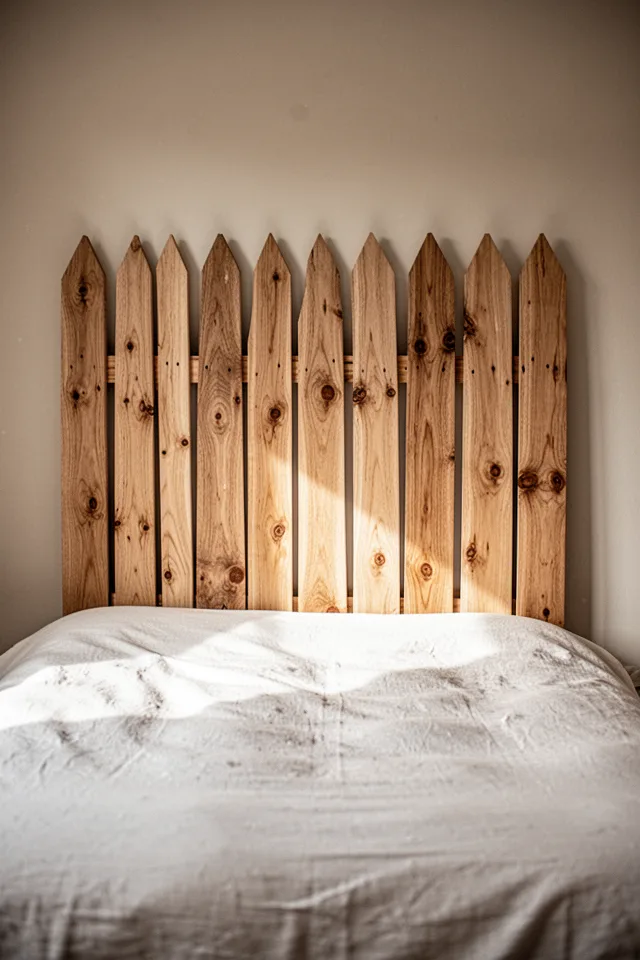
Wooden headboards in stores cost $300 for something made of plywood. I made one for $35 using cedar fence pickets from the hardware store. Cut to length, sanded smooth, stained with a single coat of walnut, and attached to a 1×3 frame that hangs on the bed frame. The whole thing took one afternoon. The pickets are 1/2 inch thick, so they have a bit of flex, but they’ve held up for three years without cracking.
What I didn’t expect: cedar smells good for the first week. That fades, but the wood looks better with age—turning a silvery grey if left unstained. I chose to stain it, which means I’ll need to reapply every few years. Also, the pickets are rough-sawn on one side, so I faced the smooth side out and sanded the edges. If you want a rustic look, leave the rough side. Cost: $35 plus $10 for stain and screws.
Cedar fence pickets are the cheapest solid wood you can buy—perfect for headboards, planters, or wall cladding.
17. Install a Dimmer Switch Yourself
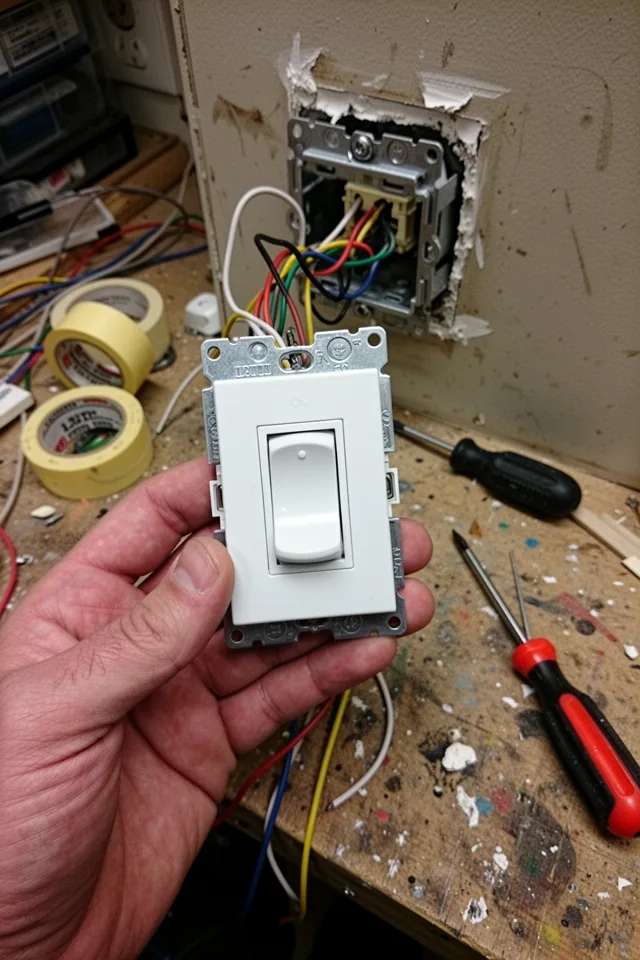
This is the single biggest upgrade for the price. A dimmer switch costs $15 and changes the entire mood of a room in 20 minutes. I replaced every switch in my living room and bedroom over two weekends. Now I can set the lights to 30% for cozy evenings and full blast for cleaning. The wiring is simple: black to black, white to white, green to ground. Turn off the breaker, double-check with a non-contact voltage tester, and it’s done.
But not all lights are dimmable. If you have LED bulbs, they must say “dimmable” on the box. Non-dimmable LEDs will flicker or hum. Also, older dimmer switches can get warm—they’re fine but don’t cover them with a thick wall plate that traps heat. Modern LED-rated dimmers run cool. Cost: $15 per switch, plus a voltage tester if you don’t have one. That’s $30 total for the most transformative change in your lighting.
Dimmer switches are the cheapest luxury you can install—just make sure your bulbs are dimmable.
18. Create a Command Center Wall
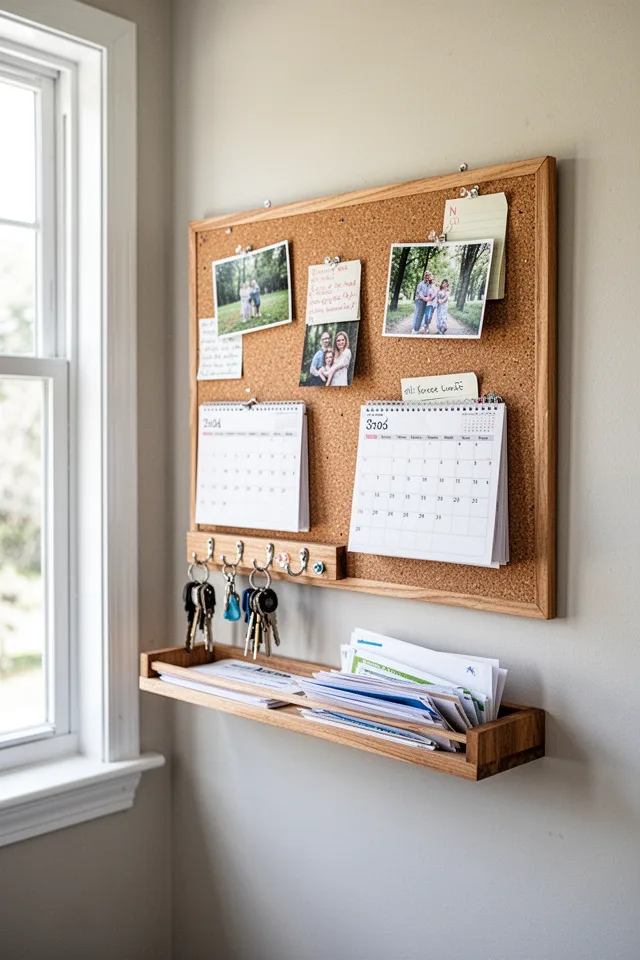
Every house has a flat surface where mail, keys, and random stuff accumulate. Mine was the kitchen counter. I converted a blank wall near the entry into a command center: a cork board for notes, a magnetic strip for invitations, a small shelf for a catch-all bowl, and wall-mounted hooks for keys. Total cost was $40 from cork tiles and a shelf board from the scrap pile. No drilling into studs—the cork board is adhesive-backed, the shelf uses toggle bolts.
The thing that fails in most command centers: the paper piles up on the shelf anyway if you don’t have a system for sorting. I added a small file box below the shelf for “to do” and “to recycle.” That made it work. Also, magnets can scratch if you use cheap enamel boards—mine is a painted metal sheet, not cork. Either works, but cork absorbs pins and won’t rust. Cost: around $40 for the full setup, more if you buy a pre-made kit.
A command center only works if you add a place for paper that’s about to be trash—separate the action items from the clutter.
19. Build a Simple Outdoor Movie Screen
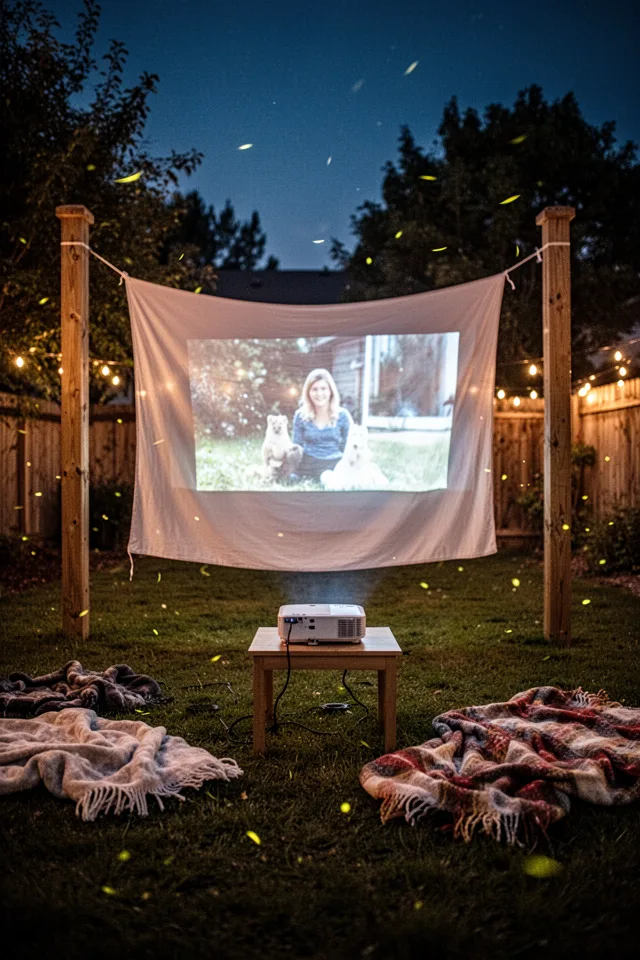
You don’t need an expensive outdoor TV to watch movies in the yard. I built a 9-foot-wide screen from two 2×4 posts set in buckets of concrete, a PVC pipe crossbar, and a heavy white contractor’s tarp. Cost: about $80 for all materials, including the sandbags to hold the posts down. The projector was another $60 used on Facebook Marketplace. Now every summer weekend, we set up blankets and watch one movie under the stars.
The trade-off: it’s not a permanent structure. The tarp will flap in a breeze, so I use bungee cords to pull it tight. The projector needs to be dark, so you can’t start until about 9 PM in summer. And bugs will gather. But for the price of one premium streaming subscription, you get a whole outdoor cinema experience. The concrete bucket bases make it portable—I move it to different spots in the yard every year. Cost: $80 for screen, $60 for projector, $10 for extension cord. A weekend project with infinite returns.
A homemade outdoor screen costs less than two pizzas and a month of streaming—and it’s a hundred times more fun.
Conclusion
The projects I’ve listed here aren’t about turning your house into a showroom. They’re about making it work better for you—and doing that with your own hands, not a contractor’s. The decision you need to make is not which one to do first. It’s whether you’re willing to live with a few mistakes, a little imperfection, and the possibility that something might not look exactly like the picture in your head. That’s what separates a home that feels like yours from one that feels like a catalog.
If you’re just starting, replace the switch plates with wood and install a dimmer. Those two things cost under $50 together, take one afternoon, and change your perception of the room immediately. The rest can wait for the weekends you feel brave. And when you do one of these, don’t show it off to everyone—keep it a secret. Let them wonder how the hell you made your house look so good.
The best home improvement isn’t what you buy. It’s what you decide to make, break, and keep anyway.

