
I woke up for the third time that week with my elbow in a half-empty water glass, the other half now soaking into a paperback on the floor. My nightstand—if you could call it that—was a folding chair draped in a scarf. The bedroom was 95 square feet, and every “small space solution” I found online assumed I had no phone charger, no books, no lotion, and definitely no coffee cup. You know the advice: “just add a mirror!” “paint it white!” “declutter!” As if clutter is a choice and not the physical evidence of having a life.
The problem with most small-bedroom advice is that it comes from people who staged a room for an afternoon photoshoot. They don’t live with the mirror that reflects your laundry pile. They didn’t try to sleep next to a “clever” wall-mounted shelf that collapsed at 2 AM. I’ve lived in nine small bedrooms across four cities, from a converted closet in Brooklyn to a sloped-attic situation in Seattle where you couldn’t stand up near the window. I’ve made every mistake, returned a dozen “space-saving” gadgets that were junk, and eventually figured out what actually works when you have to wake up in the same tiny room every day and not feel like a sardine.
So forget the generic fluff. These 25 ideas are the ones that survived real life—through winter coats, summer humidity, partner disagreements about furniture placement, and the brutal honesty of a Sunday morning when you haven’t made the bed. Some are cheap (under $20), some require a drill, and a few are a real investment. I’ll tell you exactly what ages badly, what squeaks, what feels fake, and what actually makes a tight room breathe. Let’s go.
1. Hang Curtains Like You’re Lying About The Window Size
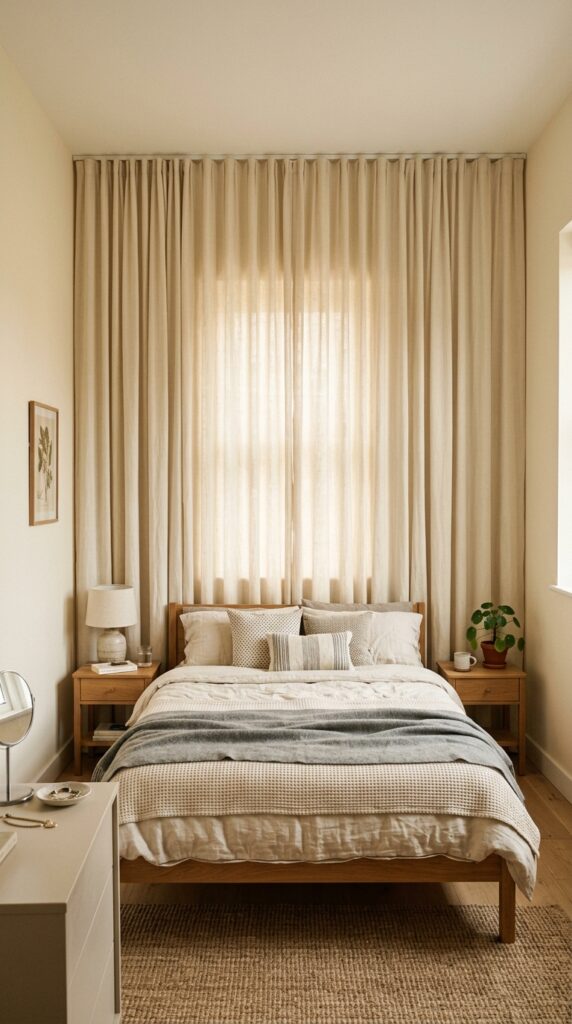
Most people hang curtains two inches above the window frame and call it done. That’s a mistake that makes a small room feel chopped in half. I run the rod all the way up to within two inches of the ceiling—and I make it span the entire wall, not just the window width. When the curtains are open, they stack entirely off the glass, so you see the full window plus wall space on both sides. The brain reads that as “there’s more wall than window,” which psychologically expands the room. Cheap trick that costs nothing but a longer curtain rod.
Here is the honest truth about fabric: lightweight sheers look dreamy in photos but feel flimsy in real life, especially if you live in a dusty area. I use medium-weight linen or a cotton-poly blend that has some drape but doesn’t collect grime like velvet. The trade-off is that good linen curtains run $40–$80 per panel, not including the rod. You can find decent knockoffs on Amazon for $25 a pair, but check the reviews for “wrinkles that never fall out.” I’ve had both. The cheap ones look fine after a steam iron, but after three washes they turn into crinkled messes. Spend the money on one wall of good curtains rather than two walls of bad ones.
Pro tip: Use ceiling-mounted curtain tracks if you have sloped walls or uneven plaster. They’re ugly but invisible behind the fabric, and they solve the “my landlord won’t let me drill above the window” problem.
2. The Floating Nightstand That Isn’t A Nightstand
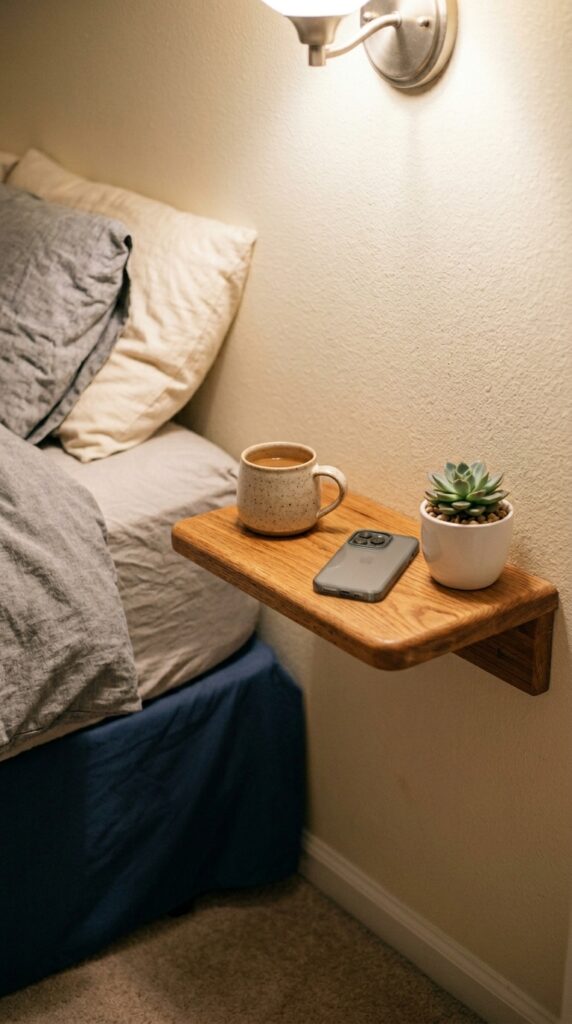
Actual nightstands are depth monsters. A standard one sticks out 18 inches, which in a small bedroom means you’re constantly squeezing past it to make the bed. I switched to a floating shelf that’s only six inches deep—just enough for a phone, a glass, and a book laid flat. The trick is mounting it high enough (about level with your mattress) so you’re not reaching down into a dark hole. I use a solid oak shelf from a hardware store, cut to 14 inches wide, sanded, and oiled. Cost me $18 plus two hidden brackets.
What nobody warns you about: floating shelves collect dust on top and underneath, and if you mount them poorly, they will tilt forward and spill your 6 AM coffee. Use a level. Use anchors rated for 30 pounds even if you’re only putting a glass on it. The cheap floating shelves from big-box stores with the invisible metal bracket? The bracket bends over time. I learned this after picking up a shattered phone. Now I buy solid wood and heavy-duty L-brackets that I paint to match the wall. The bracket shows if you’re below eye level, but who’s crawling on your bedroom floor? Cost for the good version: about $40–$60 all in.
If you’re renting and can’t drill, look for a “bedside caddy” that slips between the mattress and box spring. It’s not elegant, but it holds a water bottle and glasses without taking a single inch of floor space.
3. Paint The Ceiling A Color (Yes, A Real Color)
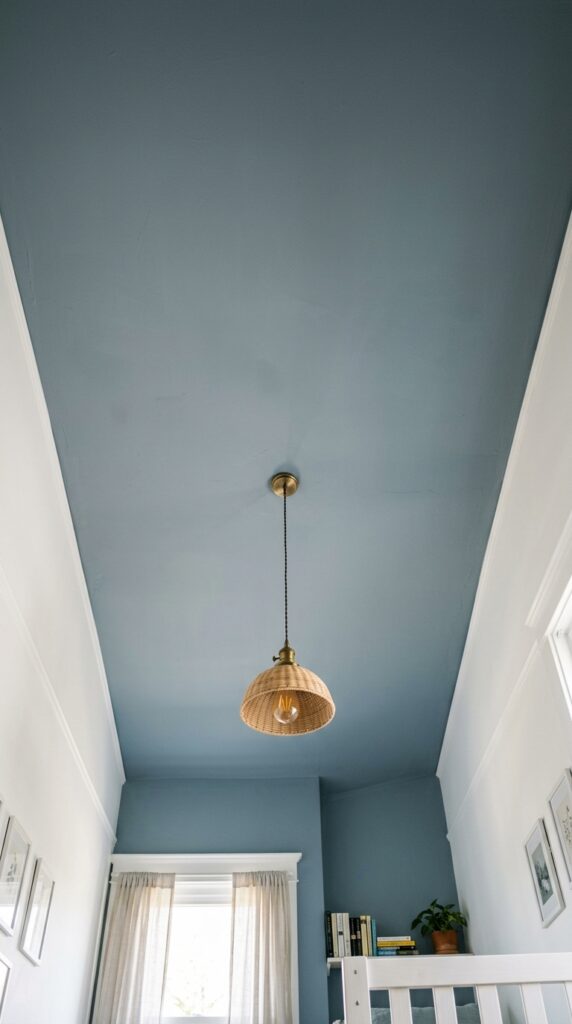
Every small-bedroom article screams “white walls white walls white walls.” Fine. But they never mention the ceiling. A white ceiling with white walls creates a cave effect—your eye travels up, hits the white, and stops. Paint the ceiling a pale, muted color (think sage, dusty blue, warm clay, or even a very light pink) and suddenly the room feels taller. The reason is weird but real: a colored ceiling reads as “sky” or “atmosphere,” while a white ceiling reads as “lid.” I used Benjamin Moore’s “Pale Smoke” on a 90-square-foot room, and three different people asked if I’d raised the ceiling.
The constraint here is brutal: this only works if your walls are a lighter or neutral tone. If your walls are already dark, a colored ceiling will make the room feel like a jewelry box—charming for a powder room, suffocating for a bedroom. Also, painting a ceiling is a nightmare on your neck and shoulders. I hired someone ($200 for a small room) and it was the best money I spent. If you DIY, use a flat or matte finish—any sheen will highlight every roller mark and patch job from previous tenants. Flat paint hides imperfections. Cost: $40 for paint, $150 for a pole and drop cloths if you don’t own them, or $200–$300 for professional.
Test the color on a foam board first and tape it to the ceiling for three days. Colors look completely different above your head than they do on a swatch at eye level. I learned this after painting a whole ceiling “misty lavender” that looked like bruised flesh.
4. One Large Mirror, Not Many Small Ones
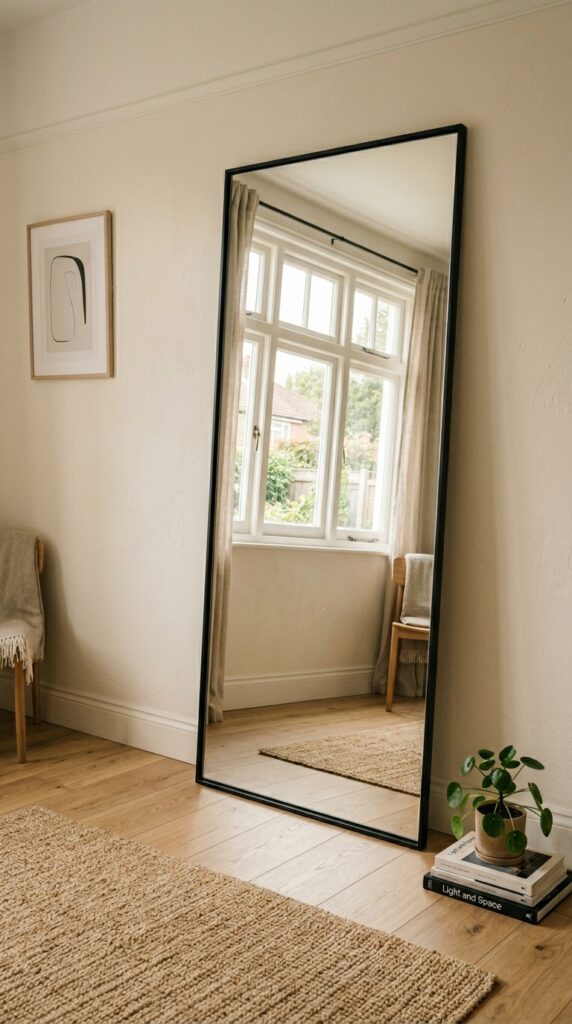
I see people stick three tiny decorative mirrors on a wall and call it “light enhancing.” That does nothing except make your wall look like a carnival fun house. One single large mirror—at least three feet wide or four feet tall—creates a believable illusion of another room. Lean it against the wall rather than hanging it flat, and the slight angle catches more light. I found a 30×70 inch mirror at a thrift store for $40 and painted the frame matte black. It reflects the entire window wall, so the room visually doubles in width.
Trade-off: large mirrors are heavy (this one is 35 pounds) and dangerous if they fall. Never lean a mirror against a wall without anchoring it at the top to a wall stud with a furniture strap. I know someone who had a mirror slide and shatter on a tile floor—she was finding glass slivers for two years. Also, be honest about what the mirror reflects. If it reflects your messy closet or the pile of clothes on the chair, you’ve just doubled the mess. Position it to reflect either a window, a piece of art, or a blank painted wall. Cost for a new large mirror: $100–$250. Used: $30–$80 plus elbow grease.
For renters: look for “full length mirror with stand” that has a metal base. It takes up 6 inches of floor depth but won’t damage walls, and you can tilt it to avoid reflecting the wrong things.
5. The Low Profile Bed (That Actually Costs You Floor Space)
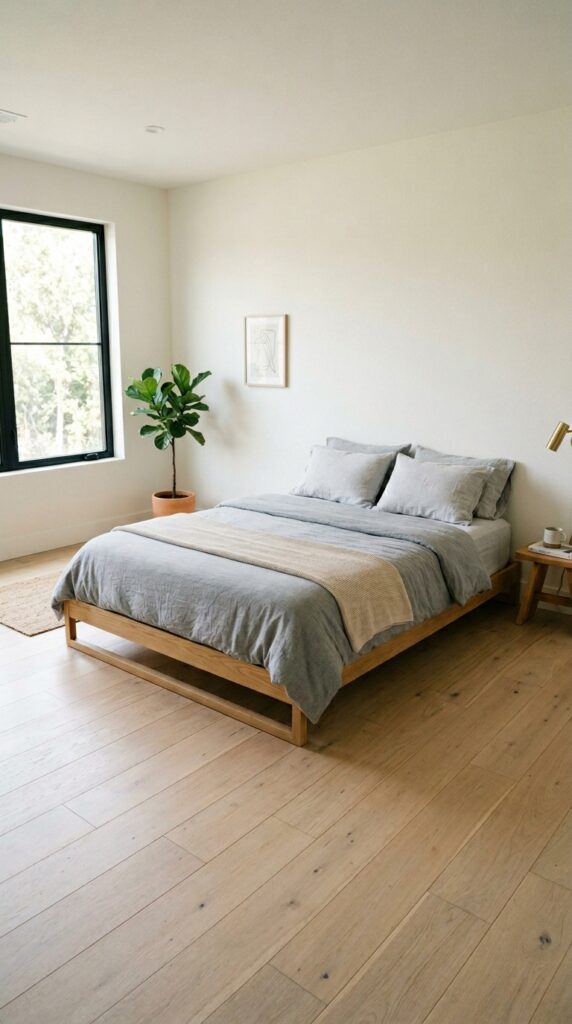
Here is a hill I will die on: a bed with a visible floor underneath it makes a small room feel twice as large. Traditional beds have box springs, dust ruffles, and chunky legs that hide the floor. Swap to a low platform frame—six inches off the ground max—and suddenly your eye can travel under the bed, reading that empty floor space as “room.” I built mine from three IKEA “Luroy” slats laid across two 2x4s, total height four inches. Ugly but invisible under the mattress. The room went from feeling like a shoe box to feeling like a platform you could dance on.
The honest constraint: you lose under-bed storage. No more giant plastic bins sliding underneath. If you need that storage (and most of us do), this idea isn’t for you. But I made the trade because I realized I was storing things I never touched. Seasonal clothes went to a vacuum bag in the closet. Extra bedding went into a wall-mounted shelf. What I gained—the visual breathing room—was worth more than the dusty bins. Cost: a low platform frame from Amazon runs $100–$200. A DIY version with wood and slats: about $60. A mattress low enough to work (8-10 inches thick): $200–$500.
Test this by removing your box spring and putting your mattress directly on the floor for a week. If you don’t mind the “college dorm” look and your back doesn’t complain, then invest in a real low frame. If you hate bending down to get into bed, stick with a standard height and try a different trick.
6. A Single Overhead Pendant (And Throw Away Your Table Lamps)
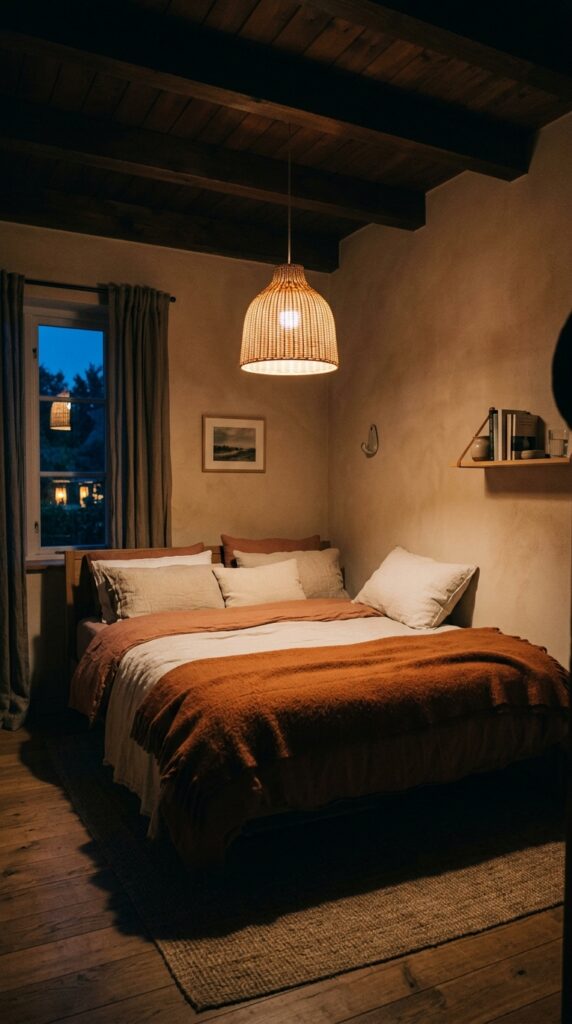
Table lamps eat nightstand real estate. Floor lamps eat floor space. I removed both and installed a single pendant light on a dimmer switch, centered over the bed. One light source, pointed downward, creates a cozy pool of light that makes the room feel like a nest rather than a hospital. The trick is the dimmer—full brightness for cleaning, low for reading, off entirely when you want ambient darkness. I used a $45 rattan pendant from a big-box store and paid an electrician $150 to install it because I don’t mess with wiring. If you have existing overhead wiring, you can swap the fixture yourself.
What fails: cheap pendant cords that twist and tangle. I bought one with a cloth-covered cord that looked vintage but twisted every time I pulled the chain. Replaced it with a straight metal rod style—less charming, but it doesn’t spin. Also, a single pendant means no reading light for two people unless you’re both under the same pool. If you share a bed with someone who reads at different hours, this won’t work. Add a small clip-on book light for each person instead. Cost for the whole setup (fixture, dimmer switch, install): $200–$350. DIY if you’re comfortable: $60–$100.
Make sure your pendant hangs at least seven feet above the floor, or low enough to feel intentional but not bonk-your-head low. In a room with low ceilings, skip the pendant and use sconces instead.
7. The Peg Rail That Replaces Your Dresser
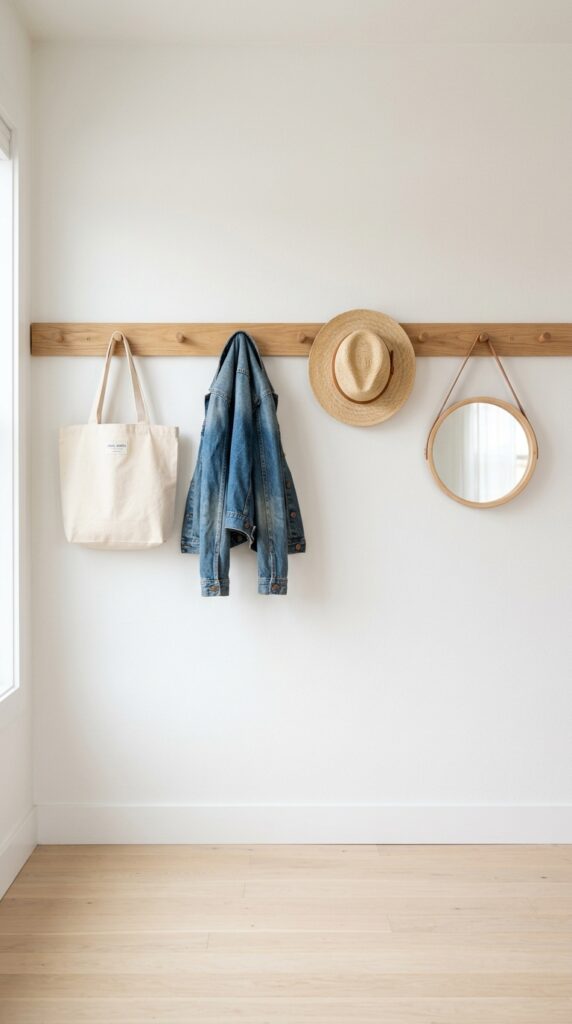
Dressers are space hogs. A typical six-drawer dresser takes up 20 square feet of floor space and sticks out 20 inches. I got rid of mine and installed a 48-inch wooden peg rail at shoulder height. Now I hang tomorrow’s outfit, my robe, a couple of bags, and a small mirror. The rest of my clothes live in the closet. The peg rail takes zero floor space, adds vertical interest, and forces me to keep only what I actually wear. If it doesn’t earn a peg, it goes.
Here is the friction: this only works if you have a closet for everything else. If you’re in a room without a closet (hello, converted studio), you’ll need a garment rack instead, which takes floor space again. Also, pegs get overloaded. I learned not to hang heavy coats or soaking wet rain jackets—the pegs hold, but the wall gets damp and the weight pulls at the anchors. Use pegs for lightweight items: shirts, scarves, hats, light jackets. Cost: a nice wooden peg rail is $30–$70. Install with wall anchors rated for 20 pounds per peg, even though you’ll use less.
Space the pegs at least six inches apart or they’ll crowd each other. I did four inches once and couldn’t fit a hanger between them. Measure twice, drill once.
8. The Closet Door I Removed Completely
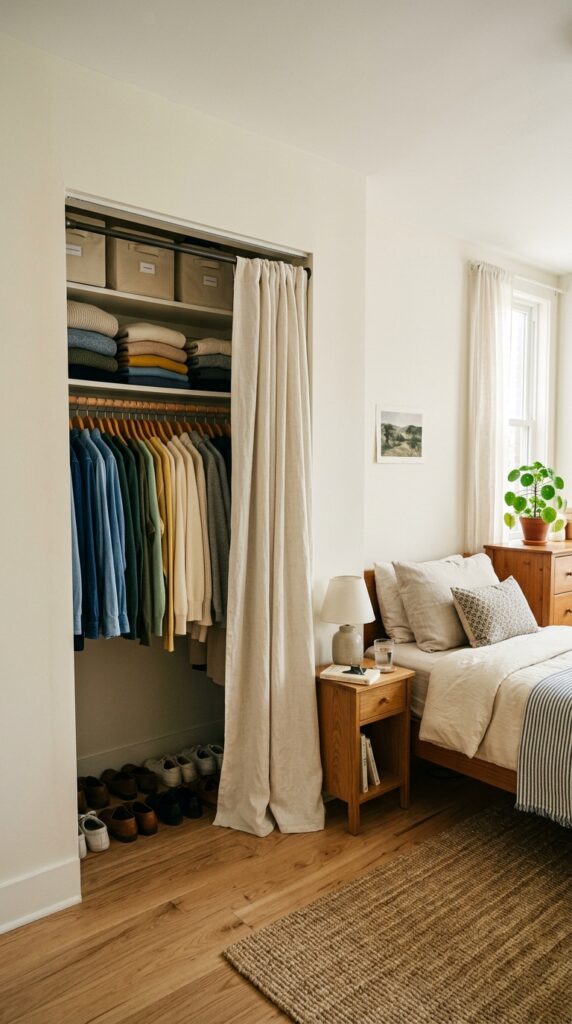
A hinged closet door swinging open takes up three square feet of bedroom floor space. A sliding door covers one third of your closet opening at all times and the track collects hair and dust. I took both off their hinges, stored them in the basement, and hung a tension rod with a flat linen curtain. Now I have full access to the entire closet, zero floor space lost, and the curtain adds softness. When the curtain is closed, it looks like a wall. When it’s open, I can see everything at once—which actually helps me put things away because there’s no “out of sight, out of mind.”
The catch: you have to keep your closet organized. An open closet behind a curtain is still an open closet. If your closet is a disaster zone, the curtain will hide it but you’ll know. Also, cats love to climb curtains. My cat turned my linen curtain into a scratching post within two weeks. I switched to a heavier cotton canvas that she can’t grip as easily. Cost: $15 for a tension rod, $20–$40 for a curtain panel. If you need to replace a bifold door, this is a $500 problem solved for $50.
Use a “no-drill tension rod” rated for the width of your closet. The cheap spring-loaded ones will fall down at 2 AM. Spend the extra $5 for one with rubber grips and a twist-lock mechanism.
9. Vertical Stripes, One Wall Only
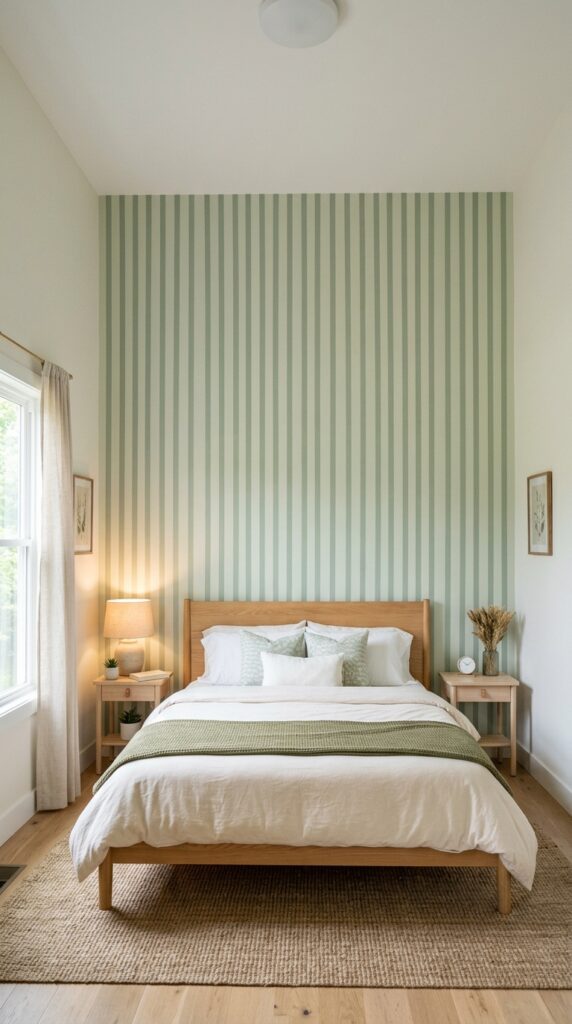
Every “make a room taller” guide says vertical stripes. But they always show an entire room wallpapered in high-contrast racing stripes, which makes a small room feel like a carnival tent. The version that works: one wall only (the one behind the bed), low-contrast stripes (same color family, one shade lighter), and widely spaced (every four to six inches). I used a pale sage green and a slightly deeper sage, painted by hand with a laser level and frog tape. The stripes disappear and reappear depending on the light, so the wall has texture without screaming LOOK AT ME.
The tedious truth: painting stripes is miserable. You have to measure, level, tape, paint the first color, let dry, tape again, paint the second color, and peel before it dries. I did a 10-foot wall and it took six hours. If you value your sanity, buy removable peel-and-stick wallpaper in a low-contrast stripe. It costs more ($80–$150 for a single accent wall) but saves your weekend and your marriage. The peel-and-stick also comes off without residue, which is a godsend for renters. Just avoid high-gloss stripes—they catch every shadow and make the wall look dented.
Test your stripe width by taping off a 2×2 foot section first. Narrow stripes (1-2 inches) feel like a prison jumpsuit. Wide stripes (8+ inches) look like siding. 4 to 5 inches is the sweet spot.
10. The Fold-Down Desk That Disappears
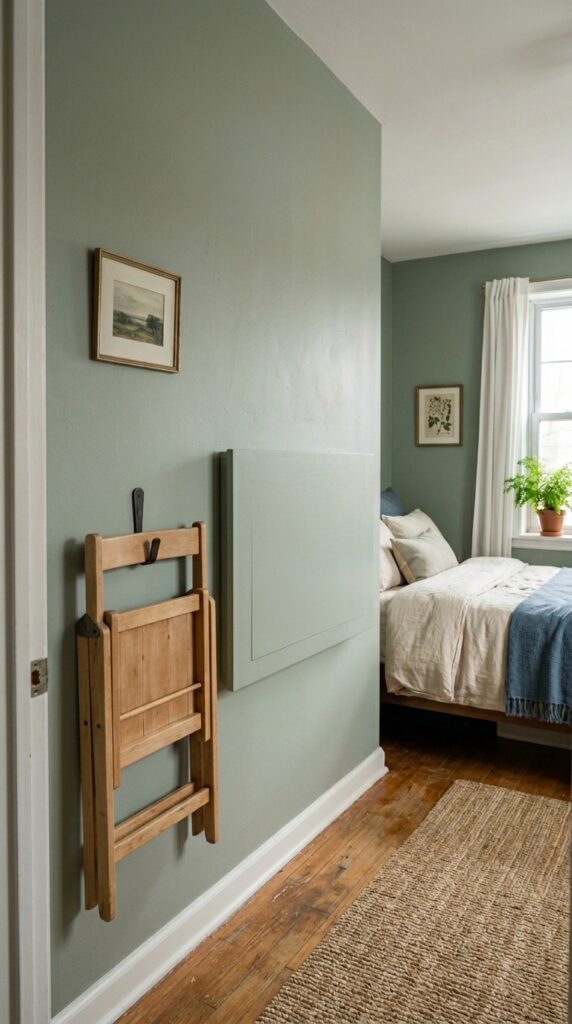
A dedicated desk in a small bedroom is a luxury you probably can’t afford. I installed a fold-down wall desk—the kind that looks like a shallow cabinet when closed, then drops open to a 24×36 inch work surface. It’s mounted beside my bed at standing height because I work better standing, but you can mount it lower for a chair. When I’m not working, it’s closed and flush against the wall, taking up exactly zero floor space. The one I bought was $120 on Amazon, MDF with a fake wood veneer. It’s not heirloom quality, but it’s held three years of laptops and coffee rings.
What fails: the hinges on cheap versions. Mine started sagging after a year because I overloaded it with a monitor and a stack of books. I replaced the stock hinges with heavy-duty piano hinges ($15) and added a fold-out leg that touches the floor for support. Now it’s rock solid. Also, you need wall space at least 30 inches wide and clear floor space in front when open. If your bedroom is so tight that you can’t stand in front of the desk without hitting the bed, this won’t work. Cost: $80–$200 for the desk unit itself, plus another $20–$50 for upgraded hardware.
Mount it into wall studs, not drywall anchors. The leverage from opening and closing will tear anchors out within months. Ask me how I know.
11. The Transparent Acrylic Chair (Not For Everyone)
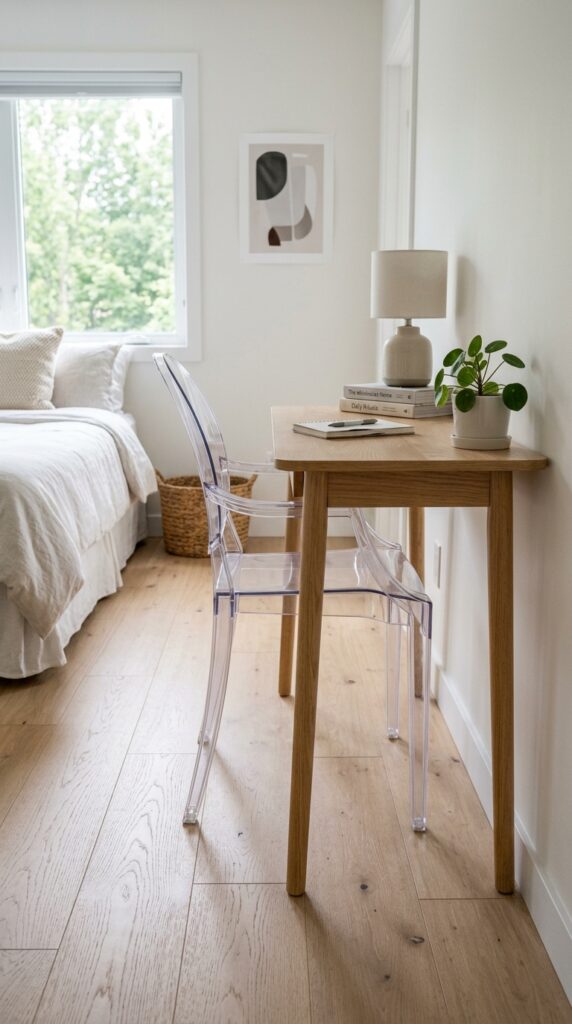
Acrylic furniture looks ridiculous in a catalog and works suspiciously well in a tight bedroom. I bought a clear “ghost” chair for $70 because I needed a place to sit while putting on shoes, but a normal chair blocked the view to my closet. The acrylic one practically disappears. Your eye sees the wall behind it, so the room feels less cluttered. It’s also easy to clean (windex) and weighs almost nothing, so I move it around constantly.
The brutal trade-offs: acrylic scratches if you look at it wrong. My cat jumped on the chair once and left claw marks that catch the light like a crime scene. Also, it squeaks. The legs on cheap ones are hollow and they squeak against tile or hardwood. I put felt pads on the bottom—quiet for a week, then the pads slid off. I’ve just accepted the squeak. And in cold rooms, acrylic is freezing to sit on. If you wear shorts, it’s unpleasant. Cost: $60–$150 for a decent one. High-end versions (like Kartell) run $400+ and still scratch.
Skip the “smoky” or colored acrylic. The whole point is invisibility. Tinted acrylic just looks like a dirty window. Go completely clear.
12. The Single Long Shelf Above The Window
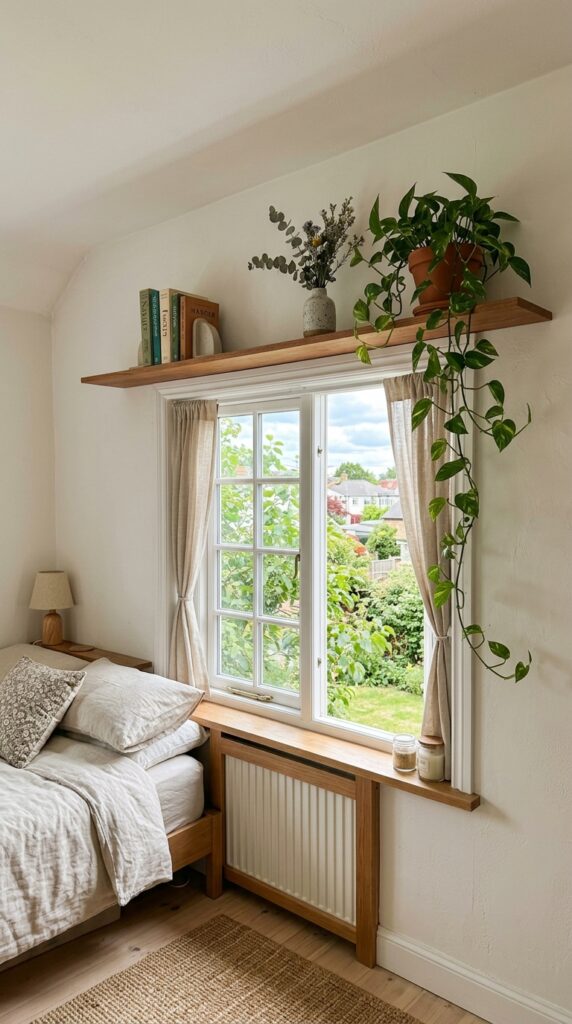
Above the window is dead space in most bedrooms. I mounted a 72-inch floating shelf two inches above my window frame, extending eight inches past each side of the casing. It does two things: it visually widens the window (because the shelf acts like a lintel), and it adds storage for things that don’t need daily access—seasonal books, small plants, a collection of found rocks. The shelf is only six inches deep so it doesn’t block light or feel oppressive.
The failure point: installation is tricky because you have to find studs above a window. Studs are rarely spaced conveniently there. I used toggle bolts instead, rated for 50 pounds, and the shelf has held for two years. But I don’t put heavy books up there. Also, dusting a high shelf is a pain. I use a swiffer duster on an extension pole once a month. If you hate dusting, skip this idea. Cost: $25 for a pine shelf board, $15 for brackets, $10 for toggle bolts. Or buy a pre-made shelf for $40–$80.
Paint the shelf the same color as the wall, or stain it to match your floor. A contrasting shelf draws attention to itself, which defeats the “widening” illusion.
13. The Door-Mounted Shoe Organizer (As An Everything Organizer)
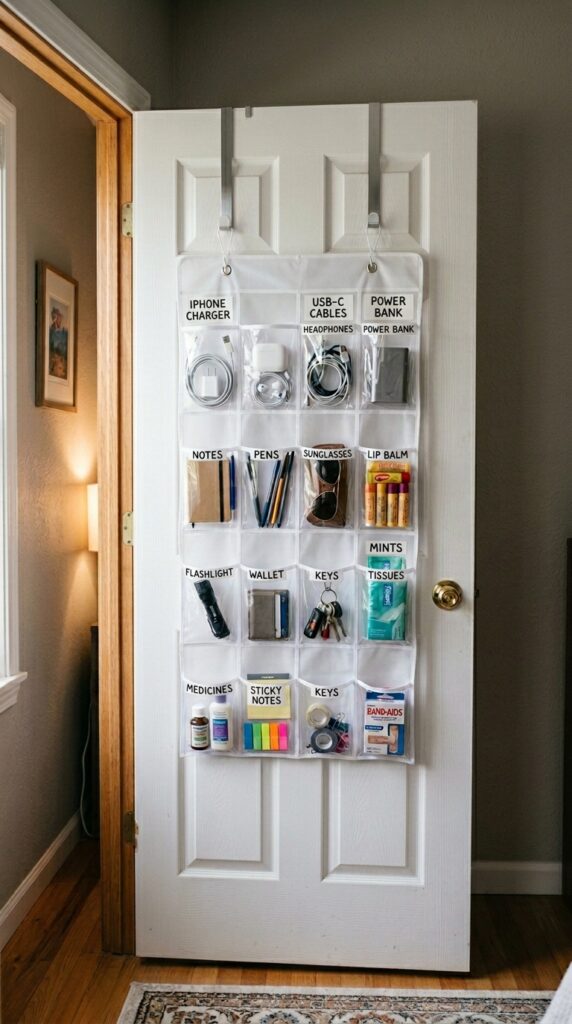
You’ve seen the over-door shoe organizer a thousand times. Usually it’s stuffed with actual shoes and it bulges so the door won’t close. The hack: use it for small bedroom clutter instead. I hung one on the inside of my closet door and put every tiny thing that used to live in my nightstand drawers—phone cables, external batteries, tape, scissors, a sewing kit, spare keys, chapstick, nail clippers. Each clear pocket is labeled with a white paint marker. The door still closes because the pockets are shallow and not overstuffed.
The constraint: cheap vinyl organizers rip at the seams within six months. I went through two $12 versions before buying a fabric one with reinforced stitching for $25. Also, over-door hooks can scratch the top of your door if they have metal edges. I padded mine with felt tape. And don’t put anything heavy in the bottom pockets—the weight pulls the organizer down and the top hooks slide off. Cost: $15–$30. This is one of the few ideas that’s genuinely cheap and effective if you don’t overload it.
Cut a piece of cardboard to fit inside the back of the organizer. It stiffens the whole thing and prevents the “bulging potato sack” look.
14. The Picture Ledge As A Nightstand
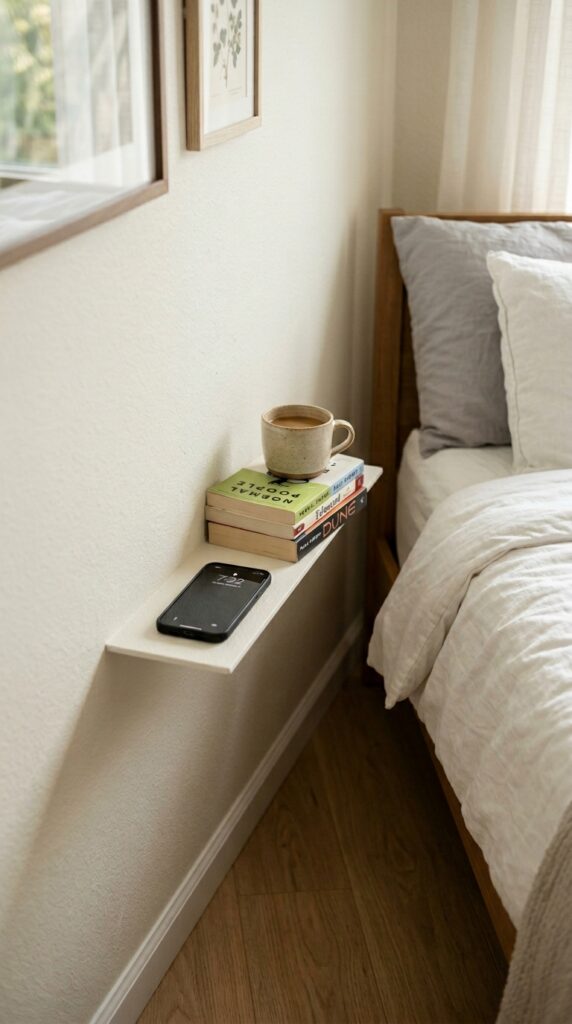
Picture ledges are sold for displaying art, but they make perfect ultra-shallow nightstands. They’re only three to four inches deep—just enough for a phone, a glass that you’re careful with, and a book laid flat. I mounted one 24 inches long next to my bed, with the top of the ledge level with my mattress. It holds everything I need at night and takes up no visual weight. The floor underneath is completely empty, which makes the room feel bigger than any bulky IKEA nightstand ever did.
The catch: you cannot put a round-base lamp on a four-inch ledge. It will fall. I use a wall-mounted swing-arm sconce instead. Also, you will knock things off in your sleep. I trained myself to put my water bottle in the middle, not near the edge. And if you’re a violent sleeper (I am not), this won’t work. Cost: a 24-inch picture ledge is $15–$30. Mounting hardware included usually. Just make sure it’s solid wood—the MDF ones sag under the weight of two paperbacks.
Buy two ledges and mount them stacked with a two-inch gap. Lower one holds your phone and glass, upper one holds a small framed photo and a candle. Double the storage, same floor footprint.
15. Paint The Trim The Same As The Walls
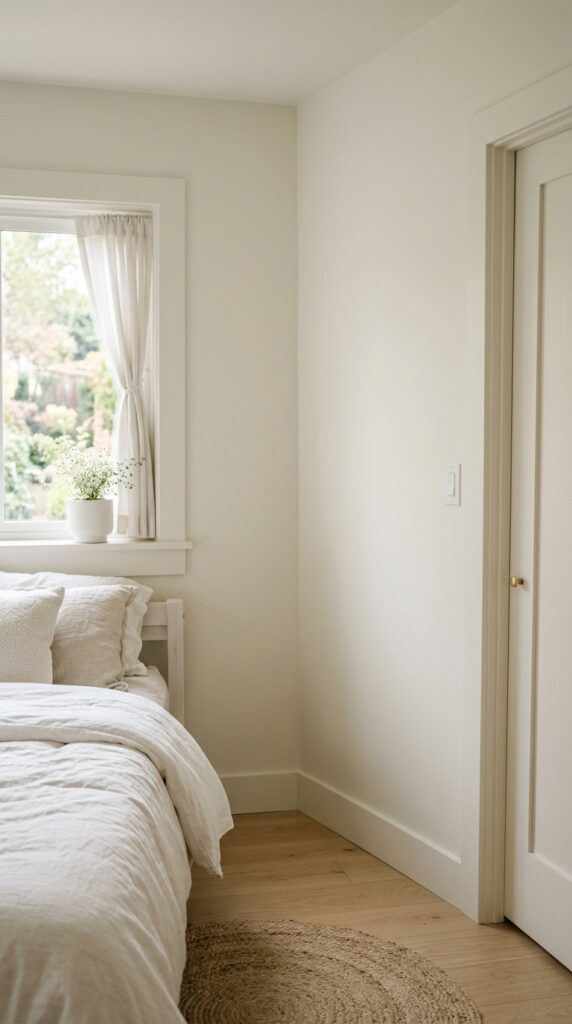
Traditional design says trim should be brighter white than walls to “pop.” That’s terrible advice for a small bedroom. High-contrast trim outlines every corner, every door, every window—it draws a map of exactly how small your room is. I painted my baseboards, door casing, and window trim the exact same color as the walls (a warm off-white). Now the edges blur. The room feels like a continuous space rather than a box with painted lines. It’s a subtle effect, but stand in the doorway and you’ll feel it.
The real-world problem: the same paint on trim will get scuffed and dirty faster than on walls. Baseboards take a beating from vacuums and shoes. I used a semi-gloss finish on the trim (same color, different sheen) while keeping the walls matte. Same color, but the semi-gloss is more durable and wipes clean. From more than three feet away, you can’t see the sheen difference. Cost: zero extra if you’re already painting the walls. Just buy enough paint for trim too and use a quality semi-gloss for those areas.
This works best with lighter colors. Dark walls with matching dark trim can feel like a cave. If you want dark, keep the trim a shade lighter or the room disappears.
16. The Corner Hammock Chair (Risky But Good)
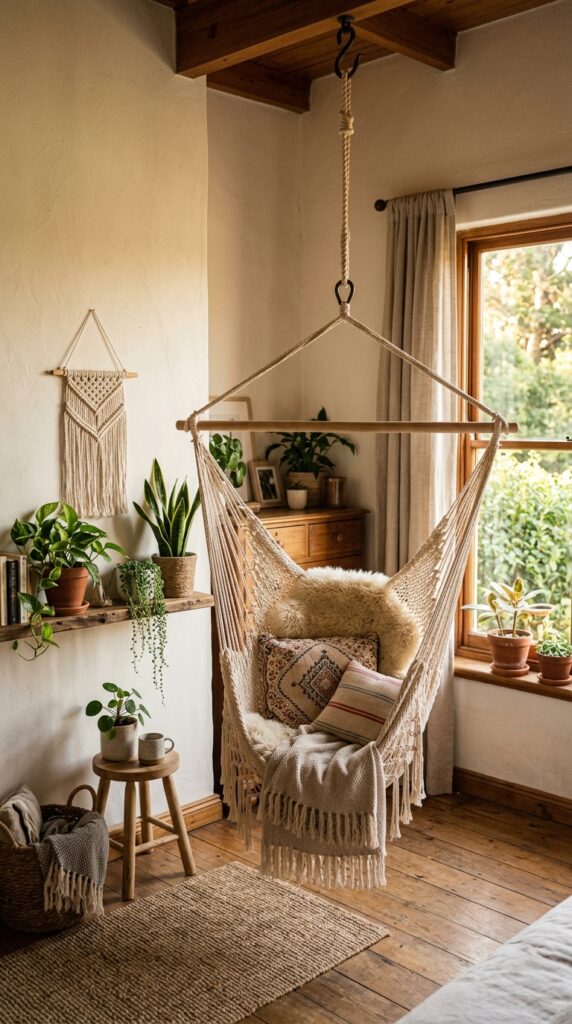
A regular armchair takes up a 30×30 inch footprint and usually sits awkwardly, blocking pathways. A hanging hammock chair uses only the ceiling hook—zero floor space—and turns a dead corner into a reading nook. I installed one in my 85-square-foot bedroom and it’s become my favorite spot. The chair swings slightly, which makes the room feel playful and less cramped. When I’m not sitting in it, I push it against the wall and it hangs there like a piece of textile art.
The installation is serious. You need to screw a heavy-duty eye hook into a ceiling joist—not drywall, not a stud finder’s best guess. I rented a stud finder from the hardware store and still missed on my first try. Also, the chair takes up visual space even when empty. If your room is cluttered, adding a hanging rope chair will make it feel like a ship’s rigging. And it’s not for tall people. I’m 5’4″ and my feet touch the floor perfectly. My 6’2″ friend sat in it and looked like a giraffe in a swing. Cost: $40–$100 for the chair, $10 for the hook, and a lot of prayer that you hit the joist.
Buy a chair with a spreader bar at the top. The ones without it (just a single rope) tangle and spin, and you’ll spend half your time untwisting yourself.
17. The Headboard That Is Also A Shelf
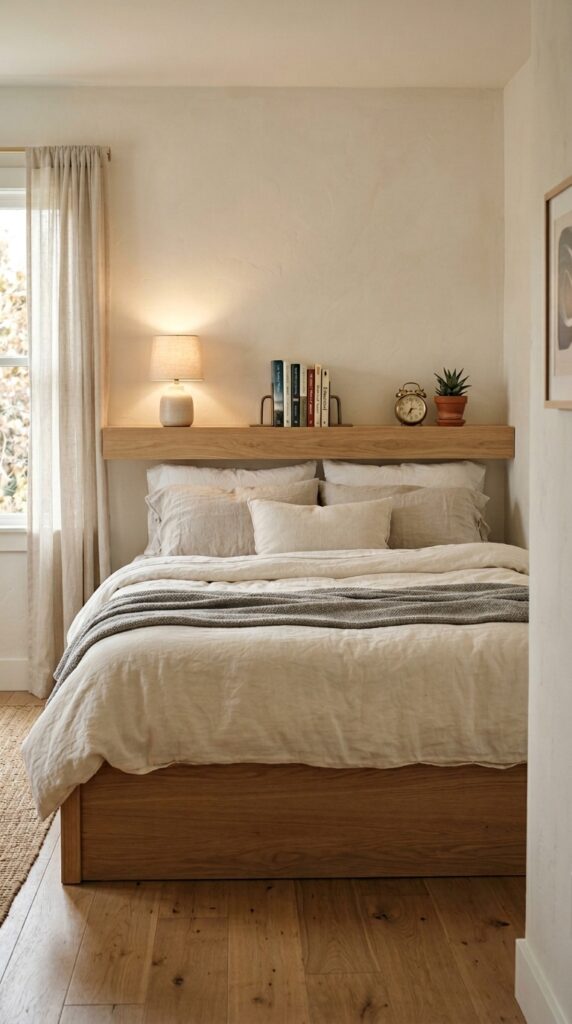
Most headboards are decorative dead weight. I replaced mine with a 60-inch floating shelf mounted at pillow height, about six inches above the mattress. It serves as a headboard (stops pillows from falling off) and a nightstand (holds a lamp, books, phone, glasses). The shelf runs the entire width of the bed, so both sides have access. No need for two separate nightstands taking up floor space. It also creates a visual anchor that makes a small bed feel intentional rather than shoved against a wall.
The constraint: you cannot lean back against a shelf. If you like sitting up in bed reading, your head will hit the shelf bracket. I mounted mine high enough (10 inches above the mattress) so that when I sit up, my shoulders hit the wall, not the shelf. But I’m short. A taller person would need the shelf even higher, which makes it less useful as a nightstand. Also, the shelf collects dust and pillow lint. I wipe it weekly. Cost: $40–$100 for a solid wood shelf and hidden brackets. Don’t use visible L-brackets—you’ll hit your head.
Run the shelf all the way across the bed, not just the center. A partial shelf looks like an afterthought. Full width makes it read as architecture.
18. The Curtain Divider For Studio Bedrooms
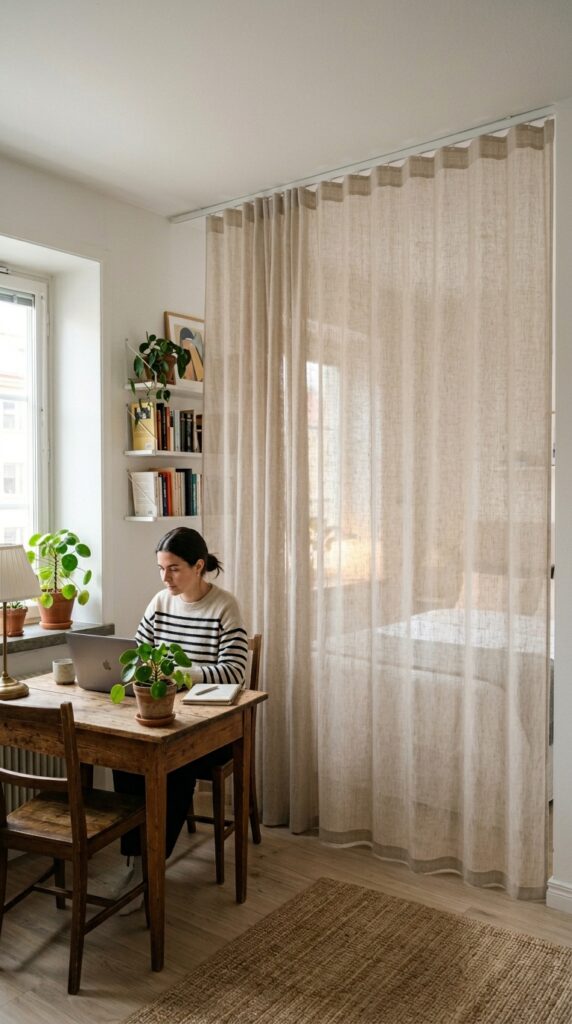
If your bedroom is also your living room (hello, studio life), a curtain divider is better than a room divider screen. Screens take up floor depth and fall over. A ceiling-mounted curtain track costs $30, the curtain another $40, and suddenly you have a soft wall. I installed one to separate my bed from my desk. When the curtain is open, the room feels like one open space. When it’s closed, I can’t see my unmade bed while I’m working. It’s a psychological trick that genuinely reduces the “I live in a closet” feeling.
The failure: ceiling tracks require drilling into the ceiling, which landlords hate. I used a tension-pole system instead—two spring-loaded poles wedged floor to ceiling, with a curtain rod between them. It’s less stable (my cat knocked it down once), but it leaves no holes. Also, fabric choice matters: blackout fabric makes the space feel like a dark cave. Sheer fabric hides nothing. I use a medium-weight cotton that blocks visual clutter but lets light through. Cost: $30–$60 for a tension curtain rod system, $30–$80 for a curtain panel.
Hang the curtain from floor to ceiling, not just door-height. A partial-height curtain makes the room feel shorter. Full height creates a real wall illusion.
19. The Under-Bed Drawers You Build Yourself
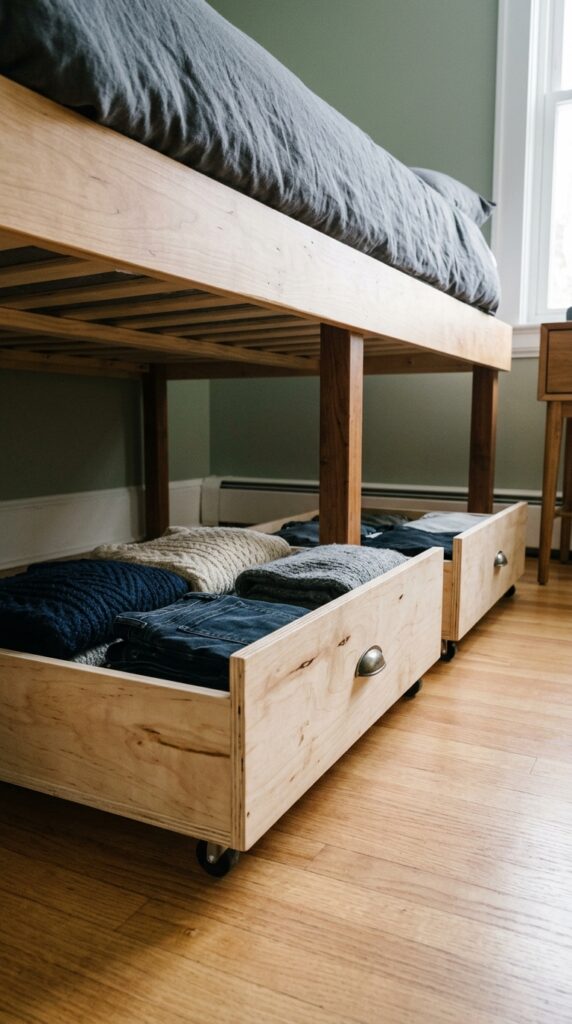
Those fabric under-bed bags with zippers? Garbage. They flatten, they rip, they trap moisture, and you never open them because they’re awkward. I built two shallow drawers on casters from a single sheet of plywood and some 1x4s. The drawers are 12 inches tall, 36 inches wide, and 24 inches deep. They slide under my bed (which I lifted by adding 6-inch risers to the legs) and hold all my off-season clothes. When I need something, I pull the drawer out like a normal dresser. No crawling. No guessing.
The honest truth: this requires a bed with enough clearance. Most beds have 6 inches. You need at least 10 inches for a usable drawer. I bought $15 bed risers to lift mine. Also, plywood drawers on carpet don’t roll well. I use hard caster wheels (2 inches) and put a scrap piece of vinyl flooring under the bed as a track. It’s a kludge, but it works. If you’re not handy, you can buy premade under-bed drawers for $80–$150 each. They’re fine but usually made of flimsy particle board. DIY cost: about $40 in materials per drawer.
Drill a few 1-inch holes in the back of each drawer for airflow. Clothes stored completely sealed under a bed can get musty. The holes make a huge difference.
20. The Single Large Art Piece (Over Many Small Ones)
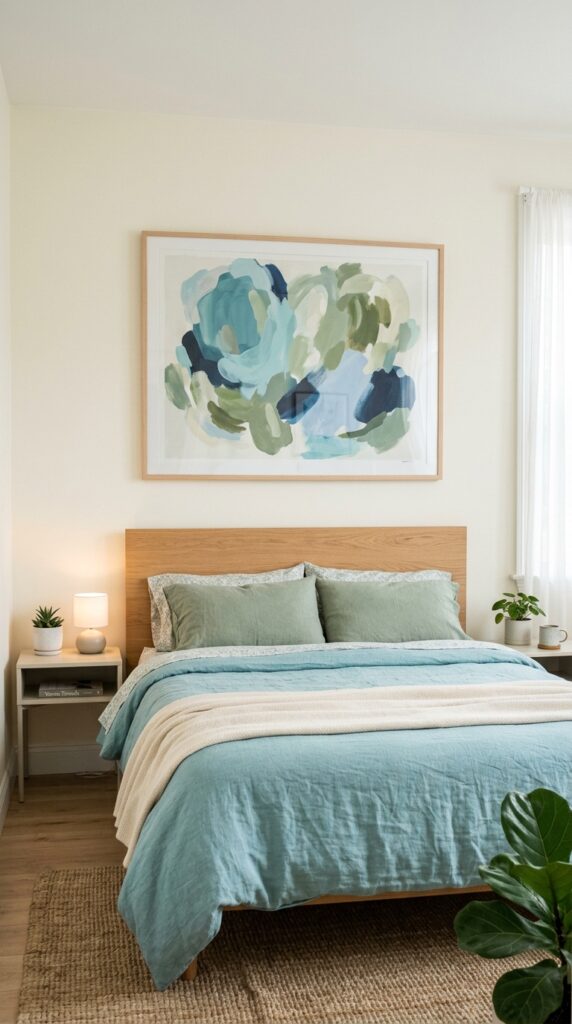
A gallery wall of small frames in a small bedroom reads as visual noise. Each frame fights for attention, and the accumulated clutter makes the room feel smaller. I swapped my collection of tiny thrift-store paintings for one single oversized print. The large scale tricks the eye into thinking the wall is bigger than it is—because the art asserts dominance over the space. I bought a 40×60 inch canvas print online for $120 (shipped) and hung it so the center is at 57 inches from the floor. The room instantly felt more expensive and less frantic.
The constraint: a giant piece of art is heavy (the canvas was 15 pounds) and requires two good anchors. I used a French cleat system rated for 50 pounds. Also, you have to love the art because it’s now the focal point of the room. My first attempt was a moody black-and-white landscape that I got bored of after six months. Now I use a rotating system: I buy cheap canvas prints from online sales and swap them out seasonally. The large format means each piece costs more, but I’ve learned to stick with abstract or botanical—they don’t get old the way a specific scene does. Cost: $80–$200 for a large canvas print.
Don’t hang a large piece directly above a bed if you live in an earthquake zone. I woke up to a canvas on my head once. Use a wire hanging system with wall anchors, not just a nail.
21. The Sconce That Replaces Your Lamp (And Your Nightstand)
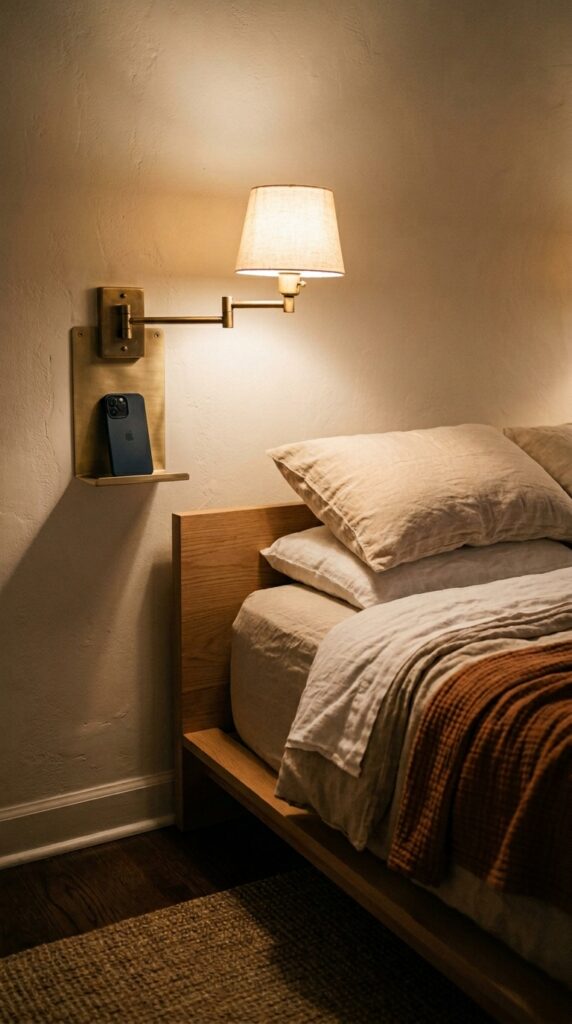
If you combine a wall sconce with a tiny shelf, you eliminate both the table lamp and the nightstand. I installed a hardwired swing-arm sconce with a 5-inch round base that has a flat top—just wide enough for a phone and a pair of glasses. The arm swings out over the bed for reading, then tucks flat against the wall when I sleep. No cords on the floor. No lamp base taking up space. No nightstand needed at all. The room feels like a hotel in a good way.
The massive catch: hardwiring a sconce requires cutting into drywall, running wire, and probably hiring an electrician. I did it myself after watching ten YouTube videos and nearly electrocuted myself. Hire someone. It cost me $150 for the sconce and $200 for an electrician to run the wire from an existing outlet. If you’re renting, this is impossible. Get a plug-in sconce instead—the kind with a cord that runs down the wall and plugs into an outlet. You’ll see the cord (you can hide it in a plastic channel painted to match the wall), but no electrical work. Cost: plug-in sconce $40–$80; hardwired sconce plus install $250–$400.
Mount the sconce at 36 inches from the floor if you read in bed sitting up. Any lower and you’ll cast a shadow over your book. I learned this from a very frustrating week.
22. The Mirrored Closet Doors (That Work Or Don’t)
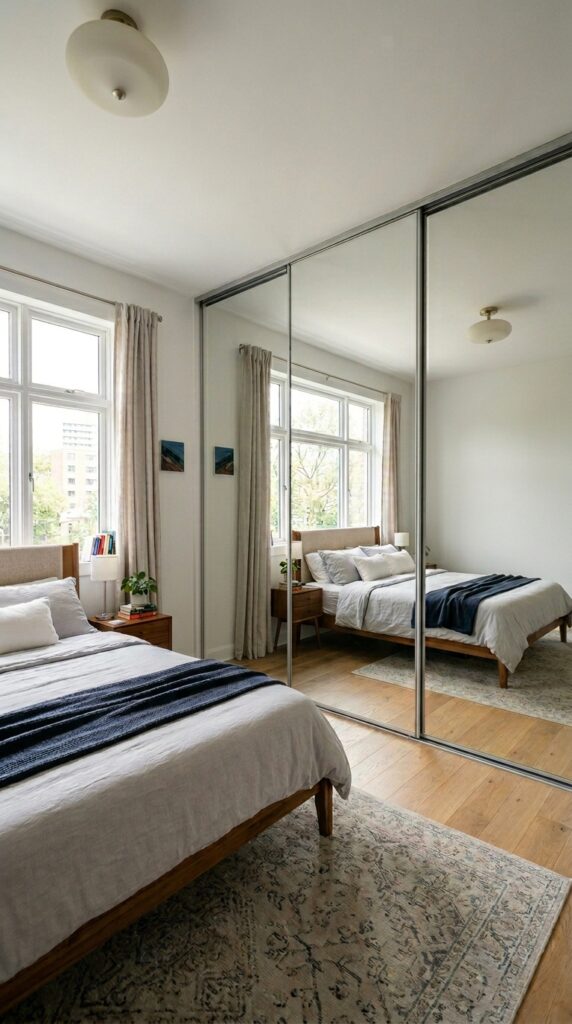
Mirrored closet doors get a bad rap because people remember the cheap, wavy, silver-tinted versions from the 1980s. But a good quality mirrored door (flat glass, no distortion, beveled edges) can make a tiny bedroom feel enormous. I replaced my hollow-core sliding doors with mirrored ones from a building salvage yard for $60 each. Now the entire wall reflects the opposite side of the room, including the window. The visual depth doubles. I don’t even need a separate mirror for getting dressed.
Here is why people hate them: cheap mirrors distort your reflection like a funhouse. Look for “low-iron glass” or “flat glass” in the description. Also, mirrored doors show every smudge. I clean mine with glass cleaner every three days because I’m a maniac. If you have kids or cats, expect fingerprints and nose prints constantly. And if the room is already very bright, the extra reflections can feel harsh. I solved that with a sheer curtain on the window to diffuse. Cost: new mirrored sliding doors run $200–$500 per pair. Used from salvage: $50–$150. Installation is a pain—sliding doors are heavy and the tracks need to be perfectly level.
Position your bed so you’re not staring at your own reflection while you sleep. Angle the bed or put it against a different wall. Waking up to your own sleepy face is weird for everyone.
23. The Leaning Ladder Shelf That Touches Nothing
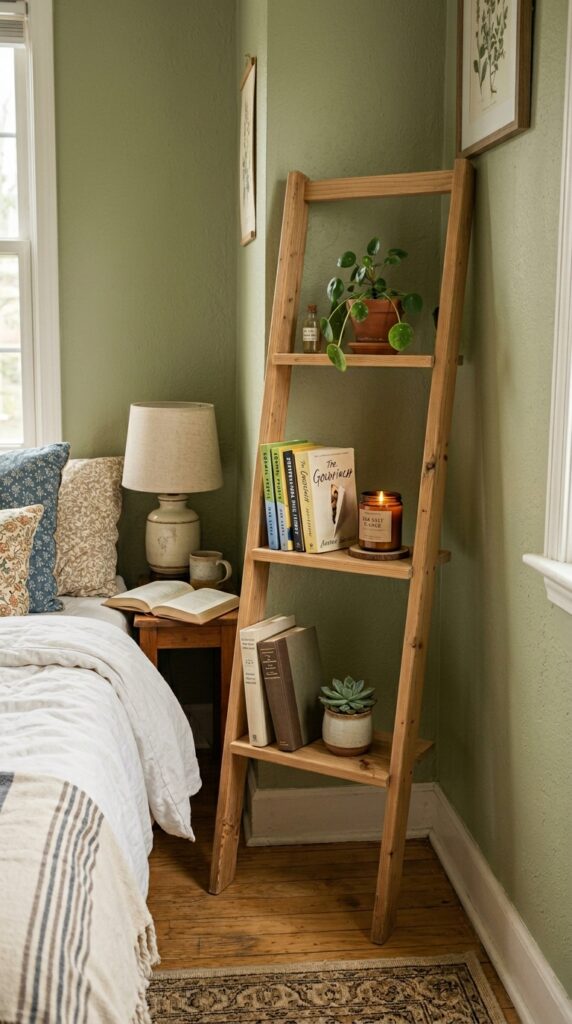
A leaning ladder shelf is the least offensive piece of furniture you can add to a small bedroom. It touches the floor in only two places (the feet of the ladder) and leans against the wall. The visual weight is almost zero because you see through the rungs. I put one in a corner that was otherwise dead, and it holds my overflow books and a small plant. Unlike a bookcase, it doesn’t block the wall or create a dark shadow.
The problem: cheap leaning shelves are unstable. The “ladder” is often just two thin pieces of wood with no bracing, and they wobble. I bought a $40 version from a discount store and returned it the same day. I ended up building one from 2x4s and 1x2s for $25 in lumber. It’s ugly but sturdy. If you buy one, look for a solid back crossbar or anti-tip straps. Also, the shelves themselves are usually too shallow for anything larger than a paperback. A normal book won’t fit without overhang. Cost: cheap ones $30–$60; good quality $100–$200; DIY $25–$50.
Attach the top of the ladder to the wall with a single small L-bracket. It’s invisible behind the top rung and prevents the whole thing from falling forward when you lean on it.
24. The Painted Arch Illusion Headboard
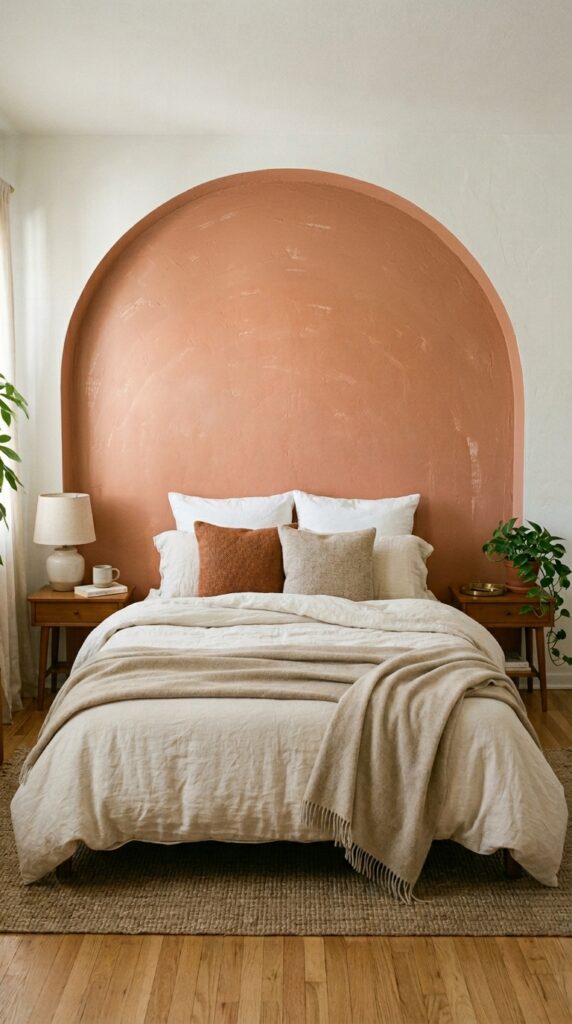
This is my favorite trick that costs almost nothing. I painted a 60-inch-wide arch behind my bed, starting at the floor and curving up to a peak at 48 inches high. The color is a dusty rose that echoes the curtains. The arch tricks the eye into seeing a niche or doorway, which adds perceived depth to a flat wall. It also serves as a headboard without taking up any floor space or requiring a physical object. When I’m on a video call, people ask if I have an arched doorway. I do not. It’s just paint and a string tied to a pencil to draw the curve.
The catch: this requires a steady hand and good tape. I used frog tape and a small roller, and it still bled in a few spots. I fixed the edges with an artist’s brush and the wall color. Also, the arch works best with a low bed. A tall bed with a thick pillow top will cover the bottom of the arch, which ruins the illusion. My mattress is 8 inches on a low frame, so the arch starts just below the pillows. Cost: $15 for a sample-sized paint pot, $10 for tape and brushes. If you hate it, paint over it. No harm done.
Don’t try to freehand the curve. Hammer a nail into the wall at the center point of your arch, tie a string to a pencil, and draw a perfect arc. Erase the nail hole later with spackle.
25. The Vacuum Bag Challenge (One In, One Out)
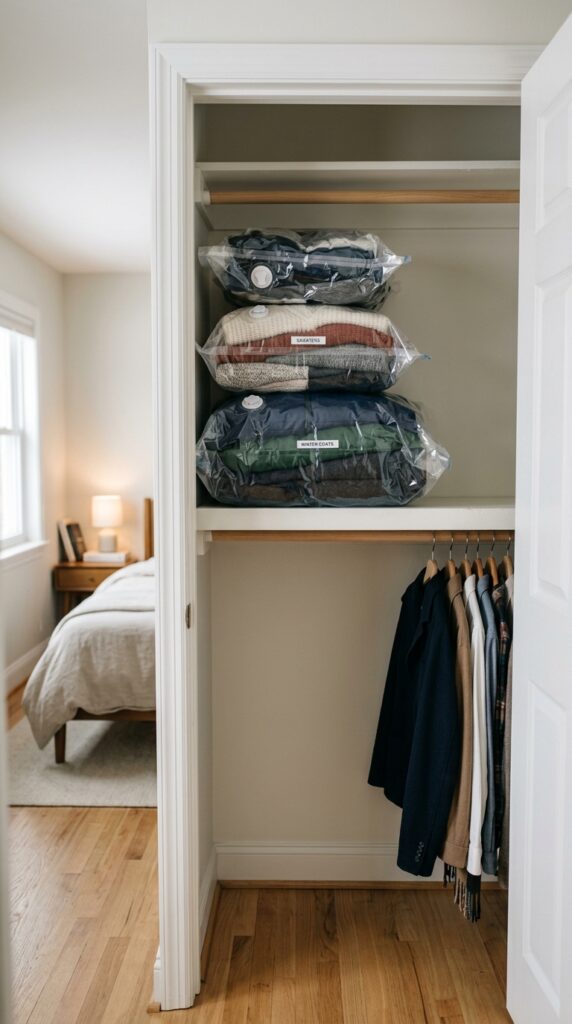
This isn’t a decor idea. It’s a rule. Every small bedroom needs a strict “one in, one out” policy for physical objects, and vacuum bags are the enforcement mechanism. I bought a set of jumbo vacuum storage bags and compressed my winter coats down to the thickness of a pizza box. Then I made a rule: whenever I buy a new clothing item, one old item goes into the donation bag. The vacuum bags sit on the top closet shelf, taking up 80% less space than the same clothes would unpacked. When the bags fill up, I have to donate something.
The realistic friction: vacuum bags lose their seal over time. The cheap ones from the drugstore will re-inflate within a month. I buy the heavy-duty ones with a double-zip and a hand pump (not the kind that requires a vacuum cleaner hose). After two years, they still hold. Also, you can’t use them for delicate fabrics like wool or down—the compression damages the loft. I learned that after ruining a down vest. For cottons, denim, and synthetics, they’re fine. Cost: $20–$40 for a set of five large bags. The real cost is the discipline to actually donate the extras.
Label each bag with the season and a rough inventory using masking tape. Otherwise you’ll open three bags looking for a single sweater and spend an hour re-compressing everything.
Summary
After 25 ideas and a lot of real talk about sagging shelves and squeaky chairs, here is what I actually want you to do: pick two of these. Not five, not ten—two. The fastest way to ruin a small bedroom is to try every trick at once and end up with a room that feels like a Pinterest board threw up. One idea from the “visual space” category (mirrors, curtains, paint tricks) and one from the “physical storage” category (peg rails, under-bed drawers, door organizers). Implement them, live with them for a month, then pick a third.
If you have no idea where to start, paint the ceiling a soft muted color and install a peg rail. Those two are the highest return on investment for the least money and hassle. The ceiling trick surprises you every time you walk in, and the peg rail empties your floor. I’ve done both in three different apartments, and they’ve never let me down.
Small bedrooms are not a compromise. They’re a constraint that forces you to be intentional. And intentionality, in the end, looks better than square footage. Now go clear off that folding chair nightstand. You deserve better.

