
Let’s be honest: grass is exhausting. It needs mowing every week from April through October, it burns in drought and drowns in heavy rain, and if your yard has significant shade, compacted clay, or slopes that send topsoil sliding, it barely survives anyway. The water bills alone can make you question every landscaping decision you’ve ever made. The slow but very real revolution happening in outdoor design right now — in both dry western climates and surprisingly, in humid eastern gardens — is rock landscaping. Not the dated railroad-ties-and-white-gravel aesthetic of the early nineties, but genuinely considered, layered, textural outdoor spaces built from stone, pebble, crushed granite, and the kind of materials that get better looking with age rather than worse.
Almost everything on this list is a weekend project. Most of it costs a fraction of turf installation and demands exactly zero ongoing irrigation. Whether you’re working with a sunbaked strip behind a rental, a sloped suburban backyard that mowers can barely handle, or a full yard you’re ready to reimagine, there’s a rock landscaping approach here that fits your situation — and your budget. These twelve ideas range from dead-simple to genuinely sculptural.
1. The Dry Creek Bed That Actually Moves the Eye
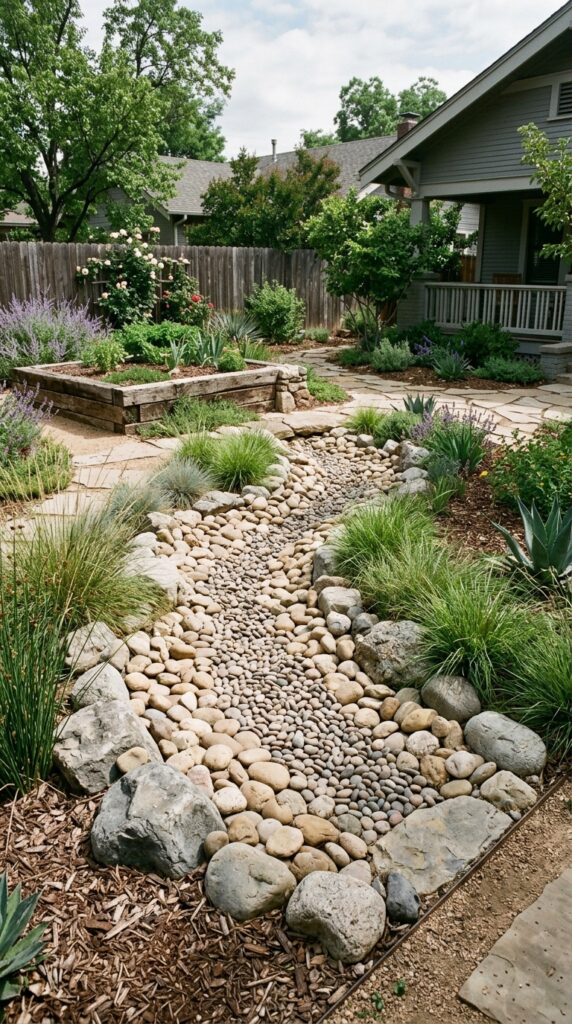
A dry creek bed is one of those ideas that sounds almost too simple, right up until you see a badly executed one — a straight trench filled with uniform-sized gravel — and realize there’s more nuance here than it first appears. The secret is the curve. Straight channels look like drainage ditches. Even a gentle S-shape through the yard immediately reads as intentional and naturalistic, as though the yard evolved this way rather than was constructed on a Saturday.
Source three stone sizes and treat them like the physics of actual moving water: large anchor boulders on the outer banks where a real creek would deposit heavy material, medium cobbles filling the body of the channel, and small polished river pebbles tightly packed in the very center where fast-moving water would carry the lightest material downstream. This graduated layering is what elevates the look from “pile of rocks” to something that holds the eye.
Lay landscape fabric underneath everything before a single stone goes in. Skip this step and you’ll be pulling grass and weeds through the gaps within two seasons. Plant feather reed grass, society garlic, or ornamental sage along the edges — the contrast of soft foliage against hard stone is the whole visual point.
Watch out: resist making the bed too wide. A creek that spans most of the yard stops reading as a creek and starts reading as a gravel dump. Keep channels between 18 and 36 inches across for most residential yards. Source bulk river rock from a landscape supply yard rather than bagged product — the price difference on a full creek bed is significant.
2. Decomposed Granite Pathways With a Hardpacked Finish
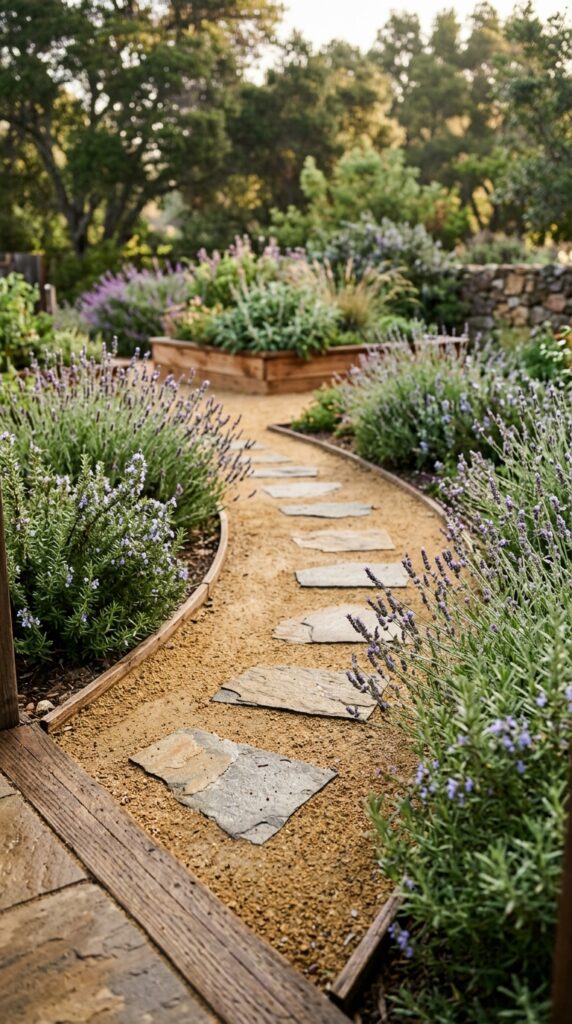
Decomposed granite — DG, in the trade — might be the single most underrated budget landscaping material available to the home gardener. It’s essentially granite broken down by weathering into a fine, compactable grit that, when tamped properly, forms a surface almost as firm as packed earth. It drains beautifully, costs pennies per square foot compared to pavers, and comes in color ranges from warm honey gold to dusty rose to charcoal depending on your region’s geology.
The difference between a DG path that looks polished and one that looks improvised is almost entirely down to edging. Thin black steel landscape edging — not plastic, which warps and discolors — keeps the granite contained and gives the path confident, clean lines. Without it, the material migrates into planting beds within one good rain and the whole composition starts unraveling at the edges.
For high-traffic areas, mix in a DG stabilizer before tamping: it’s a dry polymer additive that makes the compacted surface almost concrete-hard while still looking completely natural and unglamorous. Pair the DG with flush-set flagstone stepping stones every 24 to 30 inches and the whole thing reads significantly more intentional and expensive than the materials actually cost.
One constraint worth noting: DG doesn’t perform well in persistently shaded, north-facing yards. In damp, low-sun conditions it tends to develop moss and go soft. It’s a full-sun or part-sun material, really. If your whole yard sits in shade, this one isn’t for you.
3. River Rock Mulch Beds Around Existing Trees
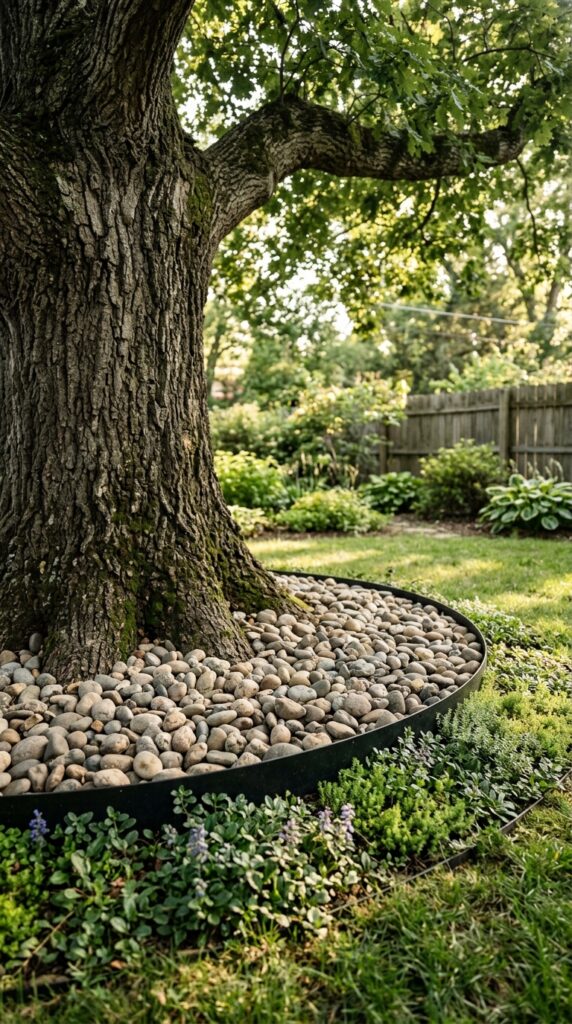
Converting the mulch rings around your existing trees to river rock is one of the fastest and highest-impact swaps on this list. Organic mulch needs refreshing every season, blows around in wind, and can create conditions that attract moisture-loving insects right at the base of your trees. River rock does none of these things. It stays put permanently, retains soil moisture without creating fungal problems at the bark, and looks genuinely polished when it’s contained by a tight steel edging ring.
Use smooth river rocks in the 1 to 2-inch size range. Smaller than that, they kick out onto the lawn every time someone walks nearby. Larger than that, and the proportions start looking aggressive around everything but the biggest trees. A three-foot ring is proportional for medium-sized trees; go to four feet for anything with a trunk thicker than your forearm.
For a more sculptural effect, layer two stone colors: a base of buff pea gravel topped with a deliberate scattering of darker slate cobbles. The tonal variation reads as depth and intention rather than just “rocks around a tree.”
Critical note: leave a four-inch gap between the stone ring and the actual bark. Both rock and organic mulch against the trunk traps moisture and invites rot and pest damage. The visual instinct is to push everything snug against the base because it looks tidier — fight that instinct. This is a genuine Saturday-morning project. One tree ring takes two to three hours including edging installation, fabric, and stone placement.
4. Flagstone Patio Inset With Creeping Ground Cover
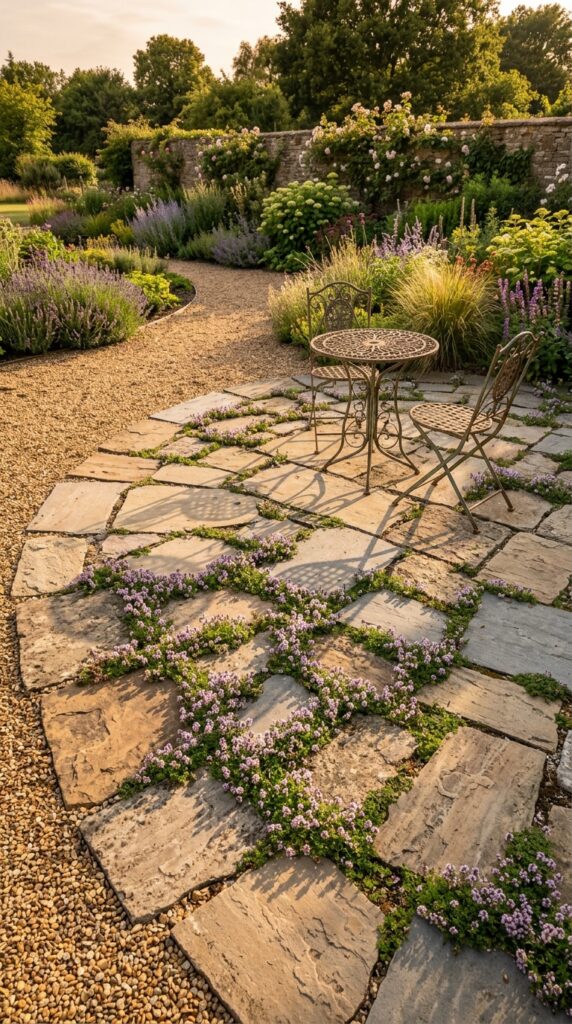
Here’s the thing about flagstone: it becomes a completely different material depending on what you put between the joints. Fill them with sand or regular mortar and you get a standard patio. Fill them with creeping thyme, Irish moss, or elfin thyme and you get something that looks like it belongs in a garden magazine and smells incredible when you step on it.
The key to making this work on a budget is choosing irregular flagstone rather than cut squares. Irregular sandstone and bluestone costs considerably less per square foot, and the mismatched edges are actually more forgiving of imperfect installation because the eye accepts organic variation more readily than it accepts slightly-off geometry in a grid of cut tiles.
Set the flags on a two-inch bed of leveled sand over a compacted base. You don’t need mortar for a patio with planted joints — the ground cover roots lock the stones in place within one growing season, and the flexibility is actually better for freeze-thaw climates where rigid mortar cracks and heaves. Plant thyme plugs, not seed — too slow — four to six inches apart in the joints right after setting the stone.
Skip this if you share the yard with dogs who dig. Planted flagstone joints and enthusiastic diggers are fundamentally incompatible. Go with straight sand joints or granite fines instead. Once established, creeping thyme handles moderate foot traffic without complaint and asks for almost nothing in return.
5. A Gravel Garden With Architectural Succulent Planting
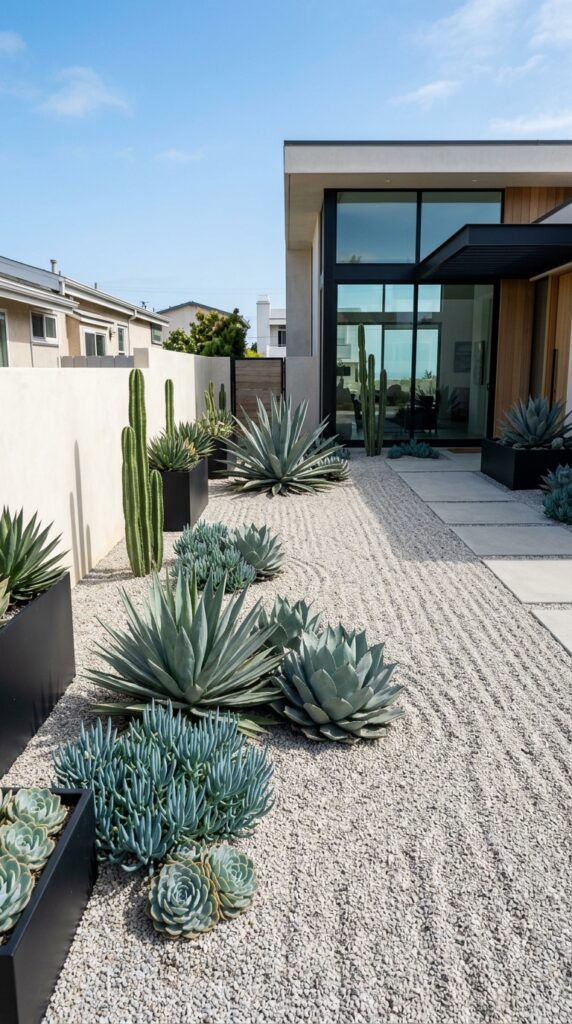
Gravel gardens are the design category that gets the most wrongly executed — and when they go wrong, they go really wrong, usually in the direction of a gas station forecourt. The difference between that and something genuinely beautiful is almost entirely the planting. Gravel on its own is industrial. Gravel with bold, architectural succulents planted in deliberate, asymmetric groupings becomes something closer to land art.
Choose your gravel color against your house rather than matching it. Warm cream and buff gravels work beautifully against terracotta, warm timber, and earthy stucco. Grey and charcoal gravels look sharp against white, concrete, and dark-painted exteriors. Don’t match — contrast, and do it intentionally.
The succulents and cacti that anchor this look best are ones with genuine presence: large blue agaves, sculptural golden barrel cacti, tall cereus columns, or bold clumps of blue fescue for softer movement. Space them generously — crowding succulents in gravel removes the drama and makes the whole thing look like a garden center display rather than a designed yard.
Practical note: in climates with significant rainfall, ensure the gravel bed has a grade that drains away from the house foundation. Flat gravel gardens in wet climates can pool, which is both structurally problematic and causes root rot in plants adapted to dry conditions. This is a beautiful, almost maintenance-free landscape when executed in the right climate and with the right plant partners.
6. Stacked Stone Raised Bed Borders
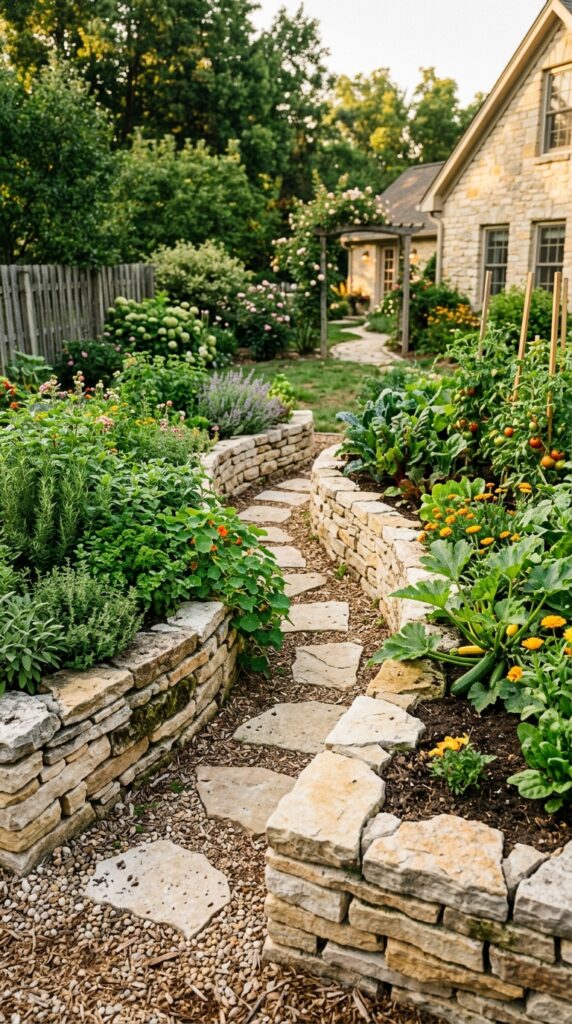
Stacked stone raised beds are one of those projects that look like they require professional masonry — and they genuinely don’t. Dry-stacking, meaning no mortar, just gravity and fit, is forgiving and surprisingly achievable for a first-time builder. The structural principle is simple: wider at the base, each course stepped slightly inward, and flat capstones on top. The wall holds itself together through weight and interlocking shape.
Source fieldstone locally wherever possible. It’s cheaper than quarried cut stone, it suits the naturalistic aesthetic better, and it tends to look more settled in the landscape because it’s actually from the landscape. Limestone, sandstone, and granite fieldstone all work well. Mix sizes for visual texture — courses of all-identical stones look like manufactured block, which misses the point entirely.
Eighteen inches is a good working height for a raised bed: deep enough for most root vegetables, tall enough to reduce bending during planting and harvest, and structurally achievable in dry-stack construction without internal reinforcement.
One thing to watch: if you’re building on a slope, the downhill face of the wall does significantly more structural work than the uphill side. Keep those courses especially wide and well-interlocked, and don’t exceed 24 inches in height on a slope without some landscape engineering input. The visual reward when it’s done is genuine — stacked stone reads as permanent and rooted in a way that timber raised beds simply don’t achieve.
7. Pea Gravel Seating Area With Defined Timber Border
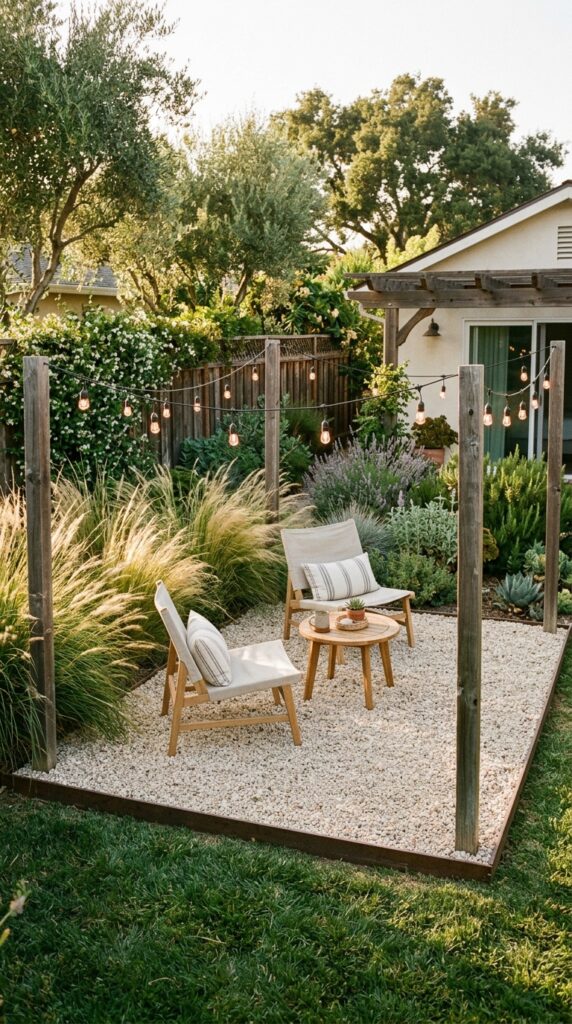
A pea gravel seating area is one of the most budget-accessible ways to create a defined outdoor room that doesn’t require a poured concrete slab or a full paver installation. Done well, it reads as a deliberate design choice rather than a workaround. The trick is the containment system: the gravel area needs clean, confident edges, or the whole thing looks temporary and accidental.
Steel landscape edging or low-profile sleeper timber borders work equally well. The depth matters: four inches of pea gravel is the minimum for comfortable seating — enough that chairs don’t scrape through to the ground fabric below. Lay weed fabric first, always. Pea gravel in natural ivory or warm buff tones photographs beautifully and sits well against almost any outdoor furniture. Avoid pure white — it shows every leaf, twig, and footprint and becomes exhausting to maintain after one season.
The one legitimate complaint about pea gravel seating areas is that it’s not entirely stable underfoot — chairs shift slightly and heels sink in. If you or your guests primarily wear heels, use flagstone for a central seating pad and pea gravel as the surrounding surround rather than the whole surface. That said, for barefoot summer living it’s actually a pleasure: cool, clean, and genuinely comfortable underfoot.
String lights hung low between timber posts, rather than stretched high house-to-fence, transform this space at dusk into something genuinely lovely without requiring a single electrical connection.
8. Japanese Zen Gravel Raking Area With Stepping Stones
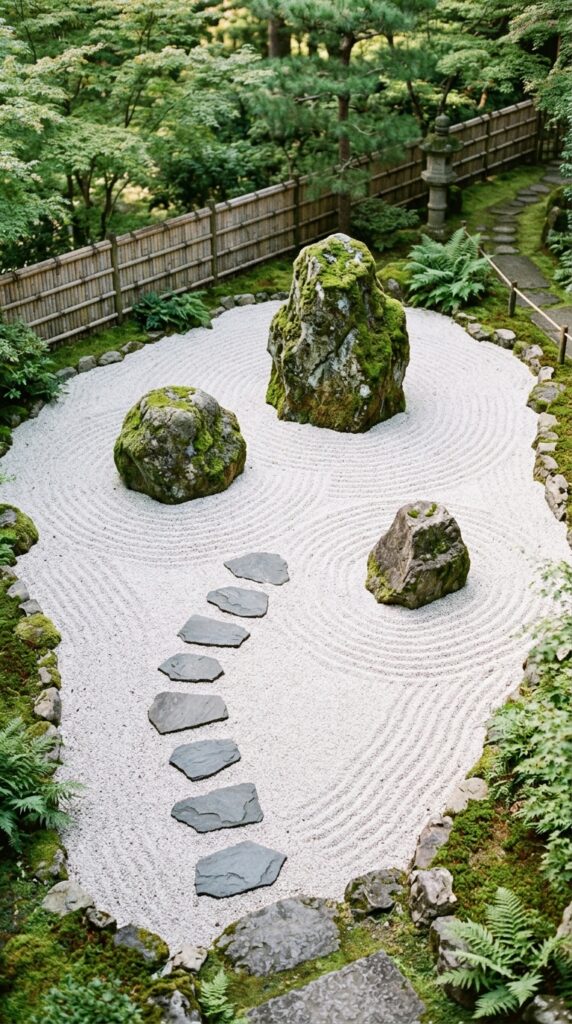
This look requires the most restraint of anything on this list, and restraint is harder than it sounds. The Japanese zen garden concept — raked gravel representing water, rocks representing islands or mountains, negative space treated as active rather than merely empty — translates into residential backyards beautifully when you resist the urge to fill every inch. Emptiness is load-bearing in this aesthetic, and fighting that instinct is the whole practice.
Use fine white or light grey decomposed granite rather than rounded pebbles for raking. Coarser material doesn’t hold the patterns. A wide wooden-tined rake creates the parallel or concentric circle patterns. Maintaining the raked surface becomes part of the point — it’s a five-minute weekly ritual that most people who commit to this space find quietly satisfying rather than burdensome.
The boulders are everything. Choose three, in deliberately varied sizes, and place them in odd-number groupings with no two at the same height. This is a deeply embedded principle in Japanese garden design: even numbers feel static, odd numbers feel dynamic and alive. The largest boulder should be genuinely significant — don’t economize here when everything else in the garden is inexpensive.
Skip this one if you have children who will play in the yard. Raked gravel patterns survive approximately one afternoon of childhood. Surround the zen area with low bamboo fencing or a simple clipped hedge to give it containment and psychological separation from the rest of the yard.
9. Crushed Basalt or Lava Rock for a Dramatic Dark Mulch Bed
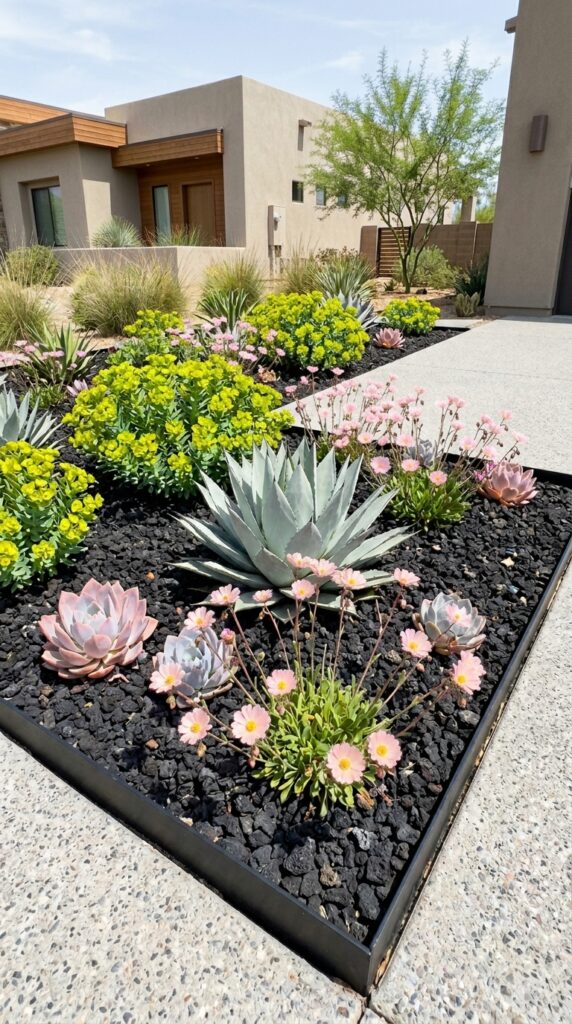
Most people’s rock mulch instinct goes immediately to tan or grey, which is fine but predictable. Black lava rock — or crushed basalt — is the move for yards with bold, colorful planting or modern architecture, and it is criminally underused in residential landscaping. The contrast it creates between the dark ground and any plant placed against it is immediate and striking. Silver agaves glow. Lime-green euphorbias pop. Even standard ornamental grasses look like a deliberate design decision rather than an afterthought.
Lava rock is also practically excellent: it’s lightweight relative to its volume — important if you’re hauling it any distance from the vehicle — extremely porous, and it doesn’t compact or break down the way organic mulch does. A bed of lava rock mulched once will look essentially the same in fifteen years.
The depth required is only two to three inches. More than that and it becomes difficult to plant through, and the extra depth does nothing for weed suppression that good landscape fabric underneath won’t already accomplish.
Color note worth taking seriously: black lava rock absorbs significant heat in direct sun and can raise soil temperatures meaningfully in warm climates. This is a genuine benefit for cold-climate gardeners looking to extend their growing season, and a potential problem in hot climates for anything with shallow heat-sensitive roots. Use it in contained beds rather than across a full yard — the drama works best in contrast with surrounding lighter stone or lawn areas.
10. Rock Mulch Rain Garden for Drainage Problem Areas
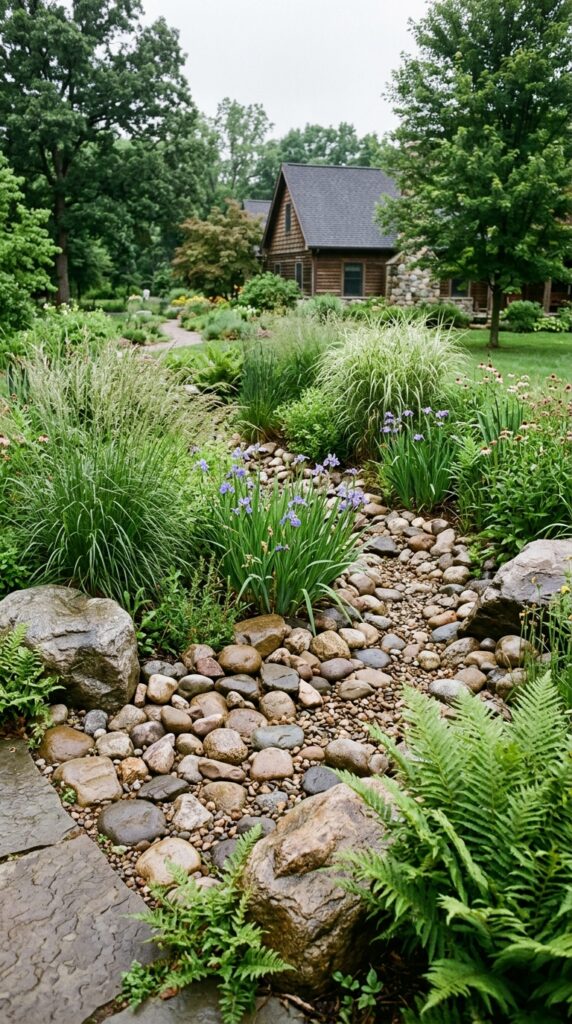
If you have a low spot in your yard where water pools after rain — and in many suburban lots, this spot exists and makes that entire corner perpetually muddy and unusable — a rock mulch rain garden transforms a drainage problem into a genuine landscape feature. The concept is straightforward: shape the low area into a deliberate, gently sloped bowl, fill it with layered gravel and river rock that allow water to percolate slowly into the ground, and plant the upper edges with plants that tolerate both wet feet during rain events and dry periods between them.
The rock layering is critical to function. The center of the bowl should contain your largest, most permeable material — river cobbles with natural gaps between them allow rapid percolation. The edges transition to smaller stone and then to the planted border. This gradient mimics the natural edge of a streambed and is both more functional and more beautiful than uniform gravel throughout.
Native rushes, Louisiana iris, cardinal flower, and swamp milkweed all thrive in rain garden conditions. They’re typically inexpensive at native plant nurseries and genuinely outperform standard garden plants in these alternating wet-dry cycles — they evolved for exactly this. A rain garden requires a bit of grading work at the outset, which is the most labor-intensive part of the project. But once established, it requires almost no maintenance and solves a drainage problem that would otherwise persist for the life of the yard.
11. Mosaic Stone Stepping Path Through a Gravel Yard
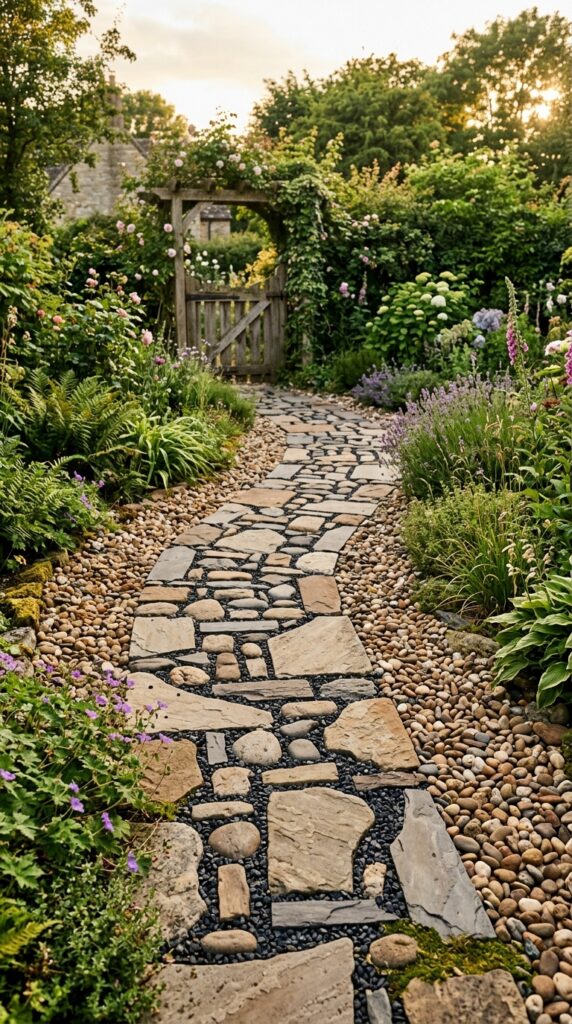
This is the option for anyone who finds pure utility landscaping too cold or impersonal. A mosaic stepping path — irregular flat stones arranged not in a straight grid but in an organic, almost artistic composition, with small dark gravel filling the joints — reads as handmade and considered in a way that manufactured pavers simply don’t achieve. It has personality, and personality in a garden is rarer than people think.
You don’t need matching stones. Mismatched is actually better: a mix of sandstone pieces, broken flagstone, and smooth river pebbles arranged flush at the same height creates a surface that looks curated rather than bought. Source pieces from stone yards that sell seconds and broken material — this is genuinely one of the cheapest stone options available because you’re buying what others considered waste.
Set each piece in a bed of sand, level carefully, and fill the joints with fine dark gravel or decomposed granite tamped in tightly. The color contrast between the flat stones and the joint fill is what gives the path its mosaic character and legibility from a distance.
One real constraint: leveling irregular stones takes time and patience. Rushing this step gives you a trip hazard rather than a path. Set aside a full weekend for even a short run, rent a rubber mallet and use a level bar rather than eyeballing it, and accept that slow installation is simply part of this particular project. The result is a path that people actually stop to look at, which is its own reward.
12. Boulder Cluster Focal Point With Ornamental Grass Planting
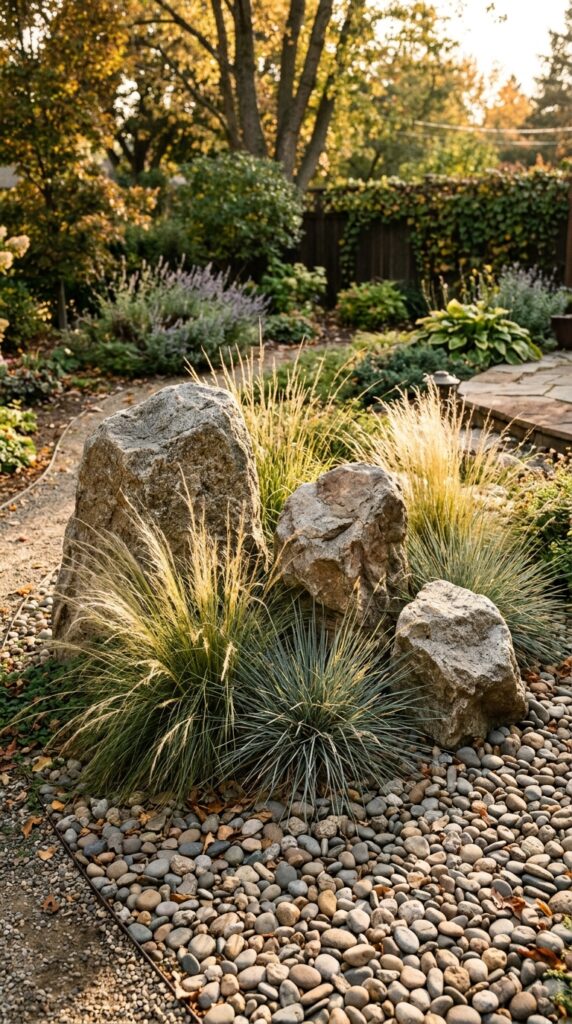
A well-placed boulder cluster is the punctuation mark a rock landscape needs: a point of visual weight that the eye returns to, an anchor around which everything else in the yard can organize itself. It’s also the highest-value single investment you can make in a rock landscape, which is why it deserves its own section and its own considered approach.
The principle that makes boulder clusters work is partial burial. A boulder sitting flat on the surface of the ground looks placed. A boulder sunk four to six inches into the soil looks like it has always been there, like the yard grew around it over decades. This single adjustment is the difference between a landscape feature and a pile of rocks, and it costs nothing except fifteen minutes with a spade.
Choose boulders with interesting surface texture: granite’s crystalline face, basalt’s columnar structure, or limestone’s weathered pitting all give the eye something to linger on. Avoid overly smooth, round decorative boulders — they look manufactured and suburban in a way that undermines the naturalistic intent of the whole exercise. Plant ornamental grasses at the base and slightly behind the boulders: feather reed grass for upright movement, blue oat grass for silver color contrast, or maiden grass for late-season plume interest. The grass softens the boulder’s hard geometry without competing with it.
If budget allows for only one major stone purchase from this entire list, make it boulders. Everything else — the gravel, the DG, the river rock — is inexpensive and easily sourced anywhere. A genuinely beautiful boulder is worth spending on, and unlike every other landscape material you’ll ever buy, it only gets better with age.
The Long View
Rock landscaping has this reputation for being a dry-climate solution — something people do in Arizona and California because they have no other choice. That’s a narrow reading of what’s actually a very rich design tradition. From English gravel gardens to Japanese dry landscapes to Mediterranean hillside terraces, cultures across centuries and climates have understood that stone and plant together create something more durable, more honest, and often more beautiful than turf.
What you’ve read here is a practical toolkit, not a prescription. Mix and match these ideas based on your yard’s specific challenges — a dry creek for drainage, a boulder cluster for focal interest, DG paths connecting it all — and you’ll end up with something genuinely layered and considered. Start with one weekend project. See how it changes the space. Most people who tear out even a single strip of grass and replace it with rock find themselves expanding the project within a season, simply because the visual return is so immediate and the ongoing maintenance so dramatically lighter. Your yard doesn’t have to be a lawn. It never really had to be.

