
There is something quietly revolutionary about a front yard that never needs watering, never browns in August, and never makes you feel guilty for skipping a weekend of yard work. Rock gardens have carried an unfair reputation for decades — people picture something stark, scratchy, or vaguely neglected. But the rock gardens being designed today look nothing like that. They’re layered, textured, and alive in a way that lawn simply isn’t. And the cost? Almost always lower than maintaining turf over the long run. The trick is in the composition — using rock not as a substitute for plants but as a partner to them, creating contrast and structure that makes even the simplest drought-tolerant planting look considered and intentional. If your front yard has been underwhelming you, or your water bill has been quietly infuriating you, or you’ve just run out of patience with grass that refuses to cooperate, these twelve ideas are exactly where to start.
1. Limestone Slab Garden With Creeping Ground Cover
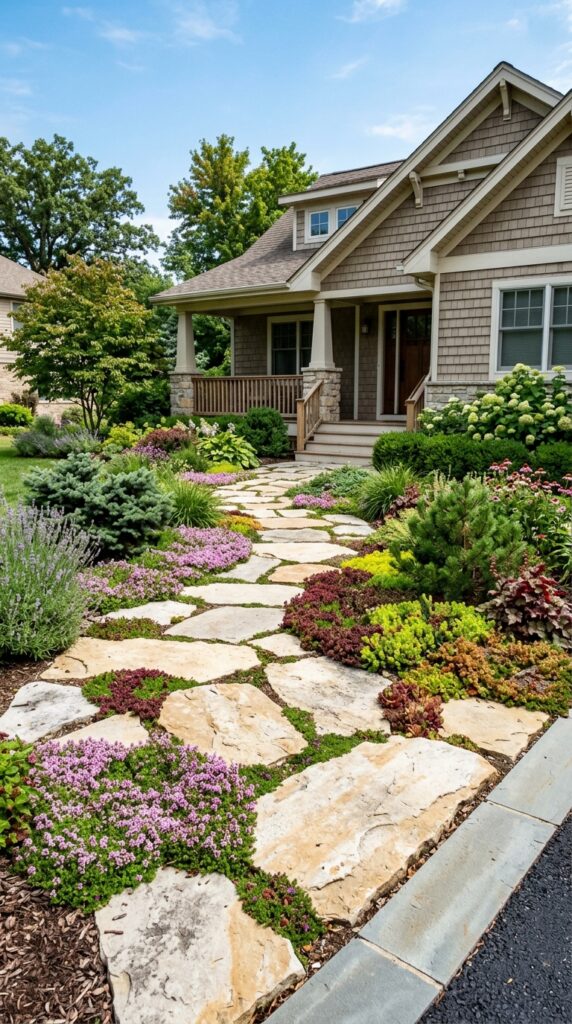
Limestone is one of those materials that ages in your favor. Fresh, it’s pale and bright — almost too clean. Two seasons in, it softens to a warm honey-gray patina that looks like it was placed there by someone with very good taste a long time ago. That quality alone justifies its modest cost over anything synthetic.
The composition here works because of the contrast between solid, flat stone and the soft, spreading character of what fills the gaps. Creeping thyme is the ideal partner — it handles light foot traffic, smells extraordinary in warm weather, blooms in small purple-pink clusters in late spring, and needs essentially zero attention once established. Alternatively, woolly thyme has a silvery texture that reads beautifully against pale limestone, giving the whole arrangement a slightly more refined, almost Mediterranean feel.
The installation principle is straightforward: lay the largest slabs first as anchors, then work inward with smaller pieces. Leave gaps of two to four inches between stones for planting — not uniform gaps, but varied ones that look naturally eroded. Plant immediately after laying so the ground cover can establish before summer heat sets in.
One watch-out: limestone in very acidic soil regions can slowly degrade and whiten unevenly. A quick soil pH test before you commit is worth ten minutes of your time.
2. Decomposed Granite Base With Ornamental Grass Islands
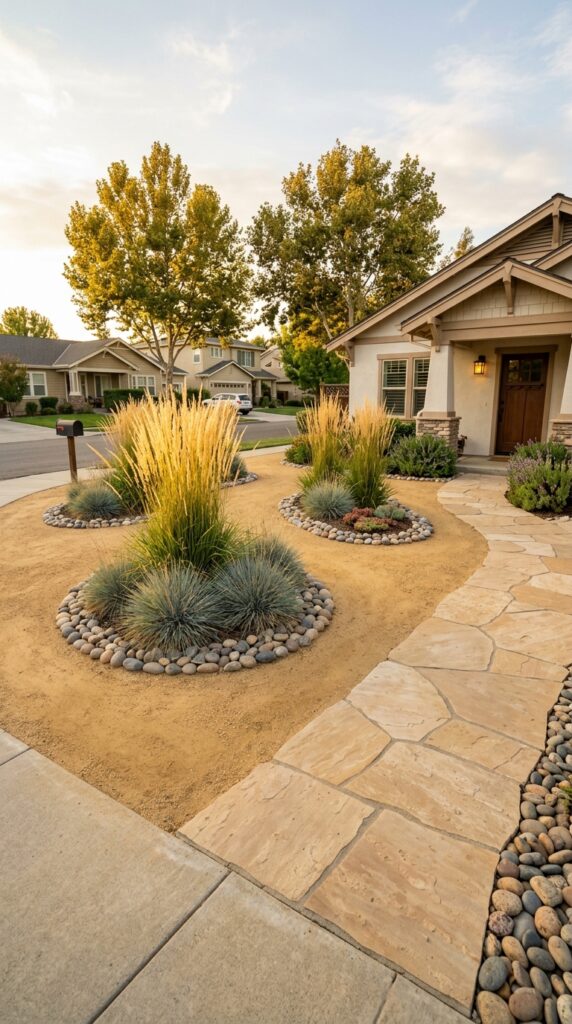
Decomposed granite as a front yard ground plane is the closest thing landscaping has to a blank canvas. It’s warm, it compacts beautifully, it drains fast, and it gives you a neutral base against which everything else — stone, plant, path — reads clearly. The mistake most people make is treating it as the finished idea rather than the foundation for one.
The island planting approach solves that. Instead of scattering plants randomly across the DG surface, group them in deliberate clusters edged with smooth river stones. Three islands of varying sizes — one dominant, two supporting — creates a composition that feels landscaped rather than planted. Blue oat grass brings cool blue-gray color that contrasts strikingly against warm tan granite. Karl Foerster reed grass adds vertical drama and movement in any breeze, making the yard feel alive even without flowers.
River stone edging around each island does two things simultaneously: it prevents DG from migrating into the root zone of your plants, and it creates a clear visual boundary that reads as intentional design. Use stones between four and eight inches in diameter — large enough to stay put, small enough to arrange without equipment.
That said, DG needs a stabilized binder in wet climates or it erodes into a muddy mess after every significant rain. Ask your supplier specifically for stabilized DG if you’re not in an arid region.
3. Dry-Stack Rock Border Along the Walkway
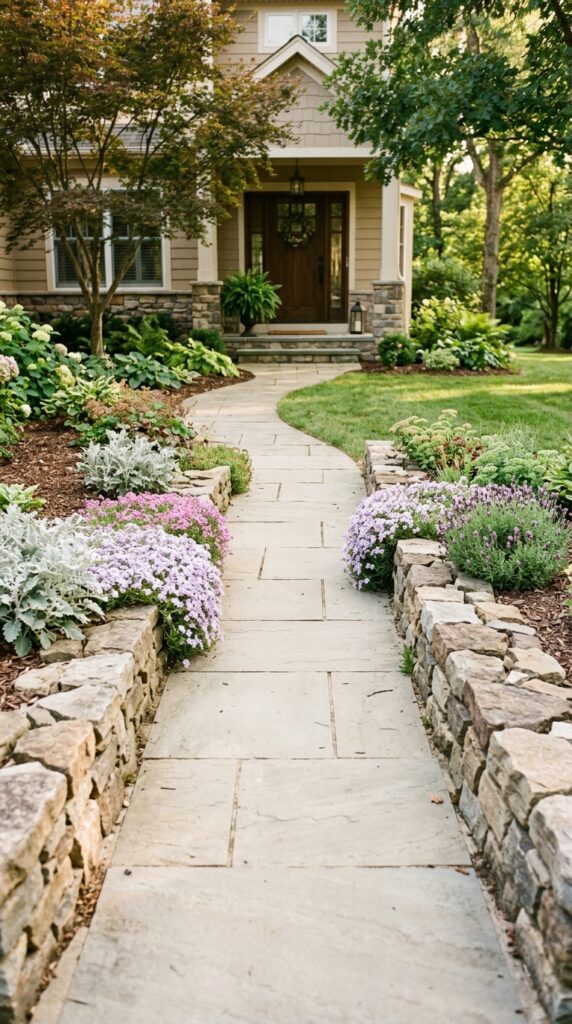
A front walkway flanked by low dry-stack stone borders is one of those upgrades that costs relatively little and completely reframes how the entire front yard reads from the street. The path stops being a utility and becomes a feature. The plantings beside it stop being incidental and become part of a composition.
Two courses of flat fieldstone stacked without mortar is achievable in a single weekend and doesn’t require masonry experience — just patience and a willingness to sort through your stone pile for pieces that fit together like a loose puzzle. The key structural rule: each stone in the upper course should span the joint of the two stones below it, just like bricklaying. This locks the wall laterally and prevents it from toppling under foot traffic or frost heave.
Keep the height modest — ten to twelve inches maximum for a walkway border. Anything taller compresses the path visually and starts to feel like you’re walking through a canyon. The goal is definition, not enclosure.
Plant into the border pockets and along the outer edge with spillers: creeping phlox in spring gives a color burst that’s genuinely spectacular, while dusty miller holds silvery texture through fall. One constraint to name honestly: dry-stack borders in high-foot-traffic areas with kids or dogs will get knocked around. In those situations, a small amount of mortar on the back face of each stone keeps things intact without changing the look.
4. River Rock Mulch Bed With Sculptural Cactus
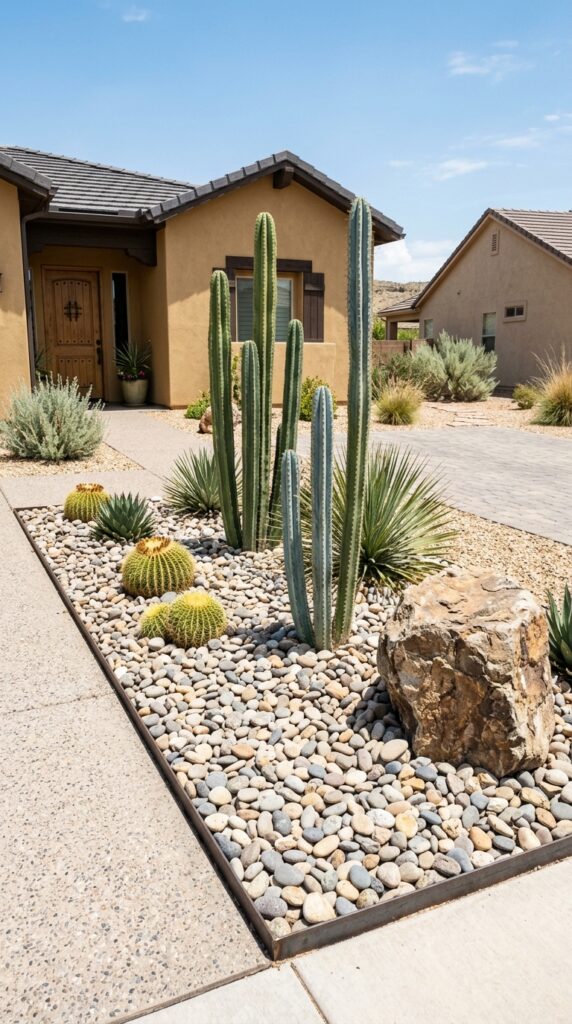
Cactus in a rock garden gets dismissed as too regional, too specific to desert climates. But the range of cold-hardy cacti available has expanded considerably, and varieties like Opuntia humifusa tolerate winters well into USDA zone 4. If you’re in a temperate climate and have dismissed this combination, it’s worth reconsidering.
The visual argument for pairing sculptural cactus with river rock is strong. The contrast between smooth, rounded stones and the angular, architectural form of a columnar or paddle cactus is dramatic in the best way — it reads as considered and deliberate even when the plant selection is minimal. A single well-placed barrel cactus in a sea of warm river rock, anchored by one large boulder, is a complete front yard vignette that asks almost nothing from you after planting.
River rock in this context should be in the medium range — two to four inches in diameter — large enough to stay stable around cactus bases, small enough to create a smooth, continuous ground texture. Avoid the temptation to use lava rock here; its dark color and porous texture compete visually with the cactus form rather than letting it stand out.
One practical note: plant your cactus before you lay the rock mulch, not after. Trying to handle cacti surrounded by loose stones is an experience you don’t want to have more than once.
5. Moss Rock Clusters in a Shaded Entry Garden
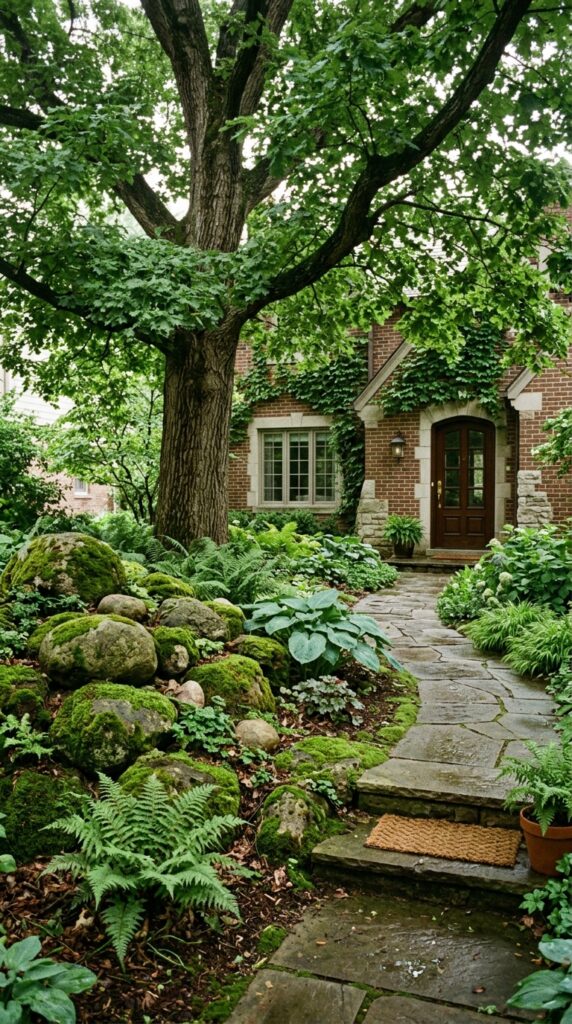
Shaded front yards are the ones that get left behind in most rock garden conversations, which is frustrating because shade actually creates ideal conditions for one of the most beautiful rock garden variations available. Moss rock — boulders and fieldstone that have developed a natural moss coating — looks genuinely ancient and atmospheric in a way that takes years to achieve in sunny gardens but happens naturally in shade.
If your existing rocks haven’t developed moss on their own, you can accelerate the process by painting surfaces with a blended mixture of yogurt, moss fragments, and water. It sounds eccentric, and it is, but it works. Within one growing season in a moist, shaded spot, you’ll have authentic-looking moss establishing on stone surfaces.
The plant partners for a moss rock shade garden are hostas, ferns, astilbe, and low-growing epimedium — all of them tough, low-maintenance, and genuinely beautiful. Hostas in particular offer extraordinary leaf variety, from blue-gray giants to chartreuse miniatures, and they return reliably every year with zero replanting.
One thing to watch: moss and certain rock types don’t cohabitate naturally. Limestone, being alkaline, tends to resist moss growth. Granite, sandstone, and fieldstone are far better candidates. Choose your stone with this in mind if the mossy aesthetic is the goal.
6. Flagstone Mosaic Ground Plane
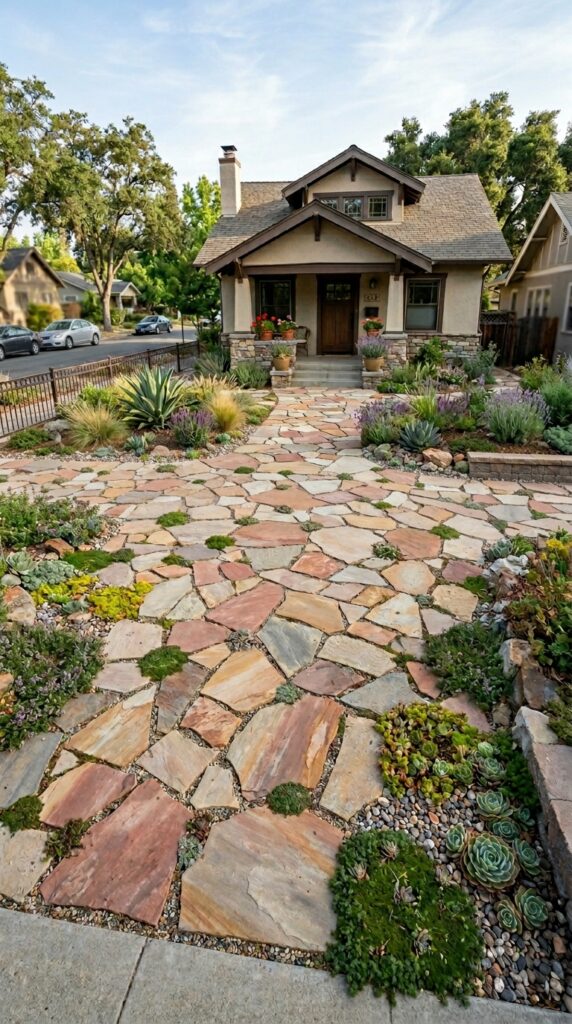
A flagstone mosaic ground plane is the rock garden idea that draws the longest stares from people walking past. Done well, it has the look of something that required professional installation and significant budget. Done on your own timeline, sorting and fitting pieces over several weekends, it costs a fraction of what people assume and becomes one of those projects you’ll genuinely be proud of for years.
The approach is essentially puzzle-solving at ground level. Source your flagstone from a landscape supply yard where you can hand-select pieces — buying blind in pallets often leaves you with awkward shapes that don’t fit efficiently. Aim for a mix of sizes: some large anchor pieces of 18 inches or more, plenty of medium fills, and smaller fragments for tight spots near edges.
The joint fill you choose changes the character significantly. Fine pea gravel joints read casual and naturalistic — more garden, less hardscape. Polymeric sand joints read clean and refined — more formal entry, less wild garden. Both work; the right one depends on your house’s architectural character.
Succulents tucked into select joints add life without adding maintenance. Hen-and-chicks are ideal — they stay small, spread slowly, and tolerate the compressed growing conditions of a joint gap remarkably well.
One honest constraint: this project requires a reasonably flat yard. Any meaningful slope turns flagstone into a slip hazard in wet weather.
7. Gravel and Wildflower Combination
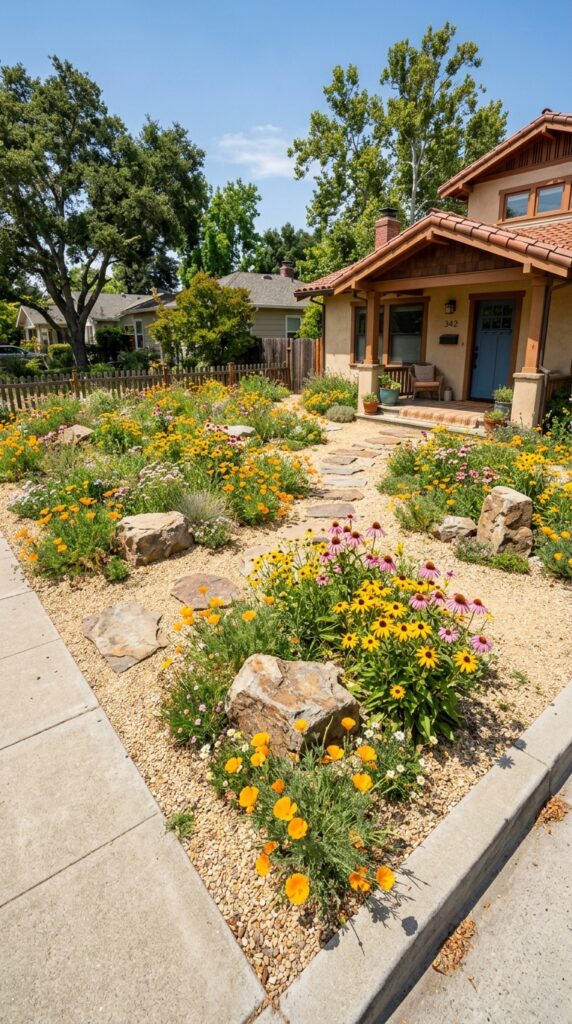
This is the one for people who love the idea of rock landscaping but aren’t ready to give up color and life at ground level. Gravel paired with direct-seeded wildflowers is the easiest version of a rock garden to install and, in the right season, one of the most visually rewarding things a front yard can produce.
The planting method is simple: prepare your gravel base, rake the surface lightly to create small furrows, scatter seed generously, and press seed into contact with the soil and gravel mix below using a board or roller. Wildflower seeds need light and contact — they don’t need depth. Water consistently for the first three weeks and then step back.
The species mix matters. For a long season of color across most of the US, a combination of California poppies, black-eyed Susans, lance-leaved coreopsis, and purple coneflower hits spring, summer, and early fall without replanting. Avoid mixes with annual-heavy formulas if you want the planting to return and self-seed year after year without intervention.
The rocks in this composition function as anchors — scattered fieldstone pieces that prevent the whole planting from reading as simply abandoned. They give the eye places to rest between flower patches and make the wildness feel curated rather than accidental.
Skip this idea if your homeowners association has strict rules about naturalistic planting. The “meadow” look remains controversial in some communities.
8. Raised Rock Garden Bed at the Foundation
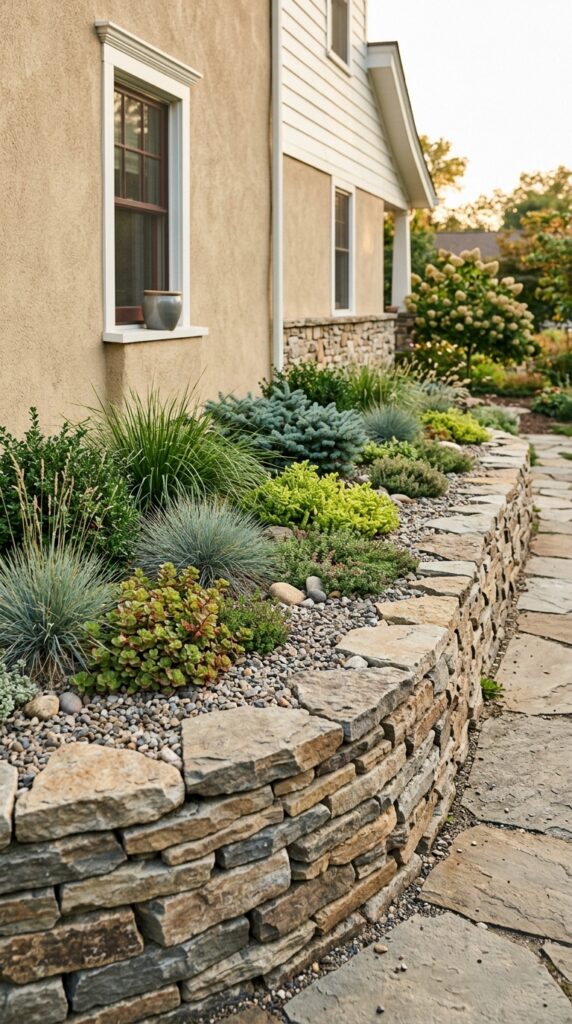
Foundation plantings are almost universally underwhelming — a row of junipers, a ring of mulch, some seasonal color that dies by July. A raised rock garden bed built against the foundation replaces all of that with something that has genuine visual mass, permanent structure, and plants that actually thrive in the lean, well-drained conditions that raised beds naturally provide.
The construction is dry-stack stone, same principle as a retaining wall but smaller in scale. Flat fieldstone or limestone pieces stacked two to three courses high, leaning slightly into the fill, create a raised planting area approximately 12 to 18 inches above grade. Fill that interior with a gritty, fast-draining mix — roughly one-third coarse sand or perlite mixed into your soil — and you’ve created conditions that rock garden plants genuinely love.
Plant selection for this application should prioritize slow-growing, compact varieties. Dwarf conifers bring year-round structure. Hen-and-chicks and sedums provide low spreading color. A single dwarf ornamental grass adds movement without overwhelming the scale.
The one thing almost every source omits: leave a gap of at least four inches between your raised bed fill and the house siding or foundation. Soil and moisture sitting against building materials causes long-term damage that no landscaping choice is worth.
9. Pebble Mosaic Accent Near the Entry Door
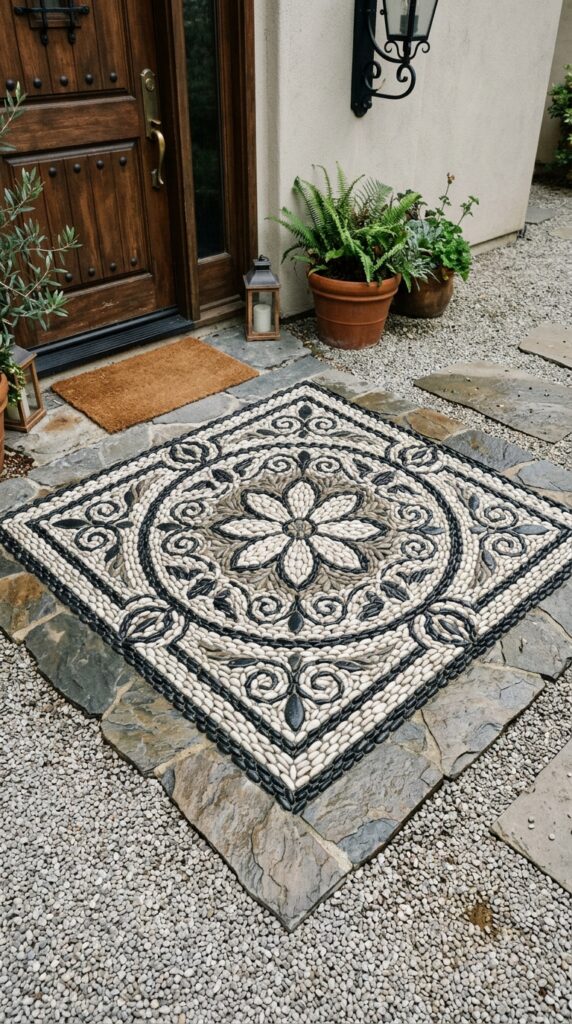
A pebble mosaic near the front door is the detail that makes visitors slow down. It’s also one of the most genuinely handcrafted things you can introduce to a front yard, and the cost is almost embarrassingly low — small pebbles sorted by color and size, concrete or mortar as a base, and time. It’s the time that most people don’t have, which is why it reads as extravagant when it isn’t.
The practical method: excavate two to three inches, pour a mortar or concrete base, and press pebbles in while the base is still workable, using a board to keep heights level. Simple geometric patterns — concentric circles, a grid, a spiral — are achievable without artistic experience and read clearly from a standing height. More complex designs are possible if you enjoy the process; sketch your pattern on paper first and use colored chalk to mark sections on the mortar.
Pebbles in black and white create the most graphic, timeless results. Warm gray and cream combinations are softer and more naturalistic. Mixing too many colors reduces legibility of the pattern — restraint here is the mark of a good mosaic.
Seal the finished surface with a penetrating stone sealer after the mortar cures fully. This deepens the color of the pebbles and protects the surface through freeze-thaw cycles.
10. Volcanic Rock Winding Path
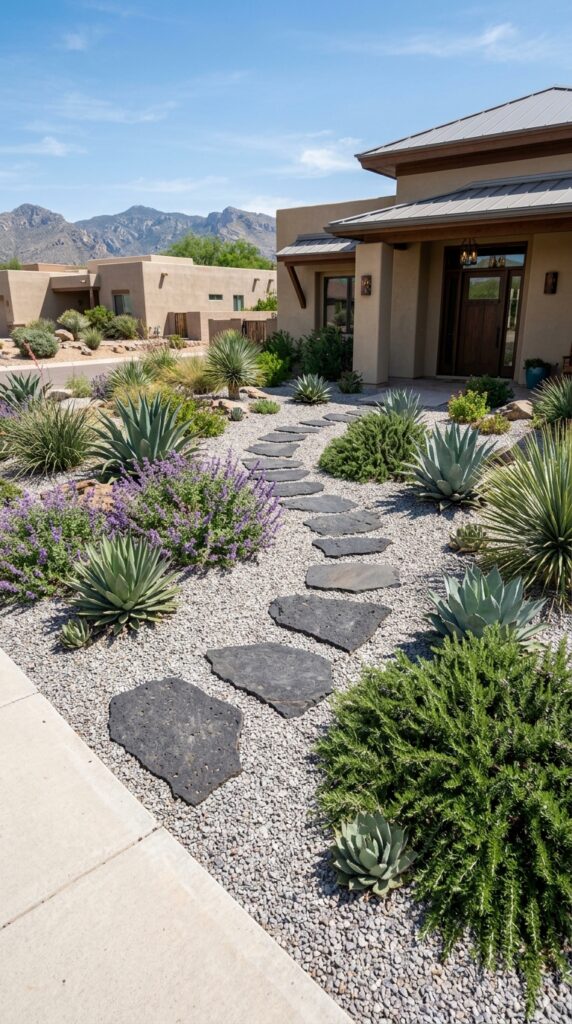
Dark volcanic basalt as a stepping stone material is the choice that landscape designers reach for when they want maximum contrast with minimum effort. Against a pale gravel field — cream, light gray, or warm buff — the near-black surface of basalt reads like a brushstroke. The path itself becomes a graphic element in the yard’s composition, visible and interesting from the street in a way that standard concrete stepping stones never achieve.
The winding path format is important here. A straight line of stepping stones from the sidewalk to the door is utilitarian. A gentle curve through a planted gravel yard turns the act of walking to your front door into something more deliberate and pleasant. The curve also creates two sides of varied depth — a wider gravel and planting zone on one side, a narrower one on the other — and that asymmetry is what makes the composition feel designed.
Basalt stepping stones are available at most stone yards and landscape suppliers, often at comparable or lower cost than manufactured pavers, particularly when bought as irregular natural cuts rather than precision-machined squares.
Plant the gravel zones flanking the path with spreading, low-growing drought-tolerant varieties. Rosemary left to sprawl over stone is one of the more beautiful things a front yard can do, and it smells spectacular every time someone brushes past it.
11. Stacked Slate Accent Wall Behind Planting Bed
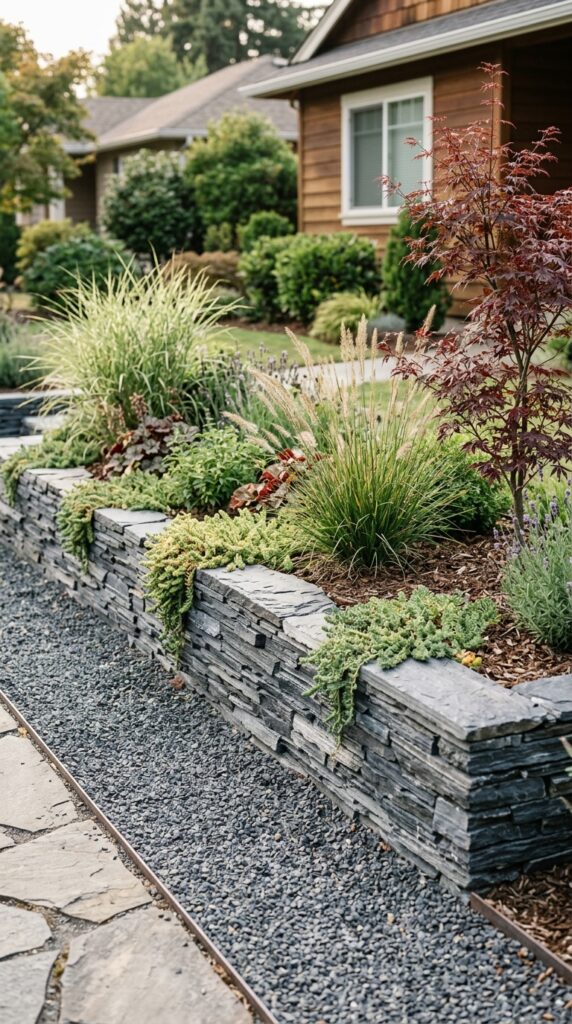
A stacked slate wall used as an accent backdrop — not a retaining structure, but a purely compositional element — is one of the ideas that bridges rock landscaping and garden design in the most satisfying way. It gives a planting bed a defined rear boundary, creates a strong vertical element without blocking light, and the natural horizontal stratification of slate provides a textural contrast to almost any plant selection placed in front of it.
Slate stacks more precisely than most other stone types because of its naturally flat, parallel faces. Even without masonry experience, you can achieve a clean, level wall face that looks professional with patience and a rubber mallet. Keep courses tight, check for level every three or four stones, and fill any wobbling pieces with thin slate shards wedged from behind.
The planting in front of this wall should have at least three distinct heights to work with the vertical backdrop effectively: a low ground-covering sedum, a mid-height ornamental grass, and one taller specimen plant — a small ornamental tree or a large architectural grass — to create genuine vertical progression from ground to wall to sky.
One material note: slate in prolonged wet climates can delaminate over several years as moisture penetrates and freezes between layers. In very rainy regions, sandstone or granite makes a more durable stacked wall choice.
12. Full-Conversion Xeriscape With Layered Rock Design
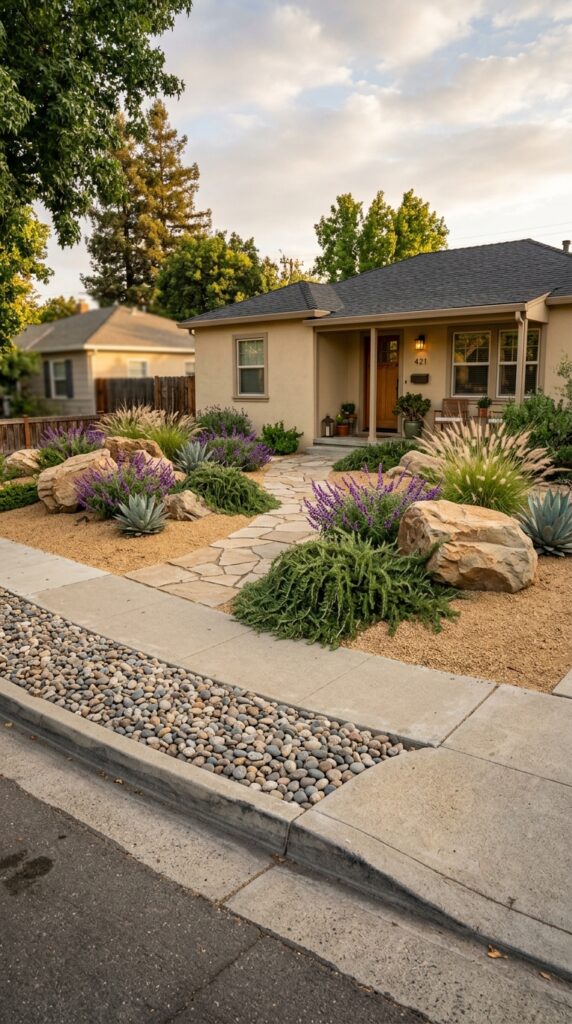
This is the full version — the one where you commit completely, remove the lawn, and build something that will genuinely outlast almost any other landscaping decision you could make. A full-conversion xeriscape with layered rock design is not a weekend project, but it is absolutely a DIY project if you approach it in phases and don’t try to do everything at once.
The layering logic is what makes a full xeriscape look designed rather than bare. Start with your large elements — boulders and anchor stones — placed before anything else. Bury each one a third of its height. These establish the bones of the composition and everything else is arranged in relationship to them. Next, establish your path, which creates the yard’s organizing axis. Then lay your ground plane material — decomposed granite or crushed gravel — across the full area, edged cleanly at the sidewalk and property lines. Finally, carve out planting pockets and install your plants before top-dressing those areas with a finer river pebble or accent gravel.
Plant in odd-numbered groupings. Three lavenders read as a planting decision. One lavender reads as something you found at a garage sale. The repetition of plant varieties across the composition ties the design together visually — use at least one species in three or more locations throughout the yard to create rhythm.
The ongoing maintenance genuinely is minimal: an annual pass to hand-pull any weeds that establish, occasional top-up of gravel in high-traffic areas, and pruning of ornamental grasses once a year in late winter. That’s it. Compare that honestly to what lawn demands every single week.
Thoughts
What you’ve learned today is that rock landscaping is really about structure before decoration — placing your largest elements first, choosing materials that speak to each other in color and tone, and letting plants earn their place in the composition rather than filling space. The front yards that stop people mid-walk aren’t the ones with the most flowers or the most rocks. They’re the ones where someone thought carefully about what goes where and why. These twelve ideas give you the framework. The decisions you make within them are what make the result yours. Bookmark this page, come back when you’re standing in your yard with a shovel and a budget, and start with the one that solves your biggest problem first. That’s always the right place to begin.

