
If you’ve been staring at your yard thinking there has to be a better way, rock landscaping might be the answer you didn’t know you needed. Not the builder-grade, gravel-dumped-from-a-truck version — but the kind that looks genuinely intentional, like a landscape designer snuck in overnight and made considered choices. The truth is, rock landscaping is one of the most cost-effective outdoor transformations available. It cuts water bills, eliminates most mowing, and ages in a way that mulch never will. Rocks don’t rot, fade badly, or need replacing each season. And the upfront investment — even when you’re buying in bulk — is almost always lower than the cumulative cost of sod, fertilizer, and irrigation over five years. Whether you’re working with a narrow front strip, a sloped backyard that turns to mud every time it rains, or just a tired lawn that’s given up, there’s a rock solution here that genuinely fits. Let’s get into it.
1. River Rock Dry Creek Beds
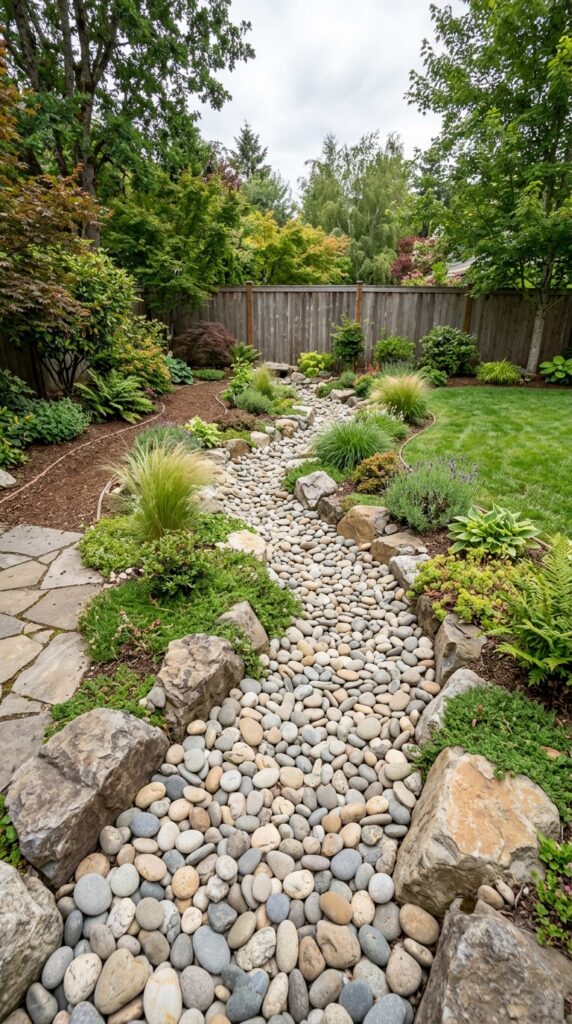
A dry creek bed is probably the most bang-for-your-buck landscaping move you can make, and I say that having seen a lot of mediocre ones. When done well, it looks like nature put it there. When done lazily, it looks like a pile of rocks in a ditch. The difference is almost entirely in the curve. Rigid, straight channels read fake immediately — your creek should meander, widen at bends, and narrow in the straights just like real water would behave.
Use a mix of rock sizes deliberately: larger anchor stones at the edges, medium smooth river rocks filling the channel, and a few small pebbles scattered naturally toward the center. The key material detail here is using actual rounded river rock, not crushed gravel with sharp edges — the smooth surface catches light beautifully and signals “water” to the brain without a drop being present.
This idea also solves a practical problem most people ignore: drainage. If your yard holds water after rain, a dry creek bed channeled toward a low corner or a French drain inlet is doing double duty — it’s decorative and functional. One thing to watch: line the channel with landscape fabric before filling or you’ll be pulling weeds from between rocks for years.
Finish the edges with a few ornamental grasses or low sedums. Let things spill slightly over the border. The messiness is the point.
2. Gravel Mulch Around Existing Plants
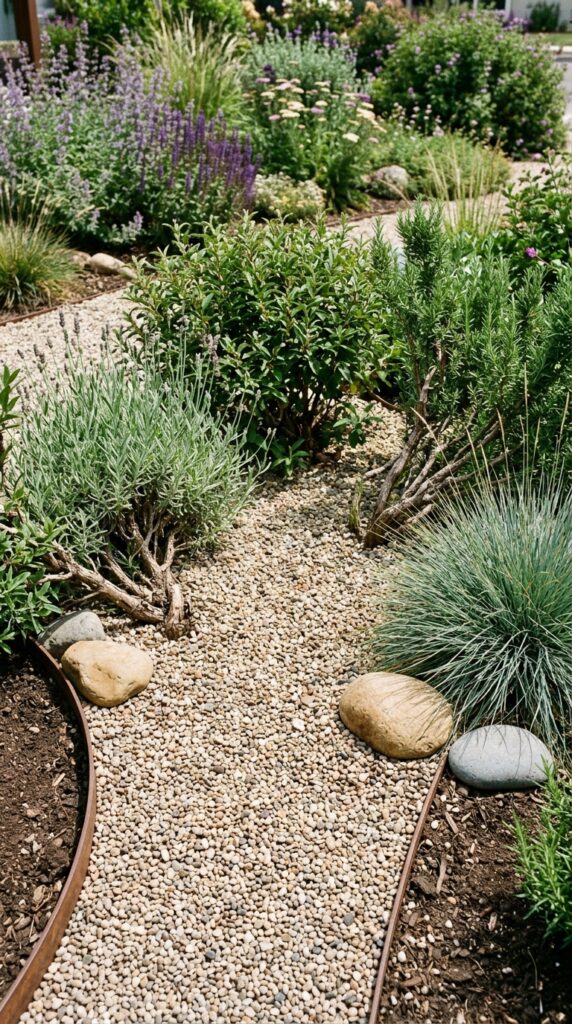
This one sounds almost too simple, and that’s why most people skip it. Swapping organic mulch for a 2-to-3-inch layer of pea gravel or decomposed granite around your existing garden beds is one of the fastest ways to make your yard look more intentional and expensive without touching a single plant.
Pea gravel in warm cream or soft gray tones reads as intentional. It suppresses weeds better than most organic mulches once you’ve got adequate depth, retains soil moisture in summer, and — crucially — never needs topping up the way wood chips do. Three years from now, that gravel will look almost identical to how it looks on day one. Wood chips in three years look like compost.
The practical install tip most guides skip: before you lay gravel, water the bed thoroughly and let it dry. Then lay your landscape fabric with overlapping seams of at least six inches and fold it up slightly at the edges of garden borders. This prevents the gravel from migrating into the lawn and the lawn from creeping into the bed — a battle that never really ends otherwise.
Stick to one gravel tone per bed to keep it cohesive. Mixing gray pea gravel with reddish lava rock in the same bed is the fastest way to make your garden look chaotic rather than curated. Pick your palette and commit.
3. Flagstone Stepping Path Through Lawn
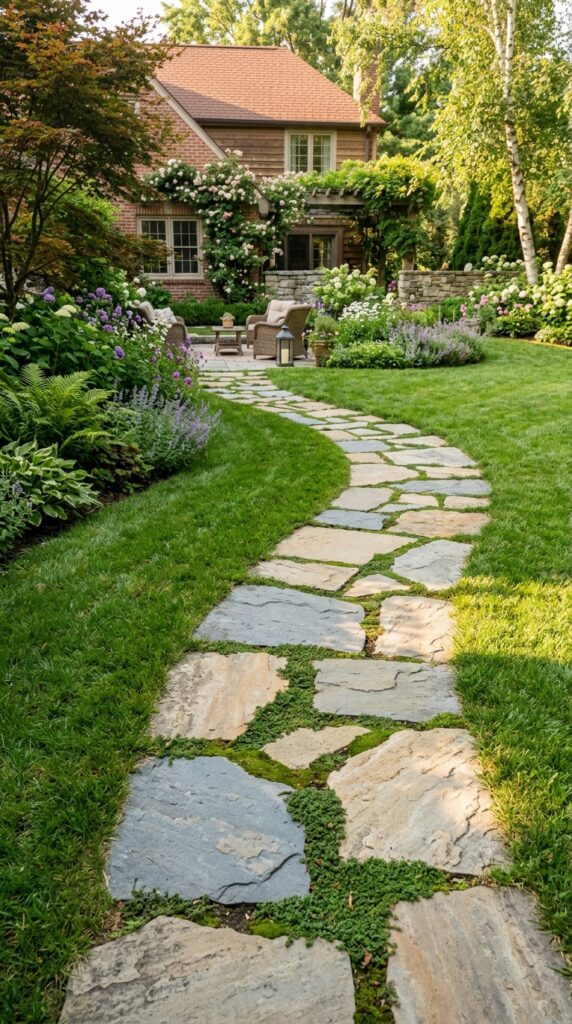
A flagstone path through lawn is one of those ideas that improves every single yard it touches — modest or grand, front or back. What makes it feel cheap is when the stones are too small, too uniform, or spaced for aesthetics rather than for actual human walking. Measure your stride and space accordingly. Each stone should land naturally under your foot without you having to think about it.
The material choice matters more than most people realize. True flagstone — sandstone, bluestone, or slate — has natural irregular edges and surface variation that reads as authentic. Concrete stepping stones with fake flagstone texture look fake at ten feet. If budget is tight, scour local Facebook Marketplace listings; reclaimed flagstone from old patios gets listed constantly for free or near-free.
The gap filler between stones transforms the whole look. Bare soil fills with weeds within one season. Instead, plant creeping thyme, Irish moss, or Corsican mint between the pieces — all three are low-growing, handle light foot traffic, and smell remarkable when you walk over them. That olfactory detail alone makes a path feel designed rather than functional.
One constraint worth mentioning: if you live in a wet climate, uneven flagstone with organic gap fillers can get slippery. In shaded or consistently damp zones, a finer crushed gravel gap fill is more practical than ground cover.
4. Rock Garden With Succulents and Sedums
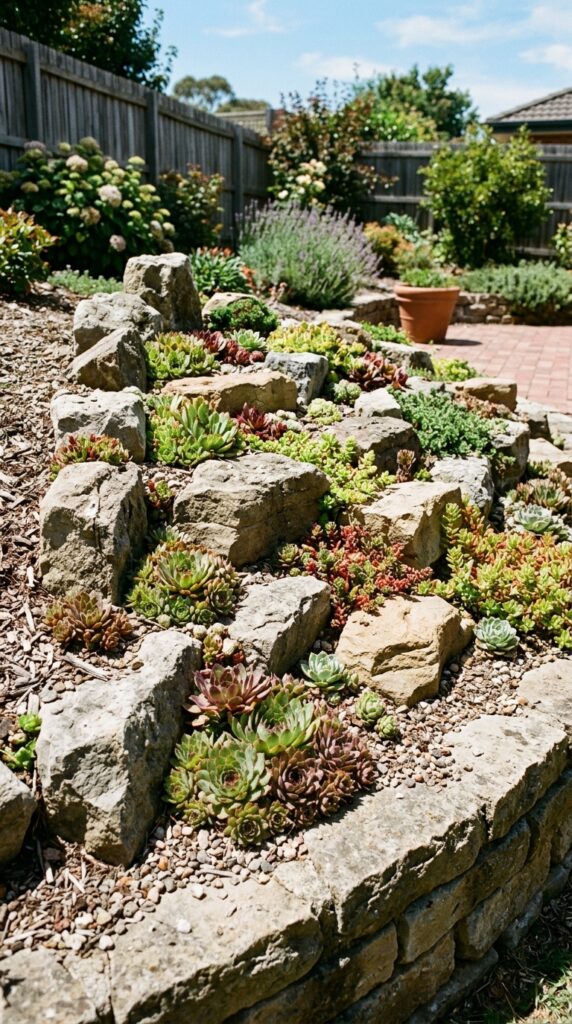
Rock gardens get dismissed as old-fashioned, which is genuinely unfair because a well-planted rock garden is one of the most visually dynamic things you can put in a yard. The key is treating the rocks like furniture, not filler. Each boulder or larger stone should be partially buried — at least a third below soil level — so it looks like it emerged from the earth rather than being placed on top of it. This single detail separates a good rock garden from an awkward one.
For planting, the combination of sedums and hens-and-chicks is hard to beat on a budget. Both spread, multiply freely, come in extraordinary color ranges — from blue-gray to deep burgundy — and ask almost nothing from you in return. Tuck them into crevices and pockets between stones rather than planting in rows, and let them find their own level over a season.
Avoid overthinking the rock palette. Pick two rock types maximum — a dominant stone and a smaller accent — and stick to colors found naturally in your region. Mixing blue-gray granite with warm sandstone and volcanic lava rock in the same bed looks busy, not eclectic.
One practical note: rock gardens need exceptional drainage to work. If your soil is clay-heavy, amend deeply with coarse sand and grit before you begin. Succulents sitting in wet clay will rot regardless of how good the rock arrangement looks above ground.
5. Decomposed Granite Patio Area
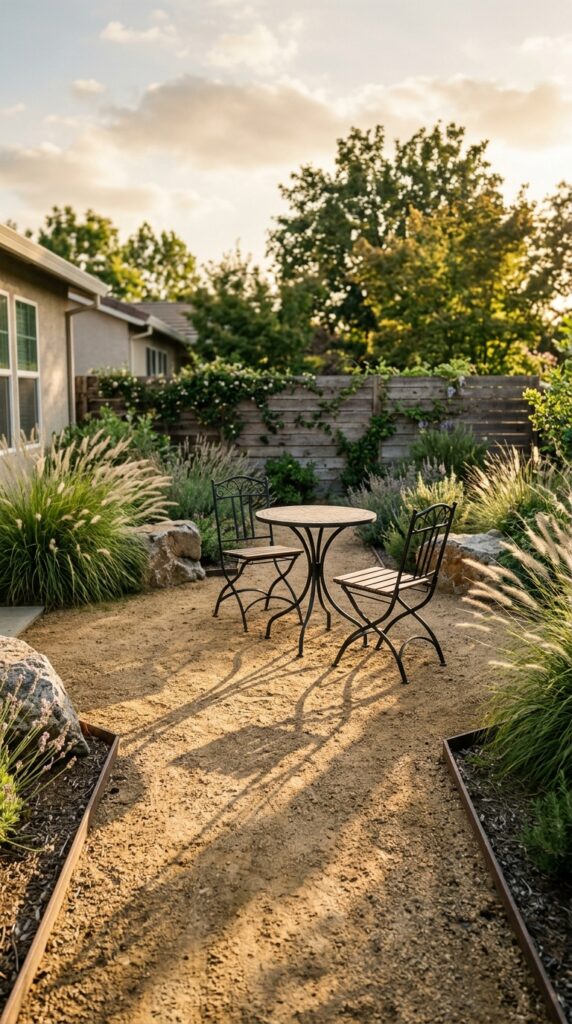
Decomposed granite — DG, if you’re going to talk about it regularly — is genuinely one of the most underused patio surface materials available. It compacts into a stable, walkable surface, costs a fraction of concrete or pavers, and looks warm and natural in a way that poured surfaces rarely do. In a dry climate, it’s almost the obvious answer to the question of what to do with an awkward outdoor area that’s too small for a full hardscape and too exposed for furniture on lawn.
The installation is straightforward enough for a determined weekend: excavate two to three inches, lay landscape fabric, add DG in two layers compacting each one with a plate compactor or heavy roller, and edge cleanly with steel or aluminum landscape edging. That edge detail matters — without a firm border, DG migrates into adjacent lawn and garden beds season after season.
For color, the classic gold-tan DG is warm and works with almost any exterior paint color. If your house runs cooler — gray siding, white trim — look for a gray or charcoal DG option. Some suppliers also carry a stabilized version that sets harder and resists erosion better, which is worth the slight extra cost if you’re in a rainy climate.
Skip the unstabilized variety for any area with regular foot traffic or anything on a slope. It will wash and shift and frustrate you.
6. Boulder Cluster Focal Points
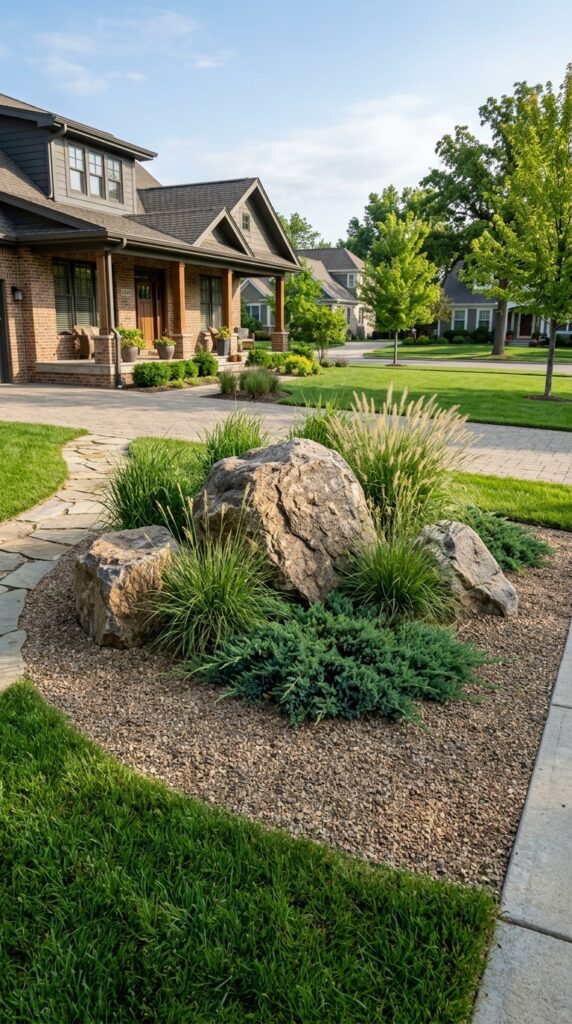
Three boulders. That’s the rule. One boulder in a yard looks like someone dropped something heavy and walked away. Two looks accidental. Three — arranged in a natural triangular cluster with intentional size variation — looks like landscaping. It’s a strange psychological truth of outdoor design, but it holds up almost universally.
The boulders don’t need to be expensive. Local stone yards sell natural granite, sandstone, and limestone boulders by the pound, and smaller feature-sized pieces run surprisingly cheap. The key is partial burial: sink each boulder roughly a third of its height into the ground. This grounds it visually, makes it look like it belongs to the earth beneath it, and prevents it from rolling after rain.
Plant selection around boulders should contrast in texture. Boulders are angular, heavy, and matte — so plants with fine, wispy, or flowing character work best beside them. Blue oat grass, Karl Foerster feather reed grass, or creeping phlox cascading from a lower stone all play beautifully against rough rock surfaces.
One thing to watch: don’t surround boulders with bark mulch if you can avoid it. Gravel mulch in a tone that complements the stone creates a far more cohesive composition. The visual unity between rock and ground surface is what separates a designed space from a decorated one.
7. Lava Rock Mulch in Hot, Sunny Beds
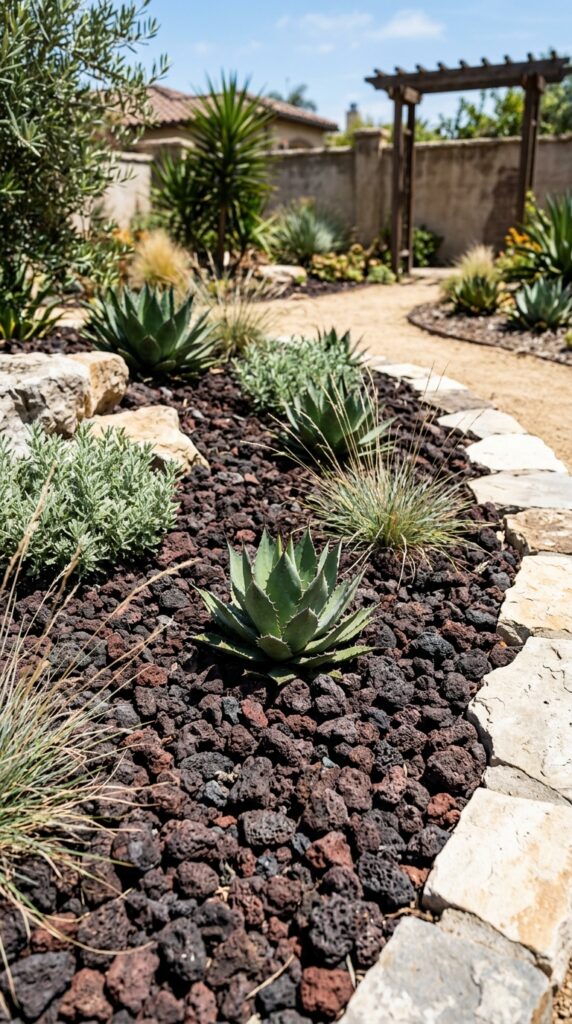
Lava rock has an image problem. For about two decades it was the landscaping equivalent of a popcorn ceiling — everywhere, overused, vaguely embarrassing. But it’s genuinely earned a second look, particularly in hot, full-sun conditions where almost everything else struggles. The porous surface absorbs and retains heat, which is actually useful for heat-loving plants like agave, rosemary, and desert sage. It also drains exceptionally fast, which prevents the crown rot that takes out so many succulents in heavier mulches.
The color is where people get into trouble. That classic bright red lava rock reads almost aggressively against most landscape palettes. Look instead for the darker charcoal-black or dark burgundy-brown lava varieties, which read as sophisticated rather than kitschy. Against silver-leafed desert plants, dark lava rock creates a contrast that’s genuinely dramatic in the best possible way.
Bag quantities at garden centers are fine for small beds, but for anything over 50 square feet you’ll want to order by the cubic yard from a landscape supply company. The price difference is substantial — sometimes 60% cheaper by volume.
This is not the right call for shaded or moist environments. Lava rock in shade tends to hold just enough surface moisture to breed moss and algae, and it starts to look murky and unintentional within a season. Commit to it only where you have heat and sun.
8. Crushed Granite Pathway Edged With Boulders
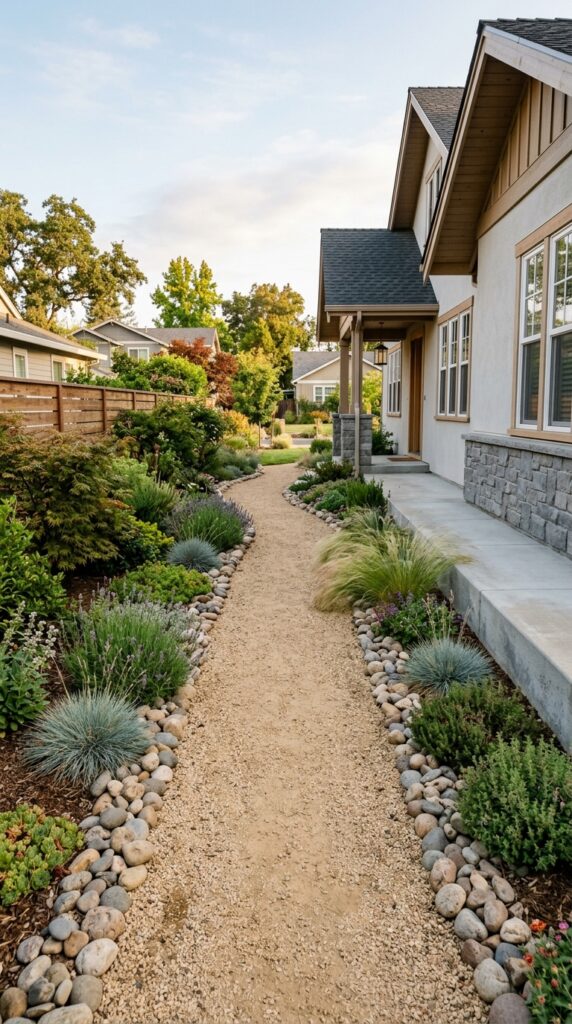
If you’ve got a side yard that’s essentially a forgotten strip between your house and the fence, this is the move. A crushed granite pathway edged with small boulders turns a no-man’s-land into a genuinely useful and attractive passage. It also solves the perennial side-yard problems: drainage, weed growth, mud tracking, and that general air of neglect that side yards carry.
The crushed granite compacts firmly underfoot and sheds water efficiently when properly graded — a very slight slope away from the foundation prevents moisture from working against your house’s footings. That detail is worth taking seriously; it’s the kind of thing that saves expensive repairs later.
The boulder edging doesn’t need to be large. Stones ranging from 6 to 12 inches in diameter work well as boundary markers, and they stay put through rain and foot traffic in a way that plastic edging rarely does. Space them naturally — not in a rigid line, but with occasional clusters and gaps — and the path immediately reads as designed rather than installed.
If the side yard gets any sun at all, plant between boulder clusters. Creeping rosemary, dwarf ornamental grasses, or a trailing ice plant will soften the stone without adding maintenance. If it’s fully shaded and dry — a tough combination — let the rocks do all the work. A well-laid granite path with good stone edging doesn’t need plant softening to look intentional.
9. Rock Retaining Wall for Sloped Yards
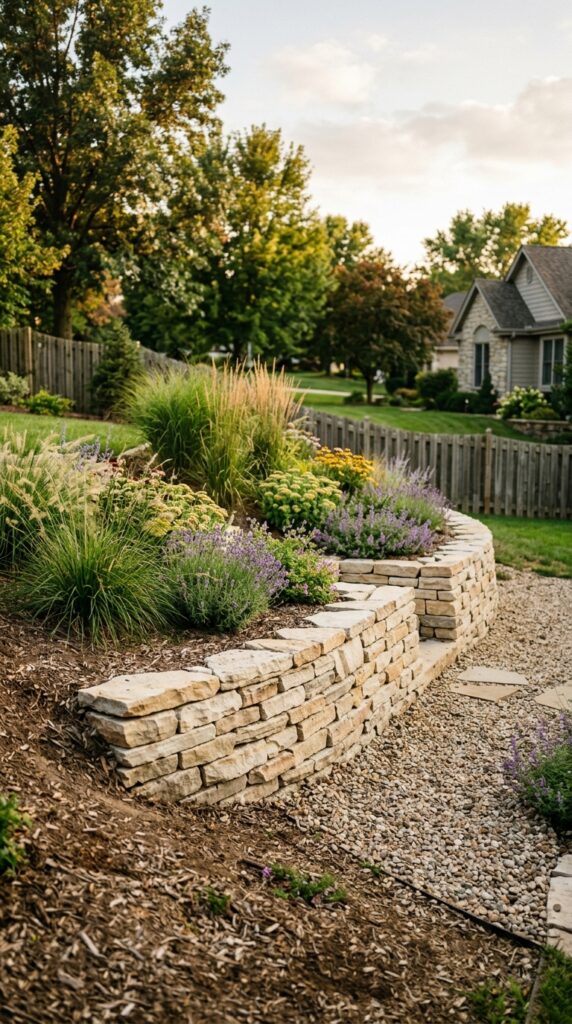
A sloped yard is one of the most challenging landscaping problems, and also one where a rock solution does more real work than any other material. A dry-stack retaining wall — stones laid without mortar in overlapping courses — can hold back a two-to-three-foot grade change when built correctly, and it looks like it’s been there for decades from day one. The texture of stacked natural stone has a permanence that timber walls and poured concrete simply can’t replicate on a budget.
The structural key that most DIY guides gloss over: the wall needs to lean slightly into the slope, not stand perfectly vertical. A backward tilt of roughly one inch per foot of height dramatically increases stability. Each course should also step slightly back from the one below it for the same reason. Skip this and you’ll be restacking after the first significant rain.
Use the flattest stones you can find for the base course — these bear the most weight and the stability of everything above depends on them. Irregular, round stones work higher in the wall once everything is locked in. Cap the top with your flattest, most attractive pieces.
One constraint worth stating plainly: walls over three feet tall really do need professional engineering in most municipalities. For anything higher, pull a permit and consult a structural landscape professional. For modest slopes, though, a well-built dry-stack wall is genuinely a weekend project with lasting results.
10. Rock Mulch Under Trees
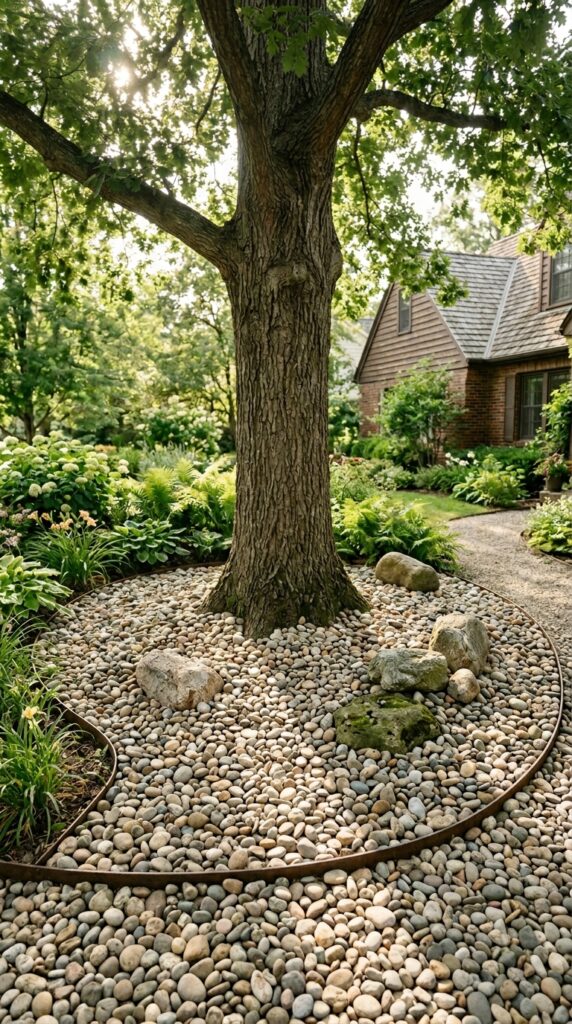
Tree rings are one of those landscape details that most people treat as an afterthought — a little ring of mulch slapped around the base and refreshed annually. Swapping that for a permanent stone mulch situation is genuinely transformative, and it’s almost entirely maintenance-free once installed. No refresh cycle, no volcano-mulching temptation, no termites, no fade.
The one rule that landscape professionals will tell you repeatedly and homeowners ignore constantly: keep the stone away from the trunk. Four to six inches of bare soil between the base of the tree and the stone mulch prevents moisture from sitting against the bark, which causes rot and disease over time. The stone ring should start at the trunk zone and extend ideally to the drip line — the outer reach of the canopy.
River pebbles in soft gray or warm cream work beautifully under most trees because they read neutral and let the tree itself remain the focal point. Bright white stones under a tree look clinical and stark — fine if your aesthetic is very modern, but they tend to read as harsh in traditional residential settings.
The layer depth here matters: two inches minimum to suppress weeds, three inches is better. Lay landscape fabric first if the area has active weed pressure. In dappled shade under deciduous trees, some weeds will still find their way through eventually — a quick occasional hand-pull keeps it tidy with minimal effort. That’s still a fraction of the time traditional lawn requires.
11. Pea Gravel Play Area or Seating Zone
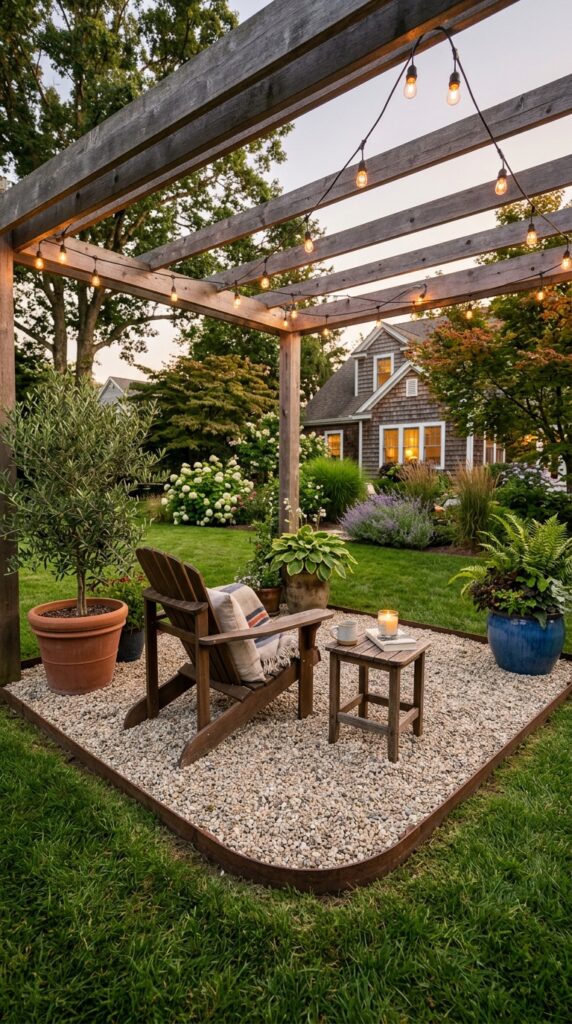
Pea gravel is the quiet overachiever of the rock landscaping world. It’s typically among the cheapest materials available at any landscape supply yard, it installs fast, requires almost no maintenance, and it has that satisfying crunch underfoot that makes a space feel considered. Defined with clean steel edging and a few well-placed potted plants, a pea gravel zone can function beautifully as a secondary seating area, a fire pit surround, or even a defined play area for kids.
The depth recommendation for a heavily used seating area is three to four inches — enough that chairs don’t immediately push through to bare soil, and enough to keep weeds genuinely suppressed rather than just delayed. For play areas, four inches gives adequate cushioning for falls and still drains freely.
The color selection for pea gravel is wider than most people realize. Beyond the standard gray, you’ll find warm buff, rosy cream, and even darker slate tones depending on your regional supplier. Pull your house’s exterior color into this decision — a warm-toned siding benefits from the buff or cream options; cooler gray or blue exteriors look sharp against the standard gray varieties.
Skip this idea if your yard has a slope of more than a few degrees. Pea gravel on any meaningful incline migrates downhill with every rain and every footstep. On a flat or very slightly graded space, it stays put with proper edging.
12. Mixed Stone Xeriscape Front Yard
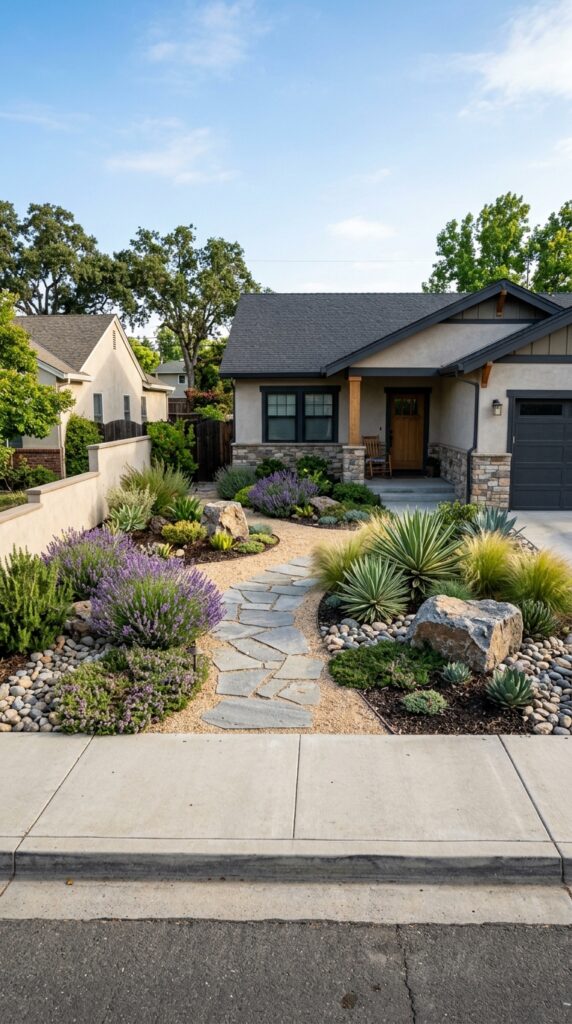
This is the full commitment — the one where the lawn goes entirely and something genuinely better takes its place. A well-designed xeriscape front yard done in layered stone is, without exaggeration, the lowest-maintenance outdoor space achievable in a residential setting. Once established, it asks almost nothing from you and gives back curb appeal, water savings, and the quiet satisfaction of never dragging a mower out again.
The layering principle is what separates a stunning xeriscape from a gravel wasteland. Think in three material tiers: large angular or flat stones for structure and focal points, medium pea gravel or decomposed granite as the ground plane, and small river pebbles as accent fill in planting bed areas. Using all three in one design creates visual depth and texture that a single rock type simply cannot.
Plant selection is the soul of a good xeriscape. Ornamental grasses bring movement. Lavender, Russian sage, and catmint bring color that returns every year without replanting. Agave and aloe bring architectural drama. Use these not randomly scattered but in deliberate groupings — three of one thing reads as a choice; one each of fifteen things reads as indecision.
One real constraint to name: a full lawn-to-xeriscape conversion is a significant project. Budget time and materials honestly. In most moderate-sized front yards, it’s a multi-weekend effort with heavy landscape fabric installation, edging work, material delivery, and planting. The ongoing investment afterward, though, is almost nothing — an occasional top-up of gravel in high-traffic areas and a once-a-year pass to pull any weeds that established before the groundwork was solid.
Final Words
The result, if you stick with it, is a front yard that looks more intentional and designed than almost anything lawn-dependent could achieve at the same budget level.
Rock landscaping rewards the people who think about it before they start — who consider drainage before beauty, texture before color, and installation quality before surface appearance. The ideas here aren’t complicated, but the details within each one are what actually determine whether the finished result looks designed or just assembled. What you’ve learned today is that the line between cheap and expensive in rock landscaping isn’t about materials — it’s almost always about decisions: burying your boulders a third of the way down, matching your gravel tone to your house, keeping stone away from tree trunks, following the curve of a real creek. Those details cost nothing and make everything. Come back here when you’re ready for the next phase — there’s always a next phase in a yard worth caring about.

