
There’s a particular kind of chaos that lives at the front door. Shoes everywhere, bags dropped mid-step, keys buried under yesterday’s mail. If you’ve ever muttered something unkind about your entryway before 8 a.m., you’re not alone. The mudroom — or the attempt at one in a hallway, a corner of the garage, or a sliver of space near the back door — is arguably the hardest-working zone in any home. And somehow it’s always the last to get any love.
The good news is that a functional, good-looking mudroom doesn’t require a renovation budget or a contractor. It requires intention, the right storage pieces, and a little willingness to edit what you keep near the door. These twelve ideas span different styles, layouts, and budgets — most leaning heavily toward the affordable side — and every single one has been chosen because it actually works in real life, not just in a photoshoot.
1. The Classic Shaker Peg Rail: Timeless for a Reason
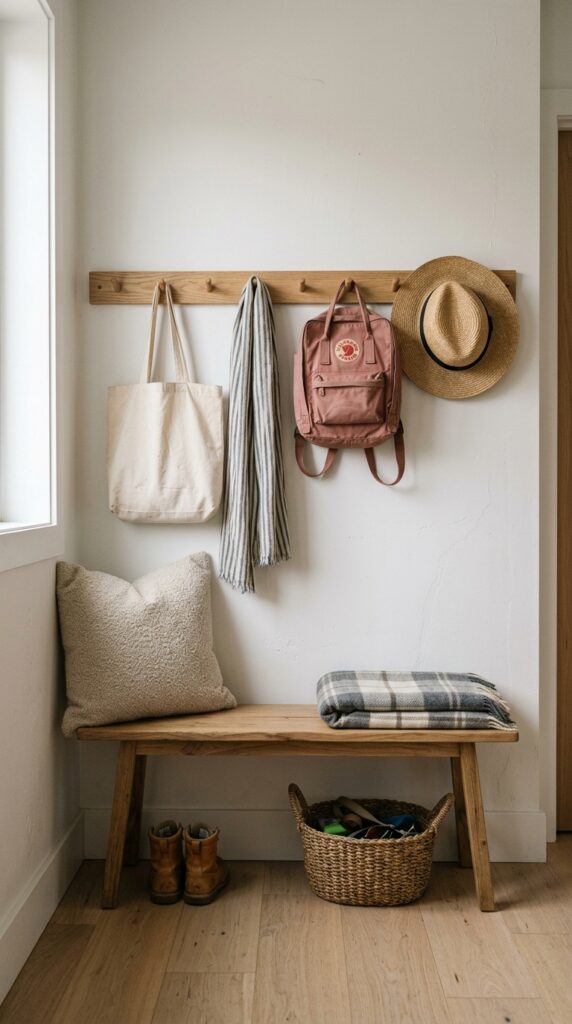
If there’s one piece of entryway hardware that earns its keep every single day, it’s the peg rail. Simple, inexpensive, and endlessly adaptable — a shaker peg rail installed at shoulder height changes the entire energy of an entryway by getting things off the floor and onto the wall in one clean horizontal line. You can find unfinished versions at hardware stores for under twenty dollars and paint them to match your trim, or leave them natural for warmth.
The trick here is rail height. Mount it between 60 and 66 inches from the floor for adults, lower if children are regularly using it. If you share the space, add a second lower rail — it sounds obvious but most people don’t do it and then wonder why small coats end up on the floor anyway.
One constraint: if your entryway walls are shallow or the hallway is narrow, a deep peg rail can feel obstructive. Opt for shorter pegs — around two inches — so hanging items don’t swing into foot traffic. Finish the look with a slim bench below and a small basket for odds and ends. It costs almost nothing and immediately looks curated.
2. Thrifted Lockers and the Industrial Storage Play
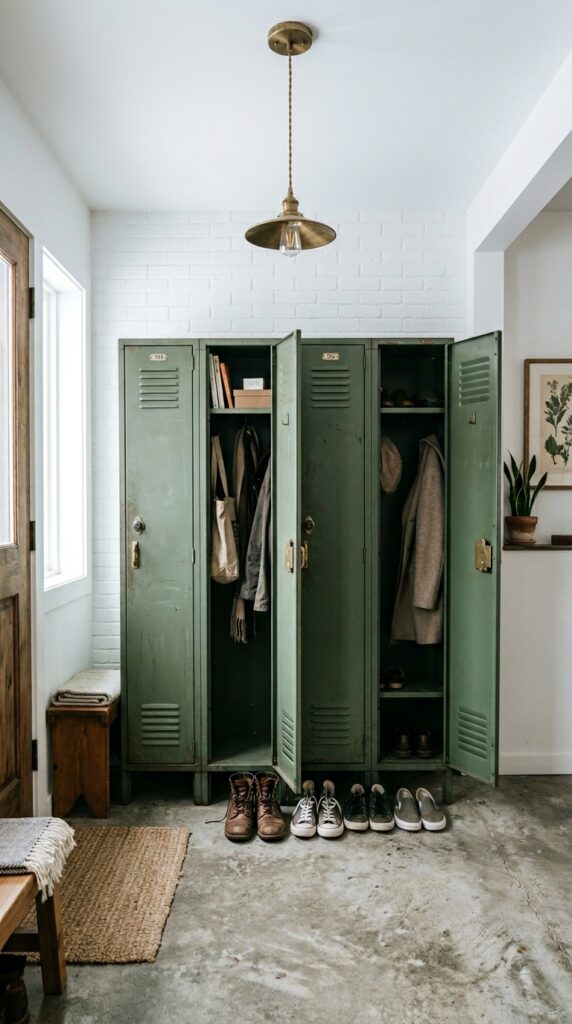
Vintage metal lockers have had a long run in interior design and they refuse to go out of style — mostly because they solve a real problem. Each family member gets their own contained zone. Coats, sports gear, bags, and shoes disappear behind a door. The chaos becomes invisible.
You don’t need to spend much here. Thrift stores, Facebook Marketplace, and salvage yards regularly carry old school or gym lockers for under fifty dollars per unit. The surface texture that comes with age — small dents, faded paint — actually adds character, so don’t feel pressured to refinish. That said, if rust is present, a coat of rust-inhibiting spray paint in an earthy tone like sage, slate blue, or warm charcoal goes a long way.
One thing to watch: full-height lockers can overwhelm a low-ceilinged entryway. In that case, look for half-height lockers and stack them with a narrow shelf on top for display. If you’re in a rental, freestanding lockers are ideal — no drilling, no patching on move-out day. The industrial edge pairs beautifully with warm wood elements and matte black hardware to keep things from feeling too cold or commercial.
3. Open Cubby Systems with Baskets: The Workhorse Setup
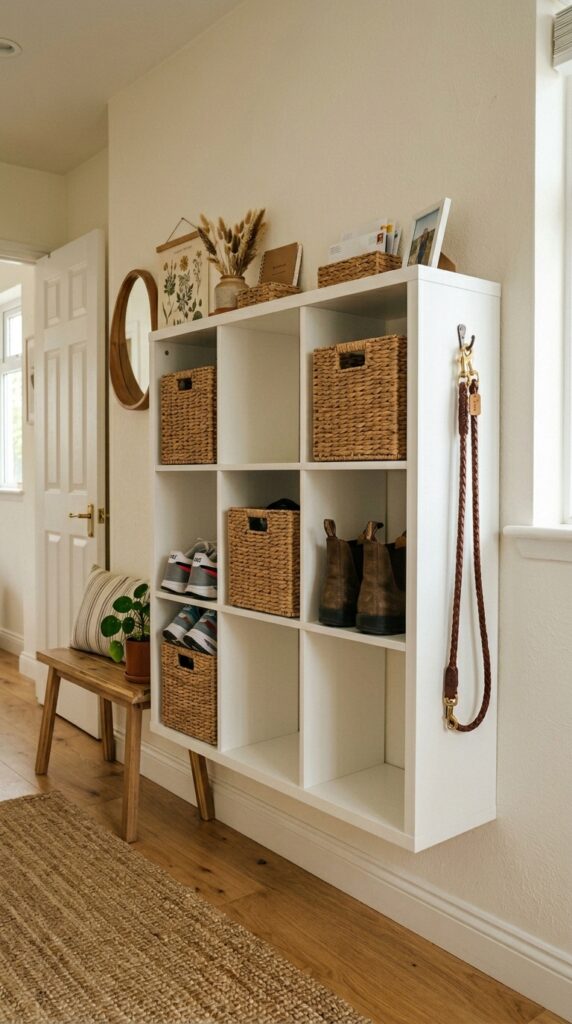
Open cubbies with baskets are the backbone of budget mudroom design, and there’s a reason every home organizer defaults to them — the system is genuinely flexible. The cubbies give structure, the baskets do the visual work of concealing whatever doesn’t need to be seen.
Seagrass and rattan baskets are the best value here — durable, neutral, and they photograph well if that matters to you. Avoid fabric bins in high-traffic mudrooms; they absorb dirt and wet, and start looking tired within months. Stick with natural materials or coated wicker that can be wiped down.
The real magic is in assigning each basket a specific category: one for dog accessories, one for reusable bags, one for each child’s small items. Once you label them — even loosely — the household tends to maintain the system with very little effort. That said, if you have young kids who can’t read yet, use picture labels or color-code the baskets. It takes ten extra minutes to set up and saves weeks of nagging. Keep the lower cubbies for shoes and heavy items; upper cubbies for lighter, less-reached things. This system works for renters because most cubby units are freestanding or can be wall-mounted with minimal hardware.
4. A Floating Bench with Hidden Storage Below
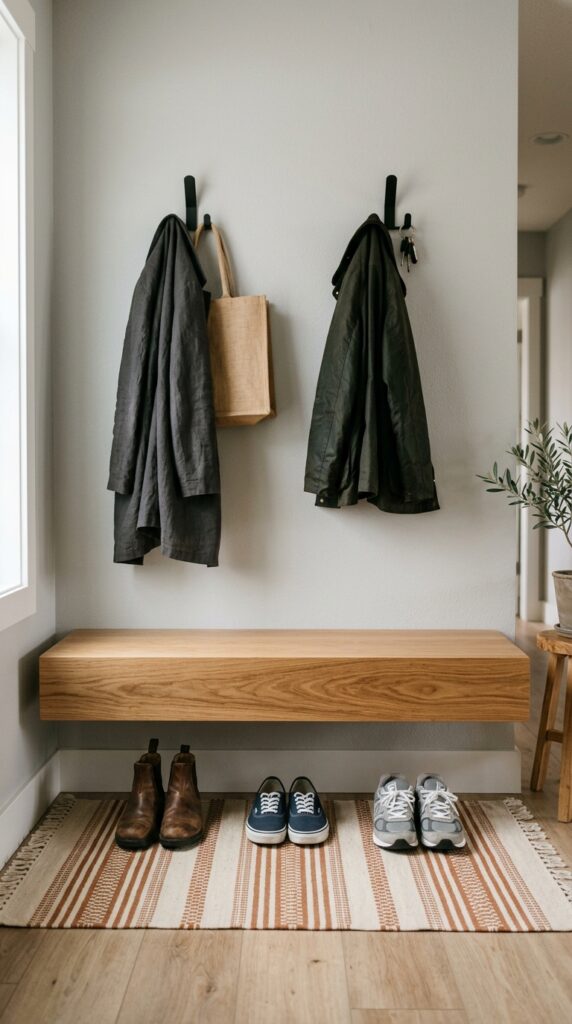
A floating bench does something floor-mounted benches can’t: it makes a small entryway feel larger. Because the eye sees floor underneath, the visual footprint is lighter. It’s also easier to sweep and mop beneath it — a detail that sounds minor until you’ve cleaned under a traditional bench with legs during wet boot season.
For storage, mount the bench at standard seat height (around 18 inches) and use the space underneath as an open shoe zone. Line the floor below with a small washable runner to catch dirt. If the wall space allows, add two or three hooks directly above the bench rather than a full rail — it keeps things from feeling too utilitarian.
The material matters more here than elsewhere because the bench is touched every day. Solid wood holds up better than veneer; white oak and pine are both affordable and take stain or paint well. If you’re painting it, use a semi-gloss finish that can handle the inevitable scuff from boot heels. One honest constraint: floating benches require wall studs or proper anchoring — skip the cheap drywall anchors on a piece someone will actually sit on. Find the studs and use proper hardware.
5. Chalkboard Paint Wall: Function Meets Personality
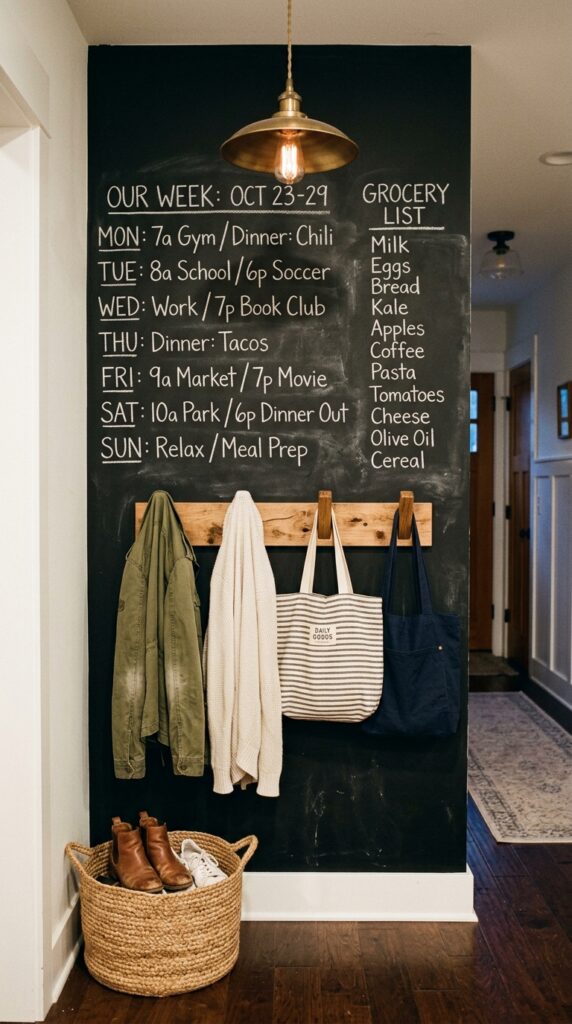
A chalkboard wall in the entryway is one of those ideas that sounds like a lot until you live with it — and then you can’t imagine going back. It’s a family communication board, a weekly scheduler, a place for kids to leave each other notes, and a visual anchor for an otherwise plain wall.
Chalkboard paint now comes in colors beyond the classic black — deep navy, forest green, and warm charcoal are all available and look more sophisticated in a home setting. One can of chalkboard paint covers roughly 50 square feet and costs around ten to fifteen dollars. Prime the wall first, apply two or three coats, and let it cure for a full 24 hours before using.
Here’s the constraint nobody mentions: chalkboard walls require commitment to maintenance. If you love visual order, this is perfect. If your household isn’t the type to erase and rewrite regularly, the wall will just look smudged and chaotic within a week. Know your household before you commit a full wall. A half-wall or a chalkboard panel (paint applied to a piece of hardboard, then hung) gives you the function without the permanence — better for renters or people who like to switch things up seasonally.
6. Slim Console Table as an Entry Organizer
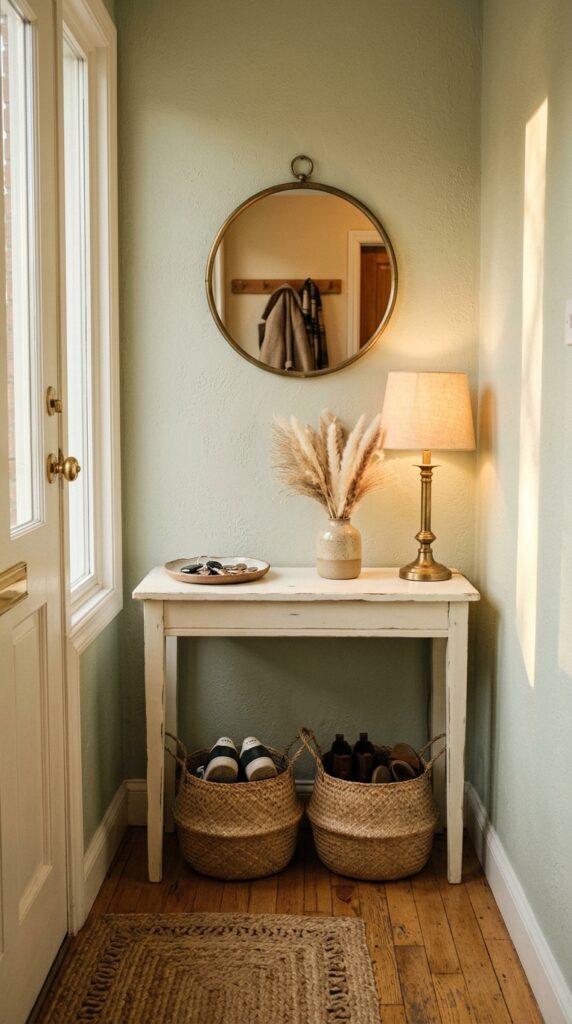
Slim console tables are one of the most underused entryway tools. A table that’s only ten to twelve inches deep takes up almost no floor space but creates an entire surface layer for organizing, decorating, and staging. It gives your entryway the feeling of a room rather than a passageway.
The key is being selective about what lives on top. A small ceramic tray corrals keys and coins. One vase, one lamp (or a battery-operated alternative for rentals without outlets), maybe a small plant. That’s it. The moment the table becomes a landing zone for random items, it stops working visually. Train yourself — and everyone else in the house — to use the tray, not the table.
Painted consoles are more forgiving of budget purchases because paint unifies imperfect construction. An antique white or warm greige hides minor flaws and feels intentional. Below the table, baskets do the heavy lifting: shoes, scarves, seasonal accessories. The console also gives you a place to mount a mirror directly above it, which adds light and depth to any entry — particularly one that faces north and doesn’t get natural light.
7. Vintage Wooden Crates as Shoe Storage
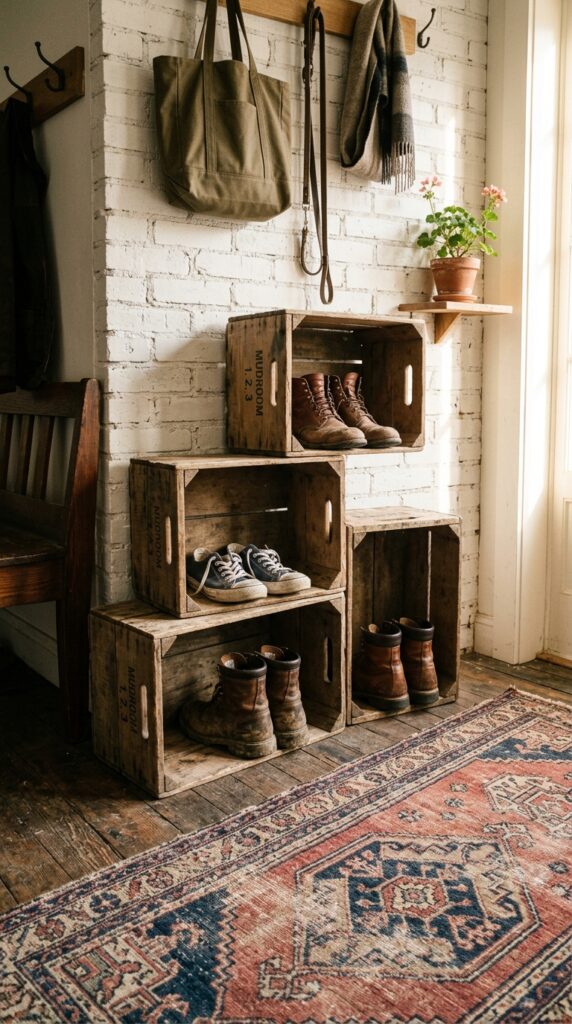
Wooden crates — the kind originally meant for wine, produce, or hardware — are some of the most versatile and inexpensive storage finds you’ll come across. Stack them, stagger them, mount them sideways: there’s almost no wrong way to use them in an entryway if the arrangement feels intentional.
For shoe storage specifically, stack two or three crates with the open faces forward, angled slightly downward so shoes slide in cleanly and are visible from above. This works for boots too if the crates are deep enough. Seal raw wood crates with a clear matte varnish so they don’t snag on shoe leather or absorb moisture during rainy seasons.
The styling trick here is all in contrast. Rough, raw wood crates look deliberate against a smooth painted wall rather than an already rustic backdrop where they’d just blend in. Pair with a worn vintage-style runner on the floor and a couple of iron or matte black hooks above — the mix of old and utilitarian reads as collected rather than accidental. One honest note: wooden crates don’t suit minimalist spaces. If you love clean, monochromatic looks, this will feel cluttered fast.
8. Wallpaper Accent: Make One Wall Do All the Work
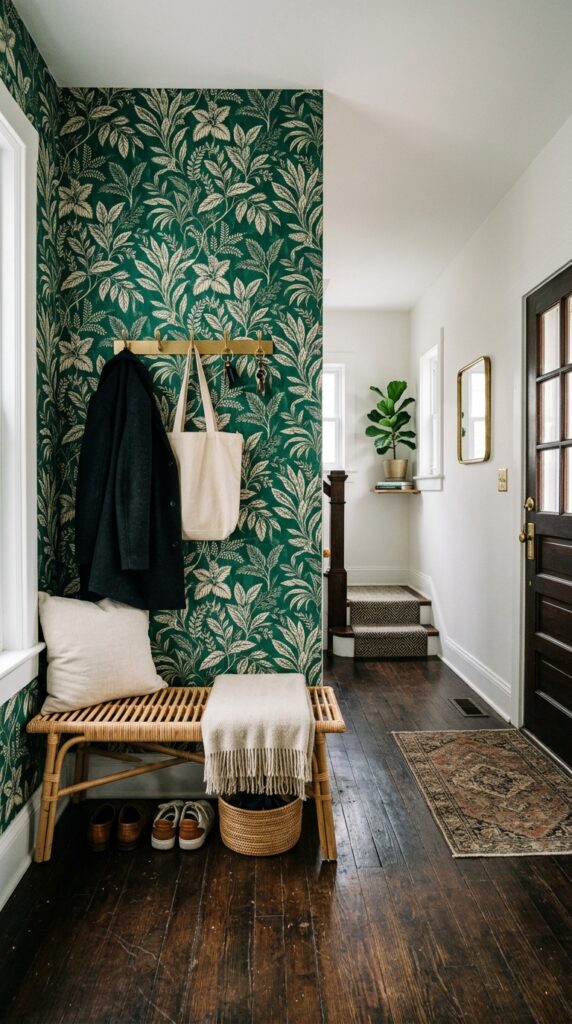
One of the fastest ways to make an entryway feel designed — not just functional — is to wallpaper a single wall. Not the whole room. Just one. It costs a fraction of a full-room paper, takes about an afternoon to install, and transforms the space entirely.
Geometric patterns and botanicals both work beautifully in entryways. The geometry gives a modern edge; botanicals add warmth and life to what’s often a windowless space. For small entryways, avoid very large-scale patterns — the repeat won’t fully show before it hits a corner, and it’ll feel unfinished. Choose a medium-scale pattern or a textural grasscloth for a subtler effect.
Here’s the trick designers use but rarely say aloud: hang your peg rail or hooks directly onto the wallpapered wall. It anchors the hardware into the moment of maximum visual interest and the wall becomes both pretty and functional rather than just decorative. If you hate the idea of committing, peel-and-stick wallpaper has gotten genuinely good — the texture feels closer to real paper now, and removal doesn’t take the wall with it. Best option for renters, hands down.
9. Mirror and Hooks Combination: Small Space, Maximum Payoff
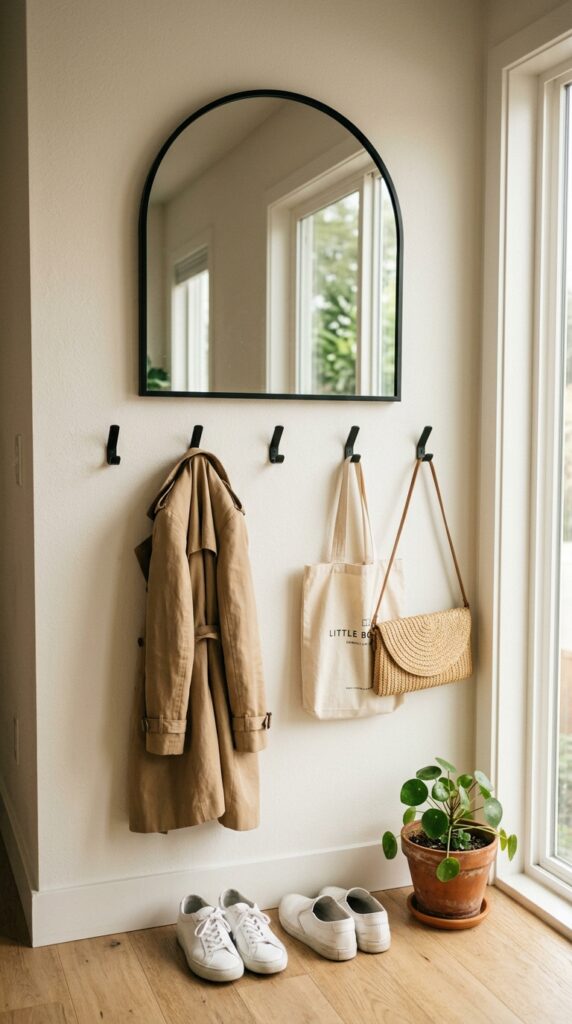
A mirror in the entryway is non-negotiable if the space is small or dark. It bounces light, it doubles the perceived width of the hallway, and it gives everyone a last look before leaving the house. Practically speaking: people who have a mirror at the door are also more likely to stop, check themselves, and remember what they forgot.
The format that works best on a budget is a round or arched mirror in a slim metal frame — they’re widely available, inexpensive, and don’t compete with anything else in the space. Mount it slightly above eye level and angle the hook hardware around it rather than in a straight line — an asymmetric arrangement of three to five hooks feels more collected than a perfectly spaced row.
One constraint: if your entryway is deep and narrow like a tunnel, a large mirror at the end of the hall can feel slightly unnerving — it creates a doubling effect that reads as disorienting in the morning. In that case, place the mirror on a side wall instead, where it adds width rather than apparent length. The entire setup — mirror plus hooks plus a small plant at the base — takes under an hour and costs well under fifty dollars.
10. Built-In Look on a Budget with IKEA Hacks
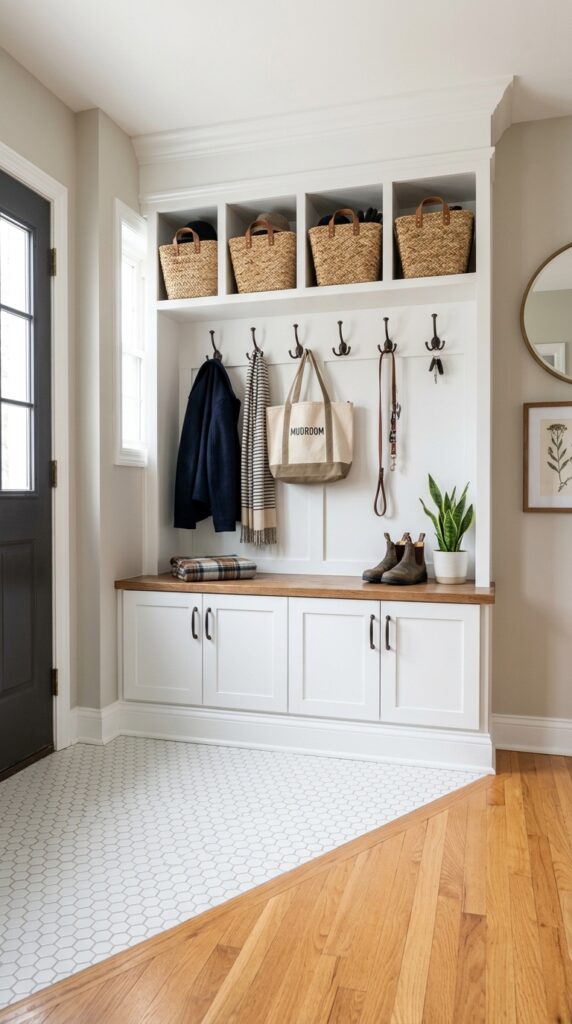
The built-in mudroom is a renovation dream. The budget reality is that you can get 80% of the look for about 20% of the price by combining flat-pack cabinets with a little architectural trim work. This is one of the most satisfying DIY upgrades possible because the result looks like it cost five times what it did.
The method: install flat-pack lower cabinets (base units work perfectly — they’re the right depth for bags and shoes) along one wall. Cap the top with a simple shelf. Add panel molding between and around the cabinets and paint everything — cabinets, molding, wall panels, all of it — the exact same color. That uniformity is what creates the “built-in” illusion. Color-matched trim erases the flatpack origins completely.
Choose a paint with a slight sheen rather than full matte — eggshell or satin — so the surface wipes clean. Finish with simple bin pulls or cup handles in a warm metal and you’ve got a mudroom that looks like a deliberate architectural feature of the house. The main investment is time and patience with a paintbrush, not money.
11. Renter-Friendly Command Center with Pegboard
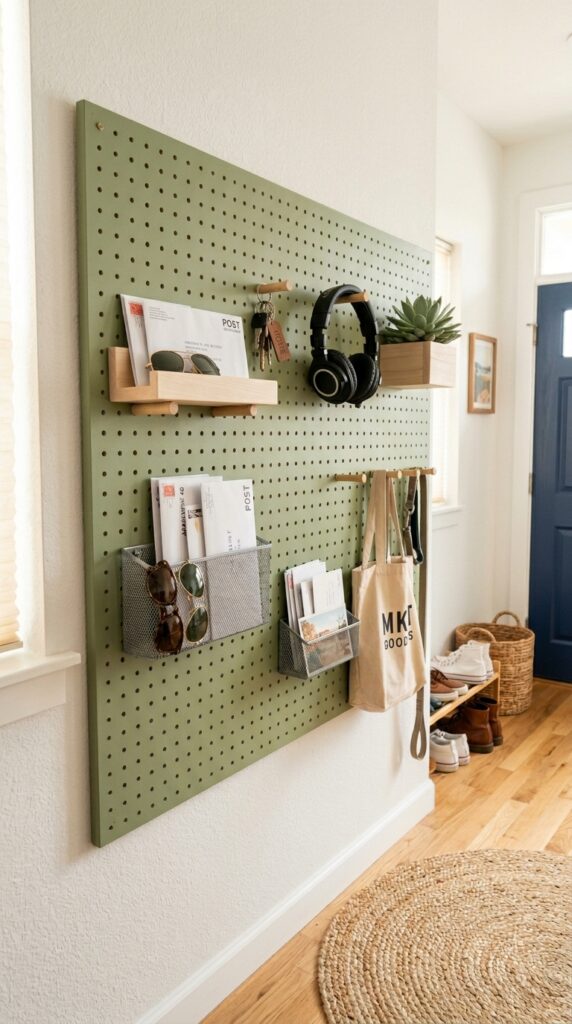
For renters especially, pegboard is one of the most underrated organizational tools available. A single large panel — say 24 by 48 inches — can be mounted with just four screws into studs and patched on move-out for almost nothing. What you gain is an entirely customizable, adaptable wall system that rearranges whenever your life does.
Paint the board first. A pegboard in plain hardware-store tan reads as workshop, not home. In sage green, dusty rose, warm charcoal, or a deep terracotta, it becomes a design choice. Use a combination of hooks (for keys, sunglasses, earbuds), small metal bins (for mail, receipts, small accessories), and one or two shelf brackets for plants or a small clock.
The configuration flexibility is genuinely useful in shared apartments where storage needs change with roommates or seasons. One thing to watch: pegboard attachments require specific pegboard hardware — the pegs have a particular spacing — so don’t assume standard hooks will fit. Buy a starter kit that includes multiple attachment types and you’ll have options. Keep the arrangement breathing; don’t fill every hole or it starts to look like a garage.
12. The Layered Rug and Texture Landing Zone
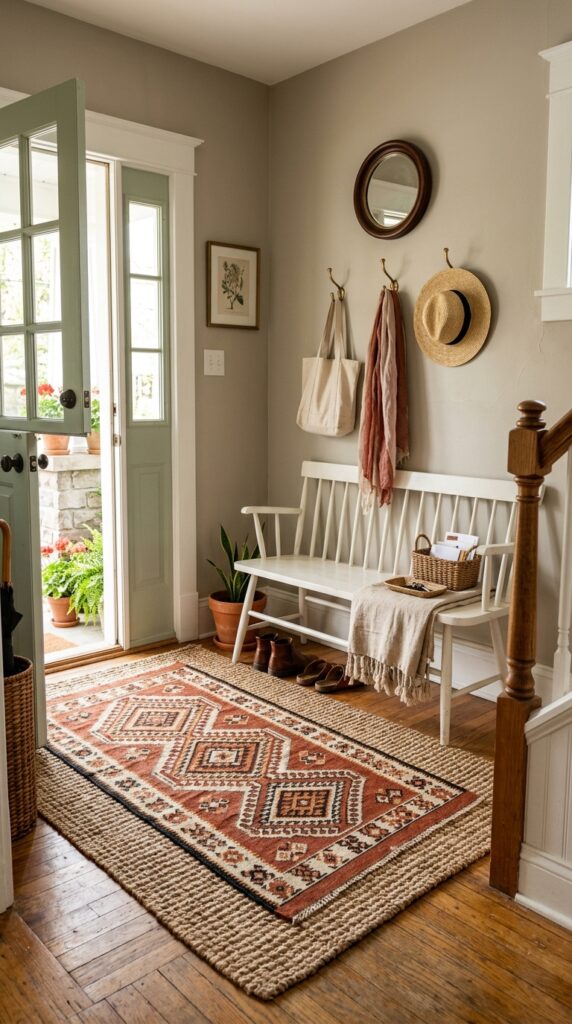
Texture is the most underused tool in budget decorating — and nowhere does it pay off more than the entryway, which most people style with zero softness. A layered rug situation changes the feeling of a space the moment you walk in. The foot literally lands on something that feels considered.
The combination that works best: a large flat jute or sisal base rug (durable, cheap, neutral) with a smaller, patterned flatweave layered on top and slightly offset. Moroccan-inspired geometric patterns in rust, black, and cream are widely available at budget retailers and add immediate character. The jute does the heavy duty work — it’s easy to shake out and hides dirt — while the layered rug does the style work.
Add a linen or cotton throw folded on one end of a bench for softness, and a couple of textured baskets nearby. The entire effect is warm, layered, and intentional without spending much at all. This approach works especially well in transitional or eclectic homes. One real constraint: layered rugs in high-traffic areas need a non-slip pad underneath both layers — without it, the whole thing shifts and becomes a tripping hazard within days.
Summary
There’s something quietly powerful about a well-organized entryway. It sets the tone for everything that comes after it — your morning, your evening return, the way guests feel when they walk in. None of these ideas require a contractor, a renovation permit, or a budget that stings. Most of them can be done across a weekend with a few hardware store trips and a clear idea of how your household actually moves through space.
What makes the difference between a mudroom that sticks and one that falls apart by week two isn’t the furniture or the hooks — it’s designing it around your real life rather than an idealized version of it. If your household drops everything at the door, design for that. If shoes are the main problem, solve that first before worrying about aesthetics. Function first, always. Beauty follows when the function is honest.
Come back to this list whenever the entry chaos returns. It will. That’s what entryways do. But now you know exactly how to fix it.

