
Whimsy is one of those qualities that sounds vague until you see it missing. You’ve probably encountered plenty of fairy gardens that had all the right components — the tiny door, the miniature bench, the bag of decorative pebbles — and still felt flat. Lifeless. Like a checklist rather than a world. And then you’ve stumbled across someone’s offhand creation made from an old colander and a handful of garden weeds and thought, somehow, that one feels alive.
The difference almost never comes down to money. It comes down to a specific quality of looseness — arrangements that look discovered rather than placed, plants that were allowed to do something unexpected, details that reward a second look rather than giving everything away at first glance.
Low-cost fairy gardening, done well, has a natural advantage here. When you’re working with found materials, charity shop ceramics, and plants propagated from cuttings, there’s less pressure to make everything perfect. The imperfection is part of it. A hand-painted door that’s slightly wonky. A pebble path that curves because the stones weren’t quite uniform. A moss patch that crept somewhere you didn’t plan for. These are the details that make a fairy garden feel genuinely inhabited rather than recently installed.
Here are twelve ideas that prove the most whimsical gardens are almost always the cheapest ones to build.
1. Hand-Painted Pebble Pathway
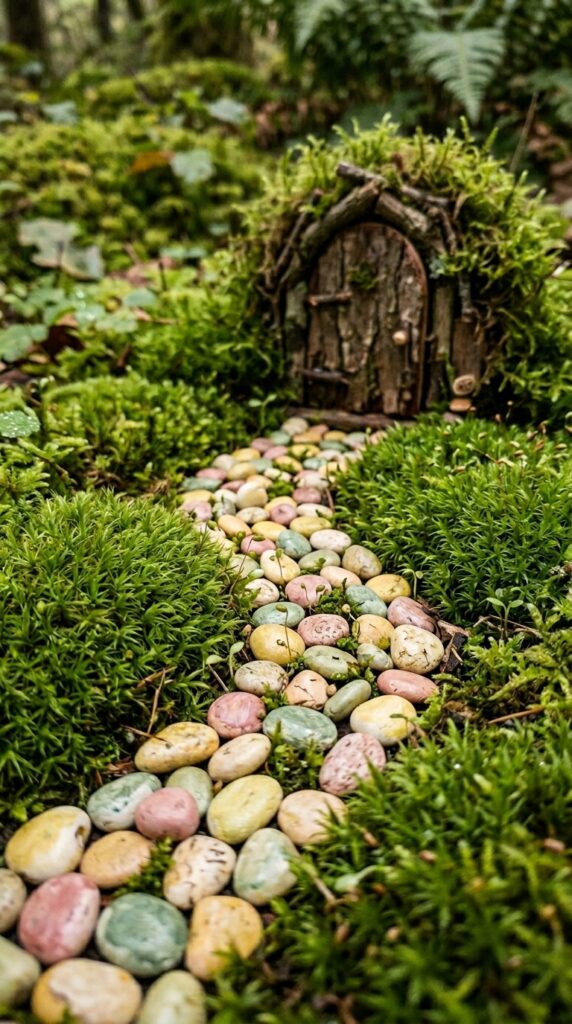
Painted pebbles are one of those ideas that sounds almost too simple until you actually try it, and then you immediately want to paint every stone you own. The combination of natural rock texture underneath and handmade brushwork on top has a quality that no manufactured miniature accessory can replicate — it’s both organic and intentional at the same time.
Collect smooth, flat river pebbles on a walk or buy a bag of decorative stones from a garden center for under two dollars. Use craft acrylic paint thinned slightly with water for a watercolor-style finish that lets the stone texture show through rather than covering it completely. Soft, muted tones work far better than bright primaries — think dusty rose, sage, warm cream, and faded terracotta rather than red, yellow, and blue.
Paint each pebble slightly differently. Vary the color intensity, let some be almost bare stone with just a wash of color, paint a tiny simple motif on one — a crescent moon, a single leaf, a dot cluster. The variation is what makes the path look curated rather than mass-produced.
Lay the path in a gentle curve rather than a straight line. Curves read as natural. Straight paths read as constructed, which breaks the fairy garden illusion faster than almost anything else. Space the pebbles loosely rather than tightly packed — the moss or soil visible between them is part of the composition.
The whole project costs the price of three small tubes of craft paint. It takes an afternoon. The result outlasts almost every other accessory you’ll add to the garden.
2. Bark Slab Fairy Cottage
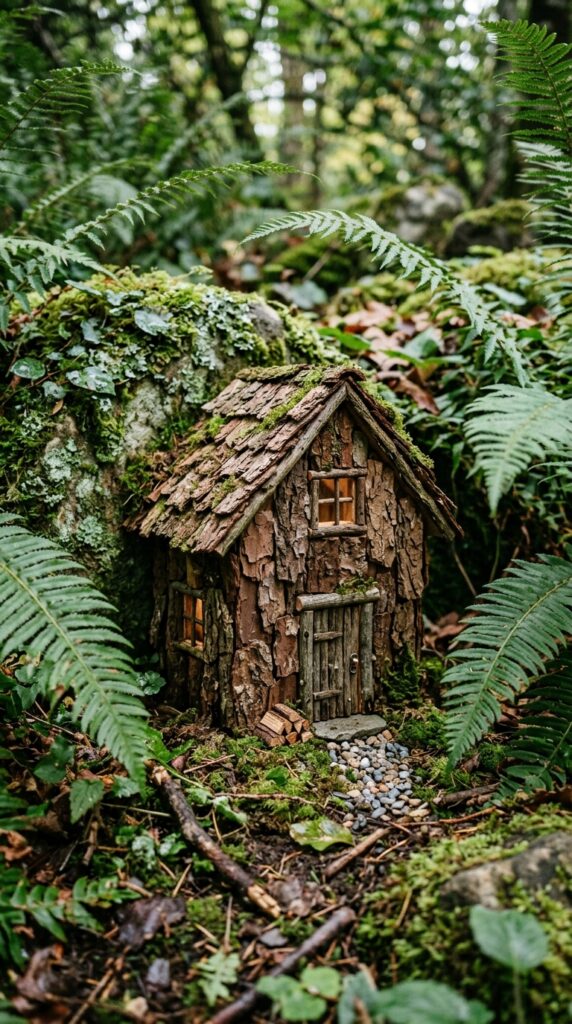
Tree bark picked up from the ground beneath any deciduous tree is one of the most architecturally beautiful free building materials in fairy gardening. The natural layering of bark, its curved surfaces, its range of tones from silver-grey to deep brown — it assembles into structures that look genuinely ancient without any aging treatment whatsoever.
Collect pieces after rain when bark tends to fall naturally from older trees. You want pieces thick enough to stand upright as walls — roughly half a centimeter or thicker. Flat pieces for the roof, curved pieces for walls, a large flat slice as the floor. Hot glue holds everything together adequately for a garden structure that won’t need to bear weight.
The windows are what make a bark cottage look like a cottage rather than a pile of wood. Cut small rectangular or arched openings with a craft knife — no more than a centimeter wide — and the difference is immediate. The shadow cast by the opening creates the depth that reads as a proper window. A tiny matchstick or toothpick across the opening as a window frame costs nothing and adds enormous detail.
Position the cottage so it’s partially obscured by foliage. A fern frond overhanging the roofline, a moss patch creeping toward the front threshold — these are the plant relationships that make the structure look embedded in the landscape rather than placed upon it. Never set fairy architecture on completely bare soil if you can help it.
3. Acorn Cap Lanterns and Candles
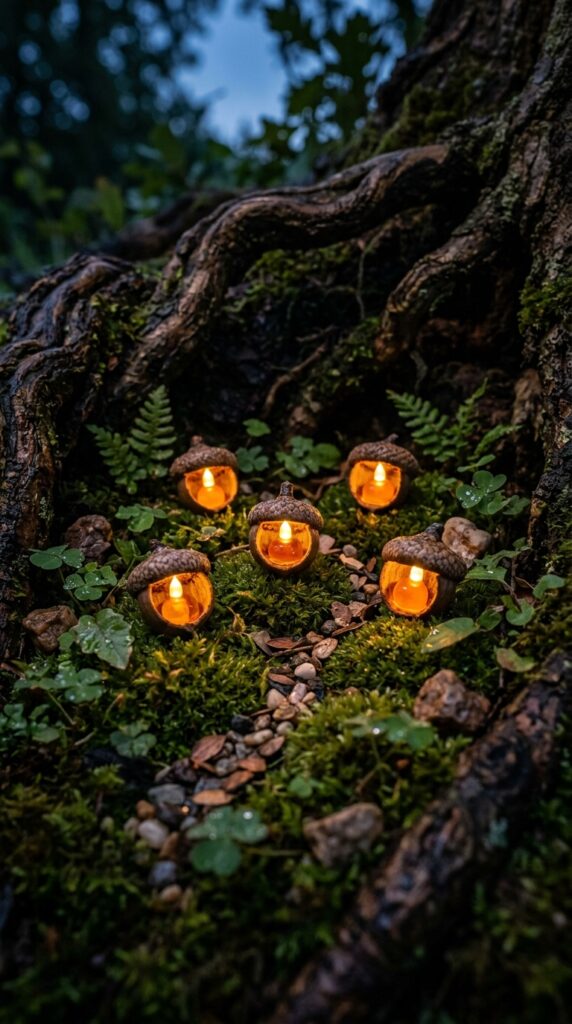
There is something about an acorn cap that is already almost impossibly perfect for fairy gardening. The scale, the natural bowl shape, the texture of the cup — it looks like something a fairy would actually use, without any modification at all. Which means with the smallest amount of intervention, it becomes the most convincing miniature prop you’ll ever make.
Collect acorn caps in autumn and allow them to dry completely before using them — fresh caps will mold in damp soil. A single walk under an oak tree in October will give you more than you’ll ever need.
For lanterns, press a small piece of orange or amber cellophane into the cup and add a tiny bead of orange translucent craft resin on top, which dries to look precisely like a candle flame frozen mid-flicker. For candles, cut a tiny section of white birthday candle down to one centimeter height and press it into the cup with a small dot of hot glue. At fairy scale, a birthday candle fragment is a perfectly proportioned pillar candle.
Arrange them in groups of odd numbers — three, five, seven — along a pebble path or around a gathering space in your garden. Asymmetric groupings at slightly varying heights (achieved by pressing some slightly deeper into soil than others) look the most natural.
These cost nothing if you collect your own acorns, and they biodegrade naturally in the garden over a season, which means they never look tired or weathered in the wrong way. They simply return to the earth, and you collect more the following autumn.
4. Mossy Stone Wall Ruins
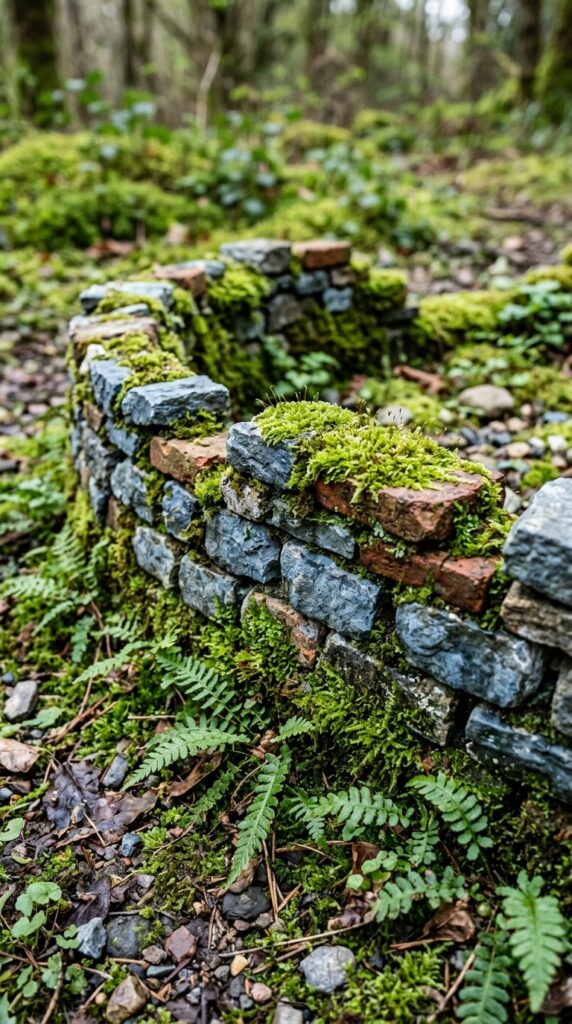
Ruins are more interesting than intact structures in fairy gardening, and almost nobody talks about this. A perfectly built miniature wall is architecturally impressive. A crumbling, moss-covered wall fragment is genuinely atmospheric. It implies history, age, and a world that existed long before you arrived to observe it — which is precisely the feeling a whimsical fairy garden should generate.
Collect small irregular stones from a garden bed, a driveway edge, or a riverbank. Broken brick fragments, small pieces of slate offcuts, and rough-surfaced natural stones all work better than smooth, polished stones, which look too decorative rather than structural.
Stack the stones dry — no mortar — in a low curved wall no higher than eight or ten centimeters. Leave deliberate gaps. Let one section be lower than the others as though it has partially collapsed. The lack of perfect uniformity is the design feature here, not a flaw.
Encourage moss to colonize the wall by painting the stone surfaces with a slurry of blended fresh moss mixed with plain yogurt and water. Applied with a brush and kept moist for two weeks, this reliably establishes moss growth on porous stone surfaces. Within a month the wall will look as though it has been there for decades.
Plant miniature ferns at the base where the wall meets the soil, allowing them to grow up against the stone face. The root systems from ferns actually help stabilize the dry-stacked wall over time, which is a happy practical bonus.
5. Toadstool Cluster From Air-Dry Clay

Toadstools are the single most iconic fairy garden element in existence, and buying them from craft stores consistently yields results that look plastic and slightly too bright. Making your own from air-dry clay takes forty minutes, costs almost nothing, and produces toadstools that look genuinely hand-crafted — which, in fairy garden terms, means they look like they grew there.
Air-dry clay is inexpensive and available at any craft store. Roll small balls for caps, pinch them into shallow dome shapes, and press a thin cylinder underneath as the stem. Score the underside of the cap and the top of the stem with a toothpick, apply a dot of water as adhesive, and press together. Allow to dry overnight.
Paint with acrylic craft paint once fully dry. The classic red-and-white spotted toadstool is beautiful, but a cluster of mixed colors — one red, two in warm brown, one in pale cream with subtle spots — looks more naturalistic and less decorative. Seal with a coat of matte outdoor varnish if they’ll be living permanently in the garden through rain.
The sizing variation is the design detail worth obsessing over. One large cap, two medium, and two small in a loose asymmetric cluster reads as a natural fungal growth pattern. A row of identical evenly-spaced toadstools reads as a craft project. The difference between those two arrangements is everything.
Nestled against a mossy stone with a ring of clover around the base, a handmade toadstool cluster is the detail that makes children (and quite a few adults) genuinely believe something lives there.
6. Bottle Cap Fairy Pond
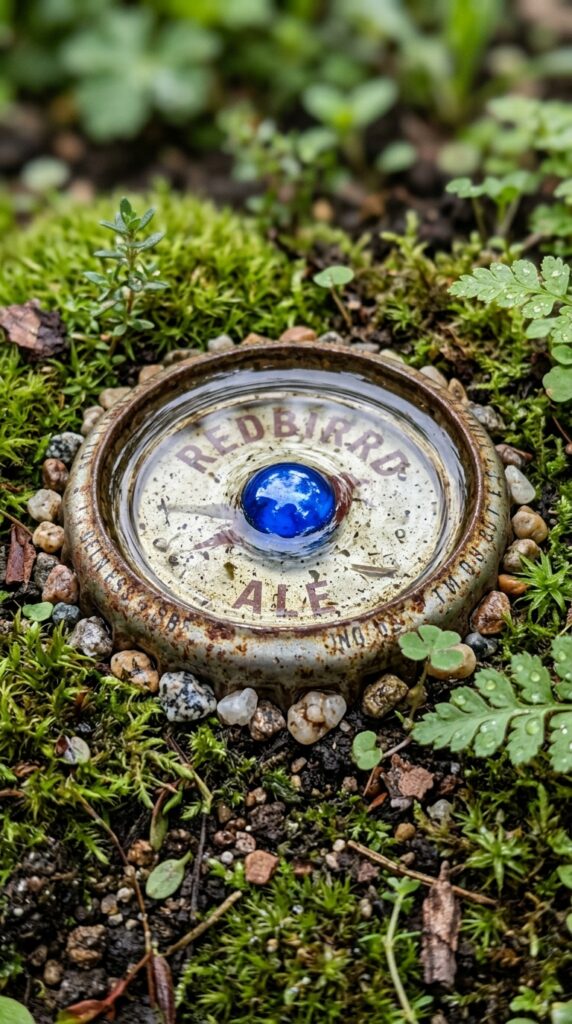
A large metal bottle cap pressed flush into garden soil makes a fairy pond so convincing that people crouch down to check if the water is real. The metal rim reads as a decorative pond edging. The shallow interior is exactly the right depth and proportion. And the materials cost absolutely nothing beyond a craft resin kit, which covers dozens of ponds from a single small bottle.
Press the cap firmly into the soil until its rim sits at ground level — this is the key detail. A cap sitting proud of the surface reads as a bottle cap. A cap flush with the soil reads as a pond. The difference is purely about that single centimeter of pressing depth.
Fill with a small pour of clear two-part epoxy resin — the kind sold for jewelry making and craft projects in small quantities. Add a single tiny polished blue or green bead at the center before the resin sets, which creates the illusion of a decorative stone visible through crystal-clear water. A thin layer of fine blue-tinted sand beneath the resin, added before pouring, gives the impression of a sandy pond bed.
Ring the outer edge of the cap with tiny natural pebbles, pressed into the surrounding soil, to blend the metallic rim into the garden surface. Then plant right up to the pebble edge — moss, baby tears, or clover — so the pond looks embedded rather than inserted.
One finished pond takes about ten minutes of active work and twenty-four hours of resin curing time. Make several at once while you have the resin mixed.
7. Driftwood Arch Gateway
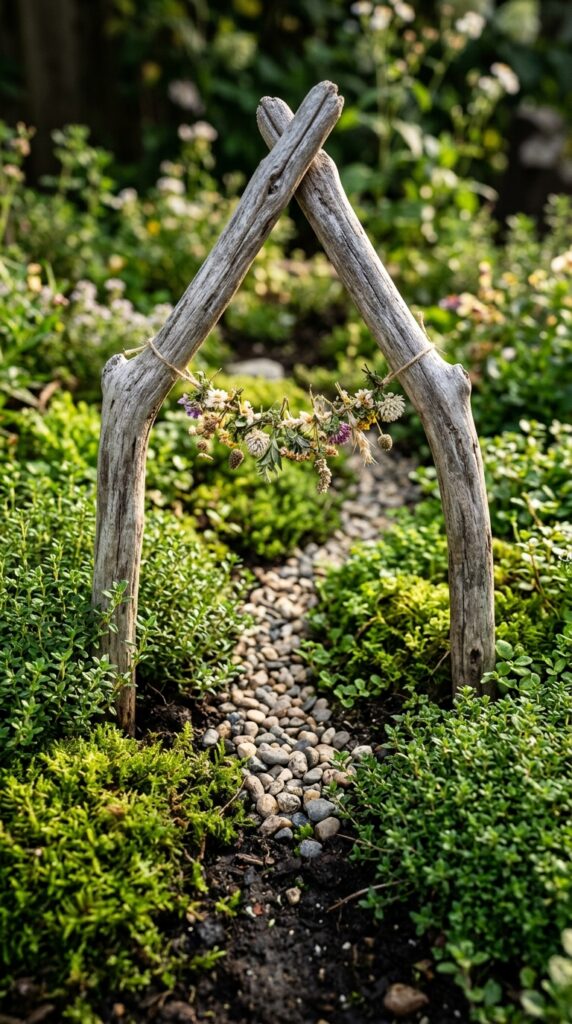
A gateway changes a fairy garden fundamentally. Before an arch, a garden is a collection of things arranged in a space. After an arch, there’s an inside and an outside — a threshold — which immediately implies that whatever lies beyond it is somewhere you would need permission to enter. That shift in spatial reading costs almost nothing to create.
Find two naturally forked branches of similar size — the fork is what allows them to lean inward and meet overhead without any fastening at the top. Driftwood is ideal because the pale, weathered surface is beautiful and lightweight. Fresh green branches work too but will shrink as they dry, loosening the arch, so either accept that as part of the charm or seal fresh-cut branches with a thin coat of diluted PVA glue.
Press the base of each branch firmly into the soil at a slight inward angle. The two forks should meet or nearly meet at the top. If they need securing, a short piece of natural twine wound twice around the junction and knotted holds everything without looking artificial.
A tiny garland of dried flowers draped between the branches — chamomile heads, lavender sprigs, or single dried rosebuds strung on thread — adds color and softness without weight. It also reinforces the sense that this arch is deliberately decorated, that someone tended it.
Plant both sides of the arch with something soft and slightly spreading, so the gateway appears to have grown from the garden rather than been installed in it.
8. Pressed Flower Fairy Path Markers
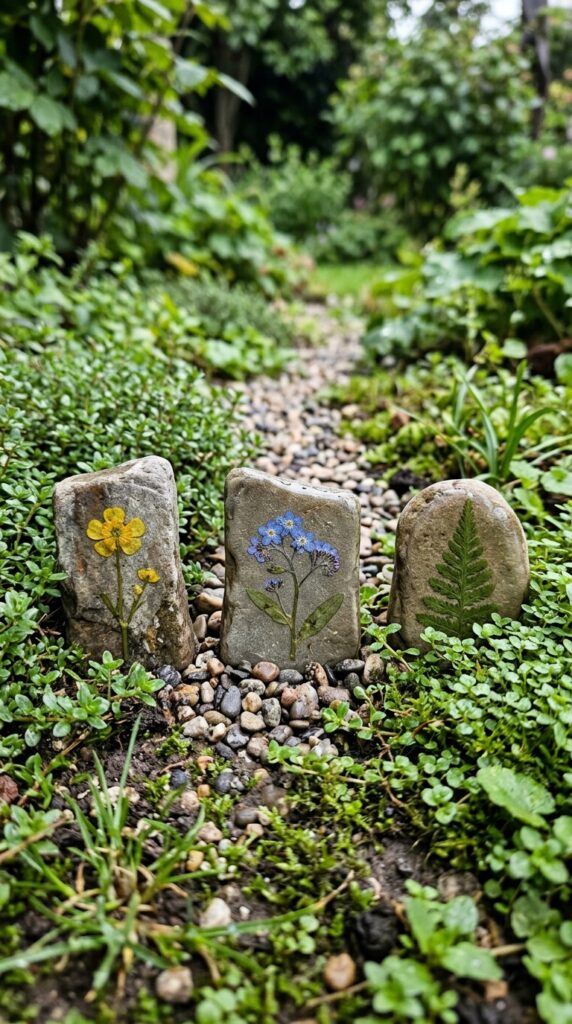
Path markers are the fairy garden element that most people default to buying — small resin signs with painted lettering, arrow-shaped stakes from craft stores — and almost nobody considers making from natural materials. The result of buying is that every fairy garden in the neighborhood ends up with the same three accessories. Making your own, even simply, produces something that belongs specifically to your garden.
Collect flat, smooth stones and press wildflowers or interesting leaves between the pages of a heavy book for two to three weeks until completely dry. Arrange the dried botanical on the stone surface in a simple composition — one flower centered, or a leaf angled across the face — and seal the whole surface with two thin coats of outdoor Mod Podge, allowing each coat to dry fully.
These botanical stones can stand upright as path markers if you bury one-third of their base in soil, or lie flat as decorative ground elements within the garden scene. Either way the pressed flower preserved under a clear sealant coat has an almost Victorian naturalist quality that suits the whimsical aesthetic perfectly.
Vary the botanicals across a set of markers. One with a tiny daisy, one with a fern leaflet, one with a sprig of dried thyme, one with a simple grass seed head. The botanical variety across a unified material — all smooth flat stones — creates coherence with enough variation to reward close looking.
These weather reasonably well outdoors for a full season before the Mod Podge eventually lifts at the edges. Rather than treating this as a flaw, consider it an invitation to make a new set the following spring.
9. Fairy Kitchen Garden in a Colander
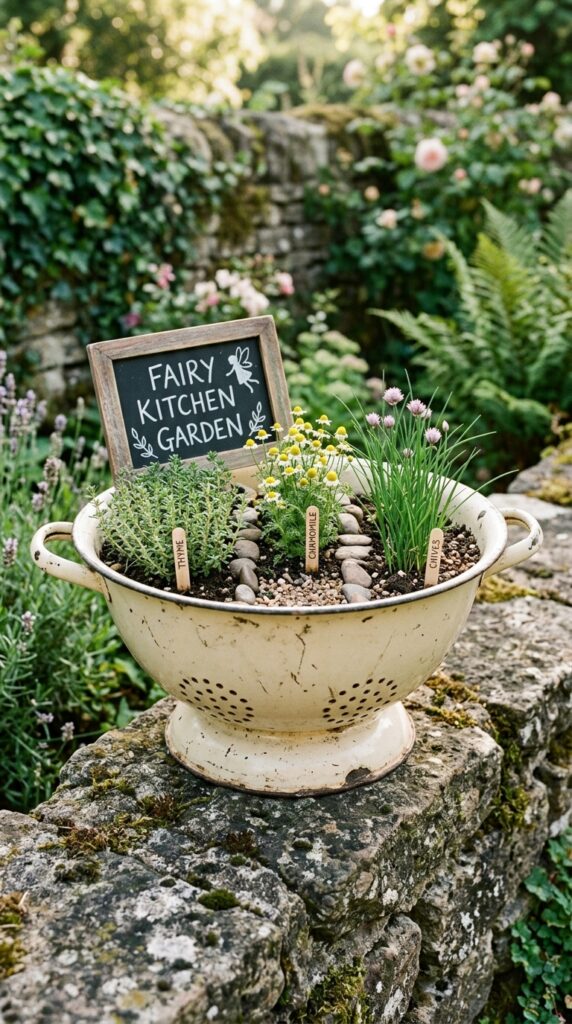
A fairy kitchen garden carries a specific kind of charm that purely decorative gardens don’t — the implication of a domestic life, of someone cooking, of tiny meals being prepared from a tiny garden. It’s a concept rather than just an arrangement, and concepts are what transform a planted container into a story.
Use a colander for the whimsy of the drainage holes and the domestic kitchen origin of the container itself. Line the interior with coconut coir, fill with compost, and plant in loose but deliberate rows: thyme at the back, chamomile in the middle, chives to one side, a small clump of mint planted in a separate buried pot so it doesn’t spread. Each herb has beautiful micro-scale foliage that photographs strikingly up close.
Divide the rows with flat stones pressed edgewise into the soil as tiny garden borders. These read as proper kitchen garden beds at fairy scale, which is exactly what makes the concept legible. Without the dividers, it reads as a herb pot. With them, it reads as a cultivated garden.
The miniature chalkboard sign — a small piece of dark grey craft foam or painted cardboard on a cocktail stick, with “Kitchen Garden” written in white paint pen — is the narrative anchor that makes the concept clear to anyone looking. Keep the lettering small and slightly imperfect. Perfect lettering looks digital. Imperfect lettering looks handwritten, which is the point.
10. Willow Twig Fairy Fence
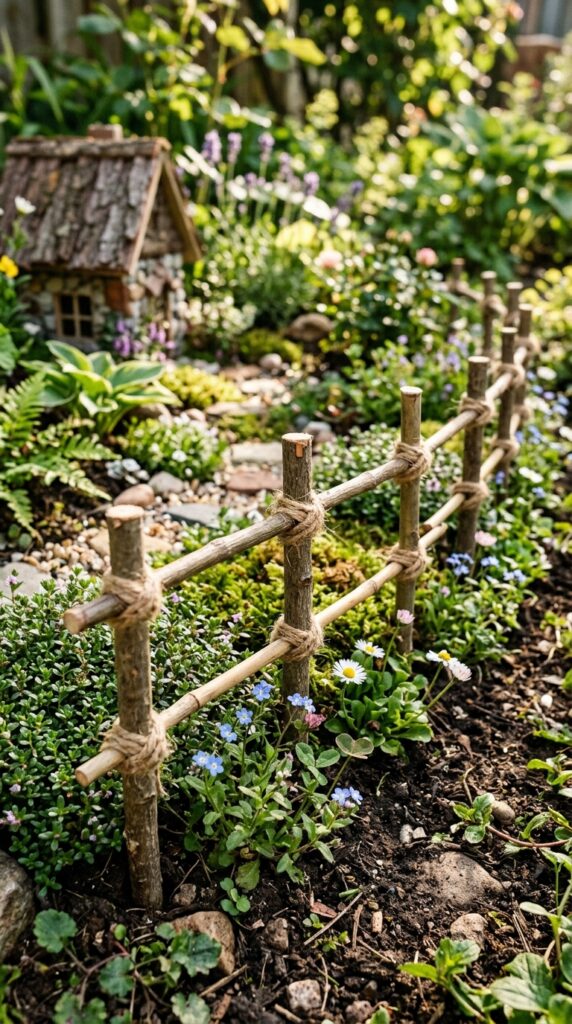
A fence changes the spatial grammar of a fairy garden in a way that almost nothing else does. It creates an inside. Before the fence, everything is open landscape. After it, there’s a domestic space — a garden within a garden — that implies ownership, cultivation, and a boundary between the wild and the tended. All from a few sticks and some twine.
Willow twigs are ideal because they’re flexible enough to curve without snapping, and their grey-green surface tone is beautiful against garden planting. Bamboo skewers from the kitchen drawer work equally well and are perfectly uniform in diameter. Cut them to uniform post heights — about eight centimeters — and push them into the soil in a line with roughly three centimeters between each post.
Lash two horizontal rails to the posts at upper and lower heights using natural jute twine. Wind the twine twice around each post-rail junction and tie off with a simple knot. The lashing doesn’t need to be structural — the posts in soil hold the fence upright — it just needs to be visible enough to read as construction.
Let the fence curve rather than running in straight lines. A fence that curves follows the natural topography of the garden planting, which makes it look grown-in rather than installed. Where the fence ends at a gate opening, two slightly taller posts on either side and a simple twig laid across the top as a lintel creates a proper entrance.
This project takes twenty minutes and costs nothing beyond a ball of jute twine, which has approximately ten thousand other uses in a garden.
11. Glass Bead Fairy Spring
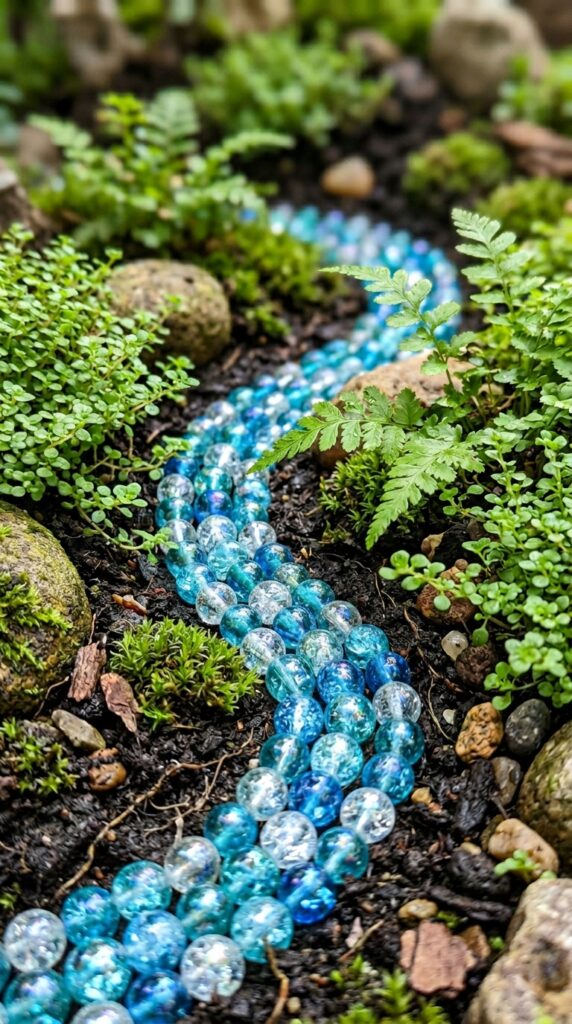
Water features are the element most fairy gardeners either skip entirely — assuming they require engineering — or buy expensively as manufactured resin pieces. The glass bead stream is the elegant solution to both problems: entirely free-form, completely customizable, and capable of catching light in a way that genuine water does.
Use glass beads in clear, pale blue, and iridescent white — the kind sold for jewelry making or vase filling at any craft store. Buy a small bag for two or three dollars and you’ll have enough for multiple streams, ponds, and waterfall effects across your entire garden.
Press the beads into slightly dampened soil in a loose, curving line — never perfectly straight, never evenly spaced. Real water moves irregularly, pools in depressions, narrows between stones. Simulate this by clustering beads more densely in certain sections (suggesting a pool), spreading them thinly in others (a shallow stream over stones), and letting a few stray beads sit apart from the main line (water that has splashed and settled).
Tuck small flat stones along the edges of the bead stream as bank reinforcement, with the occasional larger stone midstream as a boulder the water moves around. Press the surrounding planting close enough to the stream edge that leaves overhang it slightly — the overhead foliage framing a stream is the detail that makes the whole scene believable.
No maintenance required, no pump, no electricity. Just light catching glass in a way that your brain persistently reads as water, however many times you remind yourself it isn’t.
12. Fairy Lantern From a Baby Food Jar
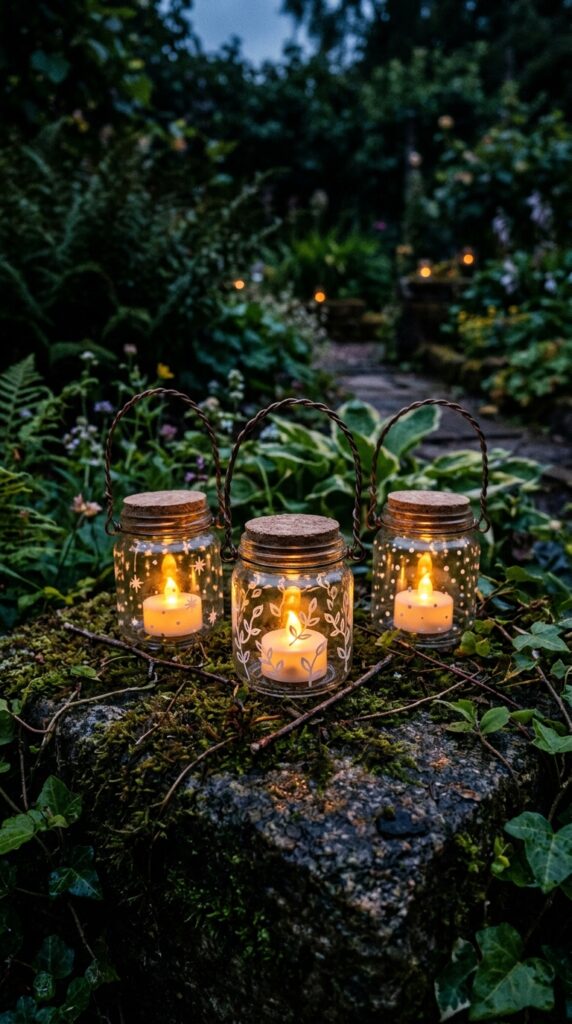
Baby food jars are one of the most universally available free materials in households with young children, and they are dimensionally almost perfect for fairy lanterns. The proportions are right, the glass is clear enough to let light through beautifully, and the wide mouth makes them easy to decorate and plant small arrangements inside.
Clean and dry the jars thoroughly. Use a white paint pen to add simple surface decorations — a row of tiny dots around the upper rim, a scattering of stars across the body, a single small leaf motif on one face. Keep the design minimal and geometric. Intricate designs are hard to execute at this scale and rarely look better than simple patterns with confident line work.
For the lantern handle, cut a fifteen-centimeter length of thin garden wire, twist it once around the jar neck, and arch it over the top where the two ends meet and twist together into a hanging loop. This takes thirty seconds and transforms a jar into something that looks intentionally crafted.
Drop a battery-powered tea light inside each jar. The warm amber glow through decorated glass at dusk is genuinely beautiful — the paint pen pattern casts tiny shadow-shapes onto surrounding surfaces as the LED flickers.
Group three jars of slightly different sizes together on a moss-covered stone or along a pebble path. The scale variation within the group and the soft individual glow of each jar creates an evening scene that no store-bought accessory at any price point reliably achieves. And the whole project, if you’re starting from scratch with jars you had to source, costs under three dollars in materials.
Why Cheap Works Better
The most magical fairy gardens are almost always the most personal ones, and personal things tend to cost less because they’re made rather than bought. A hand-painted pebble carries something a manufactured resin stone doesn’t — evidence of a hand, a specific decision about color, an imperfect brushstroke that no machine would leave. These traces of making are what give whimsical gardens their atmosphere.
Every idea in this list can be built for under five dollars in total materials, and most can be built for nothing at all. What they require instead is time, attention, and a willingness to look at the world around you — your garden, your kitchen, your autumn walks — as a source of material rather than a backdrop to it.
Come back here next time you’re standing in a craft store considering a bag of miniature accessories and feeling vaguely uninspired. Step outside instead. Pick up three interesting stones, pull a few moss tufts, find a fallen piece of bark, and start there. Whimsy, it turns out, has always been free.

