
There’s something quietly magical about giving a child a corner of the garden and a few wooden spoons. A mud kitchen isn’t really about the kitchen at all, it’s about that long stretch of afternoon where they forget the iPad exists and come inside with grass-stained knees and a “recipe” of mashed petals and rainwater. The best part? You don’t need a Pinterest-worthy budget to build one. Most of the loveliest setups I’ve come across started with something destined for the curb, a pallet, a broken nightstand, an old TV cabinet missing its doors. What follows are twelve genuinely affordable, design-conscious ideas that don’t look like an eyesore in your garden. Some are renter-friendly, some take an afternoon, and a few will outlast the childhood they were built for. Grab a coffee and a measuring tape, and let’s get into it.
1. The Classic Pallet Kitchen
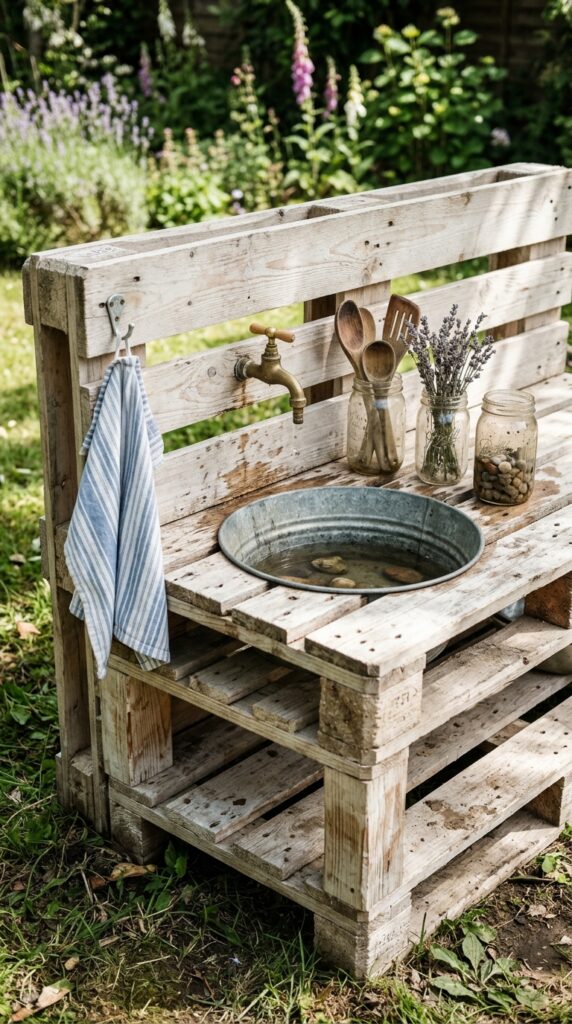
Pallets are the gateway drug of DIY parents, and honestly, for good reason. You can usually grab two for free behind a hardware store if you ask nicely, and that’s most of your build right there. Stack one vertically against a fence for the “backsplash” and lay another horizontally as the counter, then secure them with simple L-brackets. Cut a circle into the top with a jigsaw and drop in a thrifted stainless bowl for the sink. Sand the edges properly, splinters are the one thing that’ll kill the whole project. A coat of exterior wood stain in a warm walnut or soft grey keeps it from looking like a worksite leftover. One watch-out though: check the stamp on the pallet. You want HT (heat-treated), never MB (methyl bromide), which is toxic. Free, weather-tough, and built in a Saturday afternoon. Hard to beat that.
2. Upcycled Nightstand Mini Kitchen
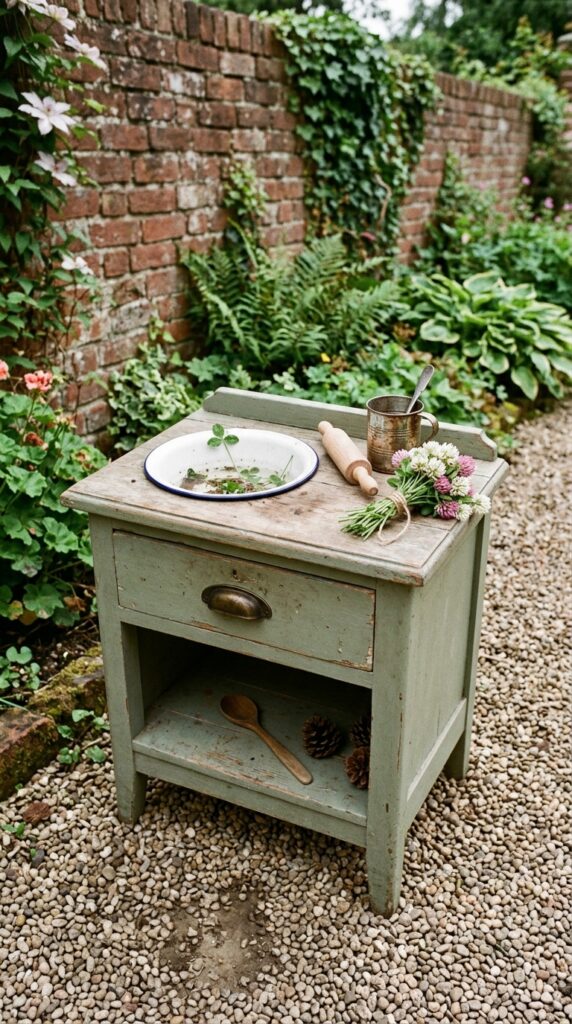
If you’ve ever scrolled local marketplace listings at 11pm, you’ve seen the parade of $10 nightstands begging for a second life. Grab one. The drawer becomes brilliant storage for play “ingredients” (acorns, dried beans, pinecones), and the top is already counter height for a toddler. Skip MDF nightstands, they’ll swell at the first rain, look for solid wood even if it’s banged up. A coat of exterior chalk paint in something earthy like sage, terracotta, or muted ochre lifts it instantly. Drill a hole for a basin, add a hook on the side for hanging utensils, and you’re done. The one thing to watch is height. If your kid is under three, you may need to saw an inch or two off the legs. A small, characterful piece that feels styled rather than slapped together.
3. The Galvanized Tub Trough Kitchen
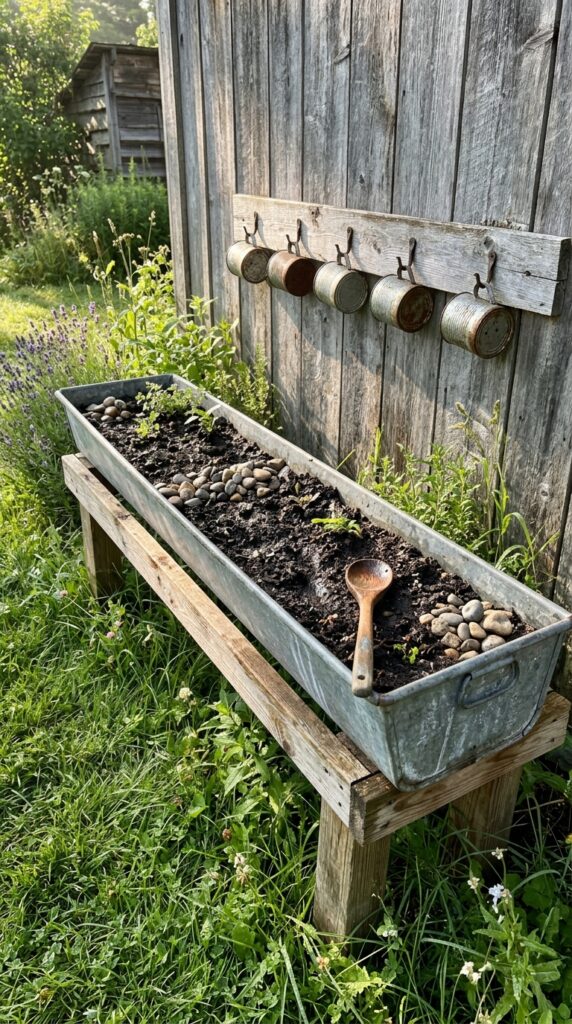
This one’s for parents who hate fiddly builds. A galvanized animal feeding trough (around $25–40 at a farm supply store) becomes the entire kitchen surface. Set it on a basic pine or 2×4 frame at toddler height, fill with sand or clean soil, and that’s your “cooktop and prep area” in one. The metal is genuinely weatherproof, won’t rot, and ages into a beautiful soft patina over a few seasons. Add a small wooden shelf below for storage and a pegboard above for hanging tools. Here’s the trick, the metal gets hot in direct summer sun, so position it under partial shade or against a north-facing wall if you can. It’s not the prettiest first thing in spring, but give it a year of weather and it looks intentional, like something a designer chose on purpose. Industrial, low-maintenance, and almost indestructible.
4. The Old TV Cabinet Conversion
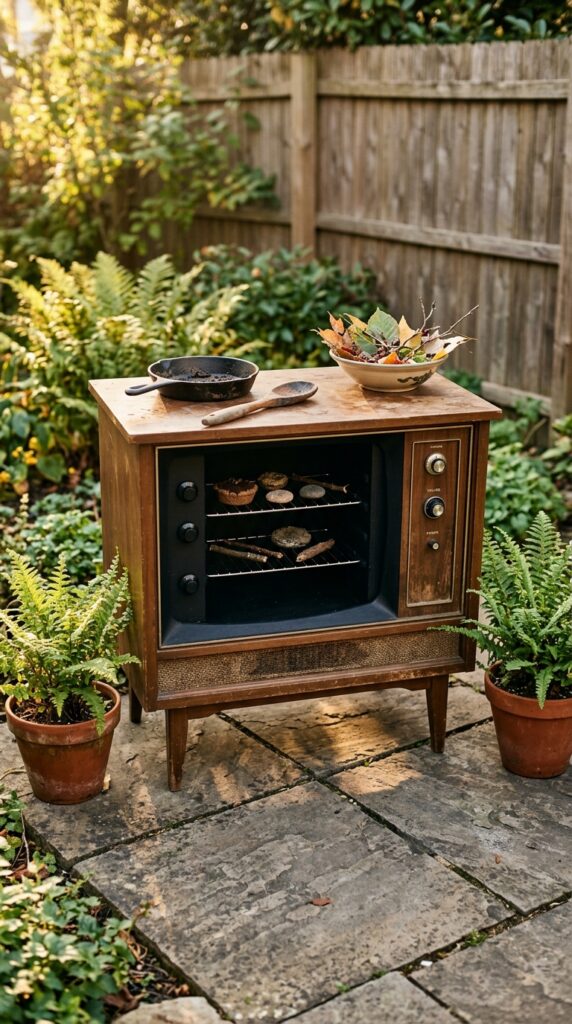
Old wooden TV cabinets, the chunky ones from the seventies and eighties, are basically free on every classified site and they convert into the most fantastic little kitchens. Knock out the TV screen, paint the inside matte black, and suddenly you have a working “oven” with a door that opens. The speaker grilles become storage cubbies. The flat top is your counter. Sand it back, give it a coat of exterior-grade paint (something muted like clay or putty looks more grown-up than primary colors), and add new hardware if the originals are tired. Skip this if you live somewhere with brutal rain unless you can keep it under cover, the veneer will lift. But for a covered porch or a shed wall, it’s unmatched character for under twenty bucks. Genuinely the most “this looks expensive” option on the list.
5. Cinder Block and Plank Setup
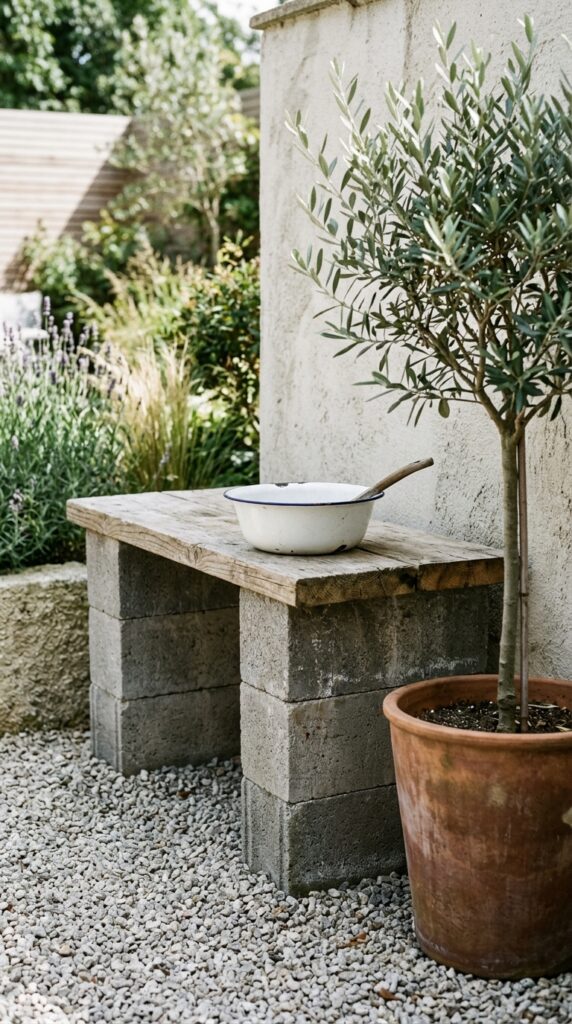
For renters or anyone who wants something they can disassemble in five minutes, this is the move. Four cinder blocks (around $2 each), a couple of sturdy planks across the top, and you’ve built a kitchen. It’s not precious, which is sort of the point, kids can drag it around, you can take it apart when winter comes. The blocks have those built-in holes that work perfectly for slotting in wooden spoons or holding little bouquets of weeds. One thing to watch, the edges of blocks are rough and can scrape little hands, so either sand them down or wrap the corners with a strip of rubber edging. Style-wise, leave the blocks raw grey for a modern look, or hit them with a coat of limewash for a softer, more Mediterranean feel. Pack-down friendly, almost no skill required.
6. Hanging Pegboard Wall Kitchen
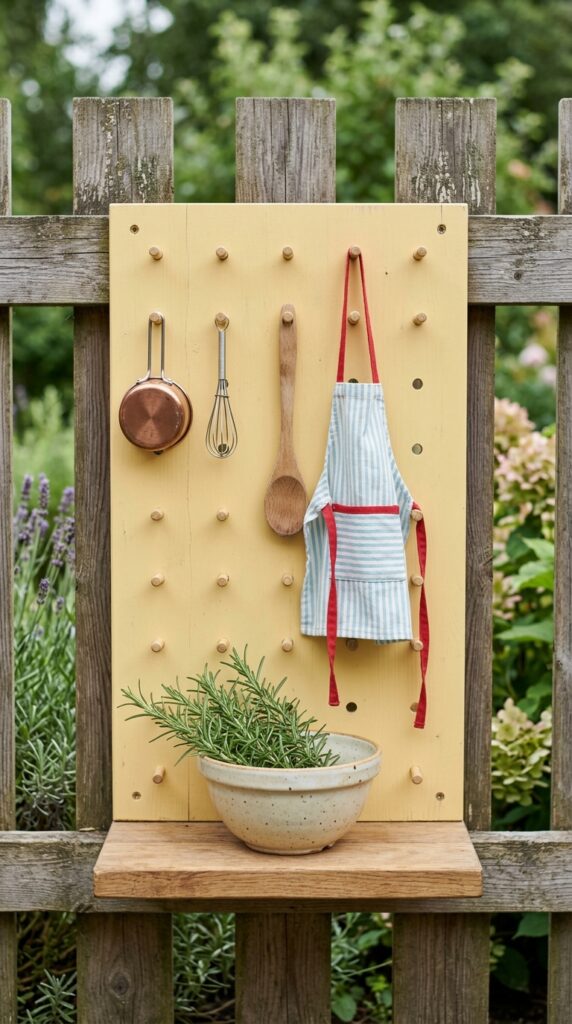
If you’re tight on actual ground space, build up instead of out. A pegboard mounted directly on the fence (or on a freestanding plywood panel if you’re renting) becomes a vertical kitchen. Hooks hold every utensil, a small fold-down shelf below acts as the counter, and the whole thing tucks against the wall when not in use. This works particularly well in narrow side yards or balcony gardens where a full kitchen footprint just isn’t realistic. Paint the pegboard a soft, unexpected color, butter yellow, dusty pink, or a chalky off-black all read more “designed” than primary brights. Watch out for cheap MDF pegboard, it disintegrates outdoors. Spend the extra few dollars on plywood or marine-grade. Compact, organized, and weirdly satisfying to look at even when no one’s playing.
7. The Drawer-Front Counter Build
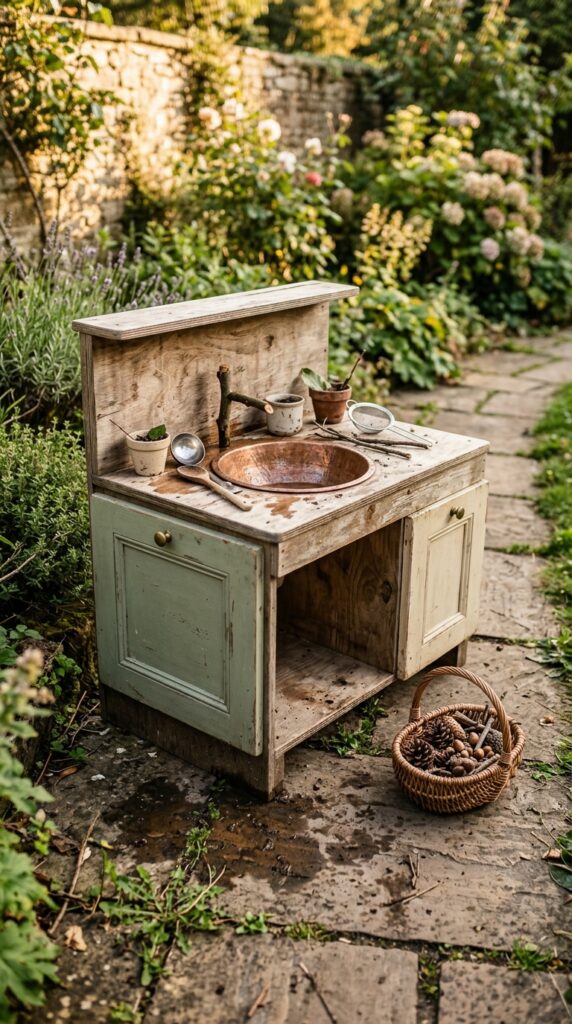
Sometimes the most charming details come from rescued pieces of furniture nobody wanted. Old drawer fronts, especially the ones with paneling or carved detail, can be screwed onto the sides of a basic plywood box to make the whole thing look like a tiny custom cabinet. Hit estate sales, those carved Edwardian-style drawers fronts are usually a few dollars each, and they instantly elevate a build from “garden shed” to “the kid has better taste than me.” Pair two different woods or paint colors for a layered, collected look. Add a copper or brass bowl as the sink for warmth. One small constraint, you’ll need basic drill and saw skills here, it’s a step up from no-tools builds. Worth the effort if you want something that genuinely looks beautiful, not just kid-cute.
8. The Tiny Bistro Kitchen
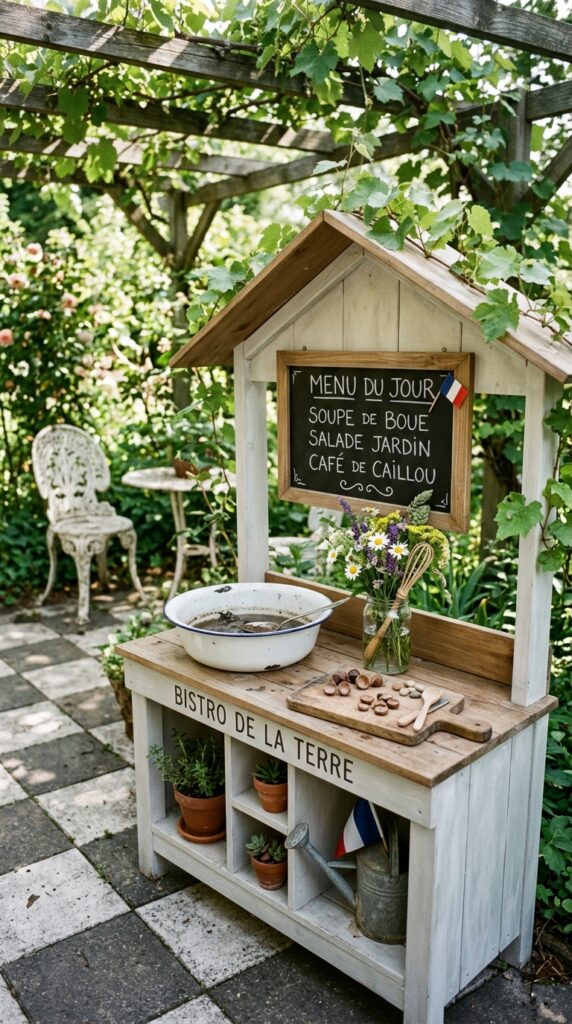
This is the styled-up option for parents who genuinely enjoy the aesthetic side of things. Build or buy a basic structure, then dress it like a tiny cafe. A small chalkboard sign hand-lettered with “today’s specials,” a striped linen tea towel folded just so, herbs growing in little terracotta pots clustered to one side. The trick is restraint, two or three carefully chosen props read as styled, ten props read as cluttered. White or cream paint with one accent color (a deep terracotta, an olive green) keeps it from feeling like a toy. Skip this if your kids are heavy-handed under three, the styling won’t survive a week. But for older children who love pretend-cooking elaborate “menus” for grown-up “guests,” it leans into that magic beautifully. Pretty enough to leave up year-round.
9. The Outdoor Sink From An Old Basin
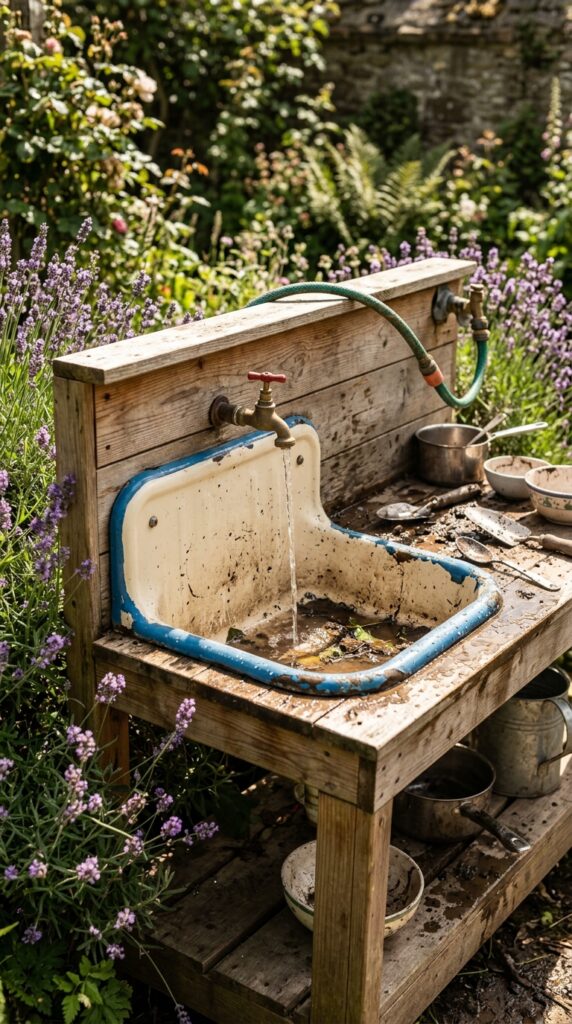
If you have access to an outdoor tap, a functional sink takes the whole experience to another level. An old enamel washbasin from a salvage yard (usually $15–30) mounted into a simple wooden frame, with a length of garden hose snaked up the back to a real tap above, gives kids actual running water to “wash dishes” and rinse their mud creations. It changes the entire play pattern, suddenly there are dishes to clean, and they spend twice as long out there. One thing to plan for, drainage. The basin needs a hole at the bottom with a hose running to a flowerbed or gravel pit so you’re not creating a swamp. Don’t connect to hot water, just cold, and use the outdoor tap shut-off in winter. Honestly, the single best upgrade on this list if you can swing it.
10. The Painted Crate Stack
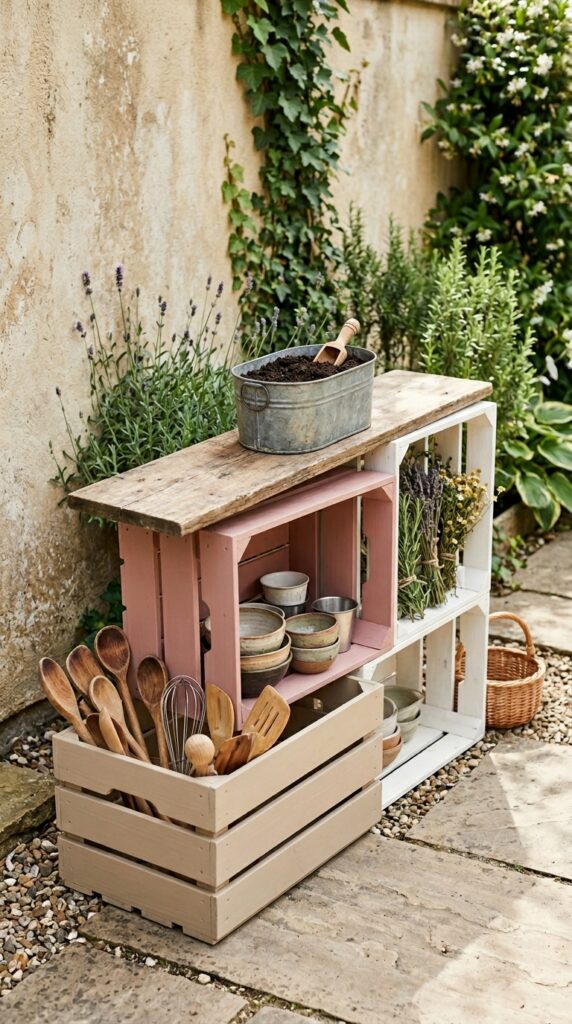
Wooden produce crates, the kind apples and oranges come in at the market, are practically free if you ask a local greengrocer at end-of-day. Stack three or four together in a staggered arrangement and you’ve built a modular kitchen that doubles as open shelving. Each crate becomes a “drawer” for different play categories: utensils in one, “ingredients” in another, plates and bowls in a third. Paint them in three or four coordinating muted shades for that gradient effect that always looks more expensive than it is. The crates can be rearranged as the kids grow or as you need more space. The constraint here is structural, you’ll want to screw them together where they meet so the whole thing doesn’t topple. Flexible, ridiculously cheap, and easy to take apart when the play phase ends.
11. The Under-The-Deck Tucked Kitchen
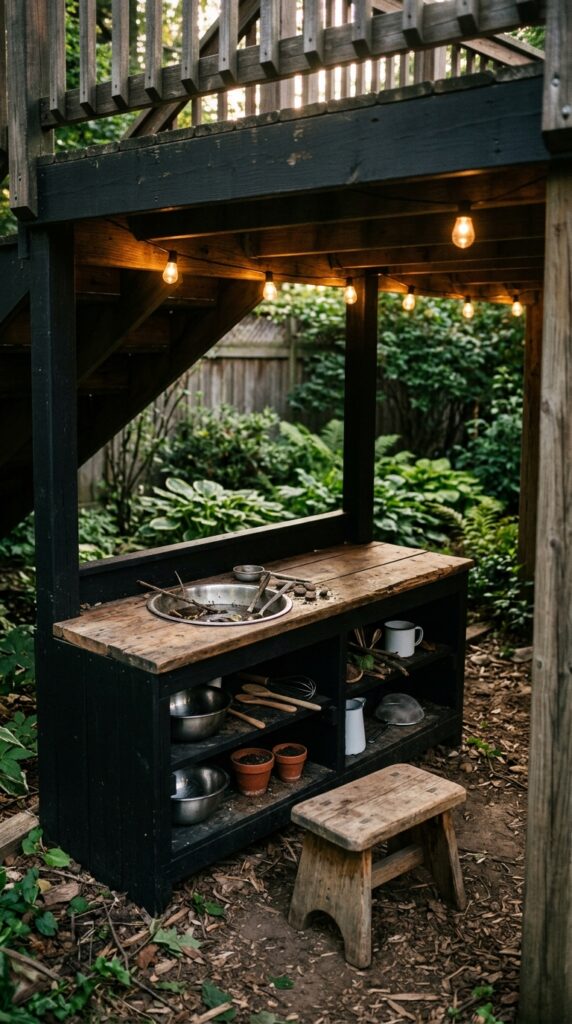
If you have a raised deck, the dead space underneath is prime real estate for a mud kitchen tucked into shadow. It’s naturally sheltered from rain, gives the kids a “den” feeling that they absolutely love, and the structure above acts as the roof so you don’t need to build one. Paint the kitchen itself in something dark, matte black, deep forest green, charcoal, so it disappears into the shade rather than fighting the natural shadow. String a strand of warm-white outdoor lights along the underside of the deck for atmosphere. Watch out for moisture, even sheltered spots stay damp underneath, so raise the kitchen on small feet or bricks to keep wood off the ground. A magical, almost secret-feeling play spot that uses space that was doing nothing anyway.
12. The Renter-Friendly Foldaway Kitchen
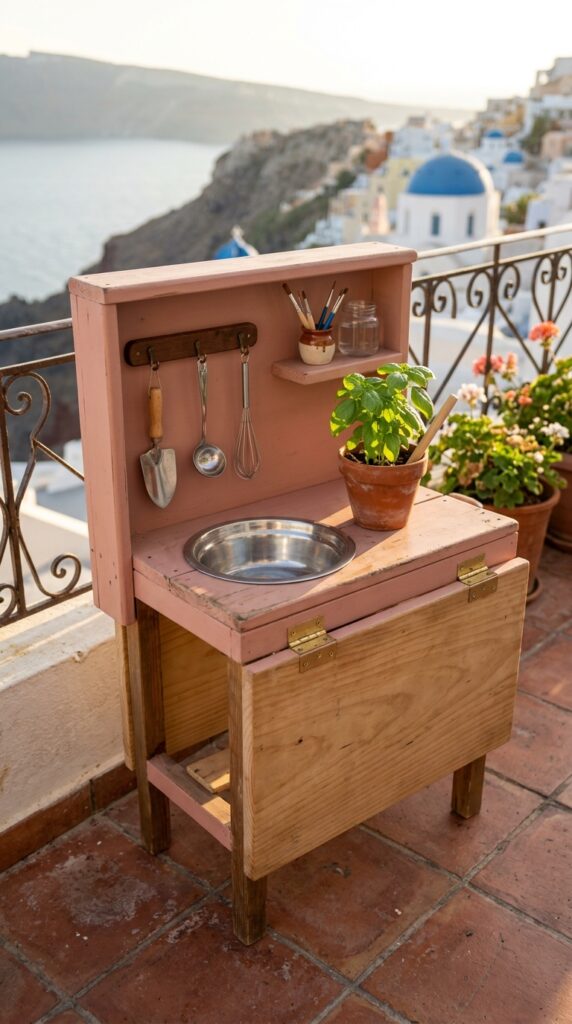
For apartment dwellers, balcony gardeners, or anyone who needs the whole setup to disappear when guests come over, a foldaway version is a lifesaver. Build the kitchen onto a hinged plywood panel that can collapse flat against the wall when not in use, or onto a folding sawhorse base that breaks down in seconds. Keep the components light, a thin basin, lightweight utensils, no real storage drawers, so the kid can help set up and pack down themselves (huge for independence). Paint it in something that complements your outdoor space rather than screaming “kids zone,” soft clay, dusty olive, chalky white. One thing to consider, this version is best for ages four-plus, since stability isn’t as solid as a fixed build. Perfect for small spaces, perfect for landlords who don’t want holes in fences.
So there it is, twelve ways to build a small piece of childhood magic without spending what you’d pay for a weekend away. The truth is, kids don’t care if the kitchen cost five dollars or five hundred. What they remember is the feel of cold mud between their fingers, the seriousness of “cooking” leaf soup, and the fact that you took the time to build them something. If even one of these ideas got you thinking about that pallet by the side of the road differently, or made you peek under the deck and imagine a tiny kitchen tucked in there, then we’ve done our job. Come back anytime, we share practical, design-conscious ideas like these every week, the kind that respect your budget, your aesthetic, and your sanity. Bookmark us, share this with the friend who’s been talking about doing “something for the garden,” and most importantly, get out there and build. Your kid’s best afternoon is waiting.

