
Here’s what nobody tells you about curb appeal: the yards that make you slow your car down and stare are rarely the ones with the biggest budgets. They’re the ones where someone paid attention — where the edging is crisp, the plants are thoughtfully layered, and there’s a clear sense of intention behind every decision. Good landscaping isn’t about spending more. It’s about spending smarter.
Whether you’re working with a flat, featureless lawn, a sloped mess of weeds, or a perfectly decent yard that just needs a little personality, these twelve ideas will help you transform what you’ve got without draining your wallet. Some of these projects cost almost nothing. A few require a weekend and maybe a hundred dollars in materials. All of them punch well above their price point — and most importantly, they’ll make your home look like you actually meant for it to look this good.
1. Crisp Bed Edging: The Cheapest Upgrade You’re Probably Skipping
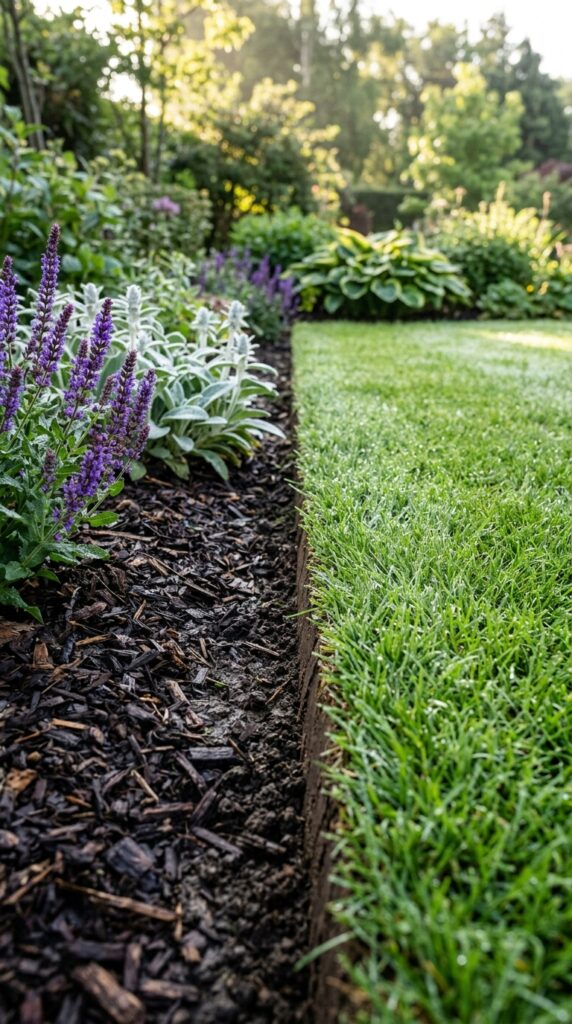
If you do only one thing to your front yard this season, make it this. Clean bed edging is the single most underrated landscaping move — it costs almost nothing, takes a few hours, and instantly makes everything around it look more intentional. A yard with ragged, grass-creeping edges looks neglected even when the plants themselves are healthy. A yard with a crisp, defined border looks tended, polished, and purposeful.
Use a half-moon edger or a flat spade to cut a clean vertical line between your lawn and your planting beds. Aim for about two inches deep. The goal is a small but visible trench — that shadow line is what gives the edge its definition. Re-edge every four to six weeks during growing season and you’ll be amazed how much it elevates the entire yard.
One thing to watch: don’t edge too far out trying to make beds larger. Bigger isn’t always better. A tighter, well-defined bed with great plants beats a sprawling one that’s hard to maintain. Start clean, stay consistent.
2. Dark Mulch: The Trick That Makes Plants Pop
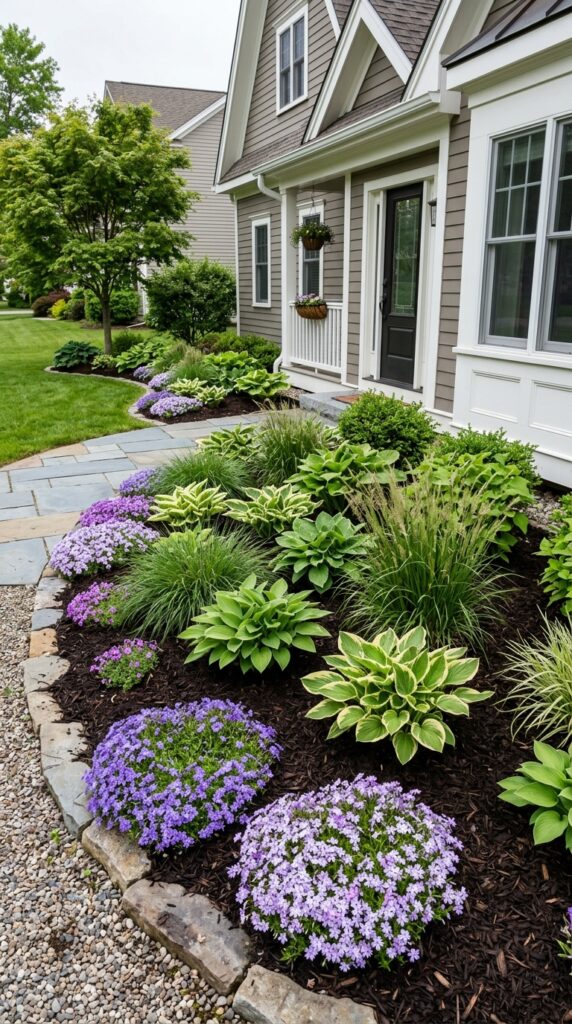
Fresh mulch is essentially a filter — everything looks better through it. Dark hardwood mulch in a deep espresso or near-black tone does something almost magical to a planting bed: it creates a high-contrast backdrop that makes foliage look greener, flowers look brighter, and the whole bed look professionally installed. Bagged brown or reddish mulch, by contrast, tends to fade fast and can make a yard feel dated.
Apply about three inches deep — enough to suppress weeds but not so thick that it smothers shallow roots or piles against plant stems. Keep it pulled back an inch or two from the base of shrubs and perennials. One common mistake is mounding mulch into a volcano shape around tree bases — it looks odd and actually damages the bark over time.
Bulk mulch from a local landscape supplier is almost always cheaper per cubic yard than bagged mulch from a big box store. If you’re covering more than three or four beds, it’s worth the trip. Dark color, even application, clean edges — that’s the trifecta.
3. A Flagstone Path That Looks Like It Cost a Fortune
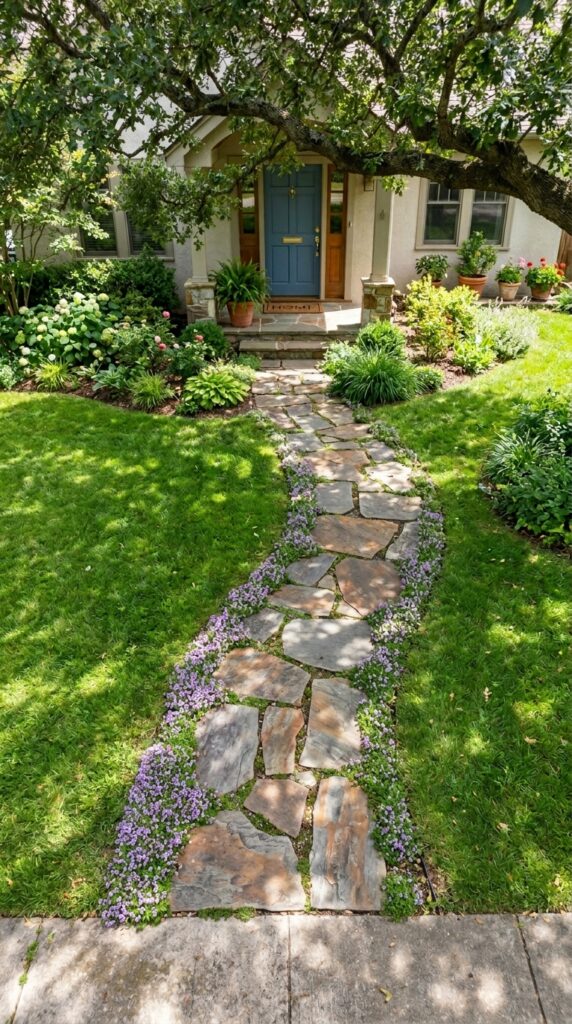
A winding flagstone path is one of those details that makes a front yard feel designed rather than just planted. The good news: flagstone is not nearly as expensive as it looks, especially if you source irregular or “seconds” stone from a local quarry or landscape supply yard. Irregular flagstone — the kind with rough, uneven edges — actually looks more natural and organic than perfectly cut pavers, and it costs significantly less.
Set stones directly in the ground for the most budget-friendly approach, pressing them firmly so they sit about a half-inch below the lawn surface. This keeps them from becoming a mowing hazard. For the gaps between stones, creeping thyme is a brilliant choice — it handles foot traffic, releases a gentle fragrance when brushed, fills in quickly, and costs very little to plug in as small starts.
Avoid laying the path perfectly straight. A gentle curve, even a subtle one, reads as intentional and elegant. Straight paths can feel institutional. That said, don’t overcorrect — a path that zigzags dramatically just looks confused.
4. Ornamental Grasses: Texture, Movement, and Zero Fuss
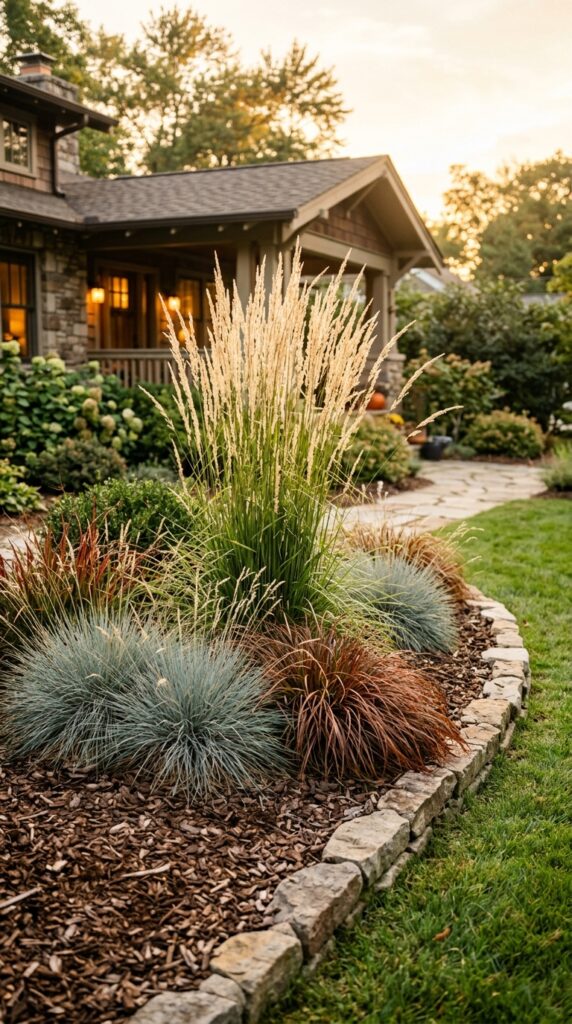
There’s a reason professional landscape designers reach for ornamental grasses constantly — they solve multiple problems at once. They add texture and movement no flowering plant can quite replicate. They look good in almost every season, including winter when most perennials have completely disappeared. They’re drought-tolerant once established, deer-resistant, and require almost no maintenance beyond one annual haircut in late winter.
For budget front yards, the formula is simple: one taller specimen grass like Karl Foerster feather reed grass as a focal point, flanked by shorter varieties like blue oat grass or blue fescue for contrast. The height layering creates instant depth. Blue fescue in particular is inexpensive, spreads slowly into tidy clumps, and pairs beautifully against dark mulch.
Skip the impulse to plant them in a single straight row along the foundation. Stagger the heights and group odd numbers — threes and fives — for a naturalistic, planted-on-purpose effect rather than a planted-in-a-hurry one.
5. A Bold Front Door Color That Anchors the Whole Yard
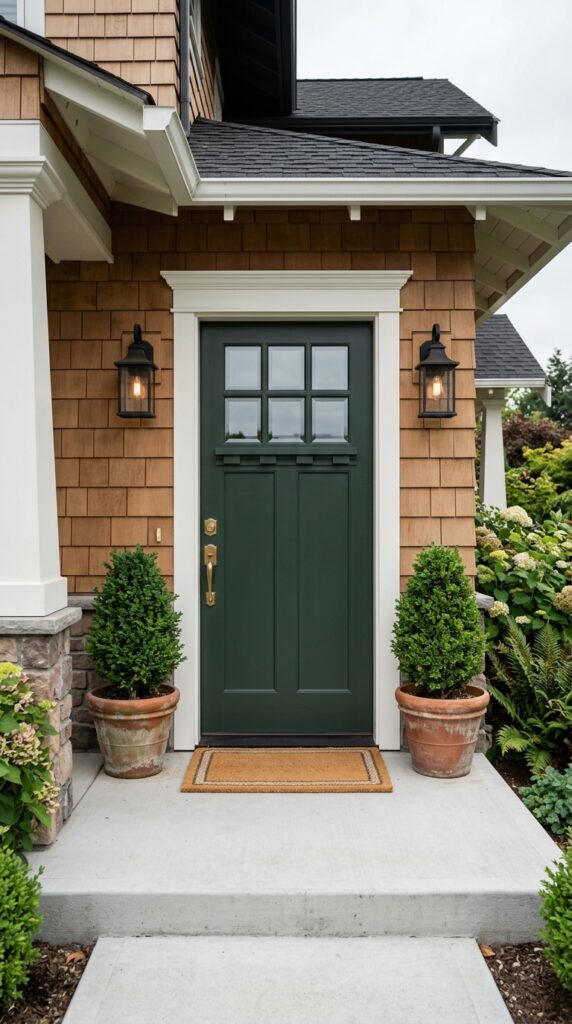
This one technically isn’t landscaping — but it works in concert with your yard so directly that it deserves a spot on this list. A front door color that contrasts sharply with your house’s exterior creates a visual anchor that makes the whole composition feel considered. It’s the thing the eye travels to first, and when it’s right, it ties the plantings, the path, and the architecture together.
Deep forest green, matte black, navy, burgundy, and terracotta are all strong performers. What doesn’t work as well are colors too close to the house’s own tone — a beige door on a beige house just disappears. One quart of exterior paint is about twenty dollars and takes two hours. The return on that investment is absurd.
If your door faces direct afternoon sun, go matte or satin rather than gloss — high-gloss finishes in full sun can look cheap and show every imperfection. Two symmetrical potted plants flanking the door complete the picture and cost almost nothing at a nursery sale.
6. Layered Foundation Plantings That Actually Make Sense
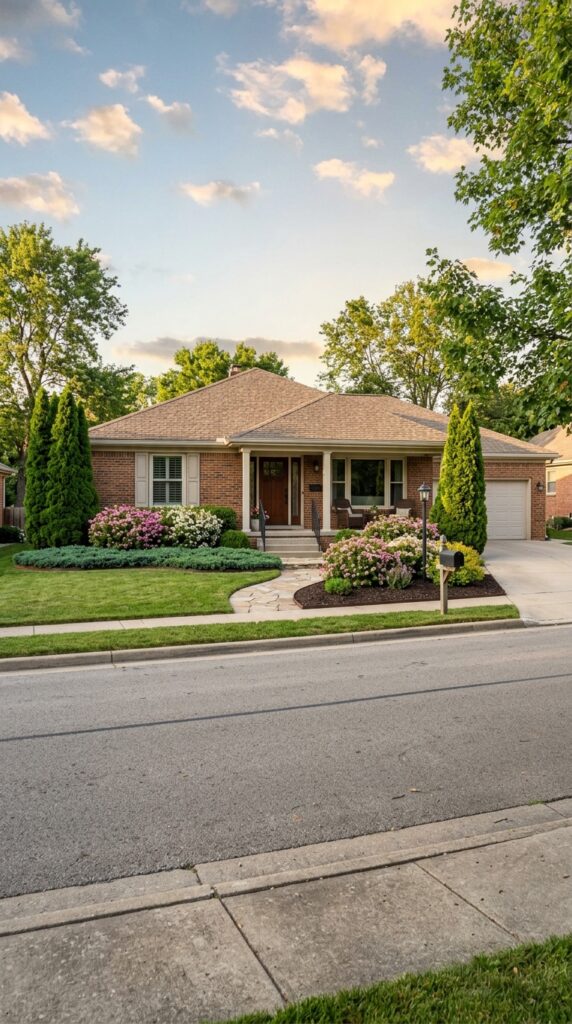
Foundation plantings are the most permanent landscaping decision you’ll make — and the most commonly done wrong. The classic mistake is planting one of everything in a single straight row, all the same height, all the same texture. It looks like a nursery lineup, not a designed landscape.
The approach that actually reads as expensive is layering: tall shrubs or small evergreen trees at the corners to frame the house, medium shrubs in the middle sections, and low ground covers or perennials at the very front. This creates a gentle slope of height that leads the eye toward the house rather than blocking it.
Stick to a limited plant palette — three to four species maximum for a typical ranch or colonial front. Too many different plants make a foundation planting look restless and amateur. Repetition is what creates the rhythm that reads as professional. One caveat: don’t plant anything too close to the foundation. Most plants need more room than the tag suggests, and crowded foundation plantings are a maintenance headache that looks worse every year.
7. River Rock Accents That Replace High-Maintenance Ground Cover
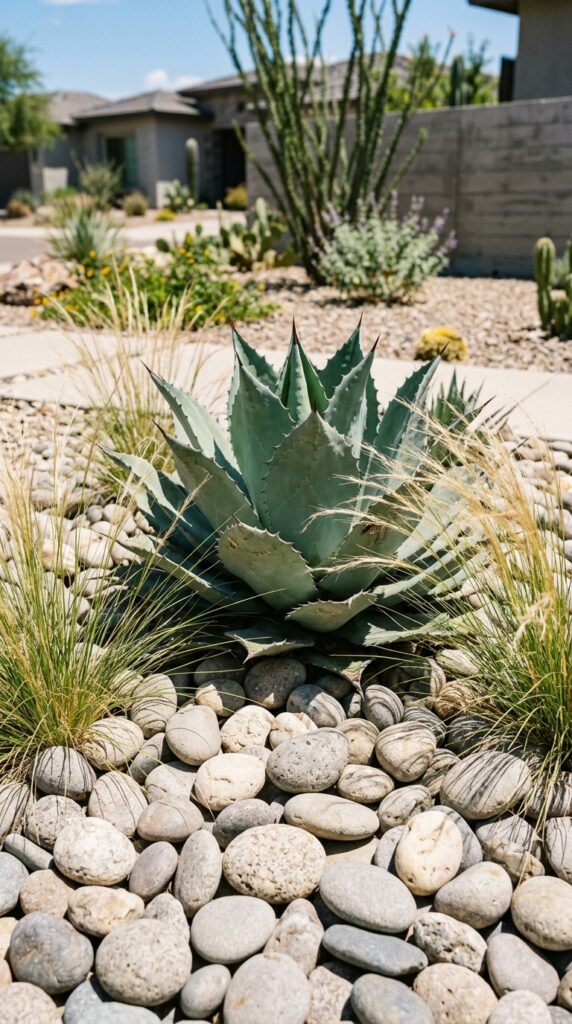
River rock is one of the most cost-effective ground cover alternatives available, and it pays dividends for years. Unlike bark mulch that needs replacing every season, river rock stays put, doesn’t fade, doesn’t float away in heavy rain, and suppresses weeds with a permanence that mulch simply can’t match. In dry climates or yards with poor drainage, it’s almost a necessity.
The key to making river rock look designed rather than dumped is scale and restraint. Use one consistent size — typically two to three inch smooth river rock — rather than mixing sizes randomly. Install landscape fabric underneath to prevent weeds from pushing through, but don’t rely on it alone — a thick, four-inch layer of rock is what actually does the suppression work.
River rock works best as an accent rather than a whole-yard treatment. Use it in beds around drought-tolerant statement plants like ornamental grasses, agave, or lavender. Surrounding lush green perennials with rock can look incongruous and dry. Match the stone tone to your house — warm cream and tan tones for warm brick or stucco, cool gray tones for white or gray siding.
8. Potted Plant Clusters That Create Instant Structure
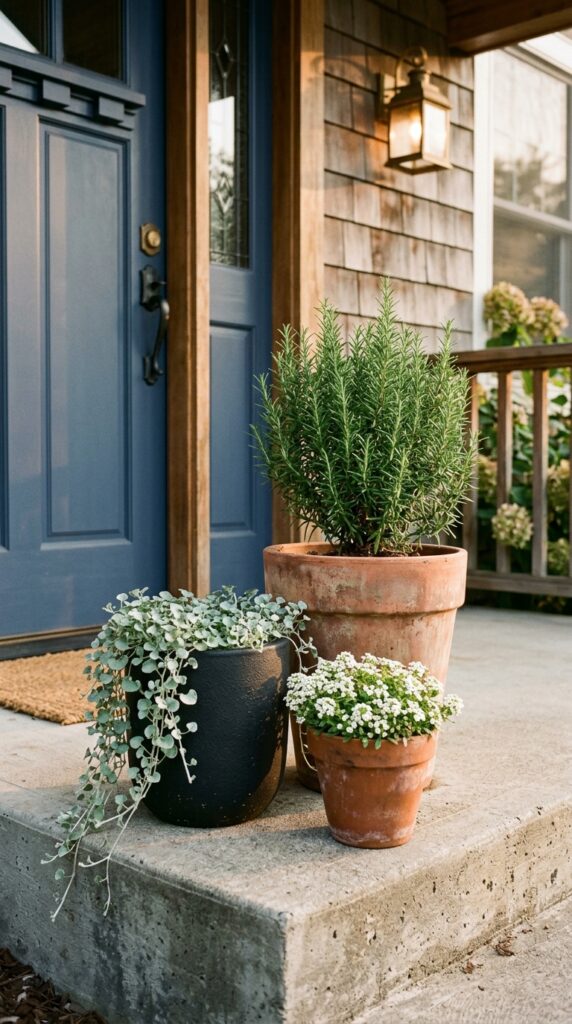
A cluster of well-chosen pots near the front door or along a porch step can do more visual work than an entire planting bed if they’re done right. The secret is varying the heights dramatically — a tall thriller plant, a medium-height filler, and a low trailing spiller, all grouped tightly together. This is the same formula used in professional container design and it creates an instant sense of abundance and intention.
Pots themselves don’t need to be expensive. A mix of terracotta and matte black or weathered cement looks genuinely upscale. Avoid shiny glazed pots in primary colors — they compete with your plants rather than letting them shine. Odd-number groupings (three or five pots) read more naturally than pairs or fours.
For budget plant choices, rosemary trained as a small topiary is inexpensive, smells incredible, and looks architectural. Trailing sweet potato vine fills in fast and costs almost nothing. White alyssum is a perpetual bloomer that softens edges beautifully. Swap out one or two seasonal plants and the whole display refreshes without starting over.
9. A Simple Defined Lawn Shape That Elevates Everything
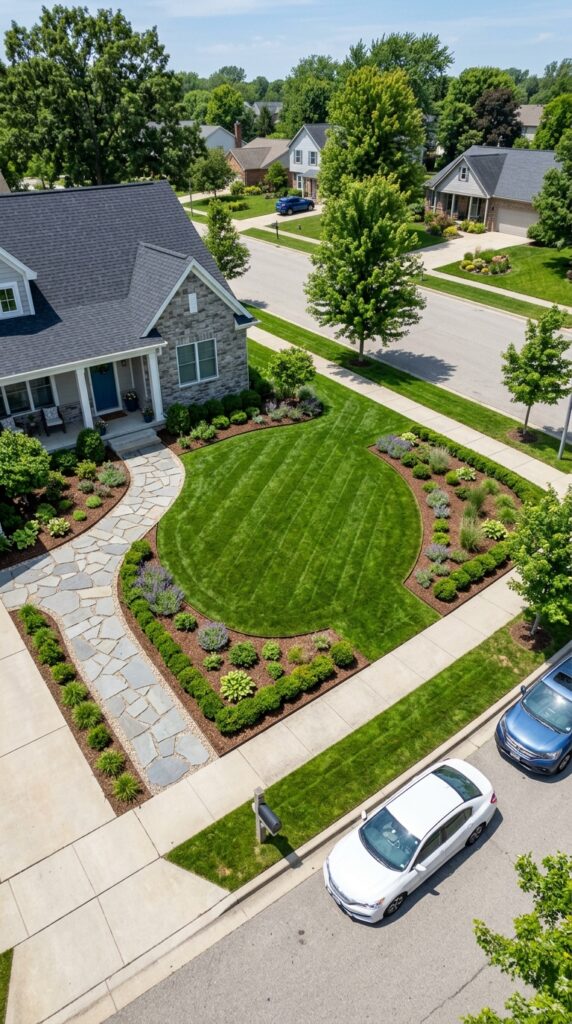
Most front lawns are shapeless — they fill whatever space is left over after the driveway and house footprint. That’s exactly why they look forgettable. One of the highest-impact, lowest-cost changes you can make is to give your lawn a deliberate shape — a defined oval, a clean rectangle, or a broad sweeping curve — surrounded by properly sized planting beds.
You don’t need to reduce the size of your lawn dramatically. Even taking six to twelve inches off the perimeter to create a proper planting bed and a defined lawn edge completely transforms how the space reads. Suddenly the lawn looks like a feature, not a leftover.
Mark the shape with a garden hose first and live with it for a day before you cut. What looks right on paper sometimes looks off in person. Once you’re happy with the curve, cut it with an edger and strip the sod from the new bed area. Fill with dark mulch and a simple planting. That contrast between the green lawn panel and the rich dark bed is the whole effect — don’t over-plant it.
10. Low-Voltage Pathway Lighting for Under $100
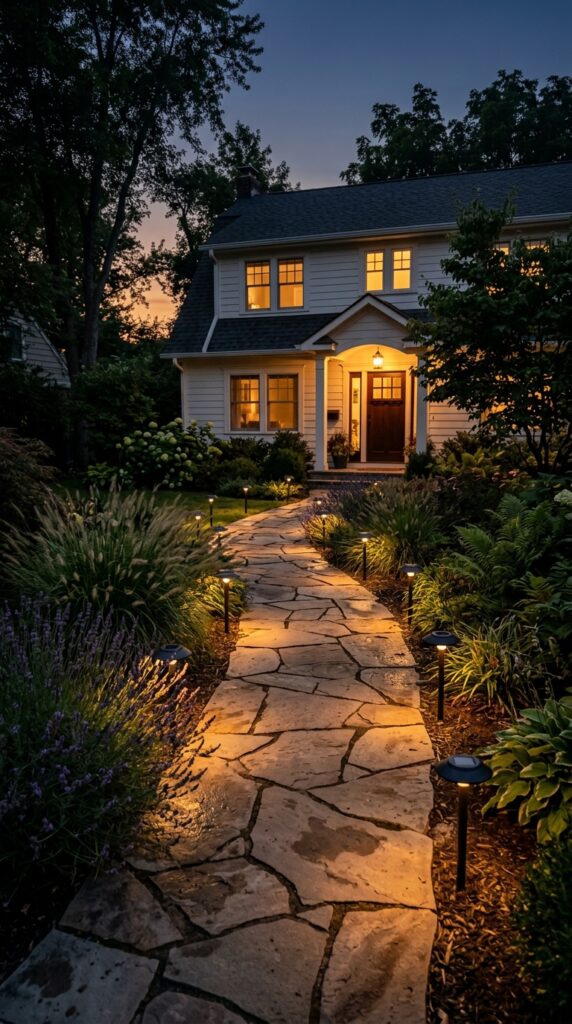
Landscape lighting has an almost unfair ability to make a front yard look expensive. The problem is most people either skip it entirely or overdo it with bright, cold-white solar stakes that look more like a runway than a garden path. The right approach is restraint: warm amber light, low to the ground, placed to guide rather than illuminate.
Low-voltage LED pathway lights on a simple plug-in timer are the most controllable and longest-lasting option. They cost more upfront than solar but perform dramatically better — consistent warm light every night, regardless of cloud cover. For a budget approach, quality solar lights have improved significantly. Look for ones with a warm color temperature (2700K–3000K) and a matte black or bronze finish.
Space lights farther apart than you think you need to — about eight to ten feet between fixtures rather than the four to five feet that looks obvious and grid-like. The goal is pools of warm light with dark space between them, not a fully illuminated path. That rhythm of light and shadow is what creates the atmosphere. Keep lights aimed down and away from the street to avoid that used-car-lot feeling.
11. A Focal Point Plant That Anchors the Whole Design
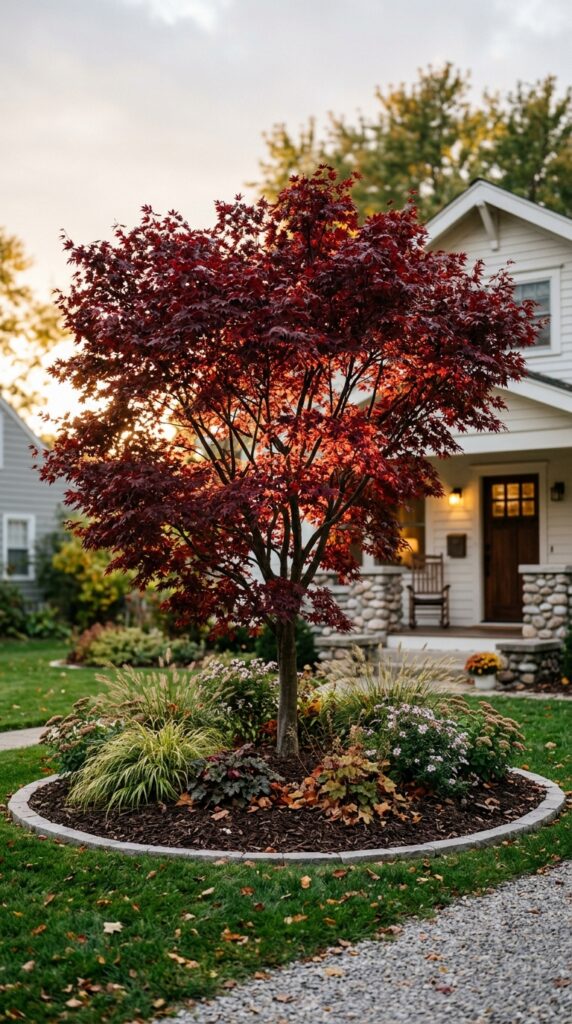
Every well-designed front yard has one. A focal point — one plant, one element that the eye goes to first, that anchors the composition and gives the whole design a reason for being. Without it, even a well-maintained yard feels like a collection of things rather than a landscape.
For most suburban front yards, a small ornamental tree is the ideal focal point. Japanese maple is the classic choice for good reason — it’s slow-growing, has beautiful year-round interest, comes in a range of sizes, and looks genuinely expensive even as a young specimen. Crape myrtle works beautifully in warmer climates. A multi-stem serviceberry is a native alternative that offers spring blooms, summer berries, and fall color in succession.
Plant it slightly off-center rather than dead center in the yard — asymmetry is more interesting and more naturalistic. Give it a properly sized planting bed with clean edges and dark mulch, and let it be the thing the rest of your plantings support. Resist the urge to surround it with too many competing plants. One great focal point with a simple supporting cast beats ten equally weighted plants every time.
12. White Flowering Ground Cover That Reads as Lush From the Street
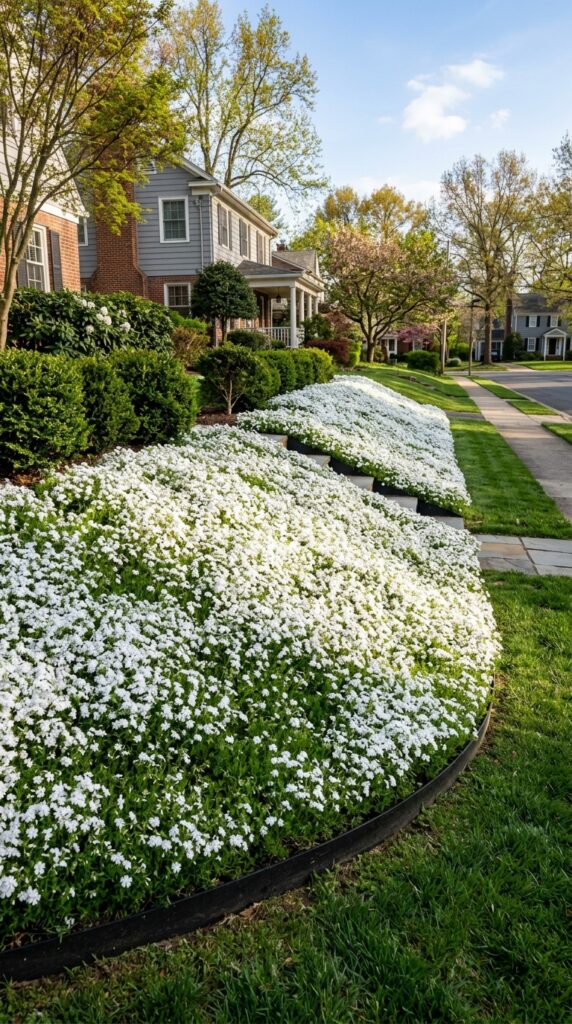
If you have a sloped area, a difficult dry strip, or a spot where grass just refuses to thrive, white flowering ground cover is one of the most elegant and budget-friendly solutions available. Creeping phlox, white sweet alyssum, candytuft, and white-flowering creeping thyme all create that lush, intentional carpet effect that photographs beautifully and looks genuinely designed from the street.
White works especially well from a distance. It reads as bright and fresh even when other details are too small to make out, and it provides contrast against dark mulch, green foliage, and most house colors without clashing. It’s also forgiving — a few gaps in coverage don’t read as neglect the way they would with a color plant.
Buy small starts or plugs rather than larger gallon pots. Ground covers establish quickly and spread reliably once in the ground. Plant at the recommended spacing (usually eight to twelve inches) rather than cramming them in — within one season they’ll knit together into a solid mass. By season two, you’ll have something that looks like it was professionally installed and costs a fraction of hardscaping alternatives.
The most important thing this article can leave you with is this: expensive-looking landscaping is almost never about expensive materials. It’s about cohesion — a limited plant palette repeated confidently, clean edges that show intentionality, a clear focal point that anchors the eye, and lighting that lets the yard work its magic after dark too. Pick two or three ideas from this list that fit your yard’s specific conditions and your own tolerance for maintenance. Do those things really well. That restraint is, counterintuitively, exactly what makes a front yard look like someone with real taste designed it.

