
There’s a particular kind of front yard that stops you mid-scroll — not because it’s lavish, but because it’s just right. Everything feels considered. The beds are tidy, the plants are healthy, there’s a clear path to the door, and the whole thing looks like someone actually thought about it. What you can’t tell from the photo is that it probably cost less than a nice dinner out.
Cheap landscaping gets a bad reputation because people confuse cheap with low-effort or low-taste. But the truth is, most of the elements that define a truly beautiful front yard — structure, repetition, contrast, clean lines — cost almost nothing to execute. What they require is a plan, a little patience, and knowing where to put your energy. This list gives you twelve of the most cost-effective moves you can make, whether you’re starting from scratch or just trying to give an existing yard a serious refresh. None of them require a contractor. Most require a free Saturday and some elbow grease.
1. Edge Everything — Seriously, Everything
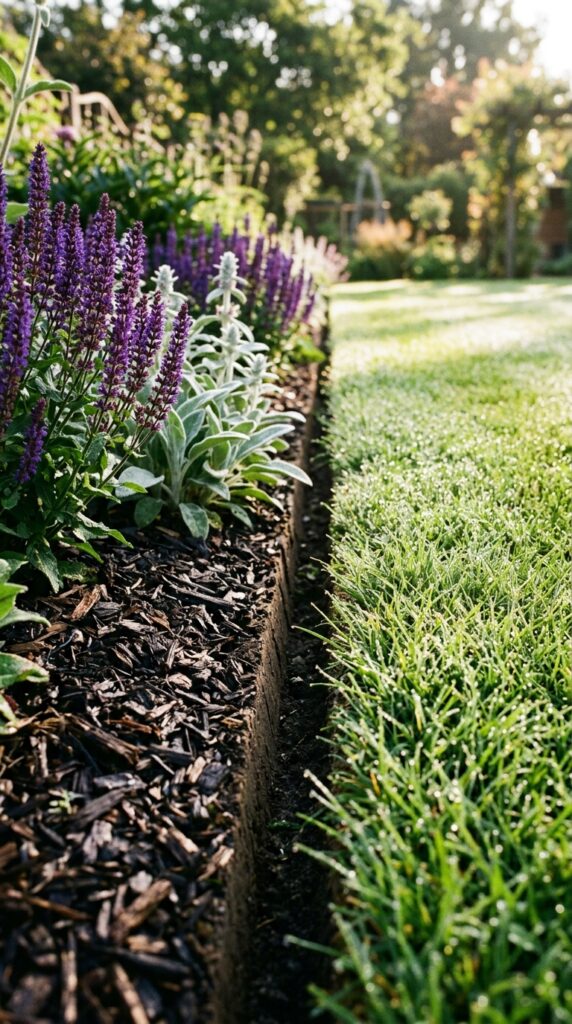
No single action does more for a front yard than clean edging — and it costs essentially nothing. A flat spade or a half-moon edger, a steady hand, and an hour of your Saturday morning can completely transform how a yard reads from the street. The difference between a maintained yard and a neglected one is often just this one detail. Grass that creeps into beds makes even healthy, well-planted gardens look messy. A clean vertical cut changes everything.
Cut about two inches deep along every bed border, driveway edge, and sidewalk line. The small shadow trench that forms is the real magic — it creates a visual line that reads clearly from a distance and makes beds look intentional rather than accidental. Re-edge every four to six weeks during the growing season to keep it sharp.
Here’s the trick most people miss: edge before you mulch, not after. Fresh mulch poured into a newly edged bed looks dramatically cleaner than mulch applied to an old ragged edge. And keep edges slightly concave — a gentle inward slope toward the bed holds mulch in place better than a flat cut. Five dollars of effort, a hundred dollars of visual result.
2. Swap Tired Shrubs for Ornamental Grasses
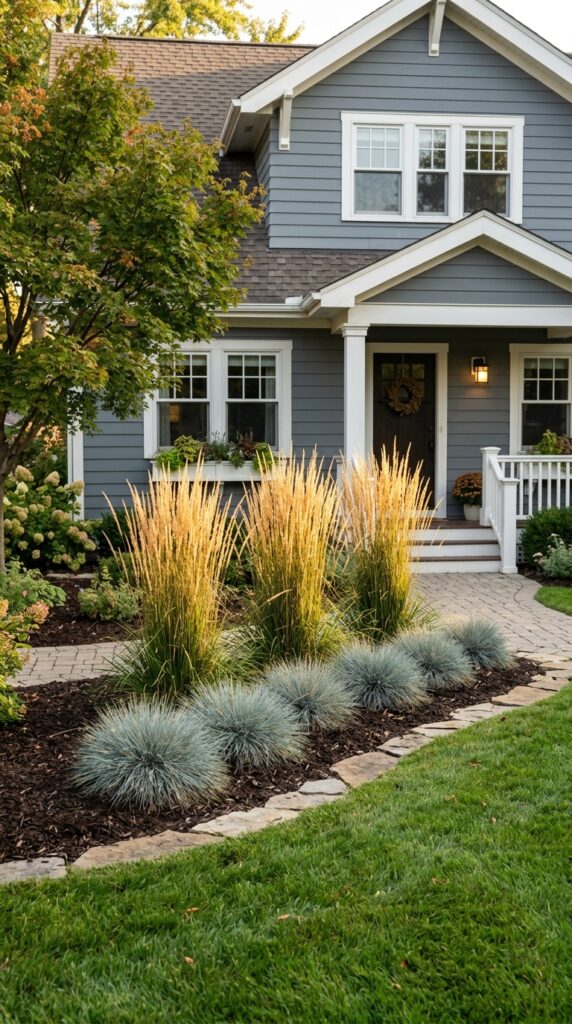
If your front yard has old, overgrown, or just plain boring foundation shrubs — the kind that get hacked into meatballs every spring and still look wrong — consider pulling them out entirely and replacing with ornamental grasses. It sounds drastic. It’s one of the best decisions you can make.
Ornamental grasses are inexpensive, establish quickly, and look genuinely designed when grouped well. They bring movement and texture that rigid shrubs simply can’t offer. Karl Foerster feather reed grass grows in a clean, upright column and stays tidy year-round — it even looks beautiful in winter when it catches frost and morning light. Blue fescue stays low and compact, perfect for front-of-bed placement. Blue oat grass bridges the gap between the two heights.
Plant in odd-number groupings — threes or fives — and stagger the placement slightly rather than lining them up in a row. The variation is what reads as natural rather than planted. One maintenance note: most ornamental grasses need cutting back hard — to about four inches — in late winter before new growth starts. Do it once a year and they reward you with a full, fresh flush of growth every spring. That’s the entire maintenance calendar.
3. Gravel Mulch in High-Traffic, Low-Water Zones
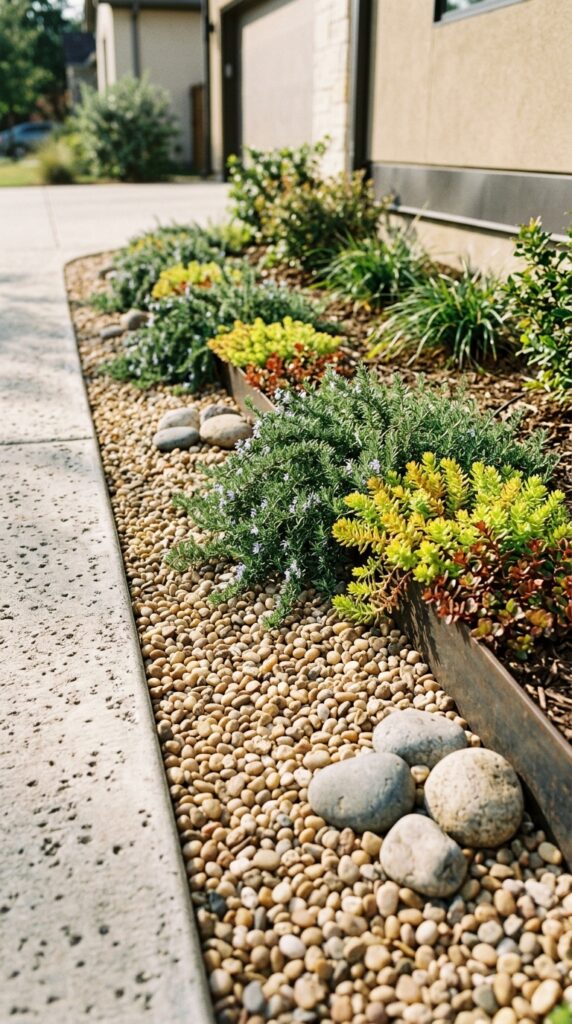
That narrow strip between your driveway and your foundation planting — or between the sidewalk and your house — is one of the most annoying pieces of real estate in any front yard. Too thin to mow easily, too exposed for most plants to thrive, too visible to ignore. Gravel mulch with a few tough, low-growing plants is almost always the right answer.
Pea gravel or decomposed granite are the two most budget-friendly options. Pea gravel in warm tan or cream tones looks clean and natural. Decomposed granite compacts into a firm surface that barely moves in rain. Both suppress weeds far better than bark mulch when laid at a proper four-inch depth over landscape fabric.
For plants that actually thrive in this environment, think low and tough: creeping rosemary, stonecrop sedum, ice plant, or creeping thyme. These plants genuinely prefer lean, well-drained conditions and will spread to fill gaps over time. Avoid trying to grow lush, water-hungry perennials in gravel — they’ll struggle and look it. Let the plants match the material.
One watch-out: light-colored gravel near a south-facing wall can reflect significant heat in summer. In hot climates, go with a slightly darker tone or choose plants rated for full desert exposure.
4. Plant Perennials Over Annuals — Always
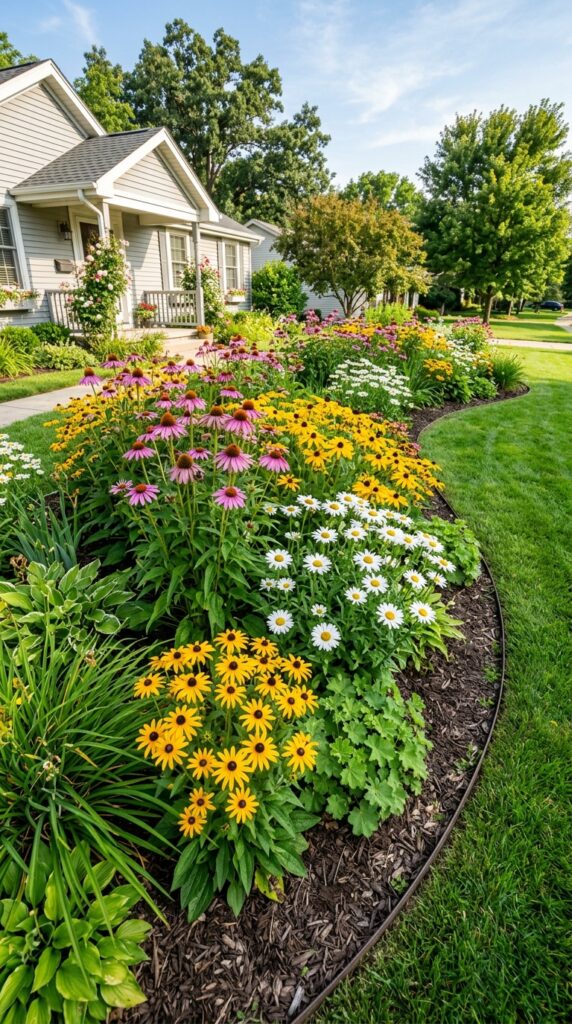
Annuals are the fast food of landscaping — satisfying in the moment, but you’re back at the drive-through next season. Perennials are the investment that keeps compounding. They come back every year, spread slowly into larger clumps, and get more impressive with each passing season. For budget landscaping, there’s really no debate.
The most cost-effective perennials for front yard beds are also some of the most beautiful: purple coneflower (echinacea), black-eyed Susan, daylilies, ornamental salvia, and catmint. All of these are drought-tolerant once established, deer-resistant, attract pollinators, and bloom reliably for weeks. They also divide easily — once a clump gets large after two or three years, you can split it in half with a spade and replant the division elsewhere for free.
Buy small one-gallon pots rather than large three-gallon specimens. Perennials establish from root growth first, not top growth — a smaller plant put in the ground at the right time often catches up to a larger one within a single season. The savings are significant, especially when you’re planting a full bed. Buy in late summer or early fall when nurseries discount heavily to clear inventory.
5. A Simple Stepping Stone Path Through Lawn
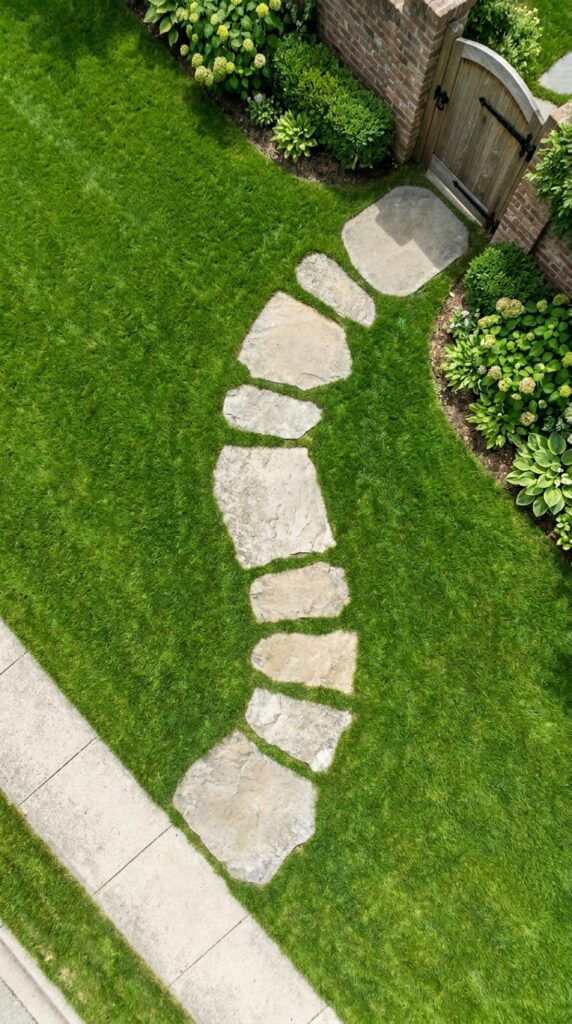
A path doesn’t need to be formal to be effective. Even a simple row of stepping stones set directly into a lawn creates implied direction, adds a layer of visual interest, and solves the very practical problem of a worn grass track where people already walk. If you have a diagonal line of dead grass cutting across your lawn, that’s not a problem — that’s the path telling you where it wants to go.
Set stones flush with the soil surface so the mower passes right over them without lifting. Space them at a natural walking stride — roughly eighteen to twenty-four inches center to center — rather than spacing them so tightly they look like continuous pavement. Gaps of lawn between stones are part of the aesthetic.
Large flat limestone, bluestone, or even simple concrete stepping pads all work well. Irregular flagstone looks most natural. The only requirement is that each stone is large enough for a comfortable foot placement — nothing smaller than twelve inches across. Stones that are too small look tentative and cheap rather than intentional. Set them in a thin bed of sand for stability and to keep them from rocking underfoot.
6. Raised Planting Beds From Reclaimed Timber
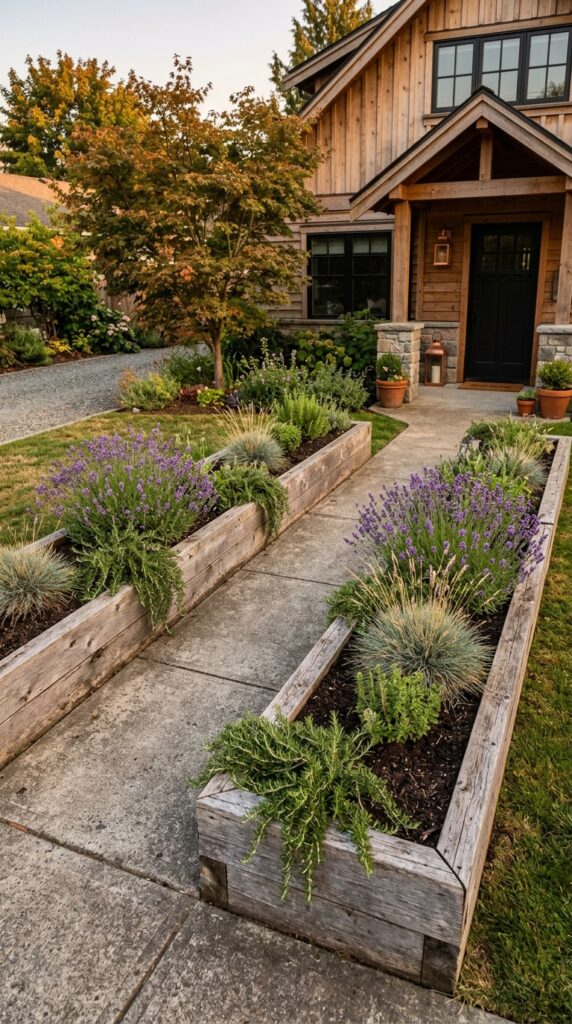
A low raised bed — even just eight to ten inches tall — does something architecturally interesting to a front yard. It creates a defined edge and a sense of elevation that makes plantings feel more like a designed feature and less like plants that just happened to land there. And if you source the lumber smart, the whole build costs very little.
Cedar is the traditional choice because it resists rot naturally and ages to a beautiful silver-gray without treatment. Untreated pine is cheaper but will need replacing within five to seven years. Avoid pressure-treated lumber near food plants, but for purely ornamental front yard beds, it’s a perfectly reasonable budget option.
Keep the beds low — no more than twelve inches tall for a front yard application. Taller beds read as vegetable garden rather than ornamental landscape. A simple two-board-high design with corner posts is achievable in an afternoon with basic tools. Fill with a mix of topsoil and compost rather than bagged potting mix — it’s dramatically cheaper per cubic foot and performs just as well for in-ground ornamental plantings.
One design note: two matching raised beds flanking a front path is a classic, almost timeless layout that reads as formal and considered without requiring expensive plants to fill them. The structure itself does most of the design work.
7. Repaint the Mailbox and House Numbers
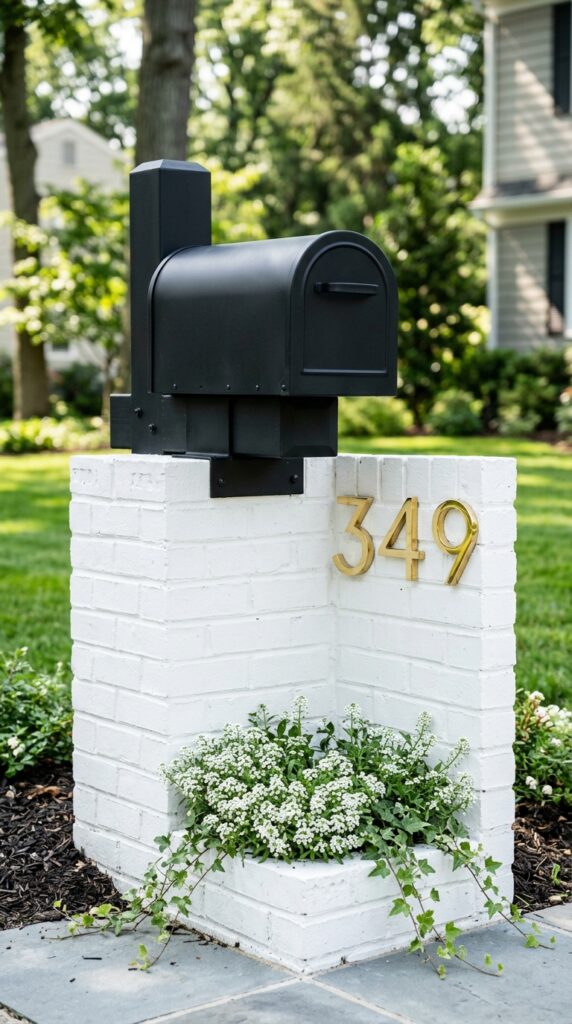
This is the easiest win on this entire list, and almost nobody thinks to do it. Your mailbox and house numbers are two of the first things a visitor — or anyone driving by — actually focuses on in your front yard. When they’re rusted, faded, crooked, or just the wrong finish, they quietly undermine everything else you’ve done. When they’re sharp, they add a layer of intentional detail that costs almost nothing.
A can of matte black spray paint will transform a tired mailbox in twenty minutes. Let it cure for a full day before reinstalling. Replace house numbers with a consistent font in brushed brass or matte black — large, legible, and mounted with even spacing. Number sets from hardware stores or online suppliers run between fifteen and forty dollars and install with two screws.
While you’re at it, look at the post the mailbox sits on. A painted wood post, freshly painted in matte black or deep charcoal, looks far more intentional than a weathered gray one. Add a small ground-level planting of white alyssum or creeping phlox at the base and the whole vignette looks designed rather than functional. Small details compound. This one is pure ROI.
8. Use Repetition to Create Visual Rhythm
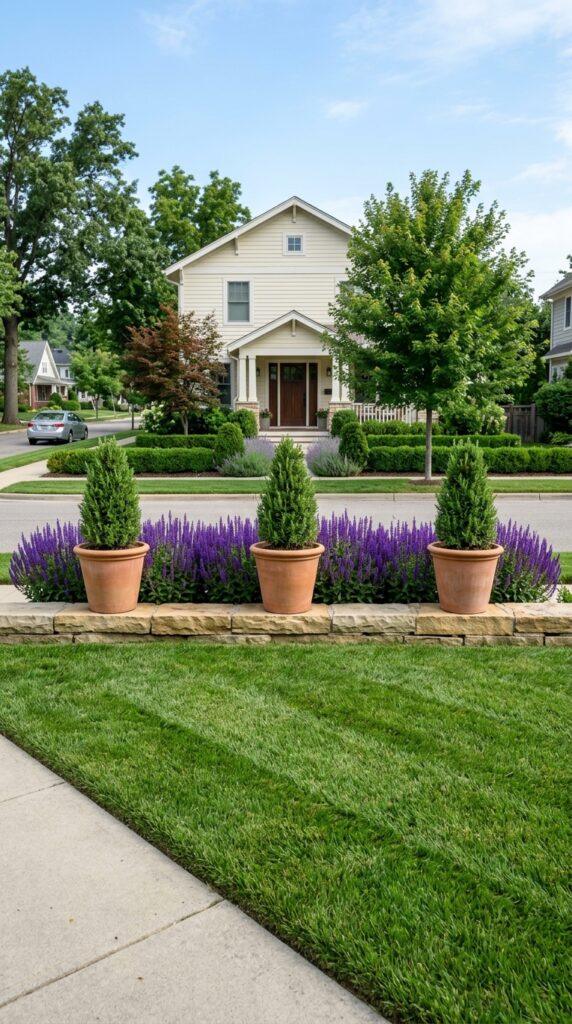
Here’s one of the most important design principles that separates professional landscaping from amateur attempts: repetition. Using the same plant, pot, or element multiple times across a space creates visual rhythm — the sense that the yard has been organized according to a logic, not just filled with whatever was on sale. It is the single most powerful tool available to a budget landscaper because it costs nothing extra. You’re just buying more of the same thing instead of buying ten different things.
Pick one plant and repeat it at least three times across your front yard. It could be the same ornamental grass at each corner of your foundation planting. It could be identical potted plants flanking both the driveway entrance and the front door. It could be one species of flowering perennial running the full length of a bed. The specific choice matters less than the commitment to using it more than once.
Avoid the collector’s instinct — the urge to buy one of every interesting plant at the nursery. That approach almost always produces a front yard that looks restless and crowded. Three species used boldly beats twelve species used timidly every time. Pick your palette and stick to it.
9. A Simple Birdbath or Garden Sculpture as a Focal Point
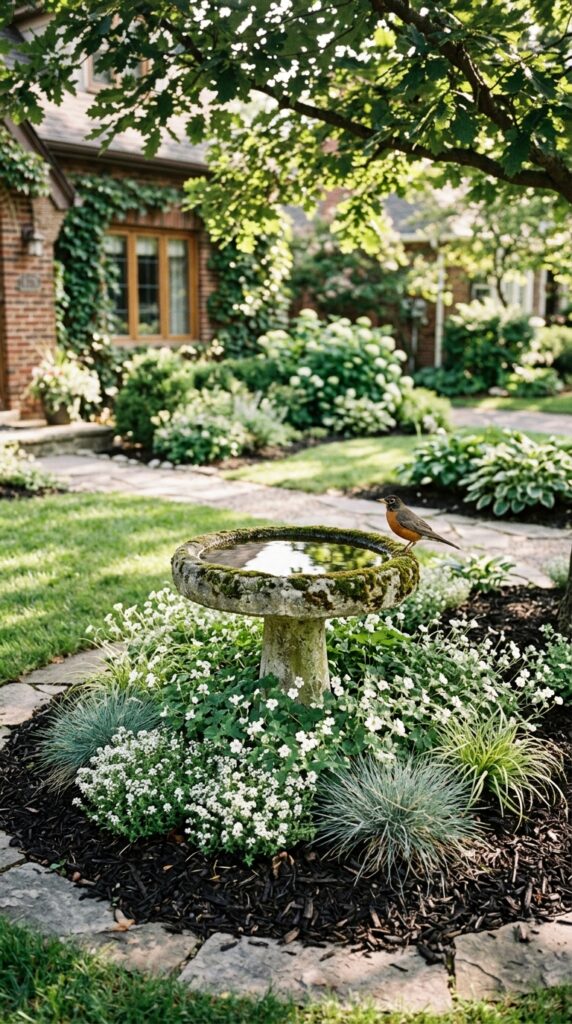
Every well-composed front yard needs a focal point — one element the eye travels to first, that gives the whole composition an anchor. A focal point plant like a Japanese maple is the ideal choice, but not every yard has the space or the budget for a specimen tree. A simple birdbath, garden sculpture, or even a large decorative urn placed deliberately can serve exactly the same structural purpose for under thirty dollars.
The key word is deliberately. A focal point only works when it’s placed where the eye naturally wants to land — typically at the center of the yard, at the end of a path, or at a spot you see directly from the street. An object tucked in a corner or hidden behind taller plants isn’t a focal point. It has to earn its position by being clearly visible and intentionally placed.
Concrete birdbaths age beautifully and look far more expensive than they are. A patina of moss or age stain is an asset, not a flaw — it gives character instantly. Keep the planting around it simple. One type of low ground cover and one type of edge grass is enough. The object itself is the statement.
10. Sow a Wildflower Patch in a Difficult Area
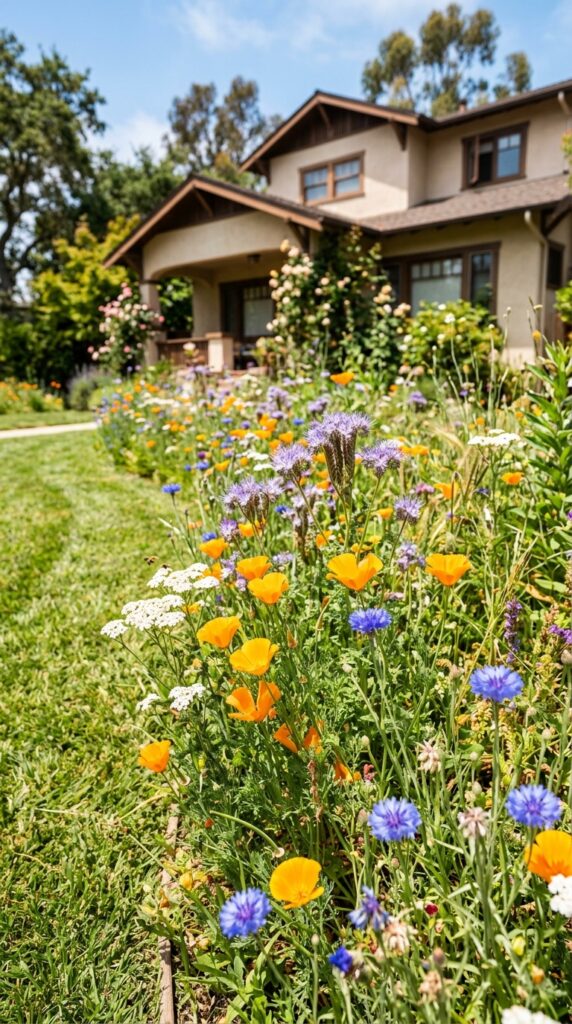
If you have a strip of ground that’s too awkward to mow, too dry for regular plants, or just too much trouble to properly landscape, a wildflower patch is the most beautiful and least expensive solution available. A packet of mixed native wildflower seed costs three to five dollars. The result — if you prep the ground properly and choose regionally appropriate species — is an explosion of color that looks intentional, supports local pollinators, and requires almost zero maintenance once established.
The most important step is ground preparation. Wildflower seed fails almost entirely when broadcast over existing grass or compacted soil. You need bare soil — remove existing grass and weeds, loosen the top inch or two, rake smooth, and scatter seed at the recommended rate. Tamp lightly and water until germination. After that, rainfall usually handles the rest.
Choose a seed mix that’s appropriate for your region. Native mixes outperform generic packets significantly — they’re adapted to your rainfall patterns, soil type, and temperature range. One honest caveat: a wildflower patch looks spectacular in mid-summer bloom and quite rough at the end of the season. If you need year-round tidiness, keep it confined to a back corner or a clearly bordered area rather than the main front yard view.
11. Plant a Low Native Hedge Instead of a Fence
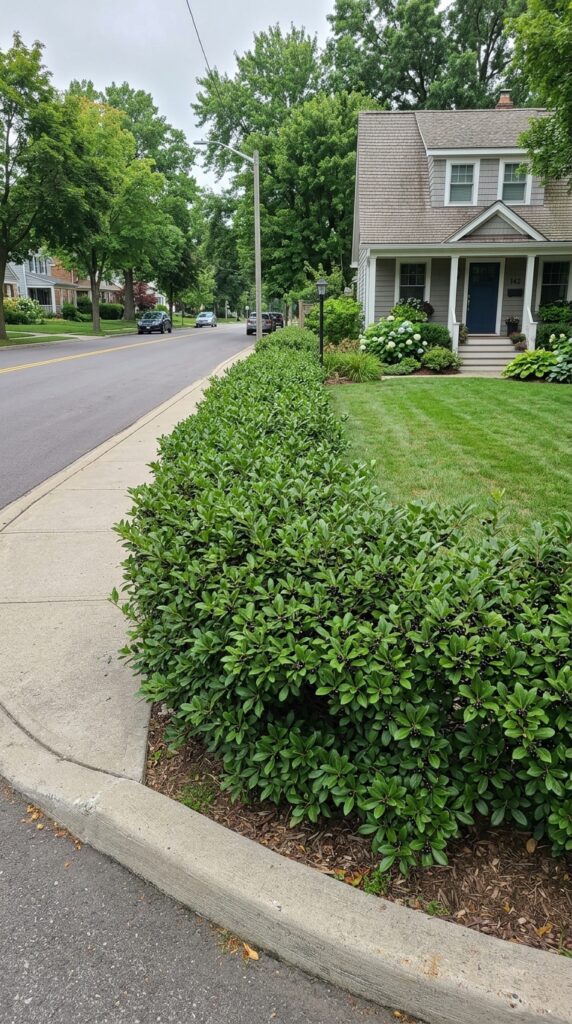
A low front yard hedge does something a fence can’t: it softens the boundary between your property and the street while adding greenery, wildlife value, and genuine privacy without the cost or permanence of a fence installation. Native shrubs grown as informal hedges are among the most cost-effective structural elements available for a front yard.
Native inkberry holly, native viburnum, dwarf forsythia, and native spicebush are all excellent hedge candidates in temperate climates. They establish quickly from small pots, handle most soil types, and require very little input once they’ve settled in. More importantly, they provide food and shelter for birds and beneficial insects — a quality that matters increasingly as suburban yards become more ecologically aware.
Plant at half the mature width for a continuous hedge effect within two or three seasons. A five-foot spread shrub planted thirty inches apart will knit together into a solid mass reliably. Keep the hedge below three feet for a front yard — taller hedges can create a closed-off feeling that works against curb appeal. The goal is definition and softness, not fortification.
12. Refresh With a $30 Seasonal Color Rotation
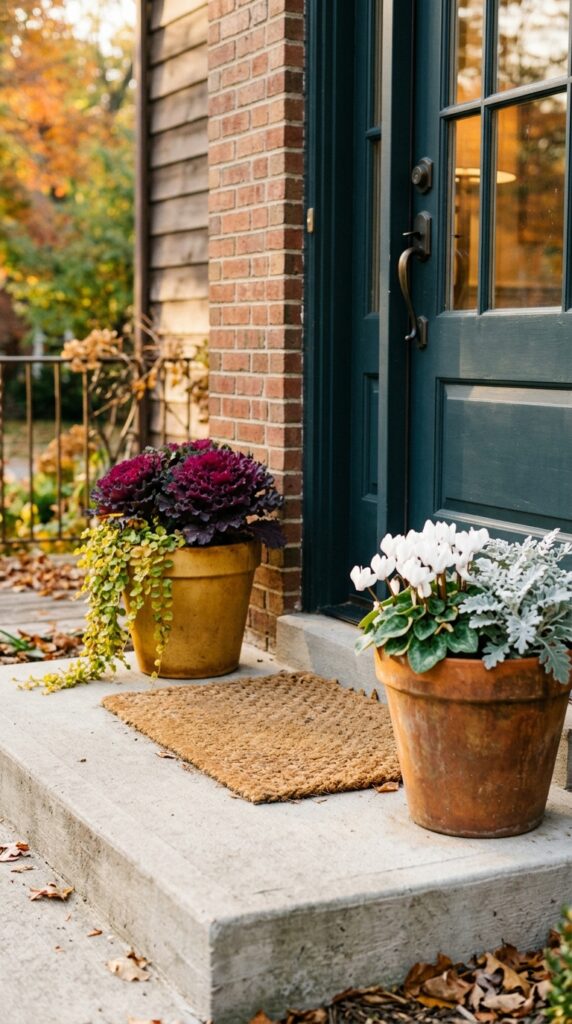
Not every front yard transformation needs to be permanent. Sometimes the highest-return move is the simplest one: a thirty-dollar rotation of seasonal color in two or three pots near the front door. It costs almost nothing, takes twenty minutes to plant, and gives your front yard a freshness that looks like you pay active attention to it — because you do.
The formula is simple and works every season. Spring: tulip bulbs or pansies with trailing ivy. Summer: upright thriller like angelonia or salvia, a filler like petunias, and a trailing sweet potato vine. Fall: ornamental kale or cabbage with creeping Jenny and white cyclamen. Winter: cut evergreen branches, berry stems, and a few dusty miller plants for silver contrast.
Stick to a three-plant combination per pot: one upright, one mounding, one trailing. Use the same color family across both pots rather than making each one different — cohesion between them matters. And buy the smallest available size of each plant at the nursery. Seasonal plants fill in within two to three weeks and smaller starts cost half as much as large ones. Thirty dollars, every season, is the cheapest recurring landscaping investment you’ll ever make — and the one most neighbors notice first.
The through-line in every idea on this list is the same: intentionality costs nothing. Clean edges, a clear focal point, repeated plants, cohesive colors — these are decisions, not purchases. The front yards that genuinely look expensive are the ones where someone made those decisions with confidence and followed through on the maintenance that keeps them looking right. Pick the three ideas from this list that fit your specific yard, your climate, and your honest tolerance for upkeep. Do those three things really well. That focused effort will do more for your curb appeal than spending ten times more on plants and materials without a clear plan.

