
There’s something about a mud kitchen that flips a switch in kids. Hand them a phone and they’ll zone out; hand them a wooden spoon, a tin pot, and a pile of dirt and suddenly they’re running a Michelin-starred restaurant for worms. I’ve designed corners of gardens for my own kids and helped friends carve out little play zones in everything from sprawling backyards to shoebox patios, and the same truth holds: the simpler and more tactile the setup, the harder they play.
This isn’t about Pinterest perfection. A great mud kitchen looks lived-in within a week, mossy within a month, and beloved for years. Below are twelve ideas that work in real backyards, real climates, and real budgets, ranging from rustic farmhouse builds to sleek modern setups for design-conscious parents who don’t want a plastic eyesore ruining the view.
1. The Rustic Pallet Build
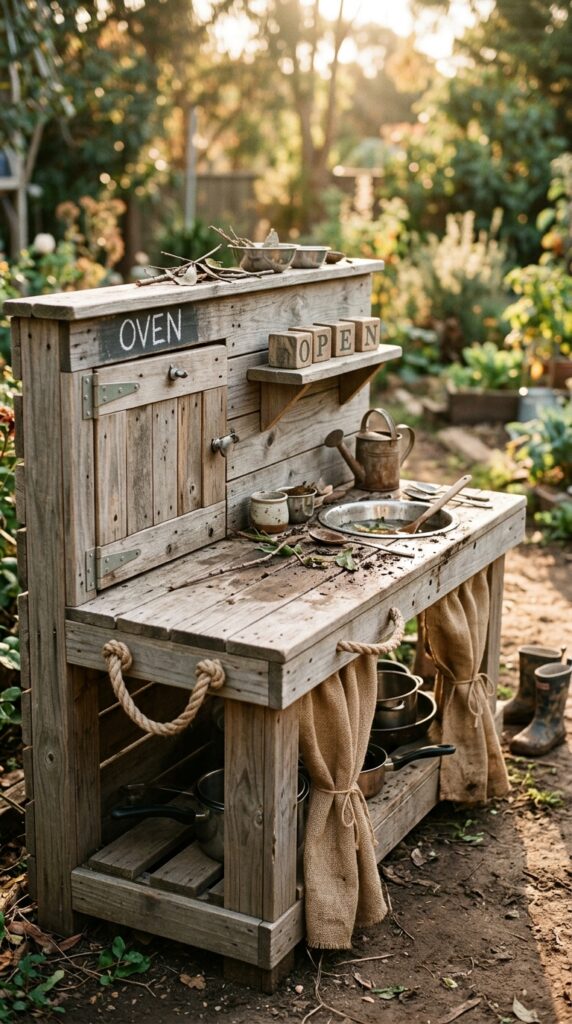
Pallet wood is the obvious starting point, and there’s a reason it became the unofficial mascot of DIY mud kitchens. It’s free, it’s chunky, and it ages beautifully. That said, please check for the HT (heat-treated) stamp before bringing one home; chemically treated pallets are a no-go around kids.
A few things I’d actually do: sand every edge until it’s baby-skin smooth, recess a metal bowl as the sink so it pops out for easy cleaning, and seal the wood with a non-toxic exterior oil rather than varnish, which cracks under sun. Add rope handles instead of metal ones if your kids are little, less pinch risk.
One watch-out: pallets splinter. Annual sanding is non-negotiable.
The takeaway? Rustic doesn’t mean rough on hands.
2. The Modern Minimalist Setup
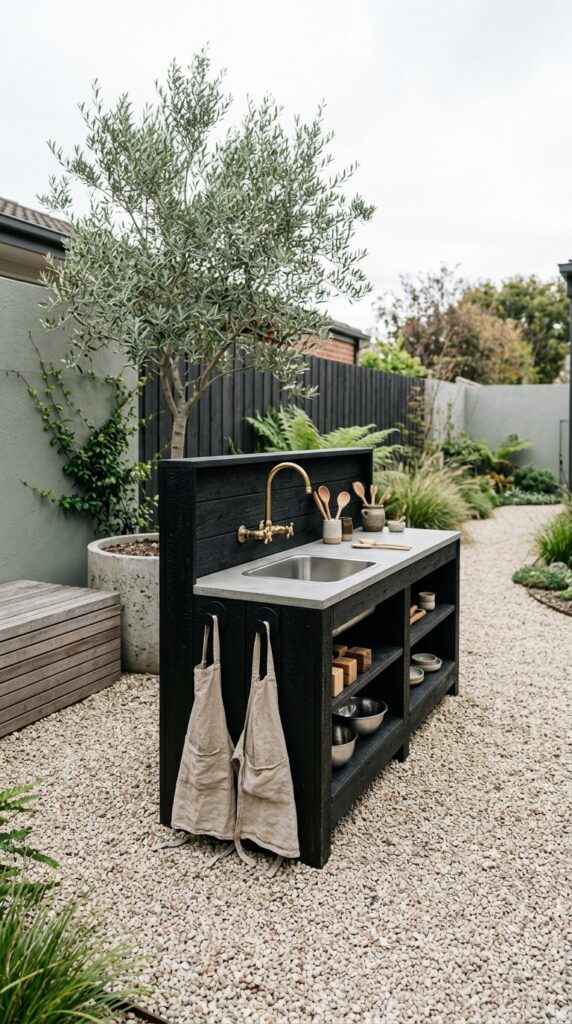
For parents who genuinely love their backyard aesthetic, the chunky farmhouse mud kitchen can feel like visual noise. There’s a quieter way to do this. Charred black timber, concrete-look counters, and a restrained palette of black, sand, and oat make the kitchen disappear into a thoughtful garden rather than scream “kid zone.”
Skip the bright primary colors and clutter. One muted apron on a hook, two wooden bowls, a single sprig of rosemary in a tiny vase, done. Kids don’t actually need ten accessories to play; they need space to imagine.
The trade-off here is honest: this setup looks gorgeous on day one and chaotic by week two. Build in a closed cabinet underneath so the mess has somewhere to live.
Quiet design, loud play.
3. The Tiny Patio Corner
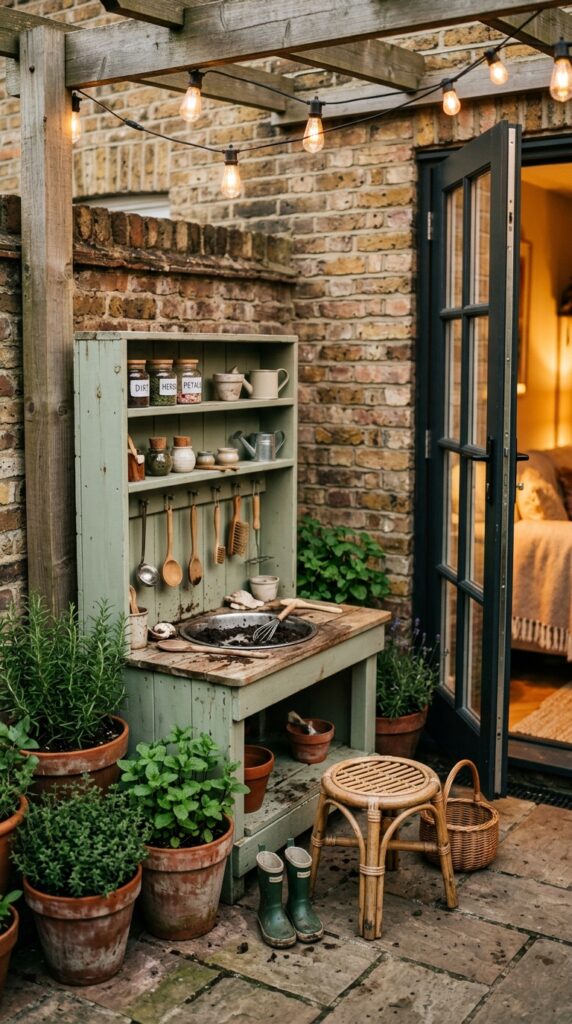
Renters and apartment-dwellers, this one’s for you. You don’t need a sprawling lawn to give kids a mud kitchen moment. A vertical, narrow setup against a fence or brick wall takes maybe three square feet of footprint and still delivers the magic.
The trick is going tall instead of wide. Two shallow shelves, one small basin, and pegs running up the side panel for hanging utensils. Paint it a soft sage or muted clay so it reads as garden furniture, not a toy. Pair it with a couple of potted herbs at kid-height; the smell of crushed mint and basil during play is half the experience.
Watch out for drainage on hard patios. Without grass to soak up spills, you’ll need a small drip tray or a bucket beneath the basin, otherwise that lovely tile turns to mossy chaos by August.
Small footprint, full imagination.
4. The Repurposed Old Dresser
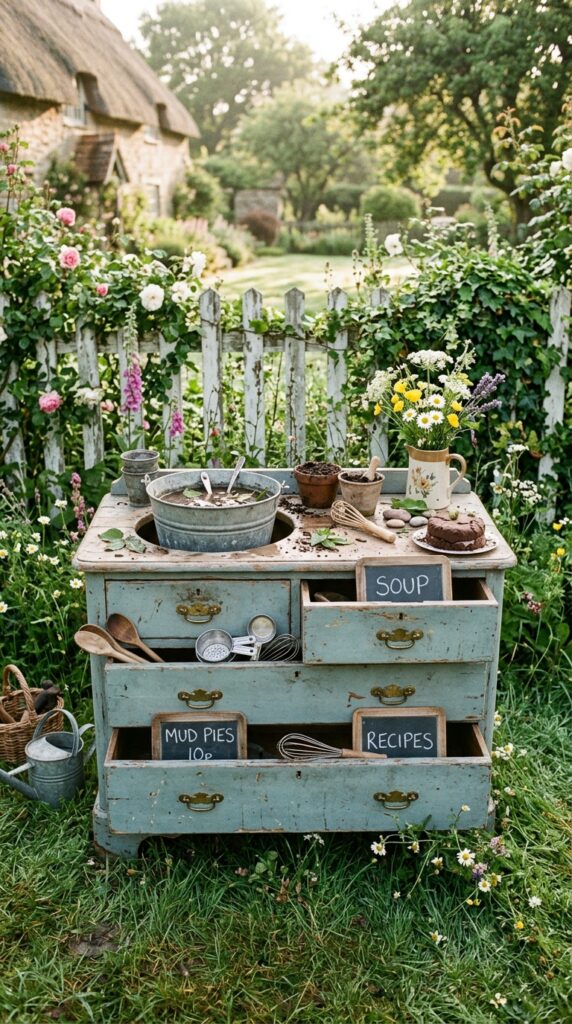
Some of the best mud kitchens I’ve ever seen started life as a dresser bound for the curb. There’s something charming about brass pulls and chippy paint that no new build can fake. If you find one with sturdy drawers, you’ve basically got built-in storage for utensils, jars of “ingredients,” and pretend recipe cards.
Cut a circle in the top for a galvanized bucket sink, leave the original hardware where it is (the patina is the point), and seal it with a clear exterior wood sealer. If the dresser has a mirror, even better, mount it as a backsplash and watch kids narrate their cooking show into it.
One honest concern: thrifted furniture can hide lead paint, especially anything pre-1978. Test it. If positive, sand and repaint with kid-safe outdoor paint before letting little hands touch it.
Old soul, new purpose.
5. The Cottagecore Garden Kitchen
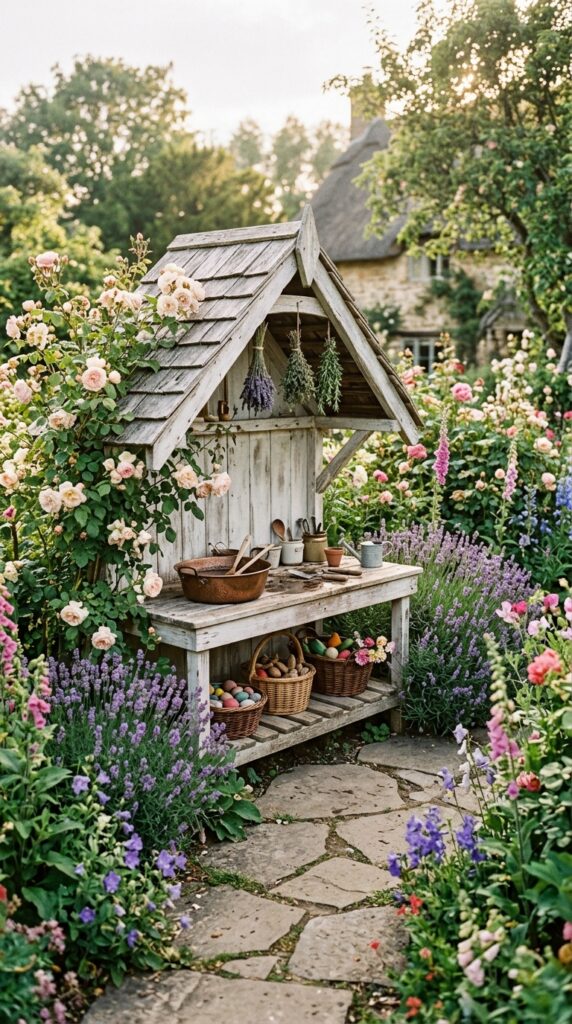
If your aesthetic leans English cottage, lean all the way in. A whitewashed mud kitchen with a tiny pitched roof, framed by lavender and climbing roses, becomes less of a play structure and more of a garden feature you’d actually photograph. I’ve seen these built into the corner of vegetable gardens, and the kids end up “harvesting” real cherry tomatoes for their mud soup.
Hang dried herb bundles from the eaves (rosemary, thyme, eucalyptus), use a copper basin instead of stainless for warmth, and store accessories in willow baskets rather than plastic bins. Every material should patina, not plasticize.
The trade-off: this style needs ongoing garden care. If you’re not into pruning roses or deadheading lavender, the magic fades fast. Pick this only if you actually like gardening.
Built for the garden, not just in it.
6. The Industrial Steel-Top Build
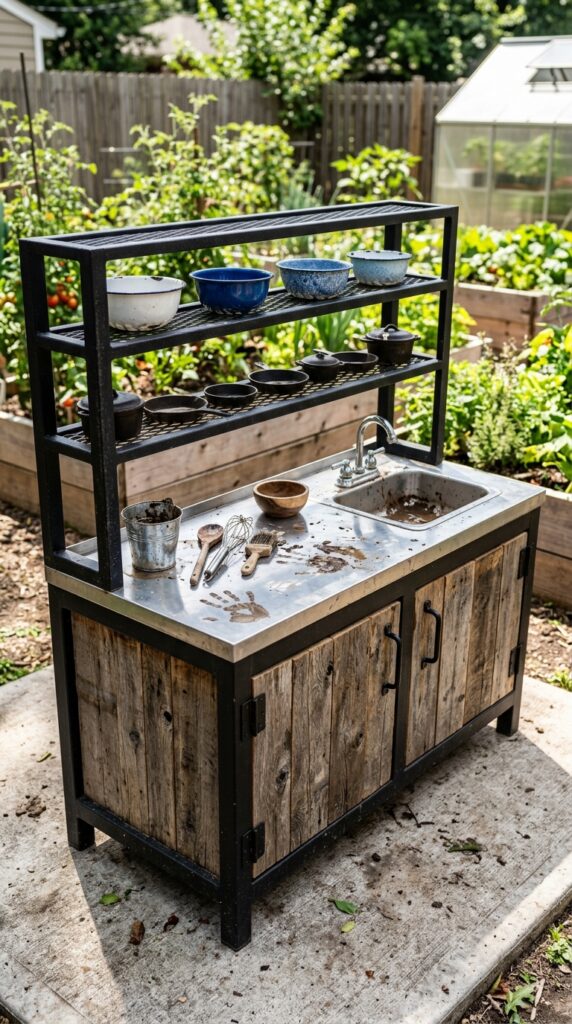
Honestly? The wooden countertop is the part that fails first. Water, mud, and sun work together to warp and rot it within a couple of seasons. If you want a mud kitchen that’s still standing in five years, go industrial up top.
A stainless steel countertop (a salvaged restaurant prep table works beautifully) on a black metal frame with reclaimed wood lower cabinets gives you the warmth of timber and the durability of a commercial kitchen. Enamelware mixing bowls in cream and navy fit the palette. Add a magnetic strip for utensils, kids love the satisfying clink.
The watch-out is heat. Stainless gets scorching in direct summer sun. Position this build under partial shade or a pergola, otherwise the counter becomes a hazard from noon to four.
Built like a tank, played on like one too.
7. The Kitchen Under a Tree Canopy
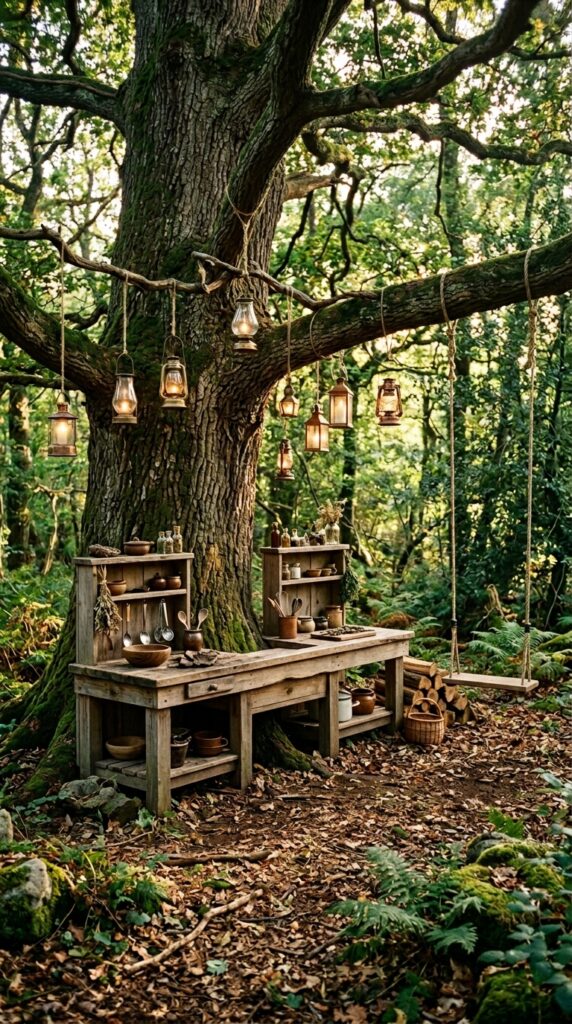
Building around a tree is the move I push hardest with clients lucky enough to have a mature trunk in the right spot. Cut the counter to wrap around it, leaving a generous gap for trunk growth (an inch or two each year, more than you’d think), and you instantly have a mud kitchen that feels like Bridge to Terabithia.
Use unstained cedar and let it silver naturally. Hang a few simple lanterns from low branches for evening play. Skip the paint entirely; the tree is the feature.
One genuine concern: tree roots and digging don’t mix. Don’t let kids dig too aggressively at the base, and don’t drill anything into the trunk itself. Wrap, don’t pierce.
Nature did the styling for you.
8. The Color-Pop Painted Kitchen
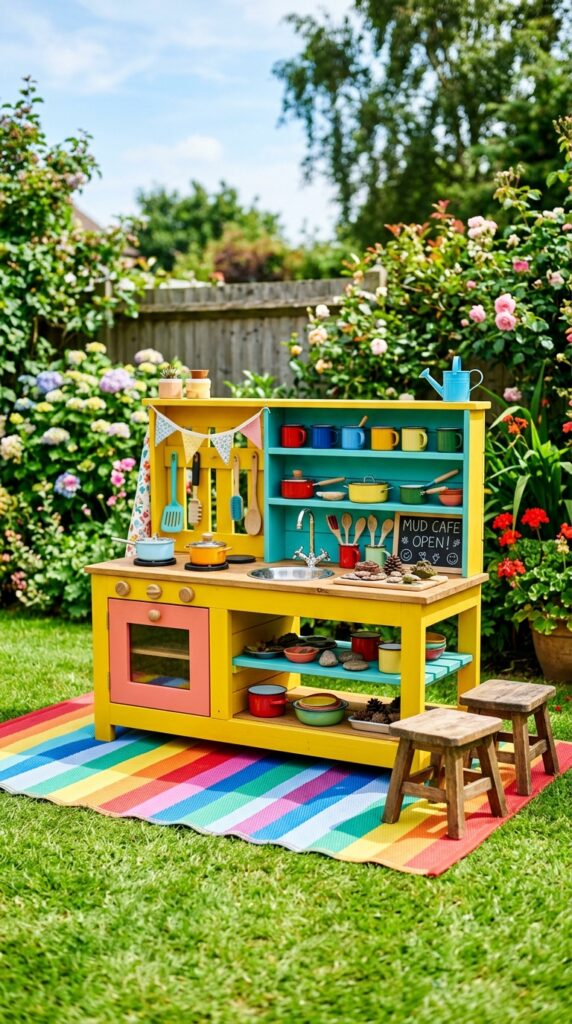
I know I leaned muted earlier, but there’s a real case for going bold, especially if your backyard is otherwise green and brown. A mud kitchen painted in sunshine yellow with a coral door and turquoise interior shelves is a small joy machine, and kids respond to color in ways adults forget.
Use exterior-grade paint in a satin finish (matte stains too easily, gloss looks cheap), and choose two complementary brights plus one neutral instead of a full rainbow. Coral and turquoise with cream. Mustard and sage with white. Pick a palette and commit.
The trade-off is repainting. Bold colors fade unevenly under UV, and you’ll be touching this up every two summers. Skip if you hate repainting.
Color is a commitment, not an accident.
9. The Outdoor “Cafe” Vignette
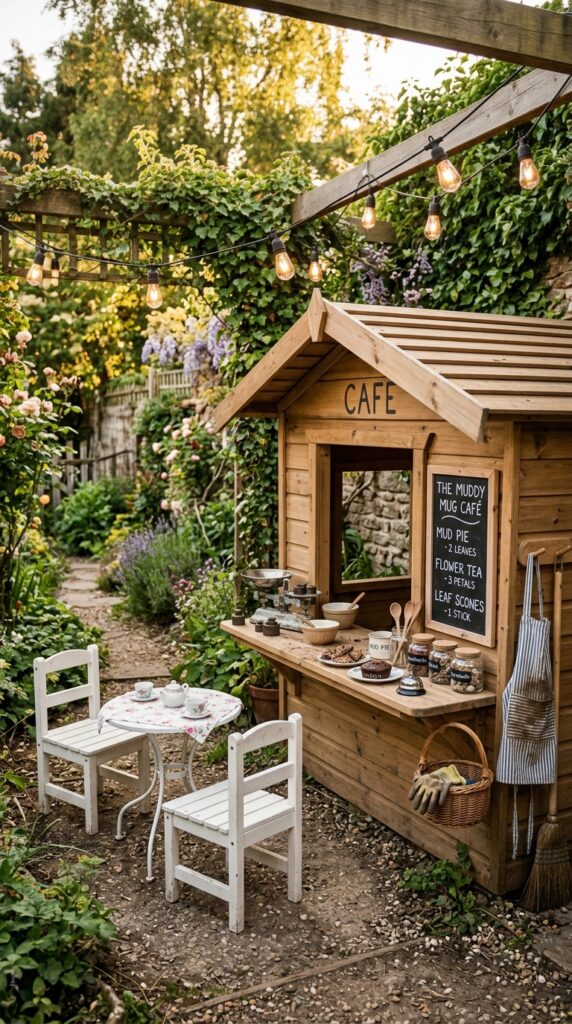
Move past the standalone kitchen idea and design a whole vignette. A mud kitchen with a chalkboard menu, a service window, and two tiny bistro chairs across from it transforms solo cooking into a full restaurant scenario. Suddenly siblings have roles, neighbors get invited, and play stretches for hours.
Add a small vintage scale, a bell to ring when “orders are ready,” and a real chalkboard menu kids can rewrite weekly. String lights overhead aren’t just for adults, they make evening play feel like an event.
Here’s the trick: leave space between the kitchen and the seating, three or four feet, so the “server” actually walks back and forth. That walk is the whole game.
The watch-out: bistro chairs tip over. Anchor them or accept the noise.
A scene, not a station.
10. The Stone and Plaster Mediterranean Build
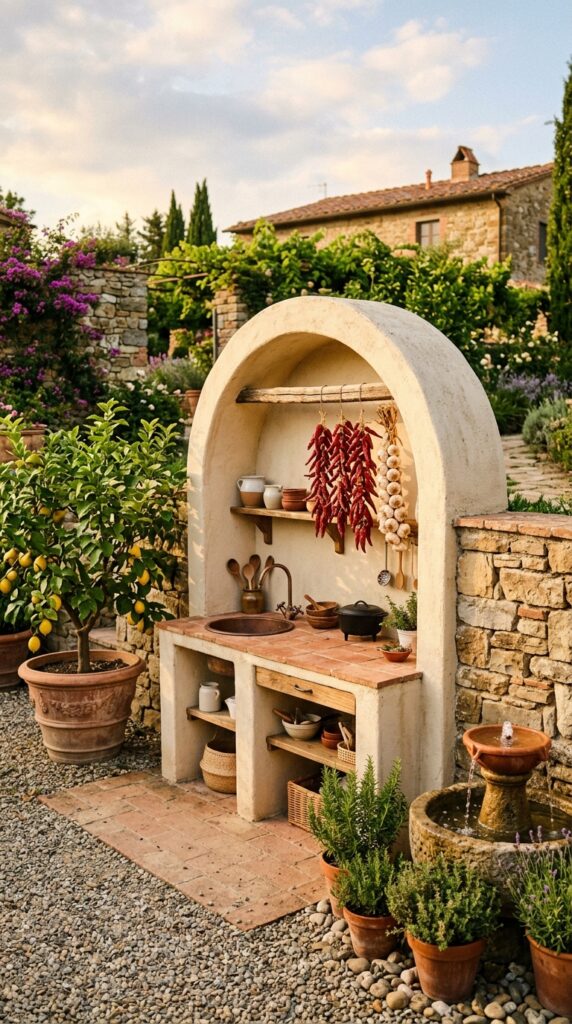
If you’ve ever visited a hill town in Italy or southern Spain and wished your backyard could feel like that, here’s your chance to live the fantasy through a kid’s play structure. A mud kitchen built from cream plaster, stacked stone, and a terracotta tile counter feels less like a toy and more like a permanent garden architectural feature.
You don’t need actual masonry skills. Faux stone panels and tinted exterior plaster over a plywood base get you 90% there. Add a small arched cutout above the “stove” and string dried chili peppers from a wooden peg.
This build is heavy and permanent, that’s the watch-out. It’s not moving once installed, so pick the location carefully. Full sun will bleach the plaster beautifully but crack it eventually; partial shade is kinder.
Vacation vibes, no flight required.
11. The Renter-Friendly Portable Cart
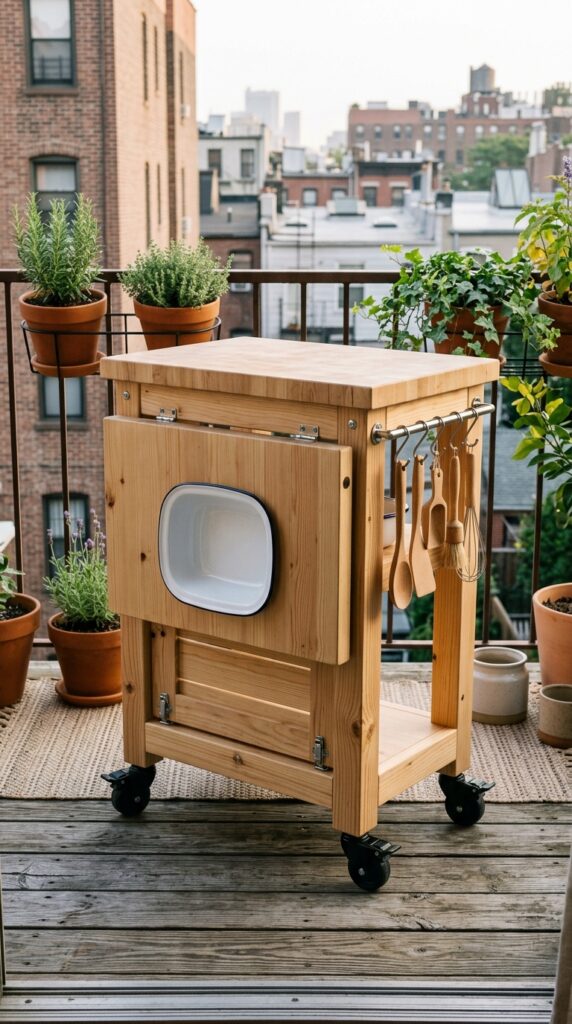
Not everyone owns the dirt their kitchen sits on. A rolling cart-style mud kitchen solves the renter problem elegantly. Build it on locking caster wheels so it can move from balcony to lawn to garage, and design it with a closed lower cabinet to contain the mess when it’s parked indoors.
Use butcher block on top (it sands clean), a removable enamel basin, and S-hooks on the sides for utensils. Keep the overall footprint under 36 inches wide so it fits through standard doorways. This matters more than you’d think.
The compromise here is structural. Wheeled kitchens wobble more than fixed ones, and aggressive play loosens screws fast. Tighten everything monthly and use threadlocker on critical joints.
Movable, livable, portable joy.
12. The All-Natural Log Kitchen
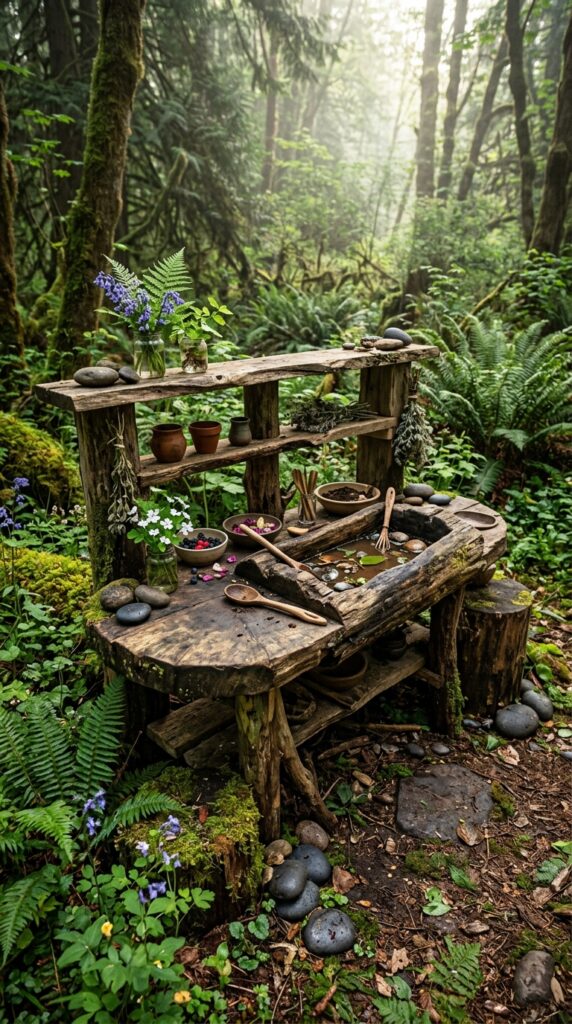
The most beautiful mud kitchen I’ve ever seen wasn’t built; it was assembled. Log slabs, a hollowed-out section of trunk for the basin, smooth river stones as decoration, and absolutely nothing else. No nails, minimal sealing, just nature arranged for play.
This works best in wooded yards or properties where it can blend into the landscape. Source logs from a local arborist (free, usually) and let everything weather naturally. Moss will grow on it within a season, which is the entire point.
The honest trade-off: this is the highest-maintenance option of the bunch. Logs rot, hollow basins fill with rainwater and breed mosquitoes, and the whole thing needs reassembly every couple of years. If you want set-and-forget, go elsewhere.
Wild by design, fleeting by nature.
Final Thoughts
A mud kitchen isn’t just a backyard project, it’s a tiny architectural decision about how you want your kids to spend the next few years. The best ones aren’t the most expensive or the most photographed; they’re the ones that match your actual yard, your actual climate, and your actual tolerance for mess. A renter’s rolling cart can spark just as much imagination as a custom-built stone Mediterranean dream.
What I hope you take away from this is permission to make it yours. Skip the kits, raid the thrift store, repurpose that dresser, wrap a kitchen around your favorite tree. The small details, the brass hooks, the linen apron, the chalkboard menu, the dried lavender, are what turn a wooden box into a place your kids will remember decades from now.
Save this article, come back to it when you’re ready to build, and explore the rest of the site for more honest, practical, design-led ideas for real homes and real families. We’re not chasing perfection here, just rooms, gardens, and corners that actually get loved. Now go get muddy.

