
I watched my first outdoor kitchen dream die under a cheap awning from a big-box store—polyester fabric ripping at the grommets after one season, and the gas grill already rusting from the inside out. The worst part wasn’t the money I wasted. It was the feeling that I had followed every listicle perfectly and still ended up with something that didn’t work in real weather, real light, or real life.
Most advice on covered outdoor kitchens treats them like indoor kitchens that just happen to be outside. But rain doesn’t care about your cabinet finish. Sun bakes stainless into something that burns your forearm. And gravel you thought was “easy” becomes a muddy mess the first time a downpour hits. The standard tips—more plants, neutral colors, good lighting—are not ideas. They are placeholders. This article skips the surface and gives you specifics: materials that weather honestly, layouts that survive real use, and trade-offs nobody tells you about. Nineteen ideas, each one tested by time and rain.
1. L-Shaped Concrete Counter with a Prep Sink
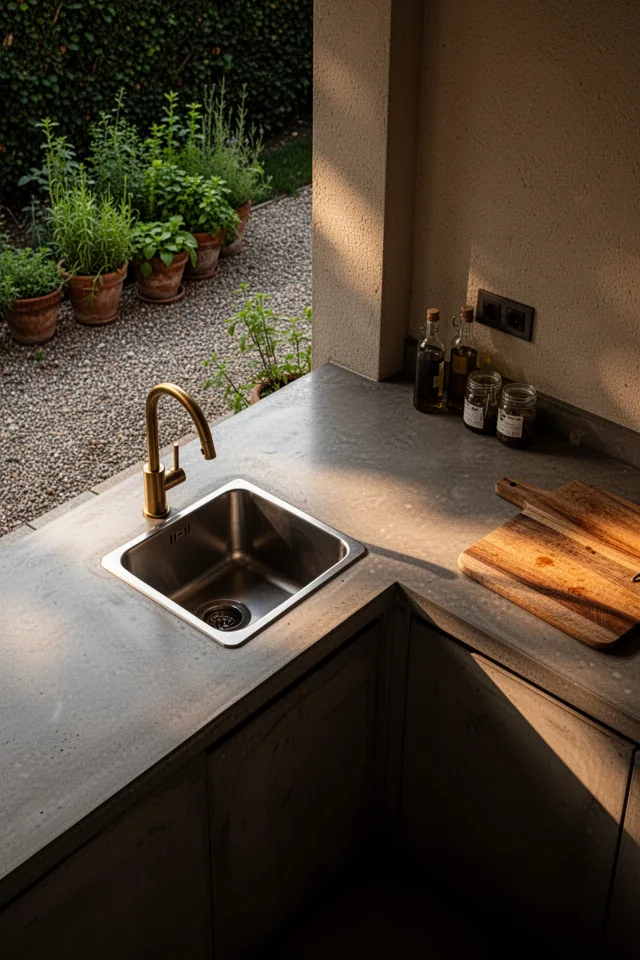
Concrete is honest. It gets small hairline cracks, and those cracks collect a little dust, and that’s fine. It doesn’t stain as badly as people think—a sealer every couple years keeps red wine from leaving a ghost. The surface feels cool under your hands, even in late summer. I built mine with a ¾-inch overhang so stools slide under neatly, and I regret not making the sink side deeper by four inches. If you’re doing a pour, ask for 4000-psi mix with fiber reinforcement. Standard 3000-psi will chip where you drop a cast iron pan. Budget around $800 to $1500 for a small L-shape installed by a contractor who knows outdoor concrete. Not a patio crew—someone who does countertops.
The trade-off: concrete is heavy. That L needs a proper footing, not just a gravel base. I’ve seen people put concrete counters on metal legs and watch the whole thing settle crooked within a year. Pour a slab or build a masonry base.
Concrete gets prettier as it ages—the cracks, the patina, the slight wear at the edges—as long as you seal it before winter.
2. Roll-Out Island on Heavy-Duty Casters
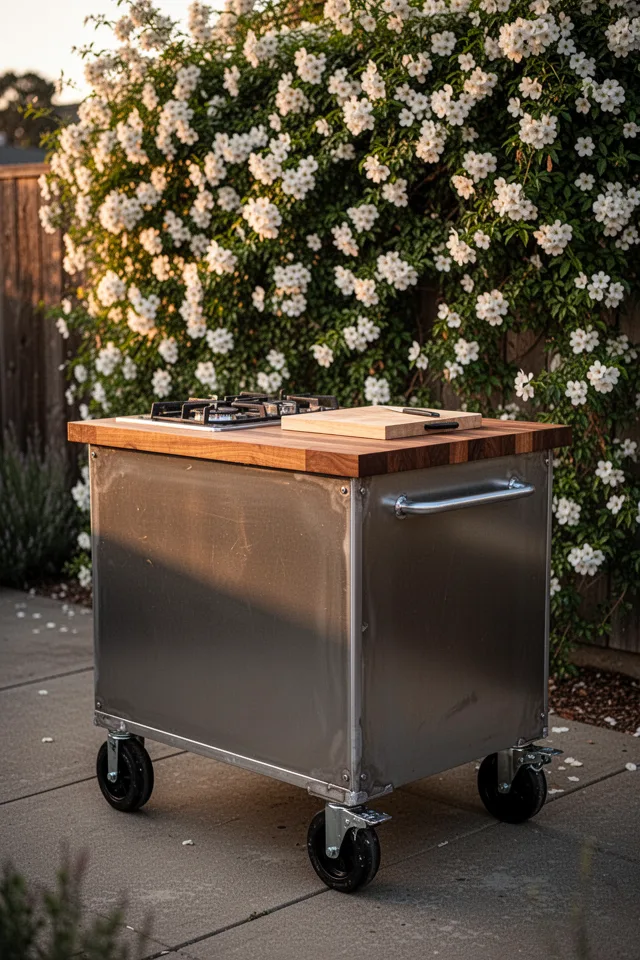
I love a fixed kitchen, but sometimes you need to rearrange. A rolling island gives you that. And it forces you to keep things simple—no plumbing, no gas line you can’t disconnect. I built one with a friend using 2-inch square steel tubing and casters rated at 400 pounds each. The butcher block top is ipe, oiled twice a year. When I want to cook closer to the grill, I roll the island over. When the party moves to the fire pit, I wheel it that way. The cost is surprisingly low if you do the welding yourself—around $200 for materials. Pre-made rolling islands start at $600 and go up fast. The trade-off: casters can rust if they aren’t stainless or phenolic. And the island has no storage beneath—you lose that drawer space. But the flexibility is worth it for anyone who rents or changes their mind often.
Get casters with a brake on at least two wheels, or the island will drift on a slight slope and take your cutting board with it.
3. Charcoal Grill Station with Built-In Wood Storage
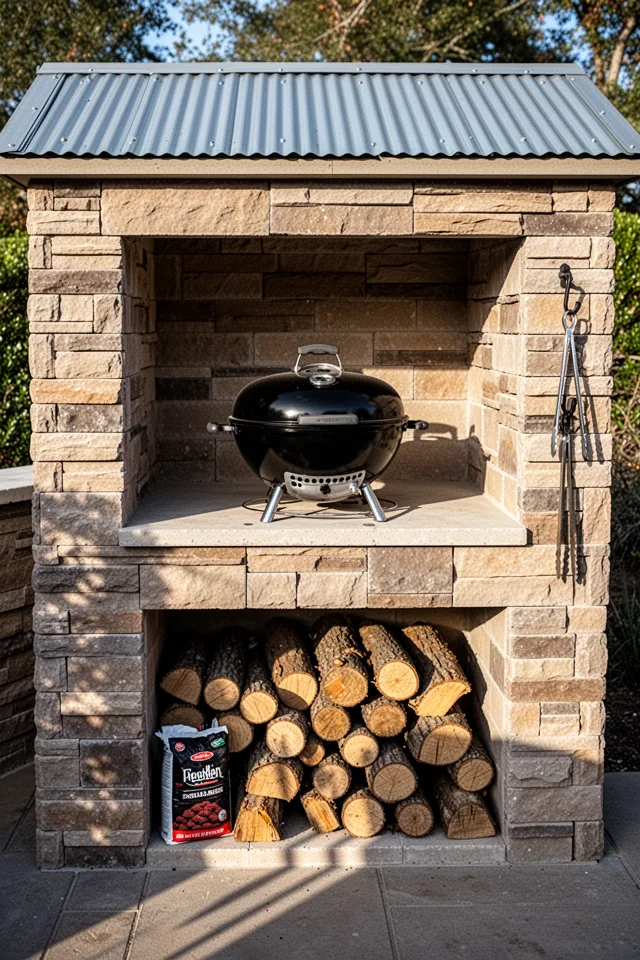
Charcoal people are a specific breed. We like the smell, the patience, the way meat tastes when it’s been kissed by real embers. But the worst part of charcoal cooking is storing the fuel. Bags on the ground get damp; moisture ruins charcoal. Build a dedicated covered compartment that opens from the front. I used cement board wrapped in thin brick, with a hinged door made of cedar. The compartment stays cool and dry even in rain. The grill itself is a 22-inch Weber Kettle, but I built the alcove deep enough that the lid can open fully without hitting the roof. That’s the thing nobody measures. Cost for the station: about $350 in materials if you do the masonry work yourself, plus $150 for the grill. Trade-off: the alcove traps heat, so you need a few inches of air gap behind the grill. I used refractory cement behind the stone veneer. Works, but adds a day of labor.
Leave a 2-inch gap at the back of the alcove and drill a couple of weep holes near the base. Heat escapes, and rainwater drains instead of pooling.
4. Pizza Oven with Custom Flue Extension
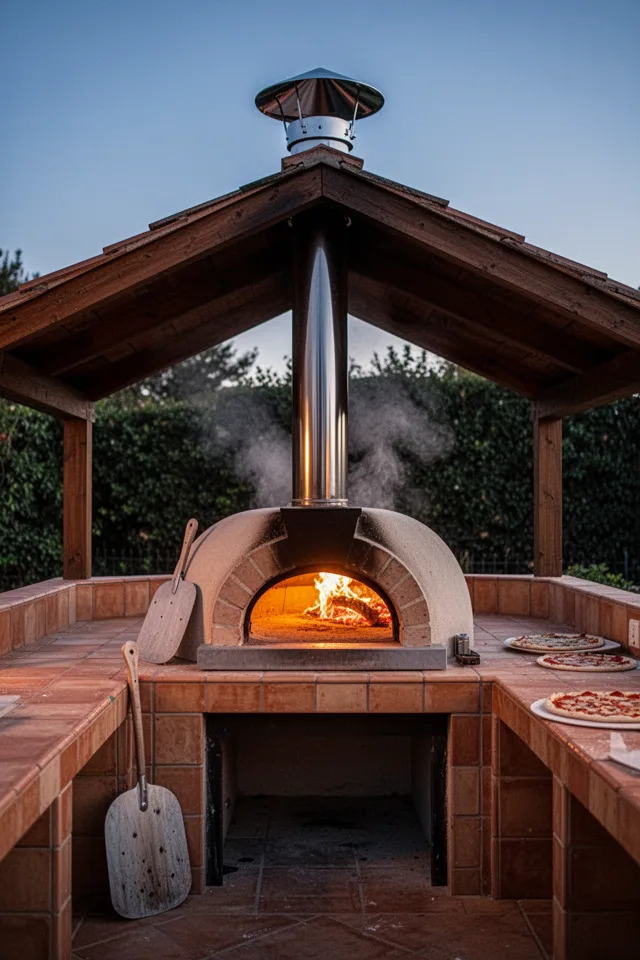
A pizza oven under a covered structure is a classic move. But the standard pre-fab ovens come with a flue that’s barely tall enough to clear the roof. If you don’t extend it, smoke backs up under the covering and turns your party into a fire hazard. I learned this the hard way. The fix: add a section of double-wall stainless flue pipe that extends at least two feet above the highest point of the roof within 10 feet. A rain cap is non-negotiable—otherwise water drips into the oven and cracks the floor. The oven itself, a small Pompeii-style kit, runs about $800. The flue extension and flashing add another $200. Trade-off: the oven wall gets hot—if you tile the surround, use thin-set that’s rated for 500 degrees. Standard mastic will fail.
Before you pour the base, mock up the flue height with a broomstick. Make sure it clears the roof overhang by those two feet. Do not skip this.
5. Stainless Steel Modular Rack System
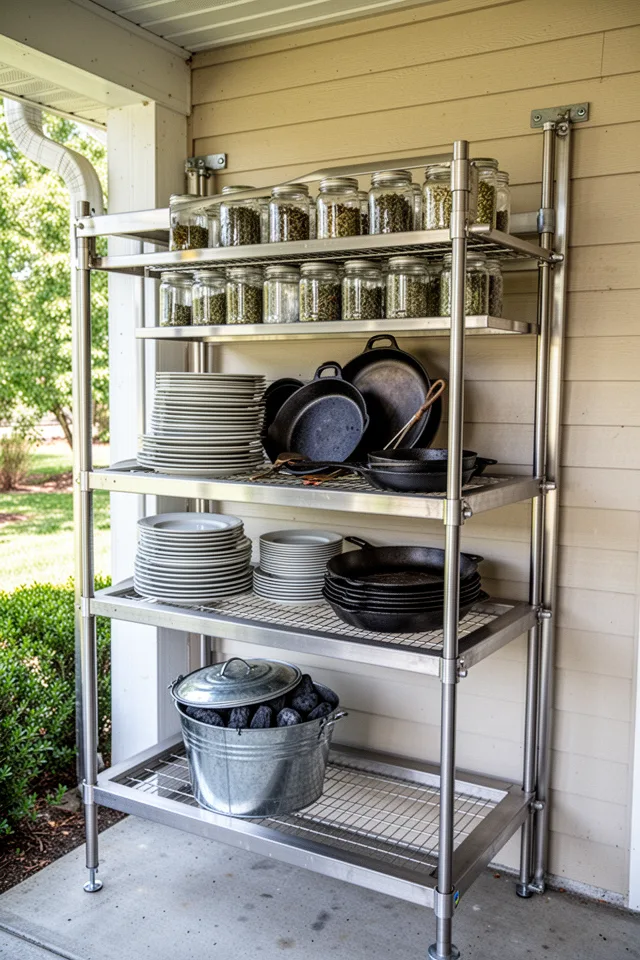
I am not a fan of closed cabinets outdoors. They trap moisture, warp, and attract insects. Open shelves expose everything to dust, but you see what you have and you clean it more often. A restaurant-style modular rack in 304 stainless is the best solution I’ve found. It costs about $200 for a 4-foot section, and it lasts forever. It doesn’t rust, it doesn’t warp, and if you bolt it to the wall, it won’t tip even in wind. The trade-off: it looks industrial. Some people hate that. But I’d rather have honest industrial than fake wood grain that blisters. One tip: don’t put the rack directly where rain can splash. Even stainless can pit if it’s constantly wet and dirty. Keep it at least 3 feet back from the roof edge.
Stainless doesn’t rust, but it does develop “tea stains” from iron in water. A paste of baking soda and water takes them off in 30 seconds.
6. Built-In Kamado Grill in a Tiled Counter
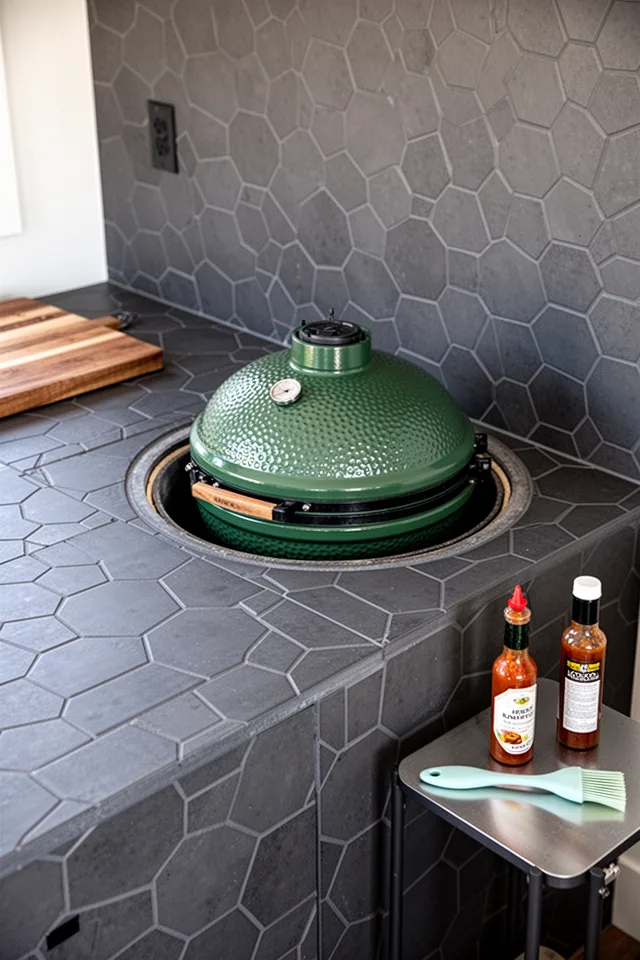
Kamado grills are great for low-and-slow cooking, but their ceramic bodies radiate intense heat. If you build a surround, use tile that can take it. Porcelain tile with a PEI rating of 4 or higher works. I used a mosaic-style hex tile from a builder’s surplus store, about $4 per square foot. The key is the gap: leave ½ inch all around the grill for air circulation and heat expansion. Fill the gap with a silicone caulk rated for 500 degrees. I’ve seen tiles pop off because someone used standard caulk and the heat expanded the grill against the tile. Cost for the full surround: around $300 in tile and cement board, plus the grill (expect $700 to $1500). Trade-off: the Kamado’s top vent needs to be accessible. If you bury it in a deep counter, ash removal becomes a hassle. Keep a small gap at the back so you can reach the vent handle.
Never seal the grill into the surround with anything permanent. It needs to come out for deep cleaning or replacement.
7. Corner Bar with Mini Fridge and Ice Maker
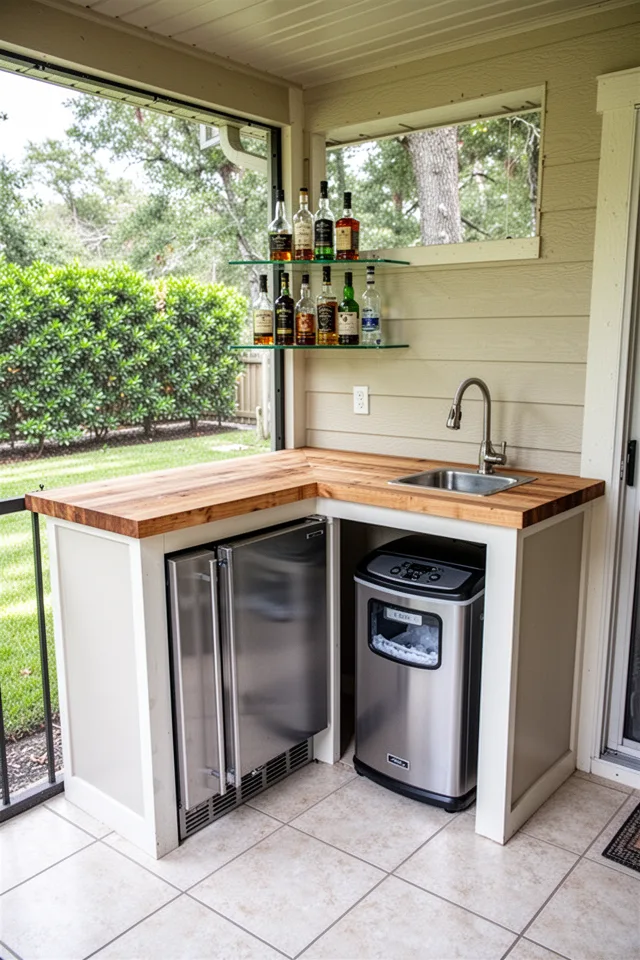
An outdoor bar seems simple, but the ice maker is the troublemaker. Most portable ice makers need a drain. If you can’t tie into a floor drain or slope the counter so water runs to a planter, you end up emptying the pan every few hours. I learned to look for an ice maker with a built-in pump that can drain into a nearby sink drain line. Those models cost around $300 to $500, but they’re worth it. The mini fridge can be a standard outdoor-rated model—expect $400—but make sure it has enough ventilation. I built mine into a corner that gets shade from a column, so the compressor doesn’t struggle. Trade-off: corner bars eat up usable counter space. You lose the L-shape’s walkway. Measure twice: allow at least 36 inches of clear floor space in front of the fridge door.
If you can’t drain the ice maker, skip it. A flooded outdoor bar is worse than no ice at all.
8. Fireplace with Grill Grate Insert
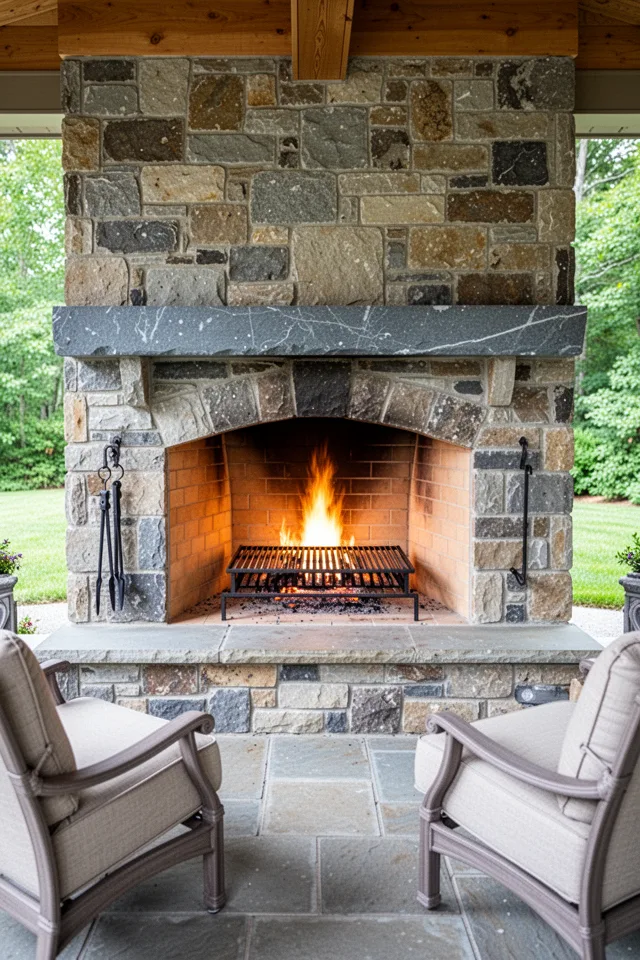
This is the most romantic idea on the list—roasting over an open fire without leaving the covered area. But it’s also the one most likely to go wrong. A standard fireplace is not designed for cooking. The heat from a cooking fire is more intense and more focused. You need a firebox lined with firebrick, not regular stone. The grate should be stainless steel, about ¼-inch thick, and removable. Cost for a custom grate: around $100. The fireplace itself is a big investment—$2000 to $5000 depending on whether you build it or use a prefab insert. The trade-off: smoke. Even with a good chimney, wind can push smoke right into the covered area. A tall chimney cap with a rotating vent helps. Also, you can’t control the heat as precisely as a grill. Use it for steaks and skewers, not delicate fish.
Cook over coals, not open flames. Let the wood burn down to embers, then push them under the grate. You’ll get even heat and less flare-up.
9. Open Shelving in Ipe Wood
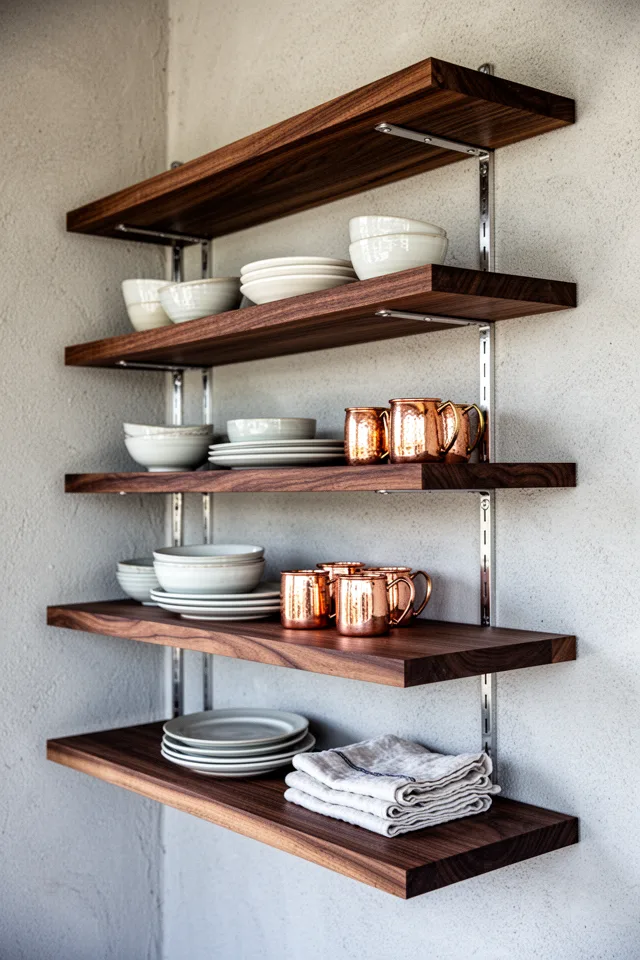
Ipe is the best exterior hardwood, full stop. It doesn’t rot, doesn’t dent easily, and weathers to a silver grey that looks like a coastal cottage. But it’s hard—hard to cut, hard to drill, hard on your tools. I paid about $12 per linear foot for a 1×8 board. A 4-foot shelf cost me under $50, including the stainless brackets. The trick: pre-drill every hole with a titanium bit, or you’ll snap standard bits. Seal the end grain with an oil finish to prevent checking. Ipe is also dense as hell, so it doesn’t bow under heavy loads. I’ve had cast iron pots on mine for two years, no sag. Trade-off: it’s expensive, and the color fades to silver quickly if you don’t oil it twice a year. I prefer the silver, so I let it go.
Ipe dust is toxic—wear a N95 mask when cutting. And never use pressure-treated pine as a cheaper alternative; it warps and leaks resin in heat.
10. Prep Station with Built-In Cutting Board and Waste Bin
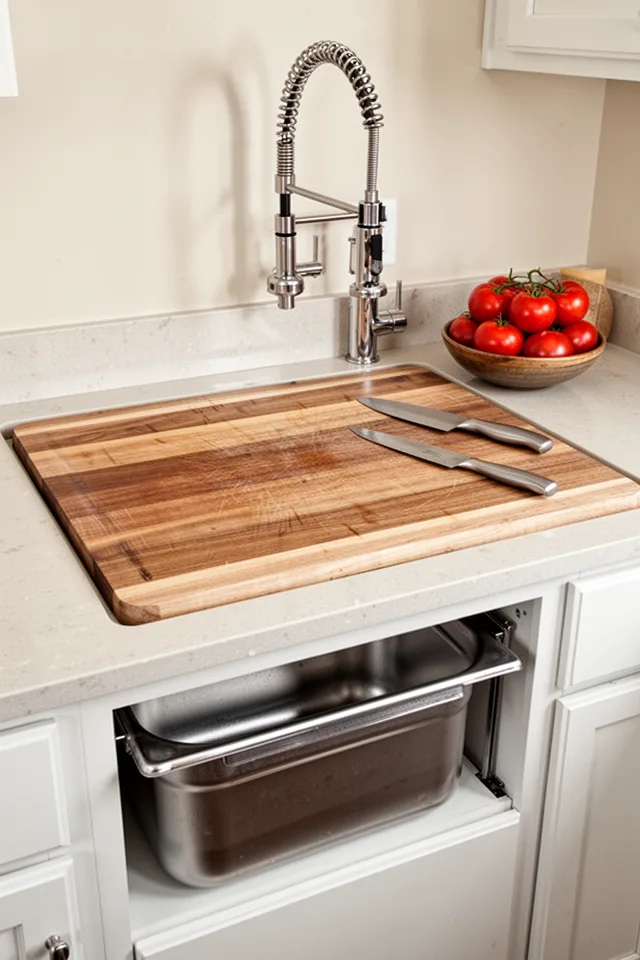
Prepping vegetables outside while the grill heats up is one of the purest pleasures of outdoor cooking—until you have to carry a cutting board covered in onion skins to the indoor trash can. A built-in waste chute is the solution. I cut a hole in the counter, dropped in a stainless steel waste bin (about $40), and installed a wooden cutting board that lifts out for cleaning. The board sits in a routed recess, flush with the counter. Cost for the whole station: about $120 for the bin, $30 for the cutting board blank (I used maple, sealed with mineral oil), and $50 for a small spray faucet. Trade-off: the bin can smell if you leave food scraps in it for a few days. Rinse it out weekly. Also, the cutting board needs oiling every month or it dries and warps.
Make the bin at least 3 gallons. Smaller ones fill up too fast and become annoying to empty mid-cook.
11. Hanging Pot Rack Over the Island
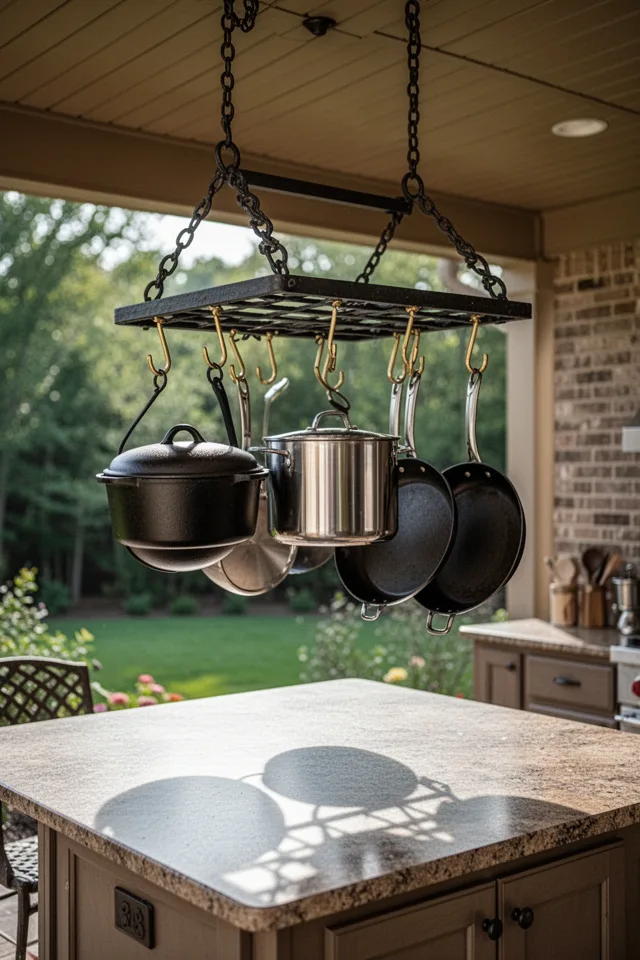
A pot rack is practical and beautiful, but outdoors it faces wind. Pots swing and clang, and in a strong gust they can actually collide and chip. I solved this by using short chains (6 inches) and S-hooks that are slightly too tight—a squeeze to remove, but they don’t rattle. Also, position the rack so it’s not directly under a gap between the roof and wall. A cross breeze will treat your pans like wind chimes. Cost: a good wrought iron rack is about $150 to $300. S-hooks are cheap—$10 for a pack. Trade-off: the rack needs to be at least 6 feet 6 inches from the floor so tall friends don’t hit their heads. I’m 5’10” and I barely clear it. If your ceiling height is under 8 feet, reconsider—or use a wall-mounted rail instead.
Use copper or brass S-hooks. They age nicely and don’t rust. Cheap steel hooks will drip orange stains onto your counter.
12. Coffee Station with Built-In Espresso Machine
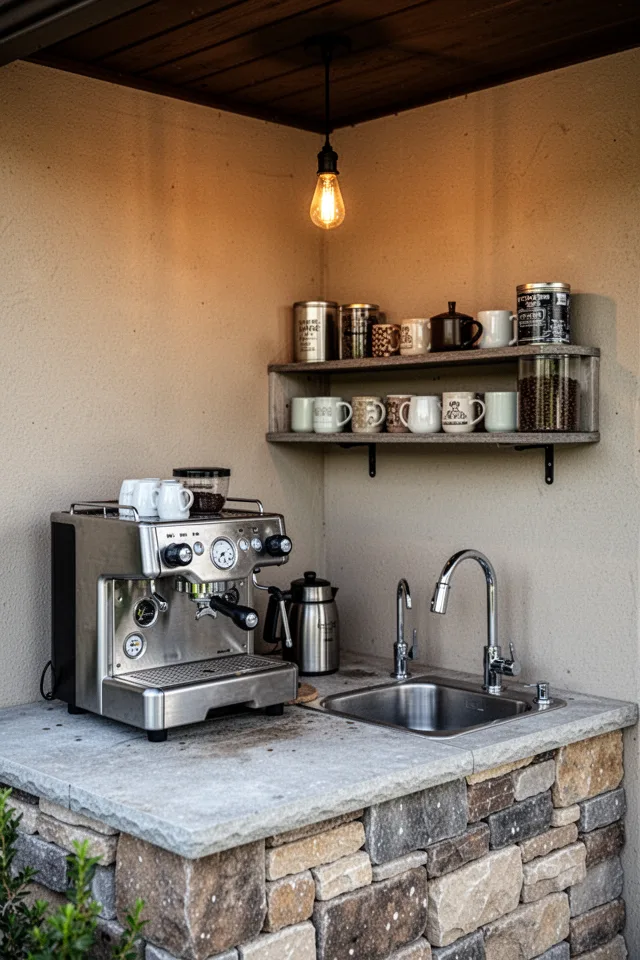
Espresso machines are delicate. They don’t like dust, humidity, or temperature swings. An outdoor coffee station is only practical if you have a very protected location—a walled-off nook or a deep covered area with almost no wind-driven rain. I put mine under a deep overhang, and I still cover the machine with a canvas cloth when not in use. The machine itself is a used Gaggia Classic Pro, about $400. The sink is a bar sink, $80. Total station cost: around $600, not counting the counter. Trade-off: the machine needs to be brought inside during heavy storms or freezing weather. If your covered patio is open on two sides, this is not a permanent setup. Also, you need a GFCI outlet nearby—outdoor electrical code requires it. So this is more of a spring-through-fall project, not a year-round fixture.
If you live in a humid climate, expect to descale the machine twice as often as you would indoors.
13. Smoker Nook with Concrete Base and Brick Enclosure
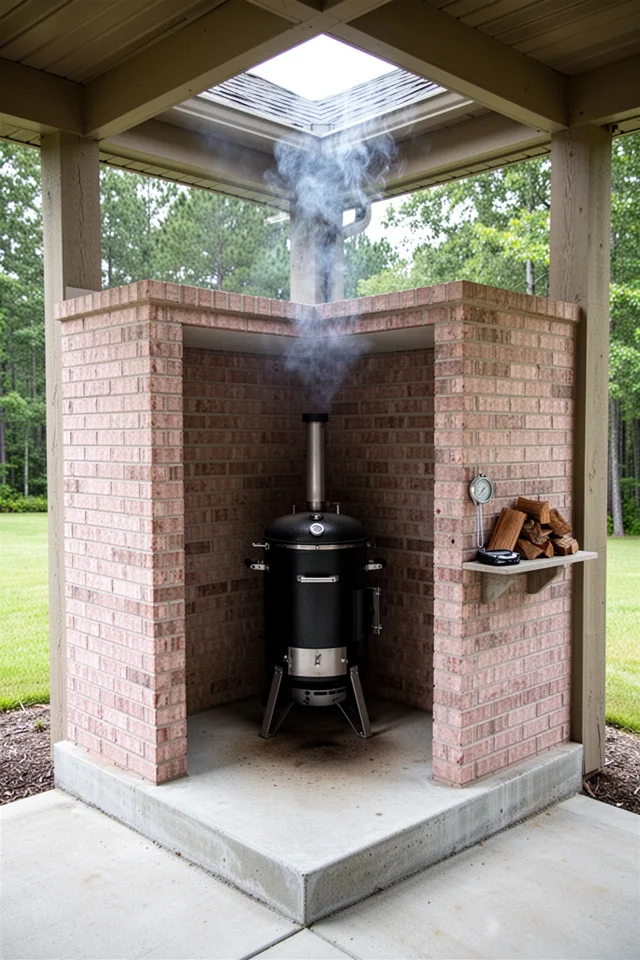
Smokers get hot on the outside, and they also leak smoke. If you enclose one, you need a gap at the top or a dedicated vent. I built a brick nook that’s open on the front and has a 6-inch gap at the top between the brick and the roof. The concrete base is pitched slightly forward, so any grease drips out rather than pooling at the back. Cost: about $200 for concrete and brick, plus the smoker (expect $300 to $800 for a decent vertical smoker). Trade-off: creosote builds up on the brick and concrete over time. It can be scrubbed with a degreaser, but the brick will darken permanently. That’s not necessarily ugly, but it’s not neutral. Also, the nook takes up a lot of floor space—about 4 feet by 4 feet.
Put a layer of firebrick on the concrete surface under the smoker. The direct heat from the bottom can crack a plain concrete slab after a few years.
14. Sink with Pull-Out Sprayer and Instant Hot Water Tap
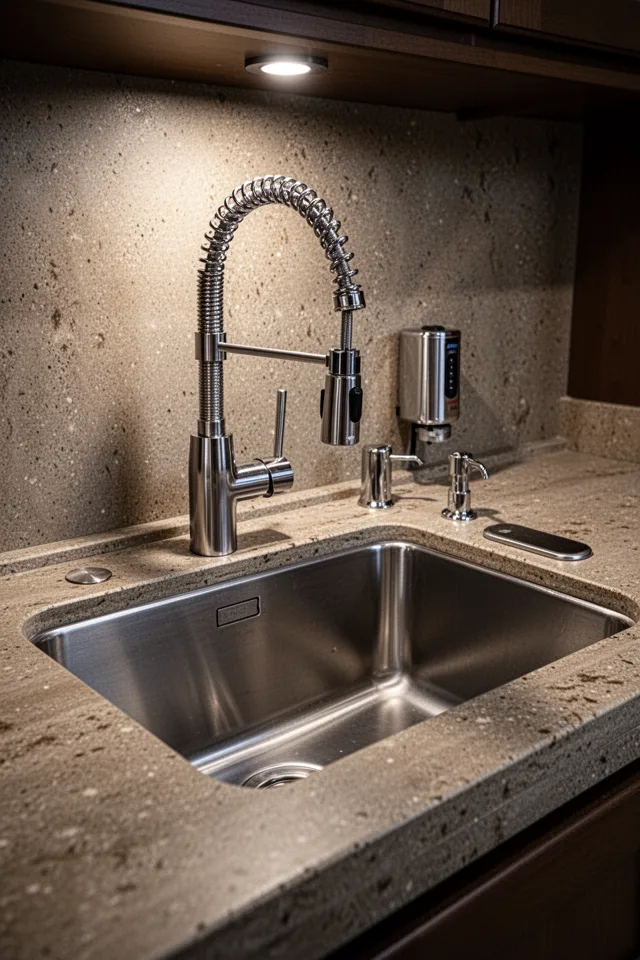
Hot water is a game-changer outdoors. Instant hot water taps (the kind that dispense near-boiling water) are usually indoor tools, but I installed one in my outdoor sink using a small ½-gallon tank under the counter. It works great for blanching vegetables, making tea, or cleaning greasy pans. The model I used is a smaller unit—about $150—that plugs into a GFCI outlet. The sink itself is a 25-inch undermount, about $200. The pull-out sprayer is standard kitchen style, $60. Trade-off: the instant hot water tap is one more thing that can freeze. I have to drain the tank and disconnect the lines before the first hard freeze. Also, the tank takes up cabinet space. If you have no under-counter cabinet, this isn’t for you.
Insulate the hot water line with foam pipe wrap. Even in mild weather, the water in the line cools down fast between uses.
15. Drop-In Induction Cooktop for Outdoor Sautéing
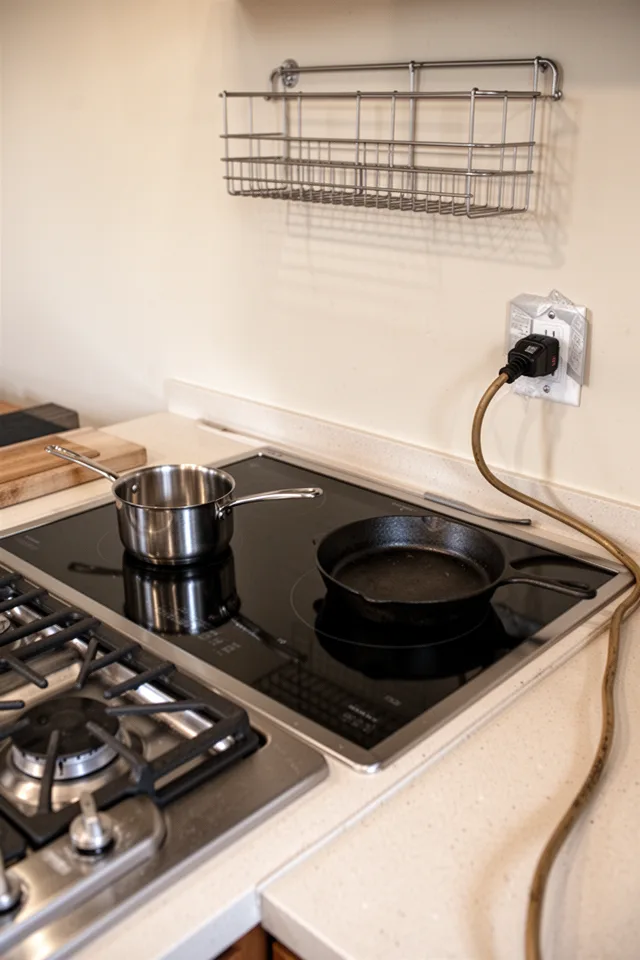
Induction cooking outdoors is efficient, fast, and doesn’t heat up the surrounding area in summer. But it requires a dedicated 20-amp circuit, and the cooktop itself can’t get wet. I used a single-burner portable induction unit (about $80) that I cut a hole for in the counter. The edges are sealed with silicone, and the underside is open for ventilation. The unit is not built-in permanently—I can lift it out to clean or store. Cost: cooktop $80, counter cutout $20 in materials. Trade-off: induction only works with magnetic cookware. Cast iron and stainless with a magnetic base are fine. Copper or aluminum won’t heat. Also, the glass surface is vulnerable to thermal shock—don’t put a frozen pan on a hot burner. And wind can blow the flame off a gas burner, but with induction there’s no flame. Just keep the surface dry.
If you live where it rains sideways, skip induction or use a removable cover when not cooking.
16. Wine Fridge and Glass Holder Station
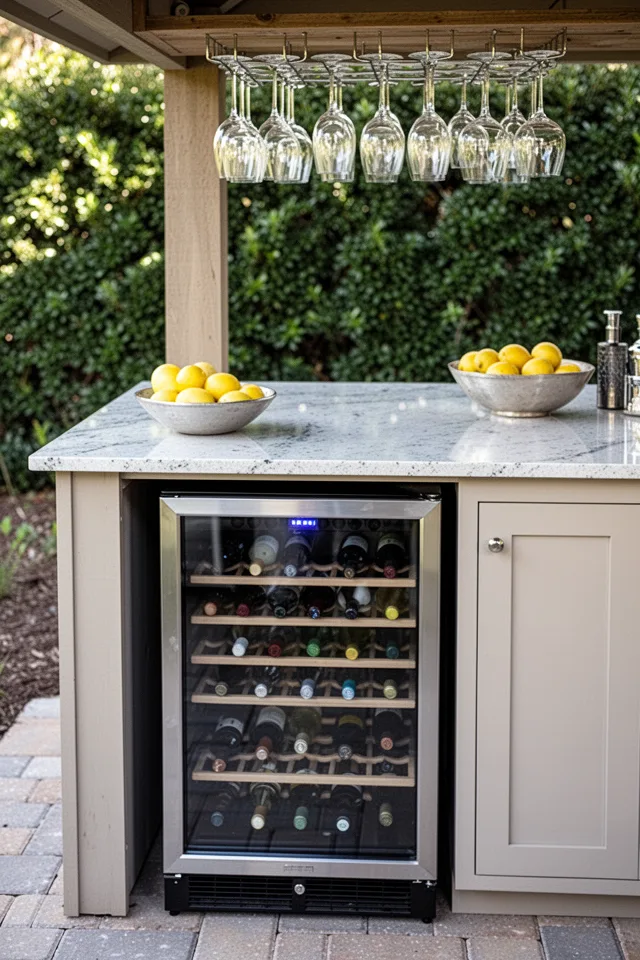
Outdoor wine fridges are finicky. They want to be in a place with consistent temperature, which is basically never outdoors. But if you put the fridge in a shaded, deep counter alcove that doesn’t get direct sun, it works. I got a cheap 18-bottle thermoelectric fridge (around $200). It’s not as cold as a compressor model, but it keeps wine at 55 degrees in mild weather. In direct sun, it fails. Trade-off: the glass door can fog up in humid weather, and the glass can break if something hits it. Also, the fridge should be in a location where you can easily clean the vents. I clean the dust off the back every month. If you want a real wine fridge, spend at least $500 for a compressor model rated for outdoor use. But for casual nights, the cheap thermoelectric works fine if you manage expectations.
Never put a wine fridge in an area where the ambient temperature exceeds 90°F, or the compressor (if it has one) will die.
17. Large Worktable with Marble Slab for Pastry Dough
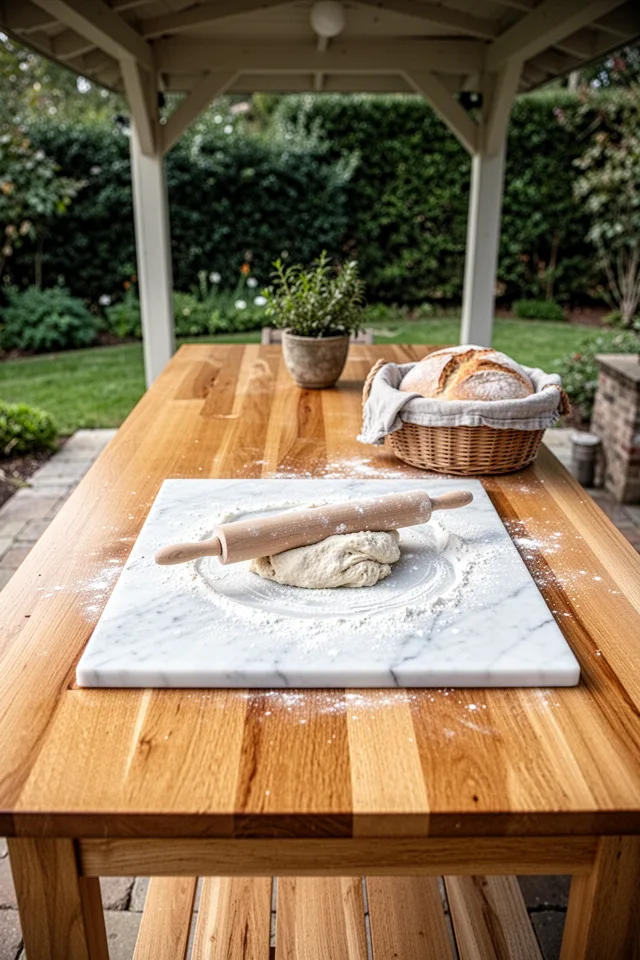
Outdoor baking is a luxury if you have a cool covered space. A marble slab stays cool even in summer, perfect for pastry dough that needs to stay cold. I found a remnant slab at a stone yard for $40. I routed a shallow recess in the worktable and set the marble in with silicone. The table itself is a simple construction: 2×4 legs and a plywood top, clad in oak planks. Total cost around $150. Trade-off: marble is porous. It stains from acidic dough, fruit juices, red wine. Seal it with a food-safe impregnating sealer. Reapply every year. Also, the slab is heavy—about 60 pounds for a 2×3 piece. The table needs to be sturdy. Don’t set it on flimsy sawhorses. And if you ever want to move it, you’ll need a friend.
Marble feels cold in winter. If you live where temps drop below 50°F often, the slab will be too cold for yeast dough to rise properly.
18. Built-In Grill with Rotisserie and Infrared Burner
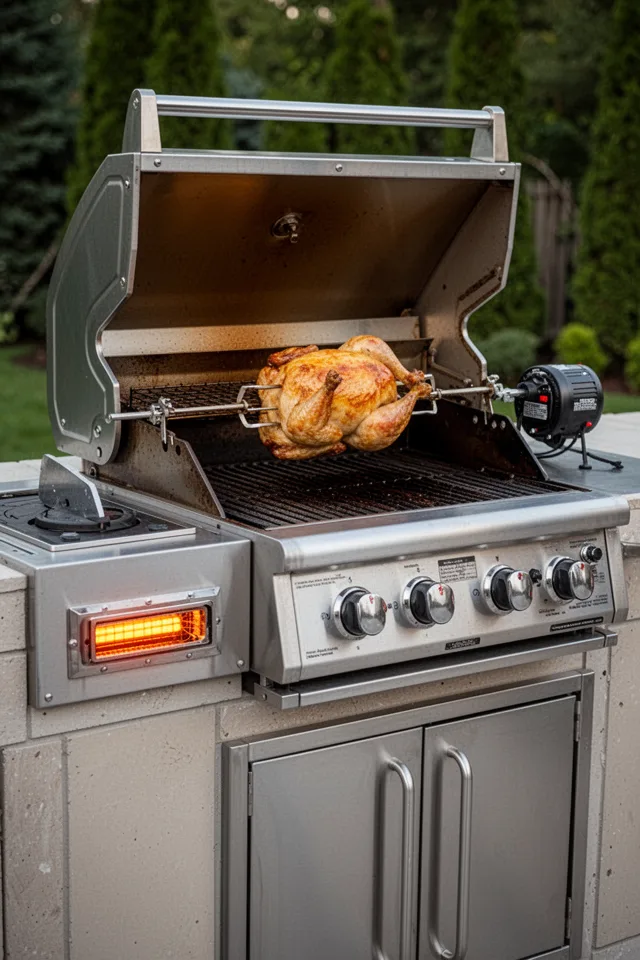
Rotisserie cooking is one of the best ways to get even, juicy meat, but the motors are notoriously unreliable outdoors. Moisture gets in, and the cheap plastic gears strip. I replaced the stock motor with a commercial-grade unit, about $80, and fitted a weatherproof cover for the back of the grill. The infrared burner is a handy addition for searing steaks—mine cost $300 as an add-on. Total for a built-in grill with rotisserie and infrared: expect $800 to $2000 for a decent stainless unit. Trade-off: the rotisserie motor needs to be unplugged and stored indoors during rain. I forgot once, and the motor seized. Also, the spit rod collects grease that drips and flares if not cleaned regularly. But the results are worth the extra care.
Buy a rotisserie kit that includes a counterweight for uneven loins of meat. Your motor will thank you.
19. Corrugated Metal Roof Overhang with Ceiling Fan
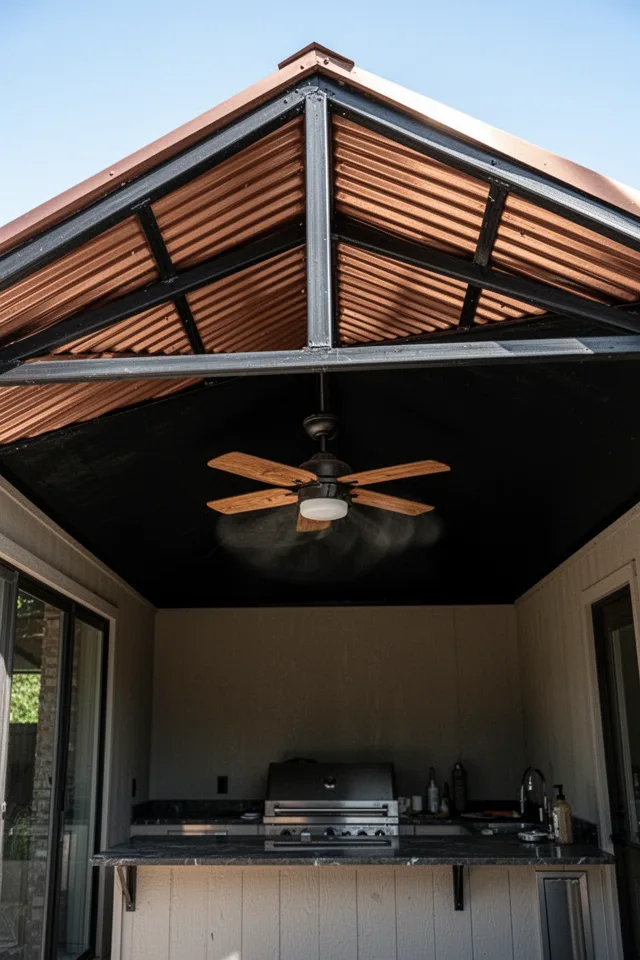
Good coverage is the foundation of any outdoor kitchen, but most roofs are too shallow. I extended my patio roof by four feet using a metal panel system—about $400 in materials. The corrugated metal looks better than painted aluminum, and the color holds up for years. The ceiling fan is not optional if you cook in summer. It keeps smoke from lingering and moves hot air away from the cook area. Make sure the fan is rated for damp/wet locations and has a lifetime warranty. I spent $200 on a Fanimation model, and it’s been running for four years without issue. Trade-off: corrugated metal amplifies rain noise. In a heavy downpour, you’ll need to raise your voice. You can mitigate that with a layer of sound-deadening insulation between the metal and the framing. Add about $50 for that.
If you install a fan on a metal roof, use a vibration-dampening mount. Otherwise the resonance will drive you crazy in even a light wind.
After building and rebuilding my own outdoor kitchen twice, I’ve learned that the best ideas are not the most ambitious—they’re the ones that survive a rainy Tuesday afternoon in March. You don’t need granite and a six-burner grill. You need a layout that funnels smoke away from your guests, materials that weather with grace instead of peeling, and at least one surface that’s comfortable to lean against while you wait for the coals to ash over.
If I had to pick one start: a concrete L-shaped counter with a prep sink and a charcoal grill station built into a corner. That core gives you the flexibility to add a pizza oven, a smoker, or a wine fridge later—as you realize what you actually cook. Don’t try to do everything at once. Build the bones that can change. And never, ever buy a polyester awning. That’s not an opinion—it’s a life lesson.
The only thing worse than an unfinished outdoor kitchen is one that looks finished but doesn’t work. You’ve spent the time reading this. Now spend it making something that holds up to sun, rain, and a cold bottle of beer. That’s the dream. That’s the goal.

