
I have a confession: I’ve built more than my share of trellises that looked like a week’s worth of Pinterest optimism propped against a fence. You know the ones—the sagging wooden ladder that promised rustic charm but delivered splinters and a lean that got worse every time the sprinklers hit it. The cheap bamboo tripod that looked elegant in the store photo and then bleached to a sad beige within two months. That moment when you step back and realize your “garden structure” just looks like a pile of sticks you haven’t thrown away yet—that is the exact moment this article exists for.
What I have learned, after years of building, buying, and watching trellises rot or warp or just disappoint, is that the difference between something that looks expensive and something that looks DIY is almost never about how much money you spend. It is about weight, finish, proportion, and a few decisions most guides skip because they are not photogenic enough. The usual advice—”use cedar,” “add twine”—does not get you there. You need to think about shadow lines, hardware that does not flash-rust, and the way a structure will look in February when the vine is just a skeleton.
So here is what this article does differently: I am not going to show you eighteen pretty pictures and tell you to go forth. I am going to walk you through each idea with the things I actually wish someone had told me—what ages well, what shifts in the wind, what feels heavy and intentional instead of flimsy and hopeful. Some of these ideas cost under $30. Some will set you back a couple hundred. All of them have been tested by weather, by time, and by my own impatience. Let us start.
1. The Framed Wire Grid
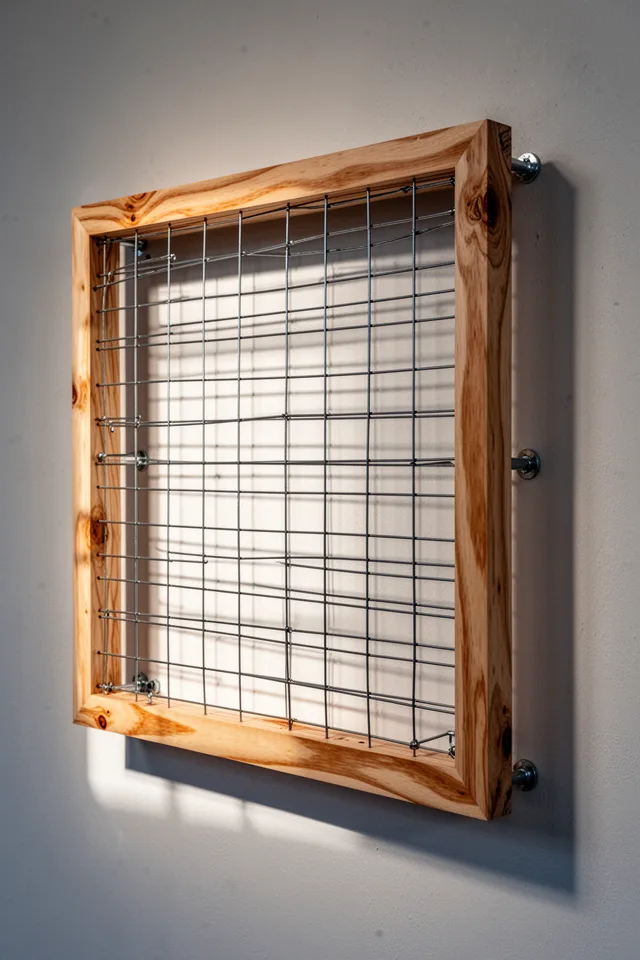
This is the trellis that looks like you hired someone. It is just a frame and some wire, but the proportions matter enormously. I use 1×4 cedar for the frame—it has enough heft to not look like a picture frame, but it is not so thick that it overpowers the plant. The wire needs to be tensioned properly; sagging wire is the fastest way to make a $40 project look like a $10 one. I use turnbuckles on the horizontal wires so I can tighten them after a season or two of thermal expansion.
The trade-off: this trellis is not for heavy climbers like wisteria or mature grapevines. The wire will hold, but the frame will twist if you overload it. Stick to clematis, morning glory, or annual peas. Also: pre-drill every hole. Cedar splits like it is made for it if you drive screws without pilot holes.
If you only build one trellis, build this one. It works in any style of garden and it ages with dignity.
Cost: under $50 for the lumber and wire if you already have basic tools.
2. The Bronze Pipe Ladder
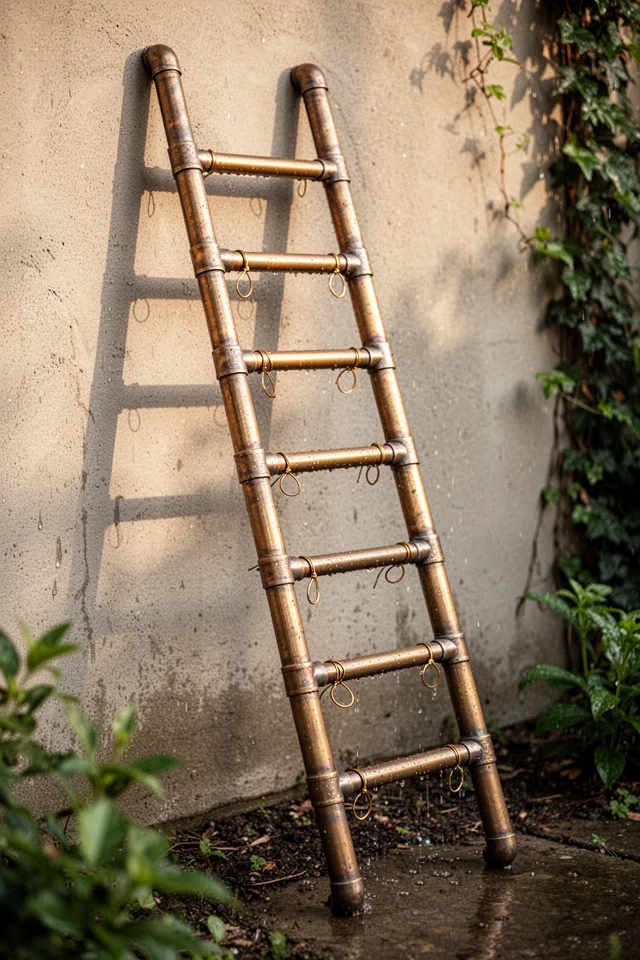
Bronze sounds expensive because it is. But here is the thing: I found that using copper pipe (which is much cheaper) and letting it patina naturally gives you almost the same look for a fraction of the cost. Copper turns that dark brown-green within a year, and it looks like it has been there for decades. The key is to not seal it. Let it weather. The warm tones of oxidized copper against green foliage is one of the best combinations in a garden.
The constraint: pipe trellises are heavy. You need to attach them to a wall or sink the legs into the ground with rebar stakes. A free-standing copper ladder will tip over in the first gust of wind. I learned this the hard way. Also, copper can leach into soil if you are growing edibles near it—stick to ornamentals.
Let the copper do its own aging. The fake patina spray cans never look right.
3. The Leather and Wood Obelisk
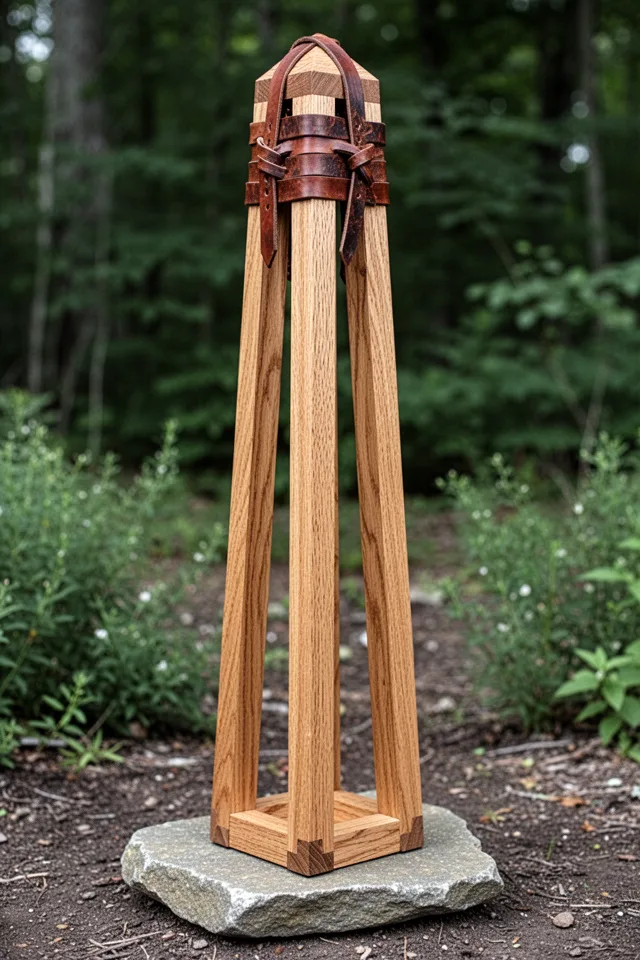
Obelisks are everywhere. But the ones with leather lashings instead of metal brackets or jute twine are different. The leather has a soft, organic look that jute cannot match—jute frays and rots in one season. Leather lasts years if you use undyed, vegetable-tanned leather. It stiffens at first but becomes more flexible with moisture. And it smells incredible when you first build it. That might sound silly, but it matters when you are up close pruning.
The downside: this is a more advanced build. You need a drill press or a steady hand to get the dowel angles right. And leather strips are not cheap. Expect to spend about $80–$100 for the materials. But the result looks like it came from a high-end garden boutique.
Wet the leather before you tie the knots. It shrinks as it dries and holds tighter than you could pull by hand.
4. The Expanded Metal Panel
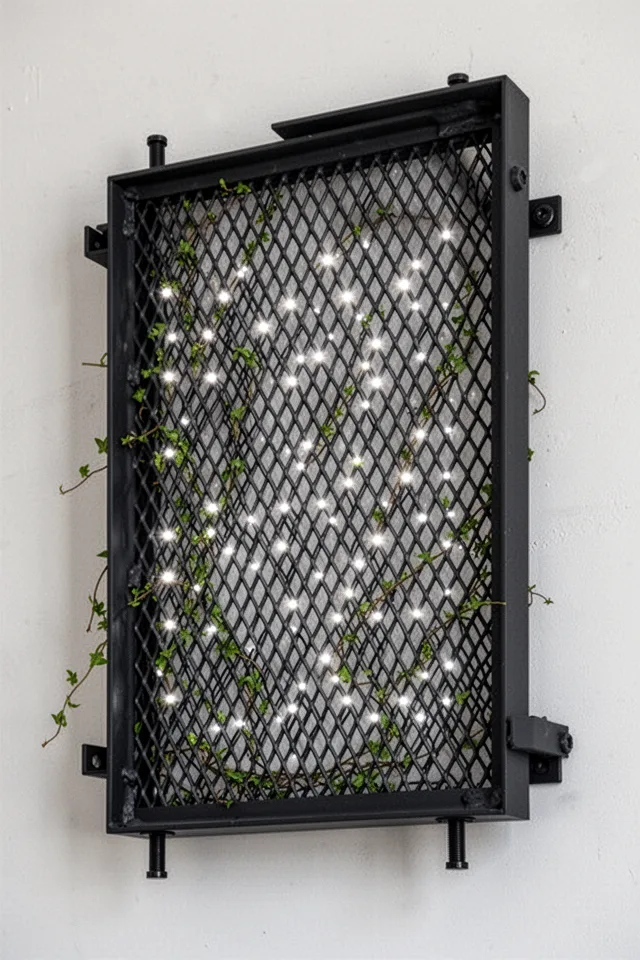
This is not a trellis for a cottage garden. It is for a modern, minimalist yard where you want a clean sculptural line. The expanded metal has a rigidity that wire grids lack—you can train even aggressive climbers like climbing hydrangea or ivy without the structure deforming. The key is the matte powder coat. Spray paint will chip and rust within a year. Pay the extra for a professional powder coat or buy pre-coated panels from a metal supplier.
Trade-off: the diamonds are small—about 1×2 inches—so thick stems can get trapped. You need to guide growth early and prune regularly. Also, the panel is heavy. Mounting it requires masonry anchors if going into brick, or heavy-duty toggle bolts for wood. This is not a weekend rental project; it is a permanent addition.
Expanded metal casts the most incredible shadow patterns on a sunny wall. The plant itself becomes secondary.
5. The Salvaged Window Trellis
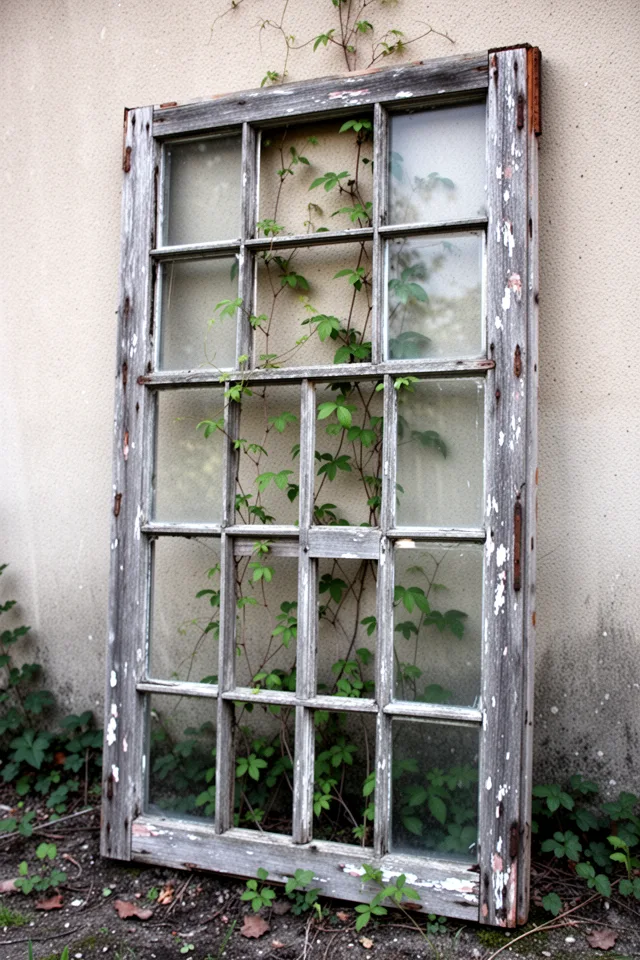
This idea is well-known, but most people execute it wrong. The mistake is to clean the window up, repaint it, and try to make it look new. That destroys the point. The charm of a salvaged window trellis is that it looks like it has existed there for decades. Leave the peeling paint. Leave the rusty hinge. Remove the glass carefully, wear gloves, and use the original hardware to mount it. I found one at a salvage yard for $15, and it has been my most-photographed garden feature.
The constraint: window sashes are not engineered to support plant weight. The muntins (the thin wood strips between panes) can snap under heavy vines. Stick to lightweight annuals like sweet pea or nasturtium. And seal the back with a clear outdoor varnish if the window will stay mounted against a wall—moisture trapped between the window and the wall rots both.
Only use a window with the original glass removed. Leaving glass in turns it into a greenhouse and cooks the vines.
6. The Minimalist Monofilament Grid
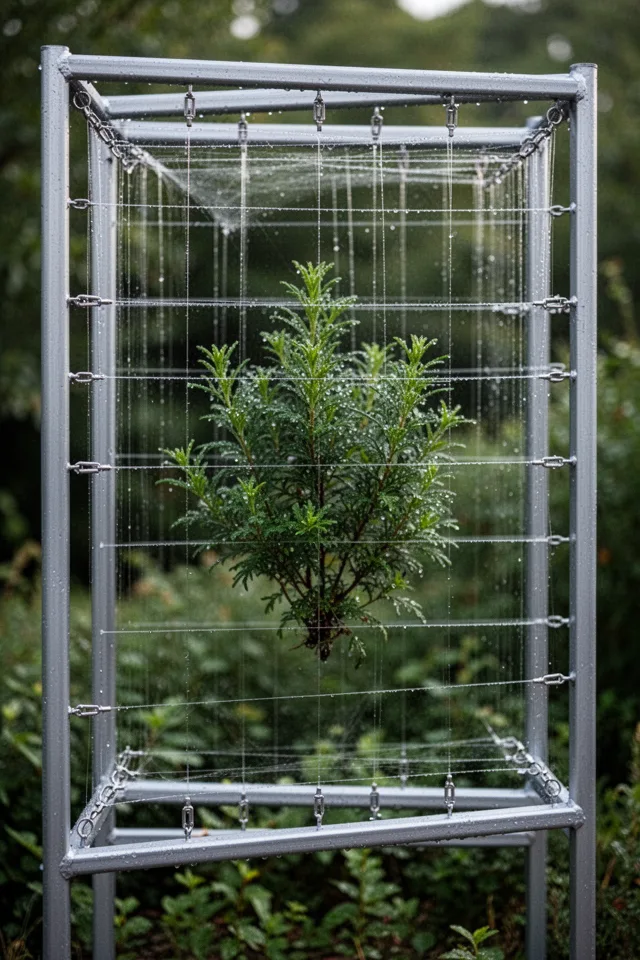
I built this for a small balcony where I did not want the trellis itself to be the visual statement. The result genuinely surprised me. With the right tension, the monofilament holds morning glory and runner beans all season. The trick is to use at least 80-pound test line—anything thinner sags and cuts into stems. And you must use stainless steel hardware: the sun degrades plastic turnbuckles in one summer.
This is not a beginner build. Threading and tensioning the grid takes patience. The frame needs to be very sturdy because all the load concentrates at the corners. I recommend using a welded steel frame (bought pre-made at a metal supplier) rather than trying to join wood. Cost: around $60–$80 for materials, plus the frame.
Clear monofilament disappears at night. Your trellis becomes just the shadow of the plant under a porch light.
7. The Cedar Slat Arch
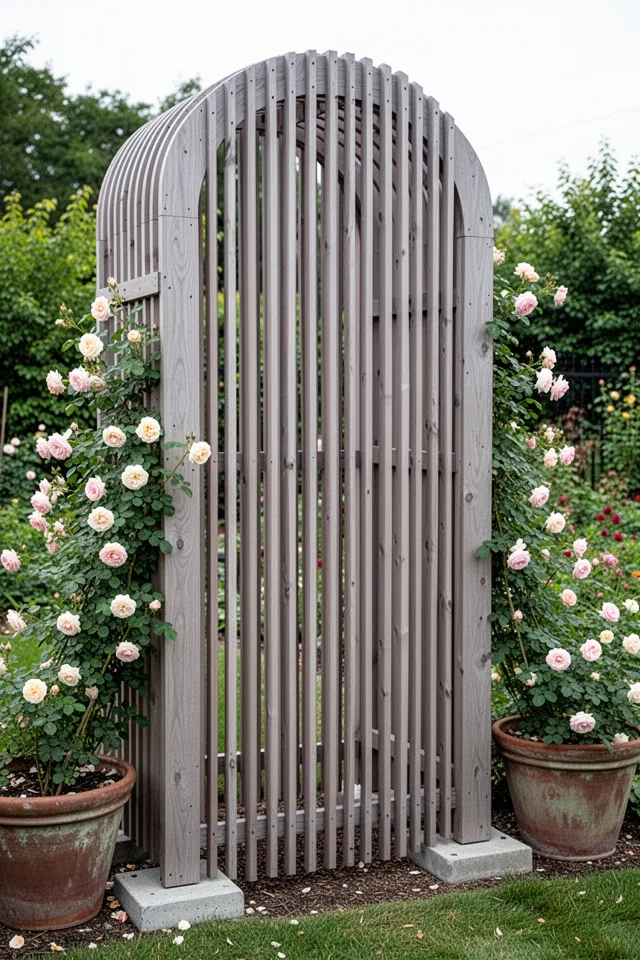
Most garden arches are flimsy metal tubes that look like they belong in a wedding rental catalog. The cedar slat arch is different because it has visual weight. The close spacing of the slats creates a rhythmic shadow pattern that changes throughout the day. I used western red cedar for the slats—it resists rot better than any other wood I have tried in this climate (zone 7, humid summers, wet winters).
The hard truth: this is a $200-plus project if you buy all new lumber. You can cut costs by using fence pickets instead of full cedar boards—they are thinner but work fine if you treat them with a clear wood preservative. The real challenge is the bent plywood frame. I had to steam the plywood to get the curve, which required a makeshift steam box. If that sounds daunting, you can build a straight-sided arch (like a narrow pergola) and achieve a similar look with less headache.
Use stainless steel screws. The cedar will bleed tannins and stain anything galvanized.
8. The Floating Dowel Wall
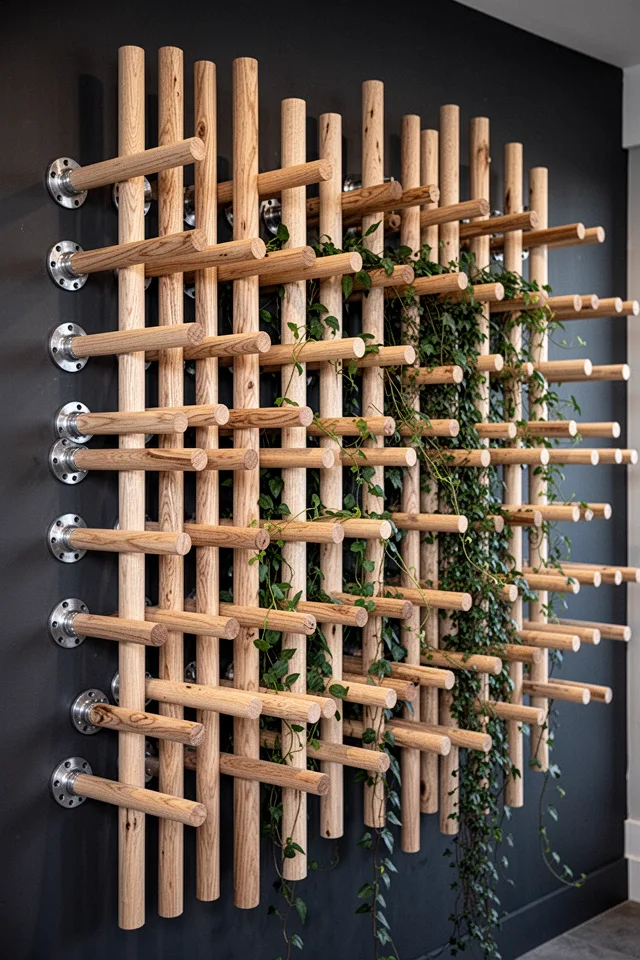
This is a bold move. It is not for the faint of heart or the renter. But it is the single most striking trellis I have ever installed. The dowels cast these amazing crisscross shadows, and the depth makes climbing plants look like they are weaving through a forest of branches. I used 1-inch oak dowels cut to 14 inches long, with 6 inches protruding from the wall and 8 inches anchored into the structure.
The catch: you need a solid wall—brick, concrete, or stout timber framing. Drywall alone will not hold the weight. Each dowel flange needs to be screwed into a stud or masonry. And the dowels will accumulate dust and cobwebs between them, so you have to clean periodically. Cost runs about $100–$150 for the dowels and flanges, plus the time to drill and mount each one perfectly level.
Leave a gap of at least four inches between the end of the dowel and any adjacent wall. You need space to train the vines around the back.
9. The Bamboo Hideaway
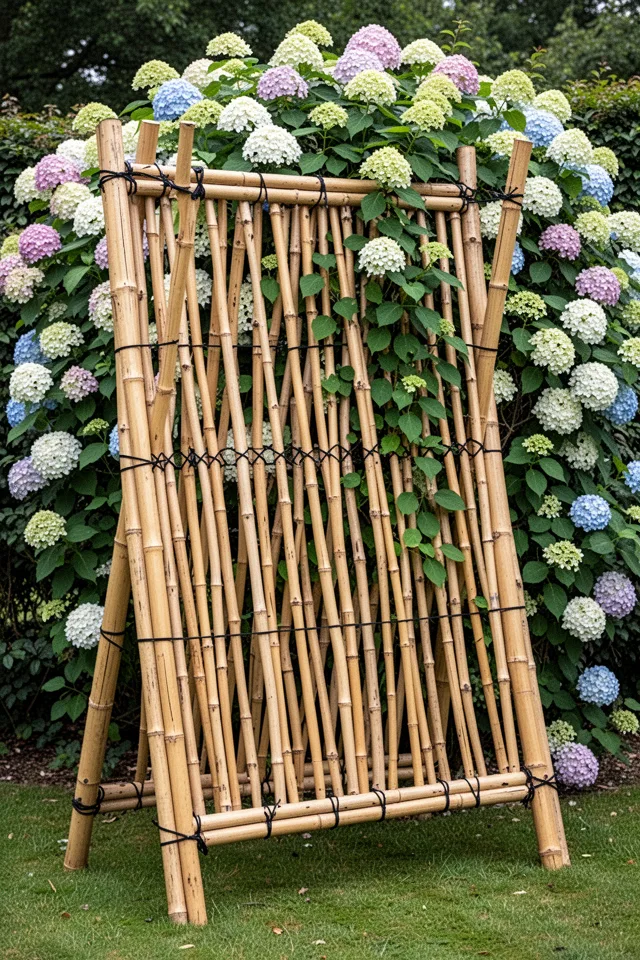
Bamboo gets a bad reputation because people buy those skinny, hollow stake bundles from the hardware store that split in the sun. This is different. You need real bamboo poles—the kind with thick walls and natural nodes. They cost more (around $8–$12 per pole for 6-foot lengths), but they last three to five years untreated if you elevate them off the ground. I set mine on concrete pavers to prevent ground rot.
The trade-off: bamboo is a natural material, and it will eventually degrade. In a dry climate, you might get seven years. In a wet one, three. But unlike metal trellises that get bent and look sad, bamboo ages gracefully—it fades to a warm straw color, then slowly crumbles at the base. When it goes, you replace it. That ephemeral quality is part of the appeal.
Do not treat bamboo with polyurethane. It peels. A light coat of tung oil every two years is all you need.
10. The Corten Steel Ribbon
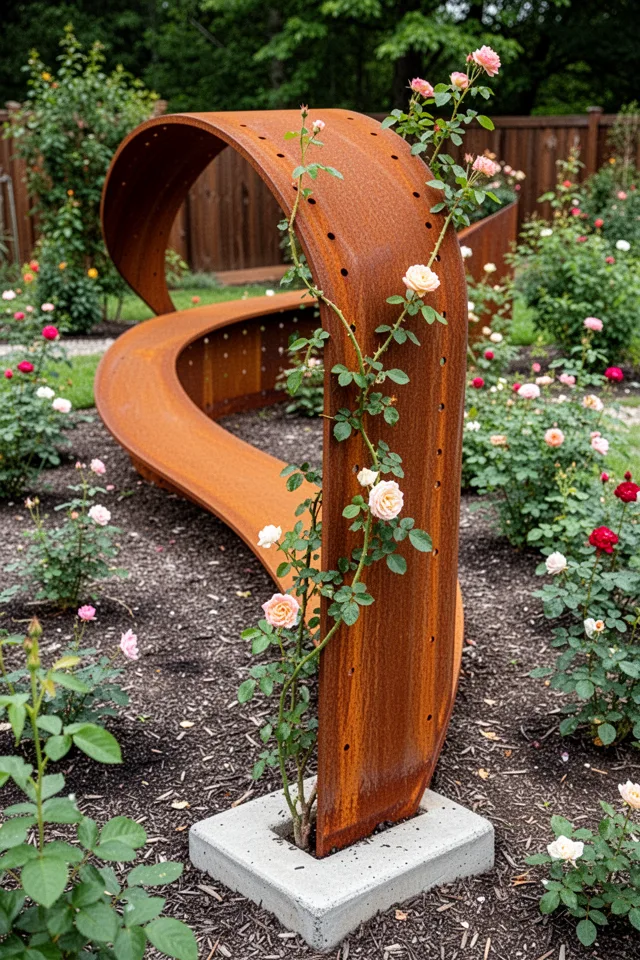
Corten steel is the material of high-end landscape design. It weathers to a rusted finish that is stable—it does not continue to corrode. The rust layer protects the steel underneath. For a trellis, corten gives you this incredible industrial warmth that contrasts beautifully with green foliage. I had a local metal shop bend a 10-foot strip of 1/8-inch corten into an S-curve. It cost $180, including drilling the holes.
Be warned: corten is heavy and sharp-edged. You will need steel-toe boots and gloves to handle it. The rust also stains concrete and stone, so put it in a bed where the runoff does not matter. And it takes about six months for the rust to fully stabilize—during that time, the orange dust will get on everything near it. You have been warned. But once it settles, it is maintenance-free forever.
Do not apply any sealer to corten. The whole point is the rust. If you stop it, you get a weird orange plastic look.
11. The Rebar Spiral
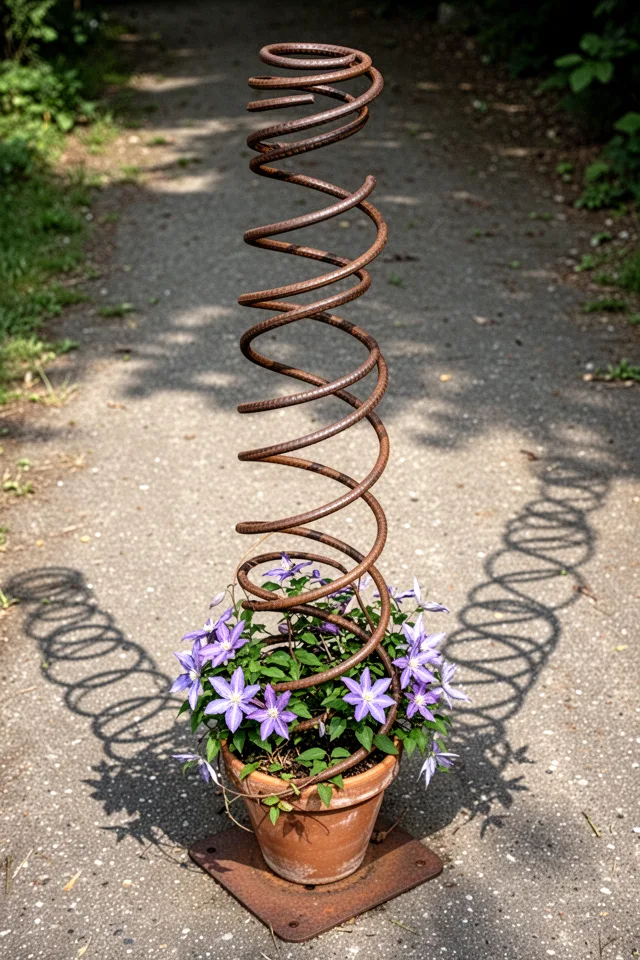
This is one of those ideas that looks like it took a lot of skill, but it is surprisingly easy if you have a rebar bender (which you can rent for a day). The spiral shape gives vines a natural path to follow, and the open structure means you can see through it from any angle. I made one for a tiny courtyard where a full trellis would have felt claustrophobic.
The issue: rebar rusts unevenly if it stays wet at the base. Set the base plate on gravel or a small concrete pad to keep it dry. And the spiral can wobble if you do not anchor it well—I drove a 12-inch spike through the base plate into the ground. Cost is under $30 for the rebar and base plate. This is the cheapest idea on the list that still looks intentional.
Heat the rebar with a torch before bending if you do not have a bender. It makes the curve smoother and prevents cracks.
12. The Horizontal Plank System
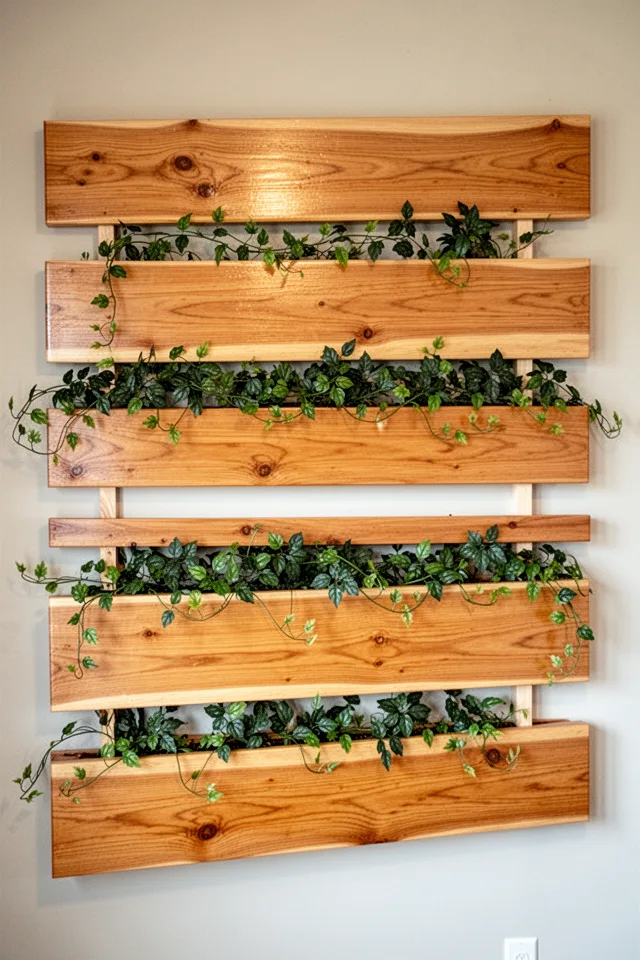
This is the trellis for people who hate trellises. It looks like a simple shelf system until the plant grows in. The horizontal lines are incredibly calming—they feel architectural in a way that vertical grids do not. I installed these on a blank south-facing wall that was baking in the afternoon sun, and they cooled the microclimate noticeably once the vines covered them.
The constraint: the planks create ledges where leaves and debris collect. You will need to blow them clean in autumn. Also, the vines tend to grow over the top of the planks rather than through the gaps, so you have to manually tuck them behind each plank as they climb. Not a huge chore, but worth knowing. Cost is about $40–$60 for cedar planks and spacers.
Use 2-inch thick planks. Anything thinner warps in direct sun and looks cheap within a year.
13. The Iron Scroll Reproduction
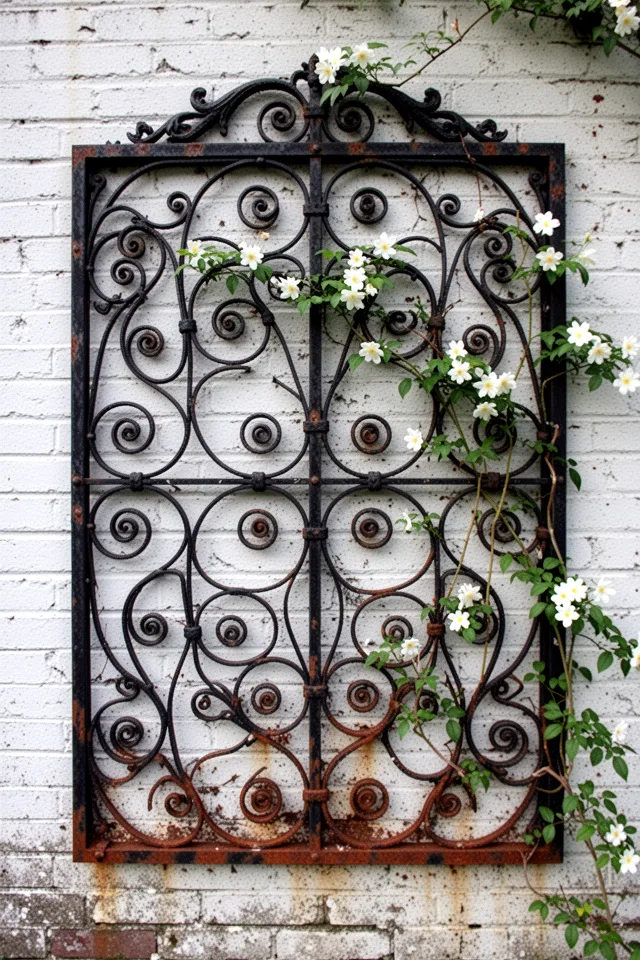
Real architectural salvage is the fastest shortcut to an expensive-looking garden. A salvaged iron panel can cost $50–$150 at a salvage yard, and it transforms a wall immediately. But you have to treat the rust first—wire brush it down, apply a rust converter, and then paint with a high-quality metal paint. Do not skip this step; the rust will stain the wall and the plants.
The catch: iron is heavy. You need two people to mount it, and you need masonry anchors that can hold 50+ pounds. Also, the scrollwork can trap water and create rust pockets if it sits flat against the wall. Use metal standoffs to keep it an inch away, or better yet, mount it on a simple wooden frame that gives you a gap.
Paint the back of the iron even if no one sees it. That is where rust starts first.
14. The Lattice Without the Cheerful Holes
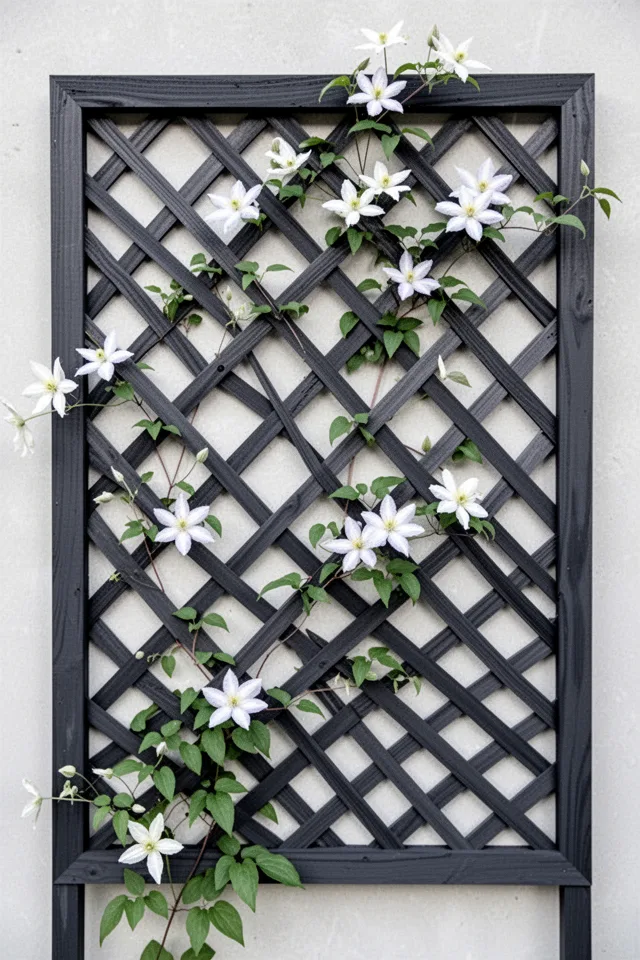
Standard lattice from the big box store is a crime against gardens. The diamonds are too big, the wood is thin pine that warps, and the finish is always that sickly yellowish-brown. But if you build your own lattice with narrow cedar strips and a tight pattern, it looks like a custom garden screen. I spent a weekend cutting and assembling a 4×6 panel. The secret is to cut all your angles consistently—use a jig or a miter saw stop block.
The trade-off: small-diamond lattice is high-maintenance for cleaning. Leaves and debris get stuck in the tight angles. You will need to take the panel down every couple of years, hose it off, and re-paint. But the visual impact is worth it. Cost: around $70 for the cedar strips and paint.
Stain the lattice before assembling. Painting individual gaps after it is together is a nightmare.
15. The Tension Cable Wall
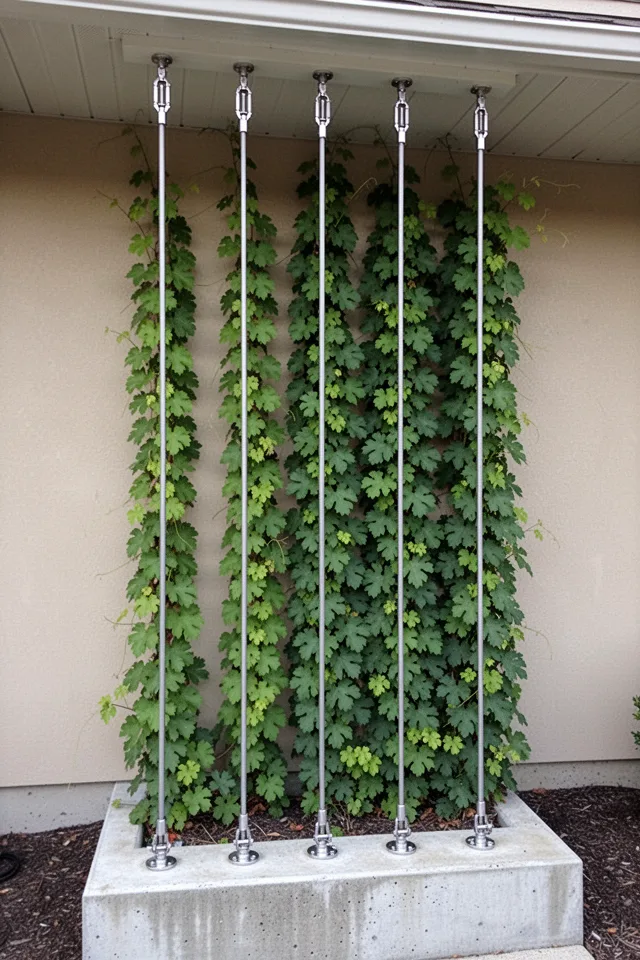
This is the trellis for a covered patio or a two-story wall. It is dramatic, clean, and industrial. The cables disappear visually, so the plant becomes the entire focus. I installed a set of five cables on a south-facing wall where I wanted shade in the summer but light in the winter (the vine drop leaves seasonally). It worked perfectly.
The difficulty: you need something solid to anchor the top—a steel beam or a heavy wooden ledger. The bottom anchors need to be in concrete or driven deep into the ground. Tensioning the cables evenly takes a few tries; I recommend a cable tension gauge. Also, the cables can sing in the wind if they are too tight. A slight looseness eliminates that hum. Cost: around $120 for stainless cable, thimbles, turnbuckles, and anchors.
Leave a three-foot border of bare wall around the cables so the vine does not stain the siding with moisture.
16. The Suspended Branch
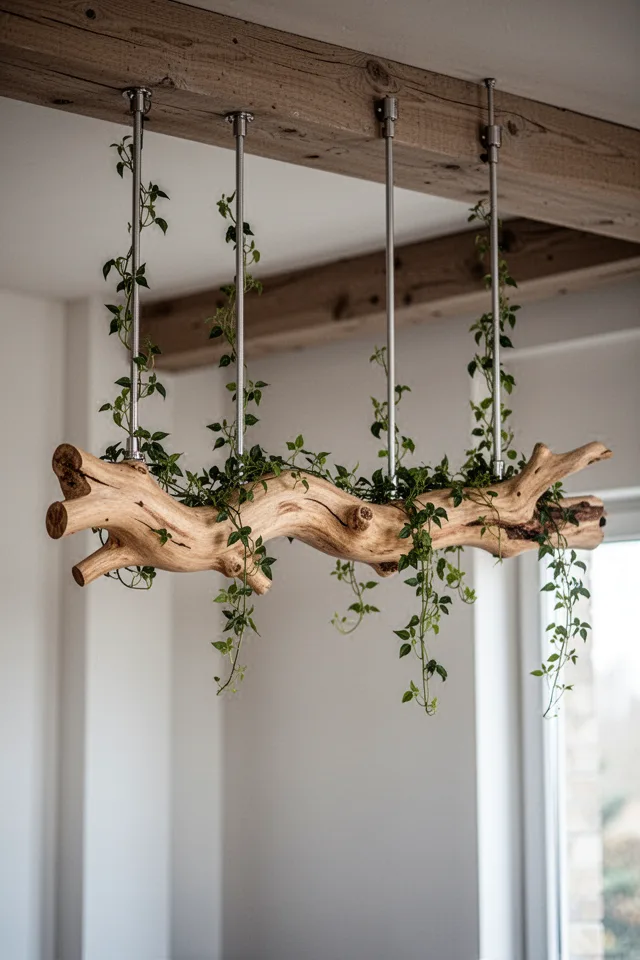
This is not a trellis in the traditional sense; it is a sculpture that supports plants. I found a branch that had fallen in a storm, cleaned it up, and hung it over a seating area. The effect is magical—it feels like the space was there before the structure. The branch does not need to be perfectly symmetrical; the asymmetry is part of the charm.
The practical reality: you need a very strong overhead structure to hang a branch that weighs 30–50 pounds. I used heavy-duty eye hooks screwed into a doubled-up joist. The branch needs to be sealed with a clear outdoor wood preservative to prevent rot and insect infestation. And the cables will need occasional re-tensioning as the wood dries and shrinks. Cost is variable—free if you find a branch, or up to $80 for cables and hardware.
Only use dead wood. A green branch will shrink, twist, and drop bark on your deck within a year.
17. The Chain Link Elevation
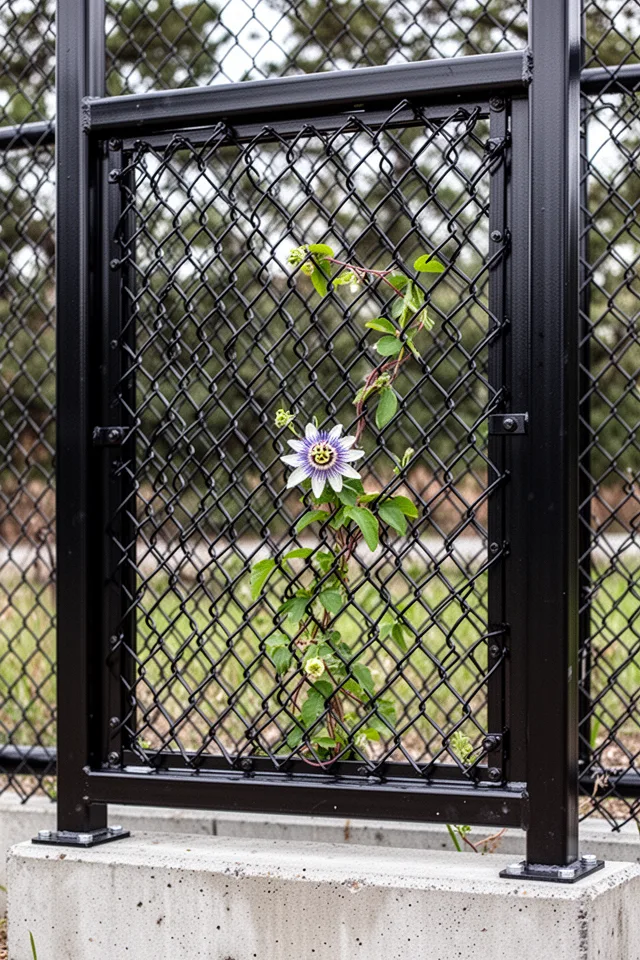
Chain link is usually ugly. But when you use the heavy gauge (9-gauge or thicker) and mount it in a proper frame, it transforms into a bold design choice. The trick is the frame: it needs to be chunky enough to visually overpower the chain link. I used 1.5-inch square steel tubing, welded into a frame, then powder-coated matte black. The chain link is stretched with a tension bar and bolted to the frame.
The downside: this is not a DIY for most people unless you have a welder. You can get a fabrication shop to make the frame for around $150. The chain link itself is cheap—under $20 for a 4×8 panel. But the total cost with fabrication and powder coating can hit $250. Worth it if you want an industrial look that no one else has.
Leave the chain link unpainted. The galvanized finish will weather to a soft grey that looks better than black paint over time.
18. The Repurposed Headboard
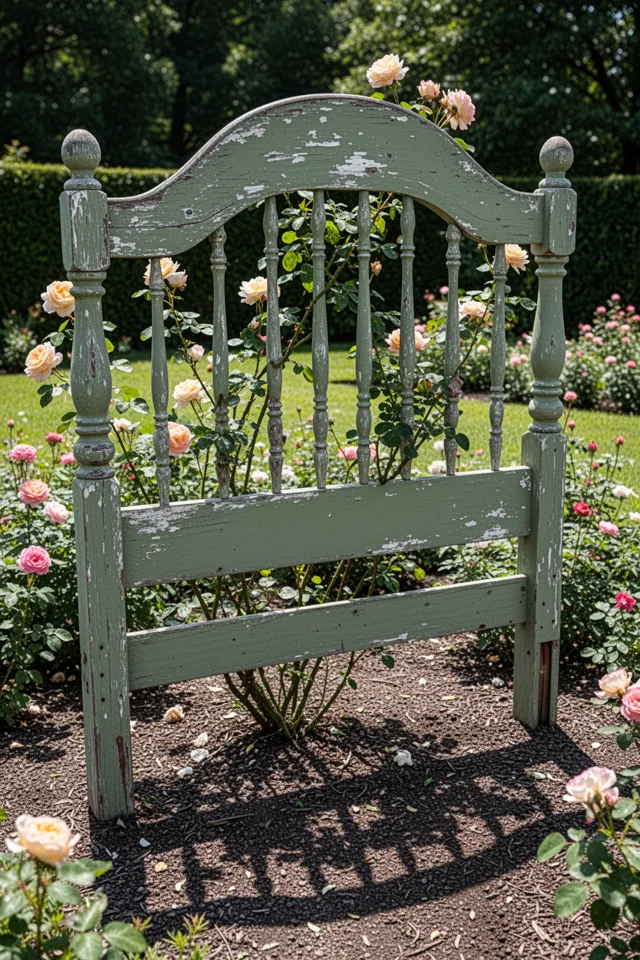
This is the most whimsical idea on the list, but it works if you choose the right headboard. Avoid anything too ornate or too small. A standard queen headboard is about 60 inches wide and 48 inches tall—perfect for a statement piece in a perennial border. I found mine at a thrift store for $25. It was solid pine, so I had to treat it with a wood hardener before painting.
The practical concerns: headboards are not designed to be outdoors. Use a high-quality exterior primer and paint. Seal all joints with waterproof caulk. And because the headboard is wider than it is tall, it can act like a sail in the wind. Sink the legs at least 12 inches into the ground, or bolt it to a sturdy stake. Also, check for old finishes that might contain lead—especially if you find a vintage piece. Sanding old paint is not worth the risk; just paint over it with a bonding primer.
Turned spindles are a nightmare to paint evenly. Use spray paint instead of a brush for the tight curves.
So here we are. Eighteen ideas, each with its own character and its own compromises. The core decision you need to make is not which one looks best on Pinterest—it is which one fits the way you actually live with your garden. Do you want something that disappears and lets the plant speak? That is the monofilament grid or the tension cables. Do you want a structural statement that looks like art? The corten ribbon or the floating dowel wall. Do you want a weekend project that costs less than a dinner out? The rebar spiral or the salvaged window.
If I had to pick one to recommend for most people in most spaces, it would be the framed wire grid from the start. It is simple, it ages beautifully, it works with almost any plant, and it costs under $50. You can scale it up or down by adjusting the frame size. It is the little black dress of garden trellises. Build one, take a photo of it in the afternoon light, and you will understand why I keep coming back to this design season after season.
You do not need an expensive garden. You need decisions that look like they were made with care, not with a budget spreadsheet and a deadline. Pick one of these, commit to the build, and let the weather do the rest. The plants will thank you, and so will your visitors who will never guess you made it yourself.

