
I know the exact moment you give up on float storage. It’s the third time you’ve dragged a wet, half-deflated raft out of a bin that now smells like a swamp, and you’re trying to untangle a noodle from a lounger while mosquitoes circle. The backyard looks like a pool toy exploded. You tell yourself next year you’ll be organized. Next year never comes.
The standard advice—buy a deck box, throw everything in a mesh bag—fails because it ignores how floats actually live in your yard. They’re damp. They’re slippery. They attract dirt and fade fast in direct sun. A bin traps moisture; a bag collapses. What you need isn’t more storage—it’s smarter separation, air circulation, and a system that doesn’t require rethinking every time you buy a new unicorn raft.
This list doesn’t recycle the same five ideas you’ve seen on Pinterest. I’ve tried—and failed with—most of these myself. What follows are fifteen specific, sometimes stubborn solutions that have survived actual summers: the ones that didn’t sag, warp, or make me curse under my breath. Some cost money. Some cost effort. All of them keep your floats from taking over your life.
1. The Float Wall (Horizontal Rack with Adjustable Arms)
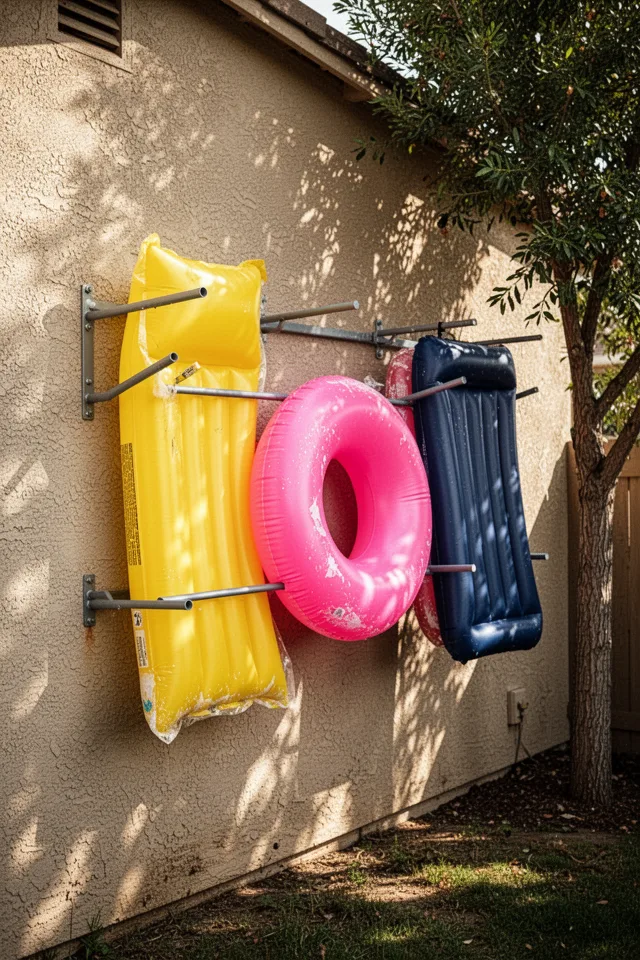
The first solution I ever built for my own yard was a horizontal wall rack made from adjustable aluminum shelf brackets and heavy-duty hooks. The idea is simple: mount two parallel rails, then slide arms that cradle each float like a hammock. You can space them to fit anything from a toddler ring to a six-foot lounger. The key is leaving at least four inches between each level so air moves freely and water doesn’t pool.
Here’s what nobody tells you: the brackets need to be rated for at least fifty pounds each. I used cheap ones from a big-box store the first time, and they sagged within a month under the weight of two wet floats. Replace with stainless steel or powder-coated aluminum—the powder coat will chip eventually on corners, but it takes years. Also, direct sun fades any float left out, so position this rack under an eave or in a spot that gets afternoon shade.
The trade‑off is wall space. If your yard is tiny, this eats a four‑by‑six‑foot patch. But for the visual relief of seeing every float separated and dry, it’s worth it. I’d do it again in a heartbeat.
Pro tip: use rubberized caps on the arm ends so the vinyl doesn’t rub thin. A set of caps is under $10 and doubles the lifespan of any float.
2. Old Wine Crate Turned Vertical Noodle Rack
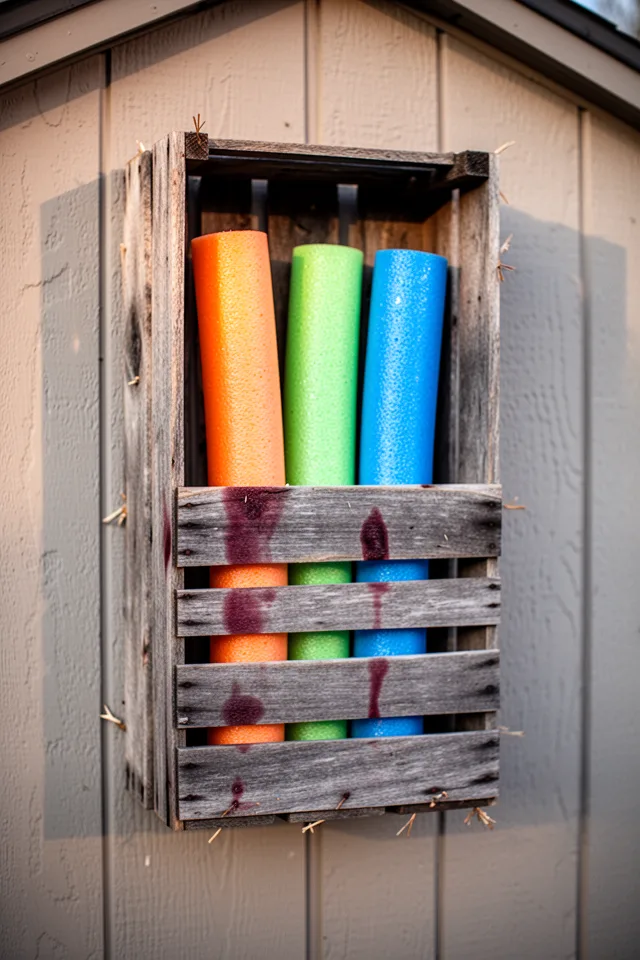
Pool noodles are the worst. They roll. They tangle. They’re never where you need them. For years I shoved them into a garbage can with the rest of the floats, only to spend ten minutes each swim session pulling them out like a game of pick‑up sticks. Then I grabbed an old wooden wine crate from a garage sale for three dollars and screwed it to the side of my garden shed. Vertical slots hold three noodles perfectly, and the open front lets them dry fast.
One caveat: the wood will warp if it stays wet. I painted mine with exterior marine varnish, and it still developed a slight curve after two rainy seasons. But it still works. The crate also collects dust and leaves if you leave it open, so I cut a piece of clear vinyl to drape over the front—keeps debris out, lets sunlight through. Total cost: under $30.
Don’t use a crate that had sugar or flour—it attracts bugs. Wine crates are safer because the wood is usually older and harder.
3. Mesh Shoe Organizer Over the Fence
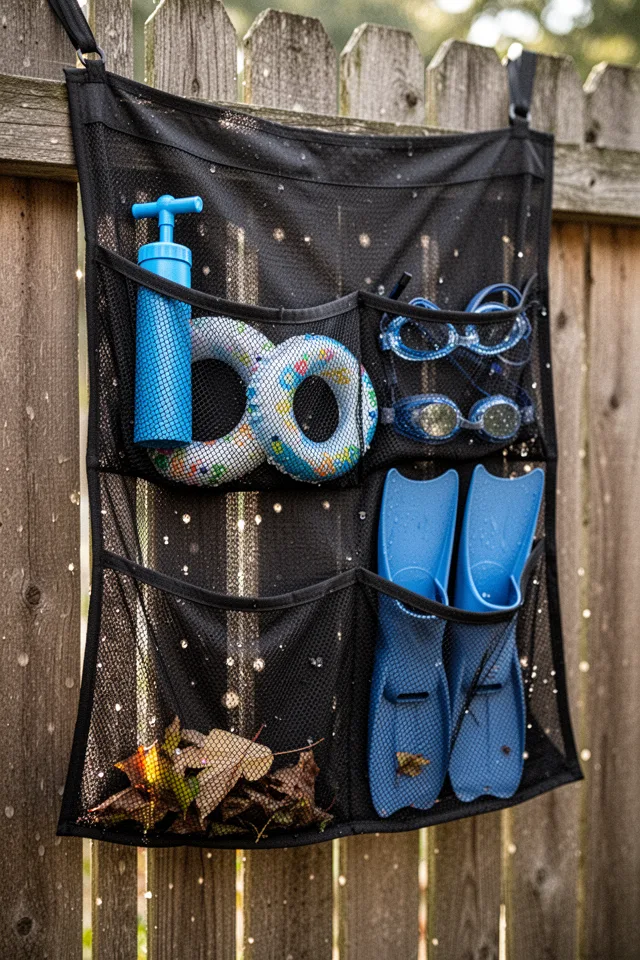
This one feels almost too obvious, but I’ve never seen it recommended for floats specifically. A heavy-duty mesh shoe organizer (the kind with reinforced grommets) hooks over a fence and gives you immediate pocket storage for smaller items: hand pumps, inflatable rings, fins, goggles, and those tiny floats you always lose. I hung mine on the inside of a six‑foot privacy fence, and it holds ten items without sagging—provided you buy one with stitched seams, not heat‑welded.
The problem: humidity. Mesh breathes, but if you live in a wet climate, anything left in a pocket for more than a week will grow mildew on the fabric. Solution: only store dry items here, or take the organizer inside every few weeks for a rinse. Also, heavy floats (think five‑pound heavy) will stretch the mesh over time. Use the top pockets for light things, bottom for heavier. Cost: $15 to $25, and it works best on a solid fence, not chain link.
Spray the mesh with a waterproofing fabric spray once a year. It repels water and stops the color from bleaching.
4. Modular DIY PVC Pipe Rack
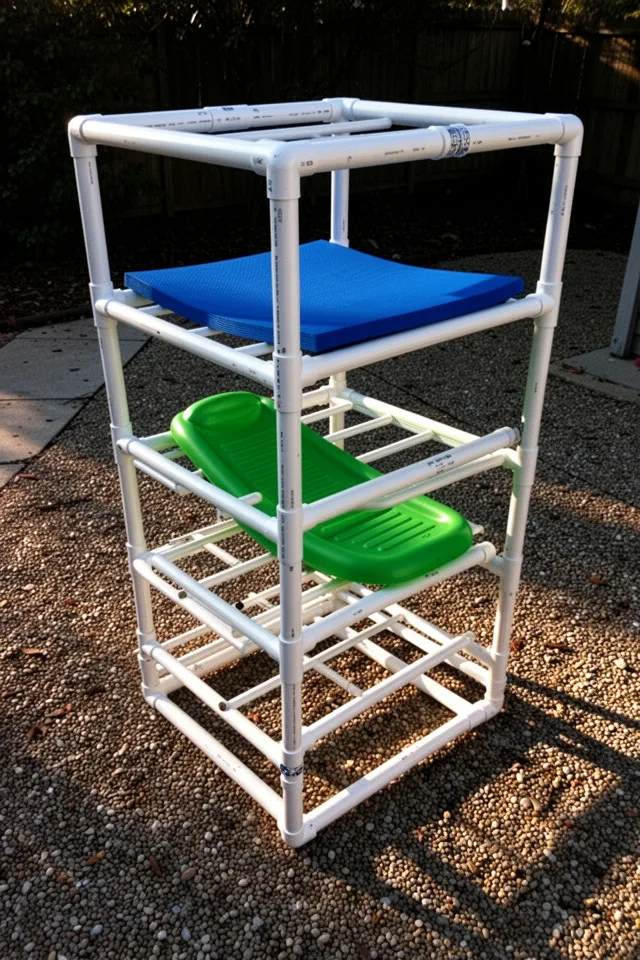
PVC is polarizing. I get it—it looks like plumbing. But for modular, adjustable float storage that won’t rot or rust, it’s hard to beat. You can buy schedule 40 pipe and connectors, cut them to length, and assemble a custom rack that fits your exact space. I built a four‑tier unit that sits on my gravel patio, each level spaced eight inches apart. The floats slide in horizontally, and the open design lets air circulate.
The trade‑off is aesthetic and durability. Over time, PVC will yellow and become brittle, especially in full sun. I painted mine with a UV‑resistant spray paint made for plastics—two coats held up for two seasons before needing a touch‑up. Also, the joints can loosen if the rack gets bumped. I used PVC cement on the bottom frame but left the top tiers unglued so I could reconfigure them. It’s a weekend project, and the whole thing costs $40 to $60.
Use 1‑1/4 inch pipe for small floats and 1‑1/2 inch for heavy loungers. Any smaller and the pipe flexes under wet vinyl.
5. Under‑Deck Pulley System for Large Matresses
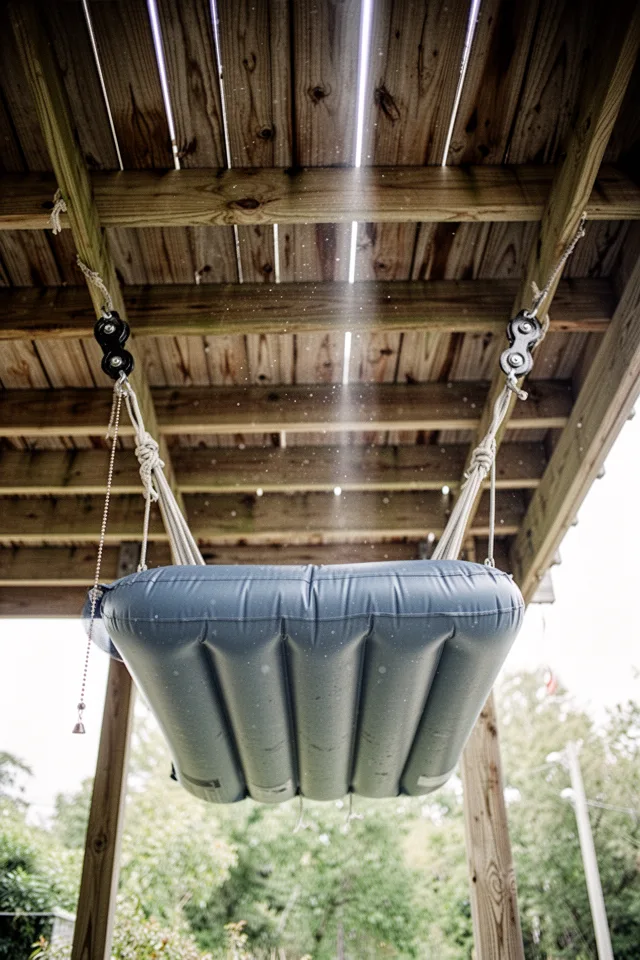
Large inflatable mattresses are the worst offenders—they take up an entire corner of a garage when deflated and still manage to cling to moisture. The best solution I’ve found uses the space under a deck or porch. Install two heavy‑duty pulley systems on the joists, attach a lightweight cargo net or nylon straps, and hoist the mattress up flat against the underside. It stays out of direct sun, dries completely because air flows from both sides, and you don’t trip over it.
This is a $50 to $100 project, depending on pulleys and rope quality. Use stainless steel pulleys—the zinc ones rust in a year. The rope should be marine‑grade polypropylene; it resists mildew and doesn’t stretch. The main drawback: you need a deck or overhang with open joists, and you need to be comfortable drilling into them. Also, the mattress will gather dust over winter, so give it a wipe before first use each summer.
Add a small bungee cord on each corner to keep the mattress flat. Without it, the edges curl up and water pools in the center.
6. Cargo Net Stretched Between Two Posts
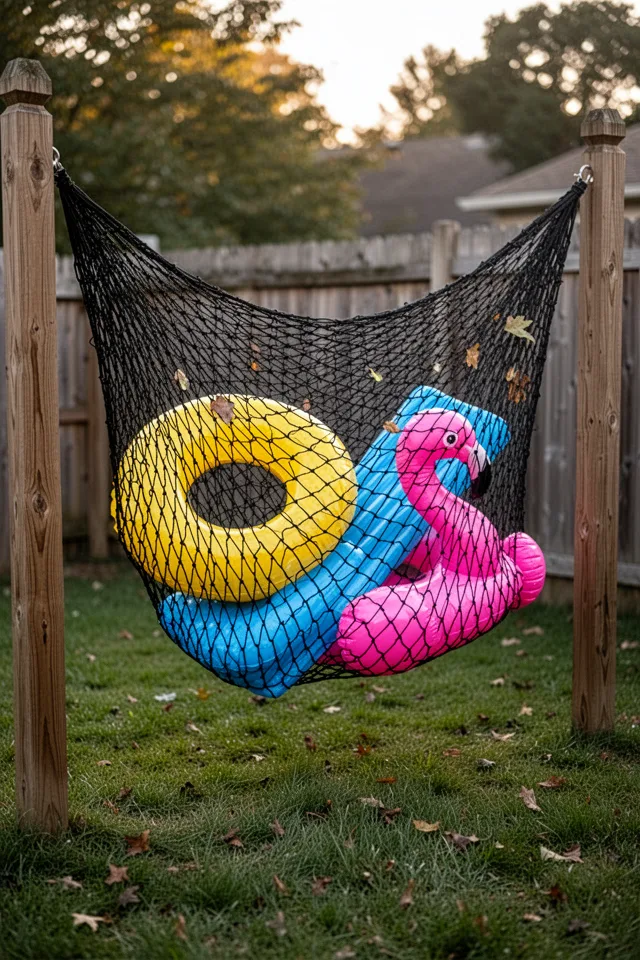
I’ve seen cargo nets used for beach gear, but never for float storage. The idea is simple: strap a heavy‑duty polypropylene cargo net between two posts, a tree, or even the side of a shed. Then you just toss the floats into the net. They settle into the pockets, air moves through, and you can grab one without lifting anything else. It’s the lazy person’s storage—and I mean that as a compliment.
The catch: the net will sag unless you tension it properly. I used turnbuckles at each corner to keep it tight, and it still dips a little after a season. Also, smaller floats can slip through if the mesh is too large. I bought a net with 2‑inch squares, and a child‑size ring fell out twice. Go with 1‑inch mesh. Cost is around $30 for the net plus hardware. The look is casual—almost beachy—so it fits a relaxed yard. Not great for formal gardens.
Use stainless steel carabiners to attach the net to the posts. Regular clips rust within weeks.
7. Old Pallet Turned Leaning Rack
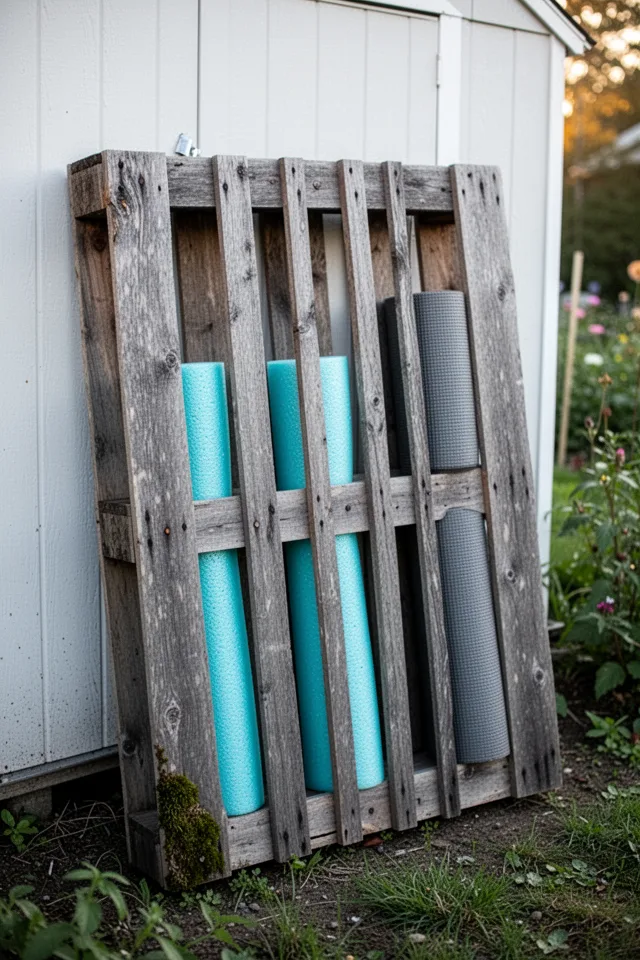
If you get a pallet for free, this is the cheapest option on the list. But I’m not talking about just leaning a pallet against a wall and shoving floats behind it—that falls over. Instead, remove every other slat from the pallet, then cut the remaining slats to create vertical dividers. The result is a leaning rack with narrow channels that hold noodles, rolled mats, and deflated compact floats upright. I built one in an afternoon, and it cost me nothing but a few screws.
The downsides: splinters. Pallet wood is rough. Sand it thoroughly and apply a coat of outdoor sealant—otherwise you’ll get splinters every time you grab a float. Also, pallets can harbor chemicals (if they were used for industrial transport), so source from a garden center or hardware store, not a loading dock. The rack needs to lean against something solid—a fence or wall—and it takes up about a foot of ground depth. But for zero dollars, it works.
Add a small piece of plywood to the bottom of the pallet to keep floats from falling out the bottom. I glued a scrap piece; it’s still holding after two years.
8. Garden Shed Wall with Tension Rods and Hooks
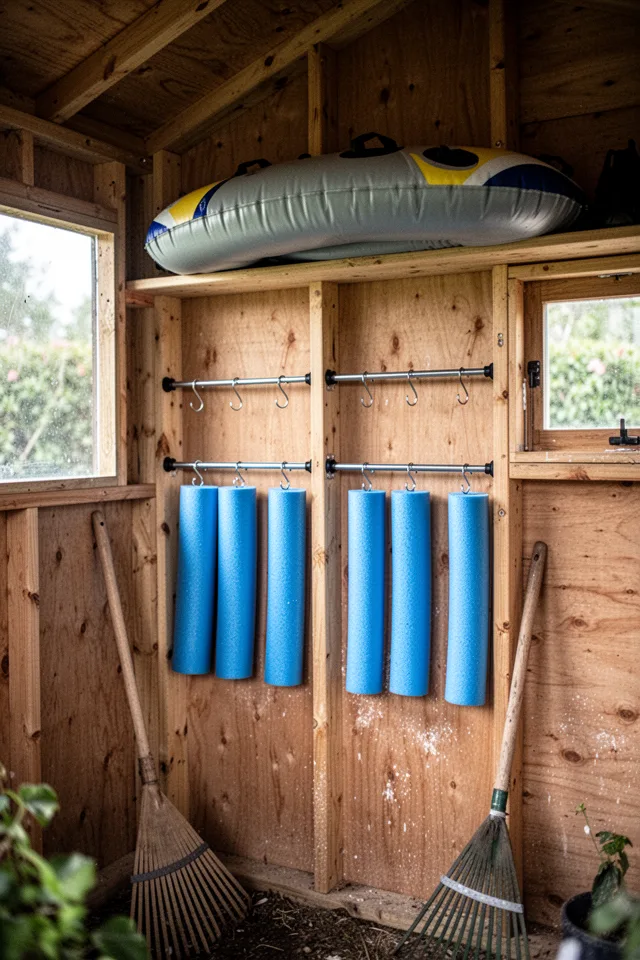
Most people forget that the inside of a garden shed is vertical space begging to be used. I installed two heavy‑duty tension rods (meant for closets) between the studs on my shed wall, then hung S‑hooks. Now I loop noodles over the rods, hang rolled up mats on hooks, and keep the shed floor clear. The rods are adjustable, so they fit different stud widths. Cost: under $20 for rods and hooks.
The limitation: tension rods rely on pressure against the studs—they can slip if weighted unevenly. I only load one side at a time, and I check them every spring. Also, sheds often have less than ideal wall depth. If your shed is tiny, this might block access to other items. But for a standard 6×8 shed, it’s a game changer. The floats stay dry and out of the sun, which extends their life significantly.
Use rubber‑coated S‑hooks so they don’t scratch the vinyl. Bare metal will rub through the float material in a season.
9. Repurposed Coat Rack with Multiple Arms
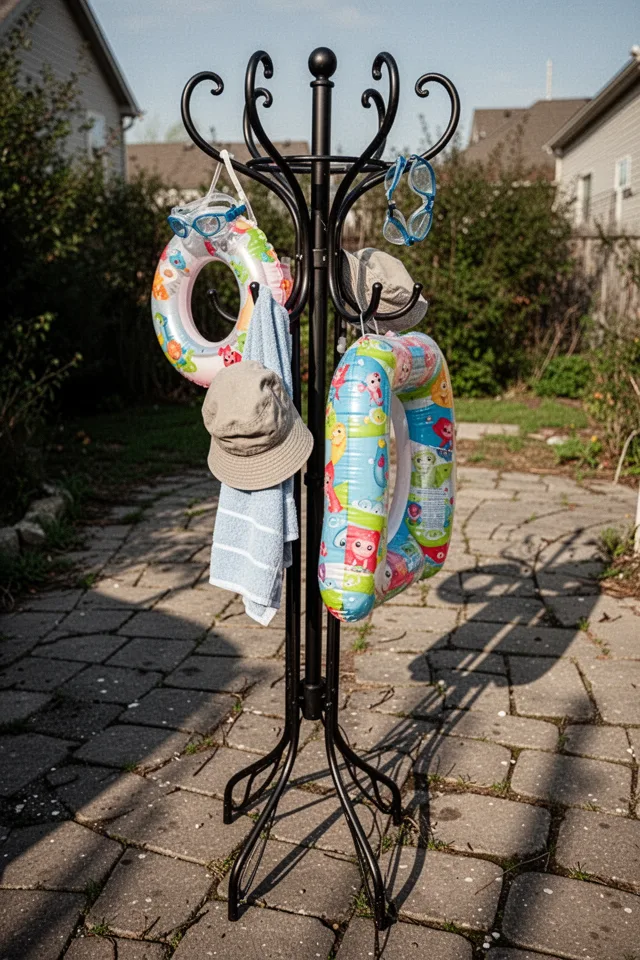
I bought a second‑hand coat rack from a thrift store for $12, expecting it to end up in a closet. Instead, it became my most used float storage. The arms are wide enough to hold a deflated ring or a small raft, and the weight works for lightweight items. I keep it by the back door, and guests can hang their wet towels and floats on it as they come inside. It’s also portable—I move it into the garage during winter.
The reality: a coat rack is not stable in wind. A gust knocked mine over twice, sending a float into the bushes. I added a heavy base—a concrete stepping stone drilled to the bottom—and now it stays put. Also, the arms are usually too short for large loungers. But for everyday floats and accessories, it’s elegant and cheap. Don’t buy a cheap plastic rack; metal or solid wood will hold up to weather.
Spray the metal with a clear exterior enamel once a year to prevent rust. The wrought iron on mine started spotting in the second summer.
10. Inflatable Float Hammock (Mesh Bag as Storage)
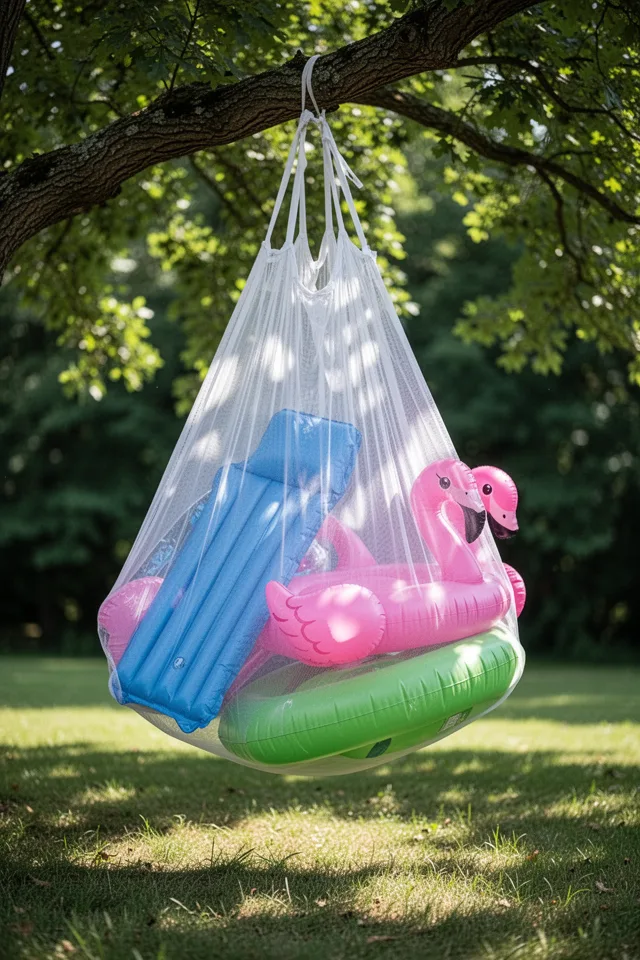
This one came from frustration: I needed a way to store deflated floats quickly without folding them. I bought a large mesh laundry bag—the kind that holds a week’s worth of towels—and hung it from a branch with a rope. Now I stuff deflated rafts and mats into the bag. They don’t need to be folded perfectly; the mesh lets air in and water drip out. It’s a zero‑fuss system that takes seconds to use.
The catch: the bag will eventually degrade in sunlight. The UV breaks down nylon mesh in one to two seasons. I buy two at a time—they’re cheap, about $10 each. Also, the bag sags under heavy loads. I reinforced the bottom with a piece of plastic canvas, but a heavy wet mattress can still yank the hanger down. Best for medium‑sized floats only. And don’t leave it out in rain; the bag holds water like a sponge.
Use a carabiner to attach the bag to the rope—makes it easy to take down for washing. I machine‑wash mine on cold with a cup of vinegar to kill mildew.
11. Old Ladder Leaning Against the Fence
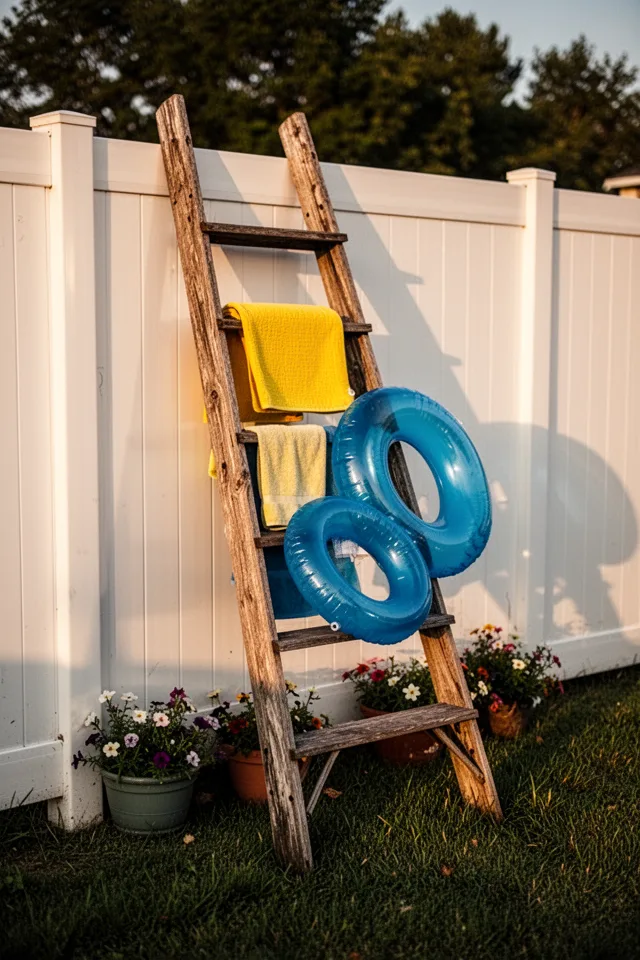
This is the easiest idea on the list, and it’s also the most visually charming. An old wooden ladder—the kind from a flea market or your grandparent’s attic—leans against a fence or wall, and you simply drape your wet floats over the rungs. The gaps between rungs allow air to circulate, and the ladder looks like intentional decor. I found a beat‑up pine ladder for $5 at a garage sale, sanded it lightly, and leaned it beside the pool.
The downsides: large floats don’t stay put—they slide off or droop over two rungs. And if the ladder isn’t stable, a strong gust will send it flat. I drilled two small holes in the bottom rung and hammered in landscape stakes to anchor it. Also, wood will rot if it stays damp. I applied a coat of teak oil every spring, and it’s lasted four years now. Cost: under $20 if you thrift it.
Don’t lean the ladder directly against a vinyl fence—the rungs can leave pressure marks. Use a piece of foam between the ladder and the fence.
12. Wall‑Mounted Broom Holder for Noodle Floats
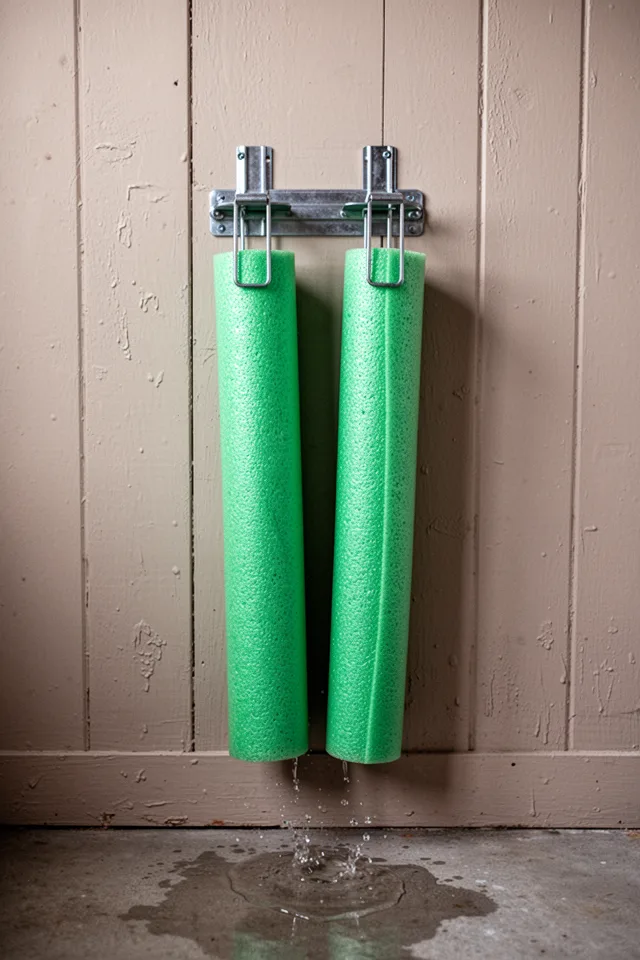
If you only have noodle floats and nothing else, this is the most efficient solution. A garage broom holder—two spring‑loaded metal clips mounted to the wall—costs about $8. You just clamp the noodles in place, and they hang vertically like brooms. I installed one on the side of my wooden deck near the pool steps, and now the noodles are always within arm’s reach, never on the ground collecting dirt.
The limitation is obvious: it only works for noodles and similar cylindrical floats. Also, the clips can rust if they’re not stainless steel. I bought a set labeled “indoor/outdoor” and they started showing orange spots after one winter. Replace with marine‑grade clips if you can find them. The noodles themselves will compress slightly where the clip grips, but foam bounces back. Total cost under $15.
Mount the holder at least 18 inches off the ground so the noodles don’t drag in puddles or muddy grass.
13. Recycled Plastic Lattice Panel as a Float Grid
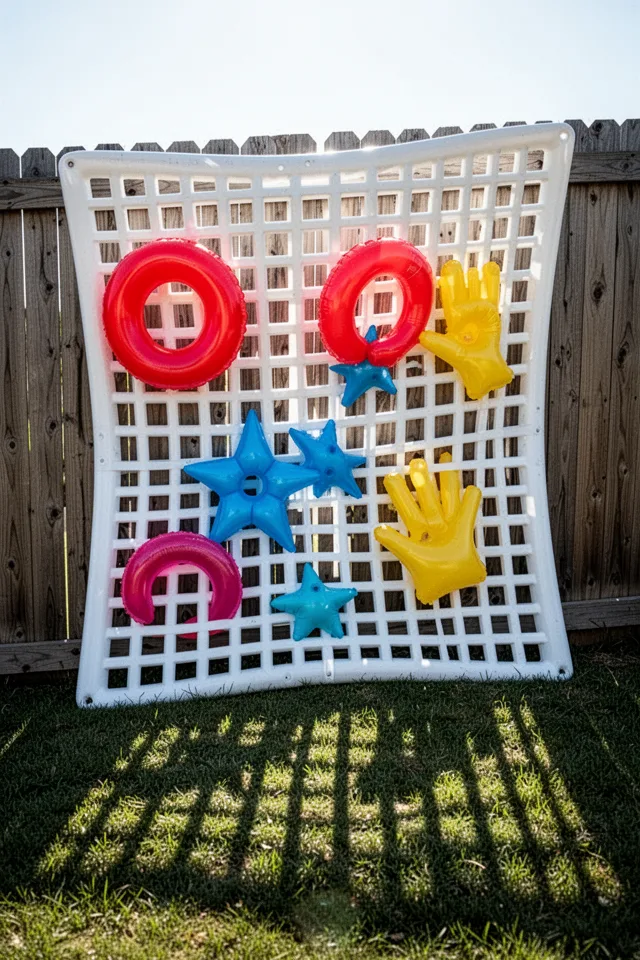
This is one of those ideas that looks absurd until you try it. I had a leftover piece of plastic lattice from a garden project. I screwed it to the side of my fence, and then I started tucking small floats—rings, hand buoys, kickboards—into the squares. They stay put, they dry fast, and they look almost like a playful mosaic. It’s especially good for families with many small floats that otherwise vanish into bins.
The reality: plastic lattice isn’t structural. It bends under the weight of more than a few floats. I reinforced mine with a wooden frame behind it, but even then, it flexes. Also, the edges of the lattice can be sharp—I wore gloves while installing. And it collects debris: leaves and grass get stuck in the squares. But for $20 for a half‑panel and an afternoon, it’s a weirdly effective system that also looks like modern yard art.
Spray the lattice with a garden hose once a week to clear out debris. The water pressure pushes everything through.
14. Cedar Planter Box with Slatted Lid (Hidden Storage)
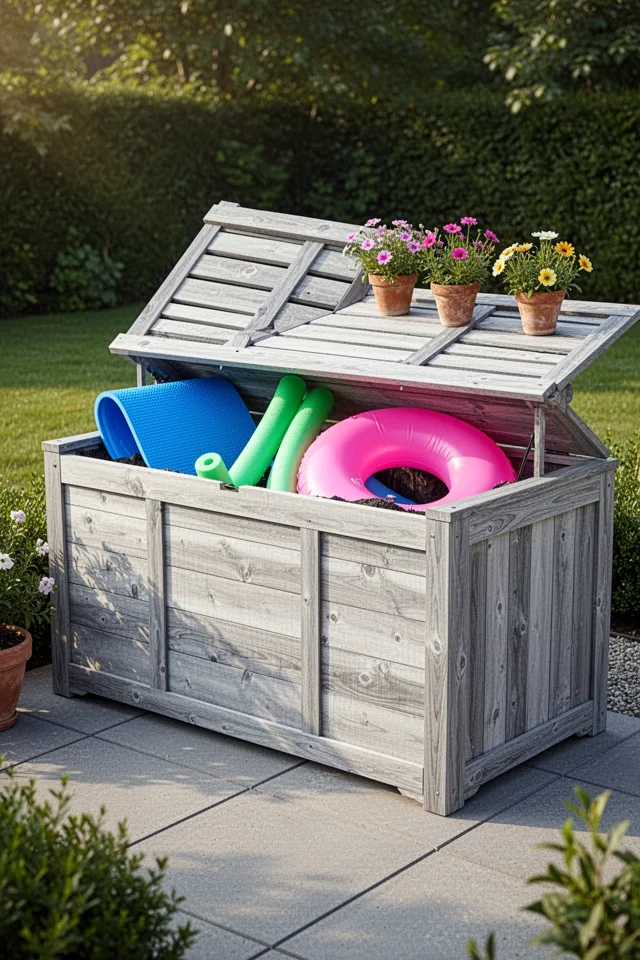
Sometimes you don’t want to see the floats at all. This is the storage that pretends to be landscaping. I built a cedar planter box with a hinged, slatted lid that doubles as a seat. Inside, I keep the main float collection—mats, noodles, deflated rings. The slats let air circulate so nothing molds. The exterior cedar weathers to a beautiful silver that blends with any yard. Cost: about $120 if you buy a pre‑built kit, or $80 if you DIY using cedar fence boards.
The catch: it’s heavy. Once filled with floats, you don’t move it. Plan the location carefully. Also, the lid needs to be flush to keep rain out—I added a rubber gasket around the rim, and it still gets a little damp inside during heavy storms. Not ideal for storing fully wet floats, but perfect for dry ones between swims. And it adds a seating area, which is a bonus you don’t get from a bin.
Add a small bag of silica gel or a moisture‑absorbing packet inside. It stops the musty smell that develops in sealed wooden boxes.
15. Retractable Clothesline for Hanging Wet Floats
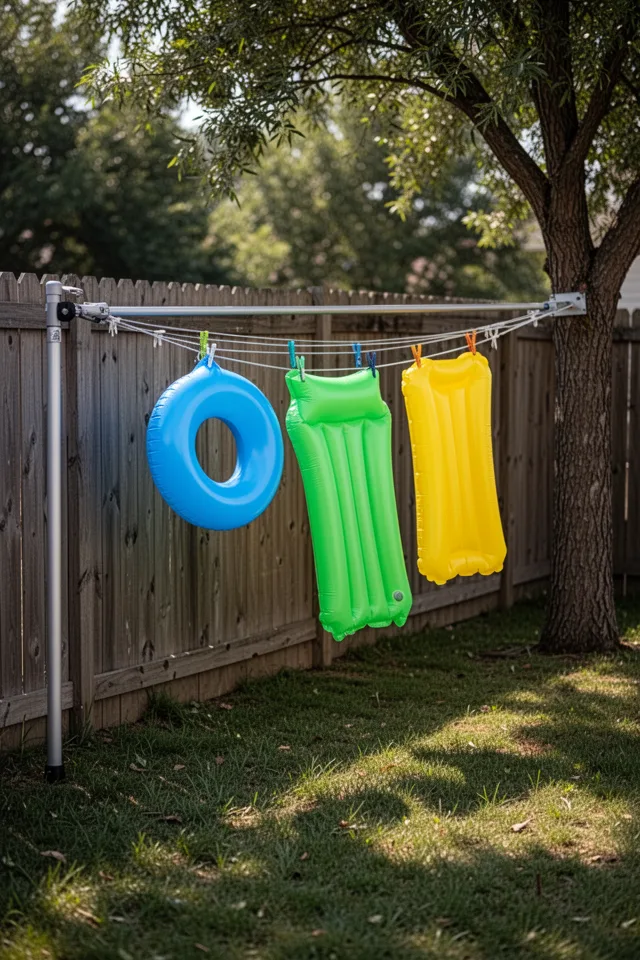
This is the last idea because it’s the simplest, but it solves the biggest problem: wet floats that never dry. A retractable clothesline stretched across a shady part of the yard lets you clip floats up with plastic clothespins or binder clips. They dry in an hour, and then you can take them down and store them properly. I leave mine up all summer and use it for towels and bathing suits too.
The downsides: the line can sag if you use it for heavy wet mattresses. I bought a heavy‑duty retractable line that holds 30 pounds, and it still dips. Also, you need two anchor points—a fence, tree, or post. And if you leave floats on it overnight, morning dew will re‑wet them. But for a daytime drying station, it’s unbeatable. Cost: around $25 to $40. The line retracts into the housing when not in use, so it doesn’t clutter the yard.
Use oversize binder clips instead of clothespins. They hold better and won’t snap in the wind. I buy a box of 24 for $6.
Conclusion
After cycling through most of these solutions in my own yard, I’ve learned one thing: the best float storage is the one you’ll actually use every single day. A perfect system you have to think too hard about will fail by July. The wall‑mounted rack and the under‑deck pulley are the two I’d keep if forced to choose—they’re visible, they work, and they don’t require digging through a pile.
For most people, I recommend starting with the ladder or the retractable clothesline. They cost almost nothing, take five minutes to set up, and immediately solve the wet‑float‑everywhere problem. Once you have that basic rhythm, you can layer in something like the cedar planter box or the shed hooks for dry storage. Don’t buy a deck bin. They trap moisture, and you’ll regret it by August.
Floats are supposed to be fun. The storage should be invisible or easy. Pick one idea from this list, build it this weekend, and see how different your backyard feels when you don’t have to sidestep a puddle of melted unicorn.

