
There’s something about giving kids permission to get gloriously, unapologetically messy that feels like a tiny act of rebellion against modern parenting. Mud kitchens are exactly that kind of magic, a corner of the garden where imagination runs the show and the dishwasher doesn’t exist. And the best part? You can build one out of pallets that someone else was about to toss.
I’ve spent more weekends than I’d like to admit hunting down free pallets behind hardware stores, sanding splinters out of my palms, and arguing with my partner about whether the stove should be on the left or the right. So this isn’t a Pinterest fantasy list. These are real, doable ideas with the trade-offs and quirks I’ve actually run into. Whether you’ve got a sprawling lawn or a scrappy patio corner, there’s a version here that’ll suit your space, your skill level, and your kid’s wildest culinary ambitions.
1. The Classic Single-Pallet Setup
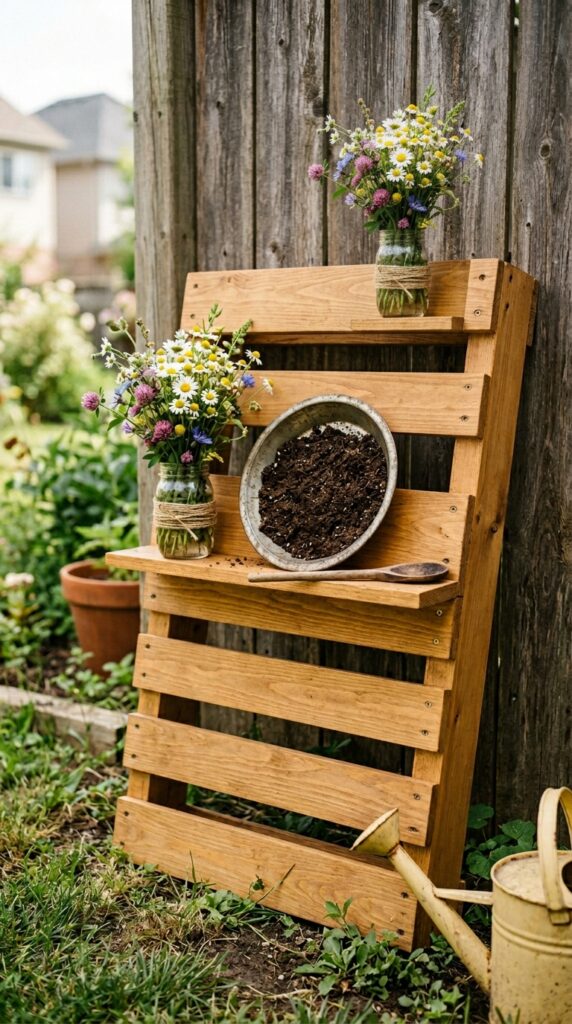
If you’ve never built anything in your life, start here. The single-pallet mud kitchen is the gateway drug to backyard DIY, and honestly, it’s all most toddlers actually need. Lean one upright pallet against a sturdy fence, screw a plank across the middle for a counter, and call it done.
A few things I’d actually recommend: sand every edge twice (splinters ruin afternoons), use exterior wood stain rather than paint if you want it to age gracefully, and add two L-brackets at the base so it doesn’t tip when an enthusiastic four-year-old leans hard. One watch-out: don’t skip anchoring it to the fence or a stake. I learned that the hard way during a windy Tuesday. The takeaway here is simple, low effort, high payoff, and you can build it in an afternoon with a screwdriver and a bit of patience.
2. The Double-Pallet L-Shape
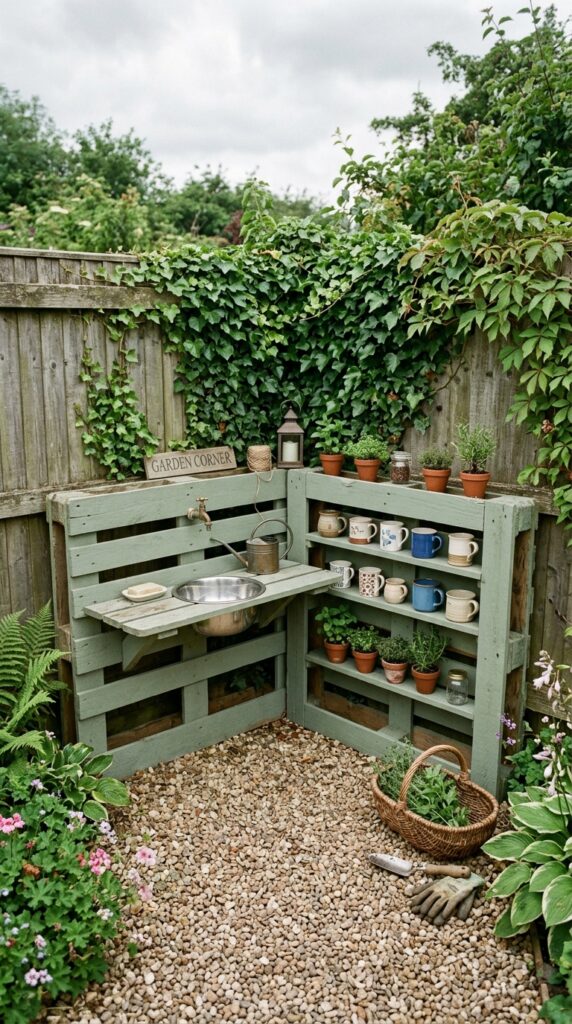
The L-shape is where things start feeling like a proper kitchen. Two pallets joined at the corner give you a prep zone and a wash zone, and suddenly your kid is hosting imaginary dinner parties for the squirrels.
Here’s the trick: cut a circular hole in one of the pallet tops to drop a stainless mixing bowl into. That’s your sink. It pops out for cleaning, which matters more than you’d think after a few weeks of mud soup. I’d also suggest staining or painting the wood with something water-resistant, because rain will warp untreated pallets within a season. Skip this layout if your garden corner gets full afternoon sun without shade, the wood will fade fast and the metal bowl will get hot enough to surprise small hands. Otherwise, this is the sweet spot between effort and theatrical play value.
3. Painted Pastel Dream Kitchen
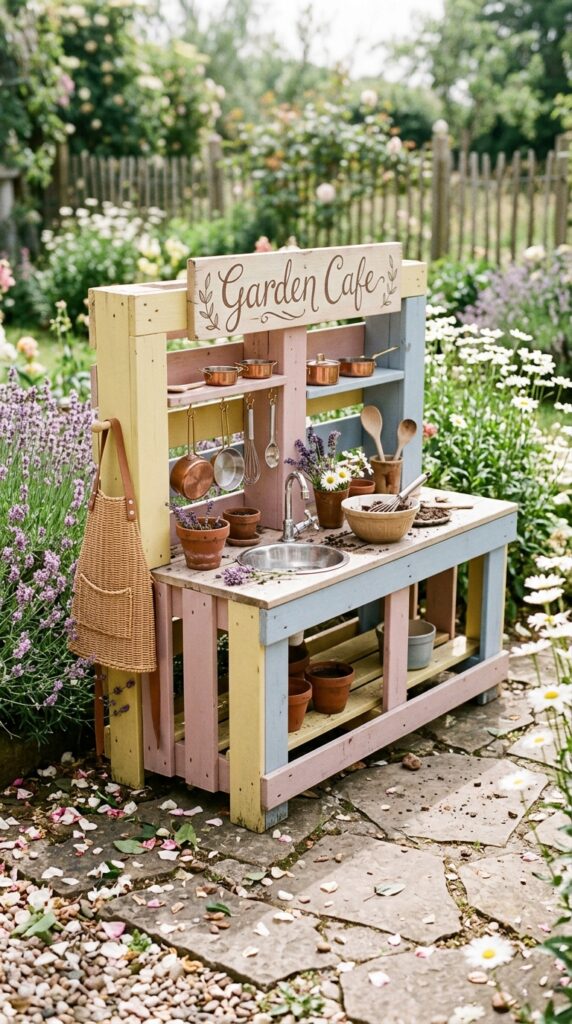
I have opinions about painted mud kitchens, and they’re mostly positive. A pastel palette transforms scrappy pallets into something that feels intentional rather than improvised, and pastels age better than primary colors, which start looking grimy after one rainy season.
Stick to two or three shades max. Buttery yellow with dusty pink is gorgeous. Powder blue with cream is calming. Avoid anything too saturated unless you love repainting. Use exterior chalk-based paint with a clear sealer on top, it gives that matte, slightly powdery finish that looks expensive even though it costs about fifteen dollars. One constraint: pastels show dirt fast. If your kid is the kind who treats mud as both medium and meal, this might frustrate you. But for slightly older kids who play more gently, it’s pure visual joy.
4. Industrial Black and Brass Look
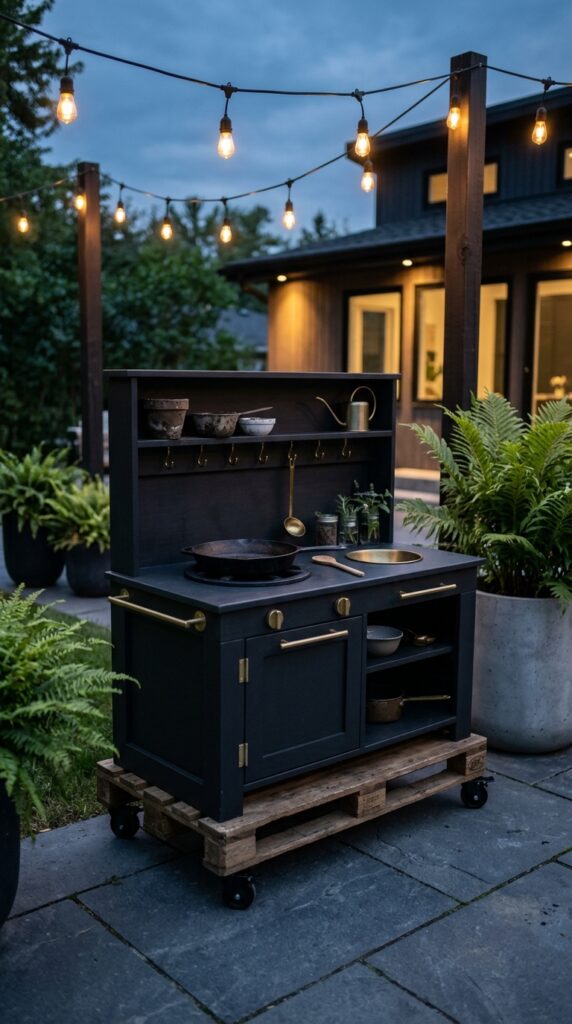
If your backyard leans modern and you’ve been resisting a mud kitchen because you don’t want a primary-colored eyesore, this one’s for you. Matte black pallets with brass fixtures look like something out of a stylish cafe, but it’s still a mud kitchen.
Use chalkboard paint on a center panel so kids can scribble menus. Add brass cup hooks (under five dollars at any hardware store) for utensils. Mount the whole thing on small caster wheels so you can roll it into the shed in winter. The watch-out here is heat absorption, black paint gets seriously hot in direct sun, so position this in partial shade or your kid will get a surprise. The payoff is a mud kitchen that doesn’t clash with your design sensibilities, which honestly matters for the parents using the space too.
5. Tiny Apartment Balcony Version
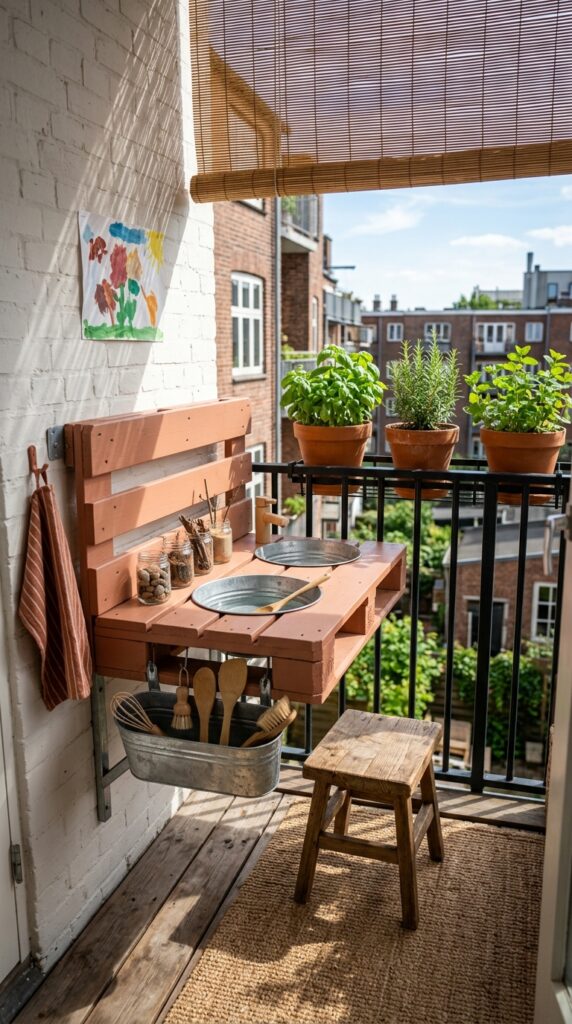
Tiny outdoor space? You can still pull this off. Mount half a pallet directly to a sturdy balcony wall, add a small lip, and you’ve got a wall-hung mud kitchen that takes up basically no floor space.
Use a zinc planter or metal bucket suspended below as storage, it doubles as a catch for soil that falls during play, which keeps your balcony floor cleaner. Stick to one or two pots of herbs nearby (basil and mint are kid-friendly to touch and smell). Renter-friendly tip: use heavy-duty removable wall anchors rated for outdoor use, so you can take it all down without damaging the wall. The constraint is obvious, you’ve got limited room, so don’t overload it with accessories. Keep it minimal and rotate the toys weekly to keep it interesting. Small space, big play value.
6. The Forest Cottage Theme
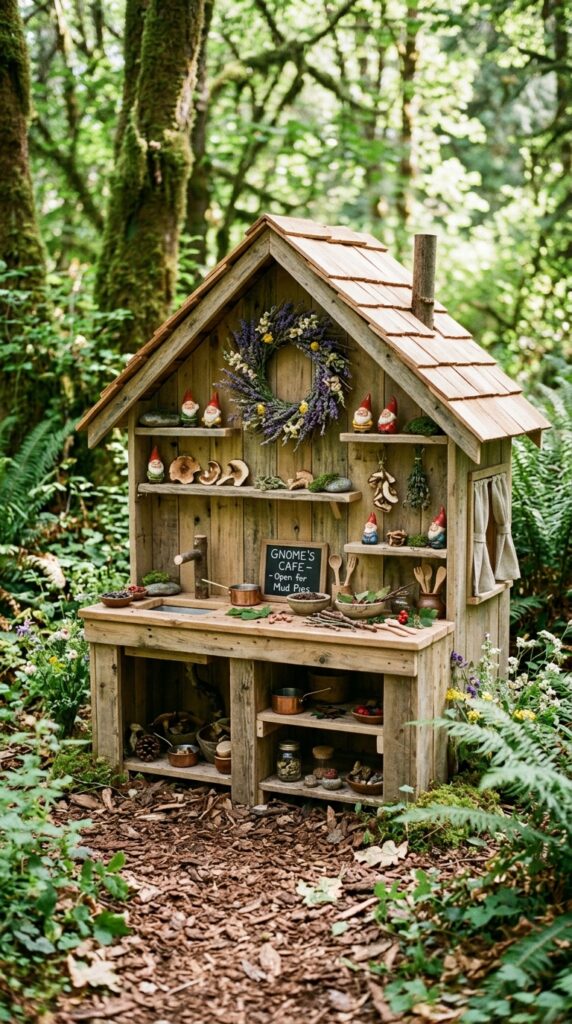
This is where I get genuinely sentimental. A forest-themed mud kitchen with a small pitched roof, raw cedar shingles, and earthy accents transforms backyard play into something that feels almost ceremonial. Kids love the storytelling element.
Keep all the wood in natural tones, no paint. Add a tiny shingled roof using cedar shakes (they cost more but weather beautifully). Stock the shelves with things from actual nature, smooth river stones, pinecones, dried flowers, fallen acorn caps used as tiny bowls. The watch-out is maintenance, raw wood needs annual sealing or it grays and softens. If you live somewhere humid, expect more upkeep. But if you’ve got the patience, this is the kind of mud kitchen kids remember as adults. The takeaway: lean into the natural materials, don’t fight them.
7. Beach and Coastal Vibes
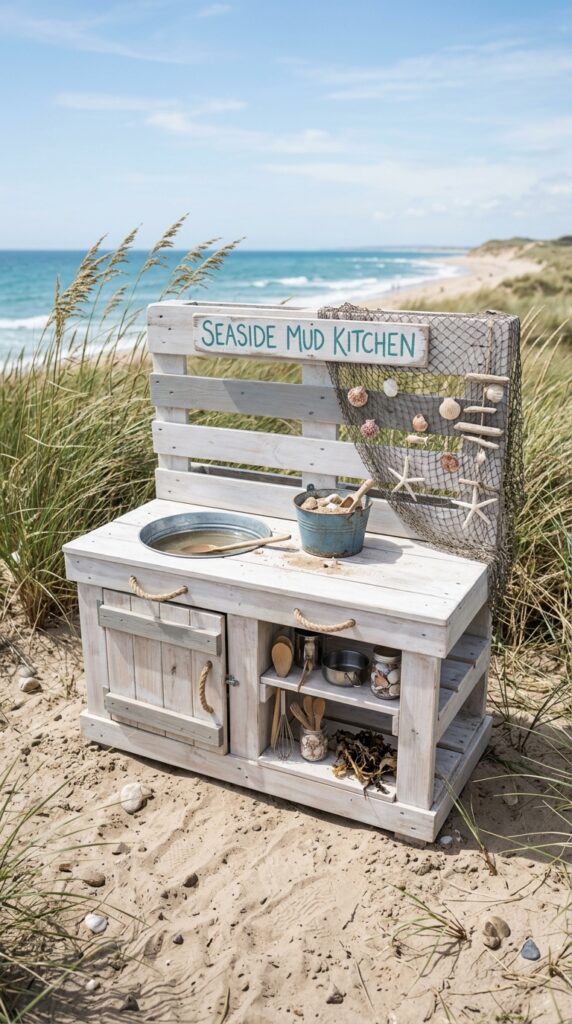
Coastal mud kitchens trade soil for sand, which is genuinely cleaner if you’re picky about what your kids track inside. Whitewashed pallets, rope details, and a galvanized basin give you that effortless beach-house energy without trying too hard.
The trick to a good whitewash is diluting white paint with water roughly 50/50, brushing it on, then wiping it back with a rag while wet. You get that streaky, sun-bleached driftwood look. Add jute rope as drawer pulls or hooks, and use real shells your kids collected, it’s more meaningful than buying a bag from a craft store. One watch-out: sand gets everywhere, including places you didn’t know existed. If you’re not okay with sweeping the patio constantly, stick with mud. Otherwise, this aesthetic is breezy, cheerful, and surprisingly low-maintenance.
8. Multi-Station Cooking Zone
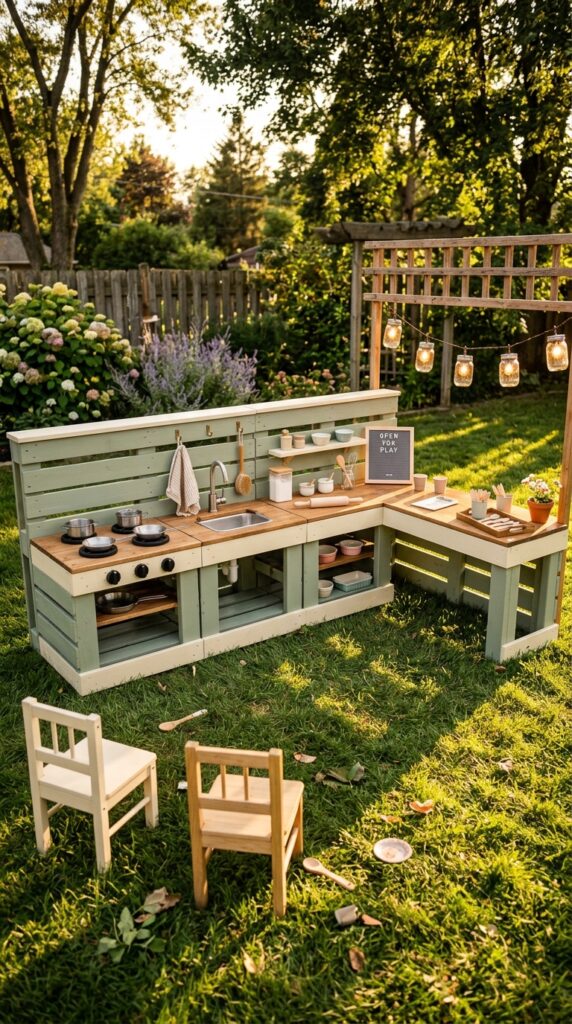
If you’ve got the space and more than one kid, the multi-station setup is worth the extra weekend. Four pallets in a U-shape gives every kid their own zone, which cuts down on the inevitable “I had it first” arguments by about 80 percent.
Designate each station clearly: stovetop, sink, prep, and serving. Paint them slightly differently if that helps visually anchor each zone, but keep the overall palette consistent or it’ll look chaotic. Add a real working pump faucet (battery-operated, around twenty dollars online) for the sink, kids absolutely lose their minds over it. The constraint is space, this needs at least a 6 by 6 foot footprint, and it’s not easily moved once built. Skip this if you rent or move often. But for a forever yard, it’s a centerpiece that grows with your kids.
9. Repurposed Hardware and Salvage Style
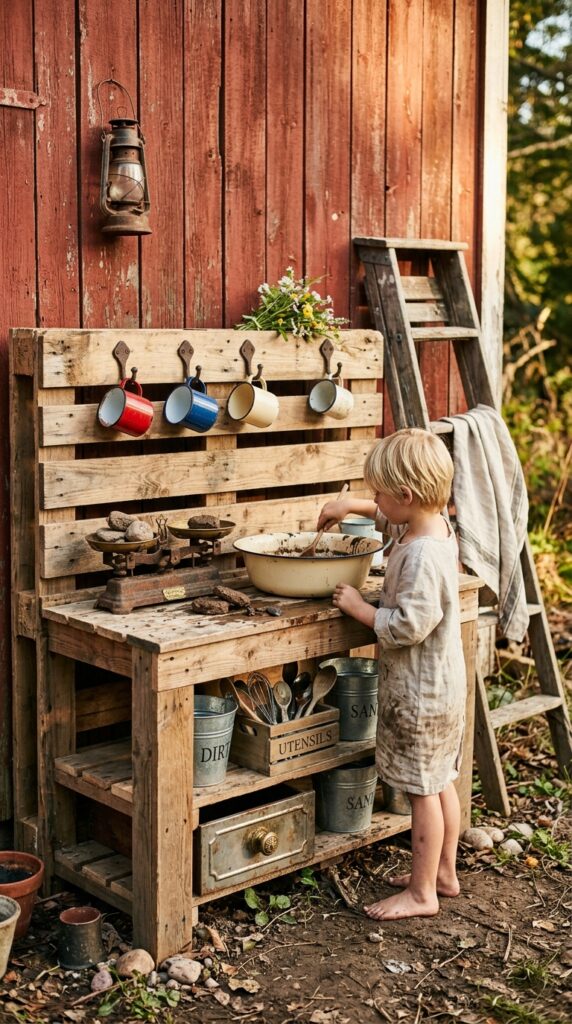
There’s something deeply satisfying about a mud kitchen that looks like it has a history. Hunt down salvaged hardware from antique stores, flea markets, or your own grandparents’ garage. Old enamelware, cast iron hooks, vintage scales, and chipped ceramic mugs add instant character that no new product can replicate.
Mix metals on purpose, brass with iron, copper with zinc. It looks intentional rather than mismatched. Use clear matte sealant on the wood instead of paint to preserve the grain and natural color. Watch out for sharp edges on truly old hardware, sand them down or skip the piece entirely. This style isn’t for everyone, if you prefer crisp and modern, it’ll feel cluttered. But if you love patina and stories, this is the most personality-rich version on the list.
10. Bright and Bold Primary Colors
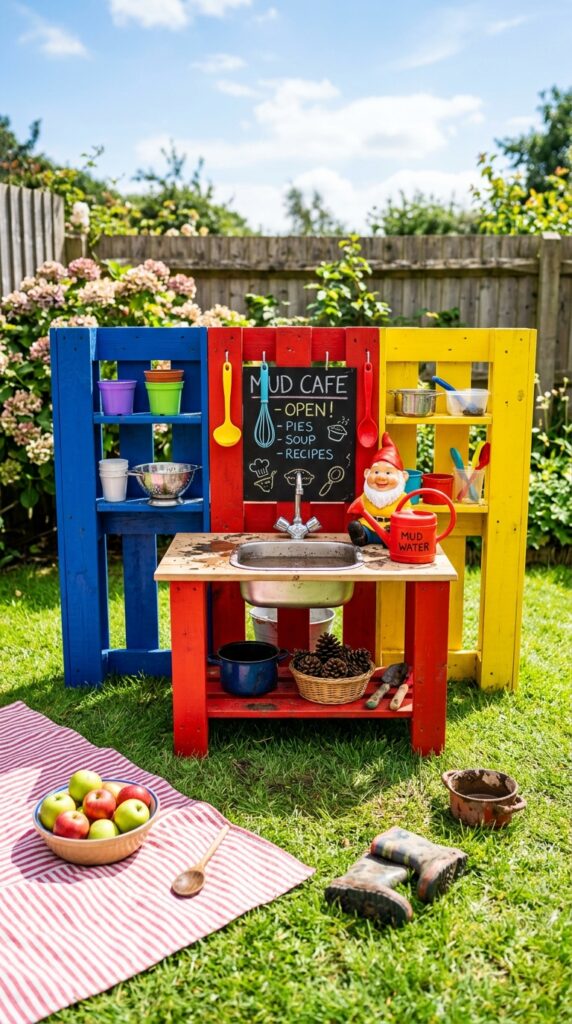
Look, sometimes kids just want loud and fun. Primary colors aren’t subtle, but they’re undeniably joyful, and there’s a reason every classic playground uses them. If your kids are under six, lean into it.
Use exterior latex paint in bold red, yellow, and blue, painting each section a different color rather than mixing them randomly. Add a chalkboard panel for menus and let your kids decorate. Pair with cheerful accessories, plastic colorful utensils are fine here, they fit the vibe. The watch-out is aesthetic fatigue, this look feels right when kids are young, but you might be ready to repaint by age seven. Plan for it. The takeaway: don’t apologize for bright colors if that’s what fits your family. Mud kitchens should feel like fun, not a design statement.
11. Edible Garden Integration
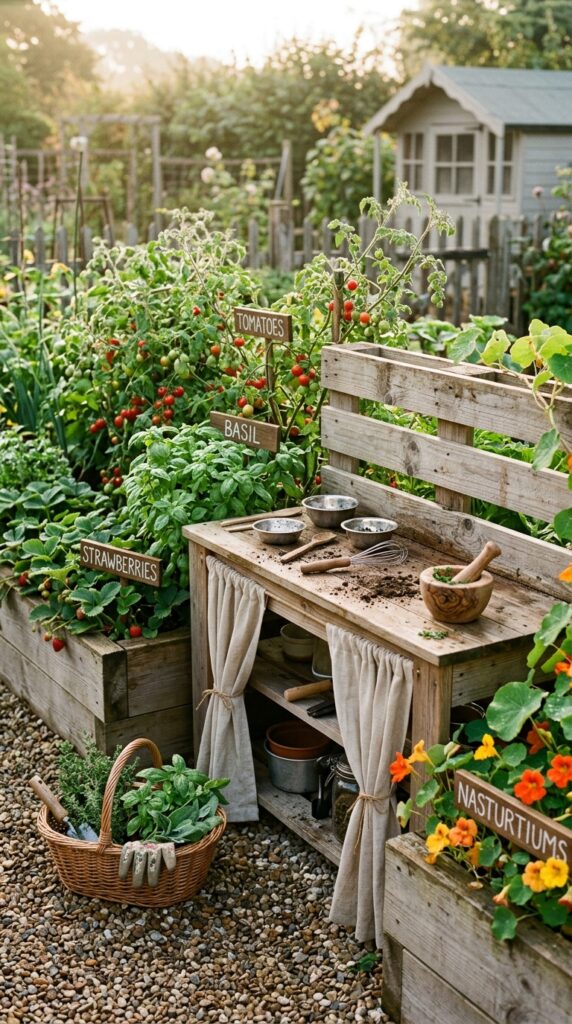
This is my favorite, and I’ll defend it forever. Building your mud kitchen inside or beside a small edible garden turns play into actual learning, kids pick herbs, examine bugs, and start understanding where food comes from without any of it feeling like a lesson.
Plant easy, kid-friendly things: cherry tomatoes, strawberries, basil, mint, nasturtiums (whose flowers are edible and gorgeous). Add small wooden plant labels they can help write. Keep the kitchen itself simple, raw wood, linen curtains, basic accessories, so the garden is the visual hero. The constraint is ongoing care. Gardens need watering, weeding, and seasonal attention. If you can’t commit to that, skip it or use hardy perennials. But if you can, this version is rich in ways the others aren’t, and the memories stick.
12. Compact Foldaway Renter Friendly Design
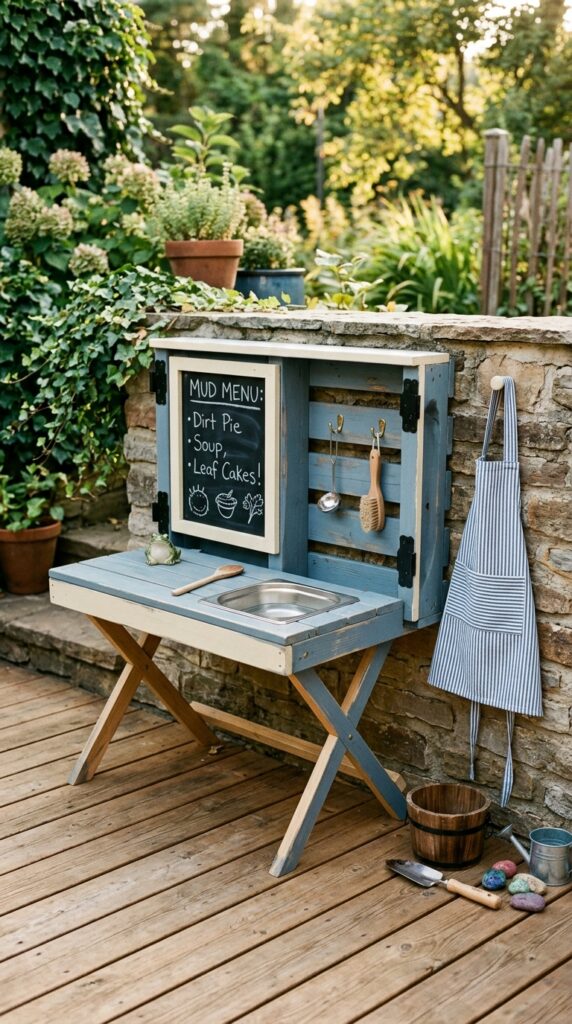
For renters, apartment dwellers, or anyone who shares a small outdoor space with adults who don’t want a permanent kid zone, the foldaway version is a small miracle. Use hinges to attach a half-pallet to a wall-mounted frame so it folds flat when not in use.
Keep it lightweight, half-pallets are easier to manage than full ones. Use a removable basin, magnetic utensil strips instead of hooks, and a chalkboard surface that doubles as the front when folded. Paint it a muted color so it disappears against the wall when closed. The watch-out is structural, folding mechanisms need solid hardware or they’ll wobble and frustrate kids. Spend the extra five dollars on proper hinges. The takeaway: your living situation shouldn’t dictate whether your kid gets a mud kitchen. There’s always a version that works.
Final Thoughts
Building a pallet mud kitchen isn’t really about the pallet, or the kitchen, or even the mud. It’s about carving out a small space in your home where your kid gets to be the boss of something messy, creative, and entirely theirs. And the fact that you can pull it off with reclaimed wood, a few hours of effort, and maybe forty dollars of supplies makes it feel even better.
Whatever version you choose, remember the goal isn’t perfection. It’s a space that gets used, weathered, repainted, rebuilt, and loved into something better than what you started with. Don’t stress about the finish being flawless or the styling being magazine-worthy. Kids don’t care, and honestly, neither will you once you see them genuinely playing.
Bookmark this page, come back when you’re knee-deep in pallet splinters and questioning your life choices, and remember, every great backyard memory started with someone deciding to just try. We’ve got more practical decor and outdoor living ideas waiting for you, so stick around. Your future muddy-kneed kid will thank you.

